
The invitation has been on the fridge for weeks. The dress is ironed, the shoes are by the door, and the only thing left is your hair. Then you look up what a salon charges for a single updo and close the tab.
Long hair is a gift most days and a problem on event days. Left down, it goes flat by the second hour, sticks to your neck during the first dance, and ends up in a quick ponytail by dessert. Put up well, it looks polished in every photo and stays out of your way all night.
The good news is that most elegant updos for long hair come down to a few basic moves: a ponytail, a twist, a braid, and a handful of well placed pins. Once you can do those, you can do every style on this list in front of your own bathroom mirror.
This guide is for anyone with long hair and an event coming up: a wedding, a prom, a graduation, a gala, a holiday party, or a job interview that calls for something neater than your usual bun. Each updo comes with how long it takes, how hard it is, and the trick that keeps it in place until you get home.
Pick two or three, practice each one once before the big day, and save your stylist money for the shoes.
Everything above is sold at any drugstore. If you own a curling iron, a teasing comb, and a hand mirror for checking the back, you have the whole kit a stylist would use.
1. Low Messy Bun With Face Framing Pieces
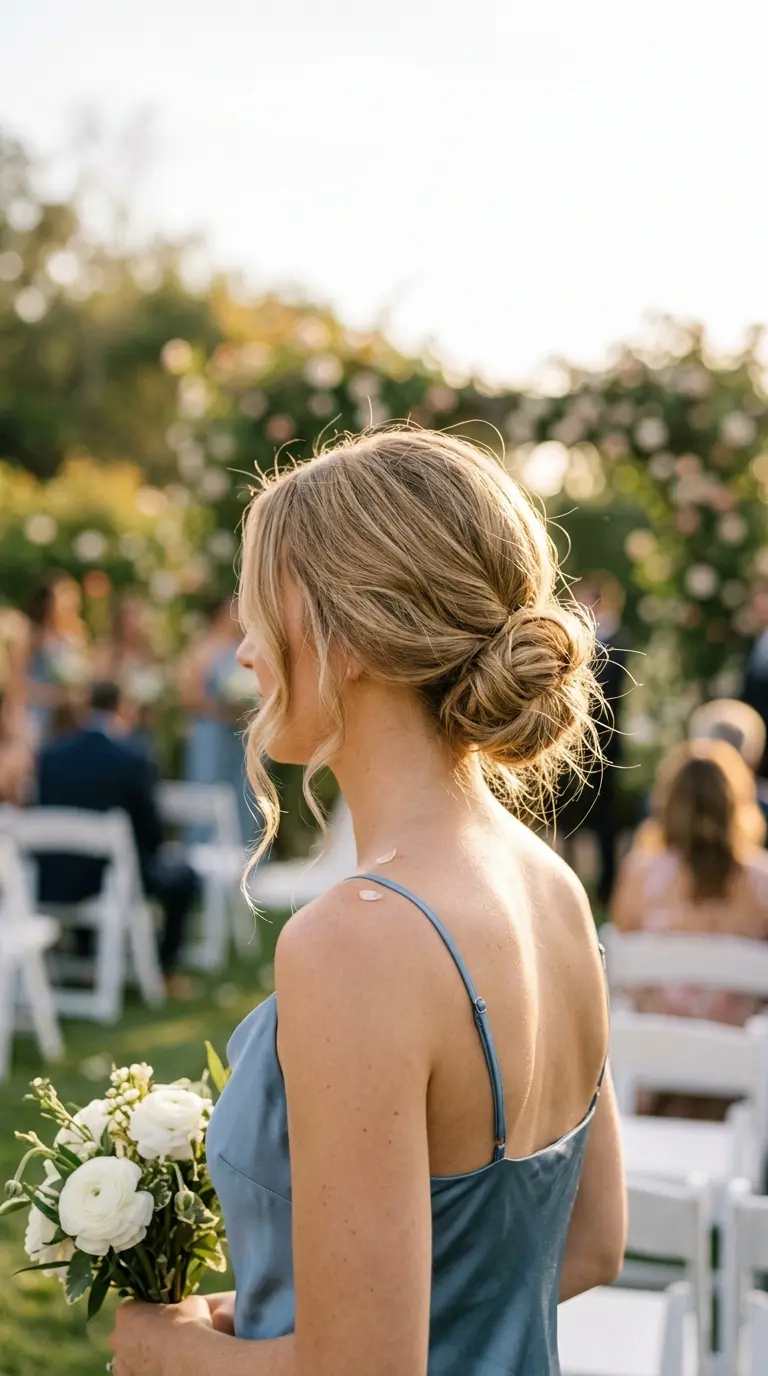
If you only learn one updo, make it this one. It looks soft and romantic, it suits almost every dress, and it forgives mistakes because it is meant to look a little undone.
- Curl your hair loosely with a 1.25 inch iron, or start with second day waves.
- Spray texture spray through the lengths and rake your fingers through to break up the curls.
- Pull out two thin pieces near your face and set them aside.
- Gather the rest into a loose low ponytail and twist it into a coil.
- Wrap the coil around the elastic and pin it with U shaped pins, letting some ends poke out.
- Gently pull at the crown and the bun to loosen it.
Quick tip: pin into the elastic, not only into the bun. The elastic is the anchor, and pins hooked through it will not slide out.
2. Classic French Twist
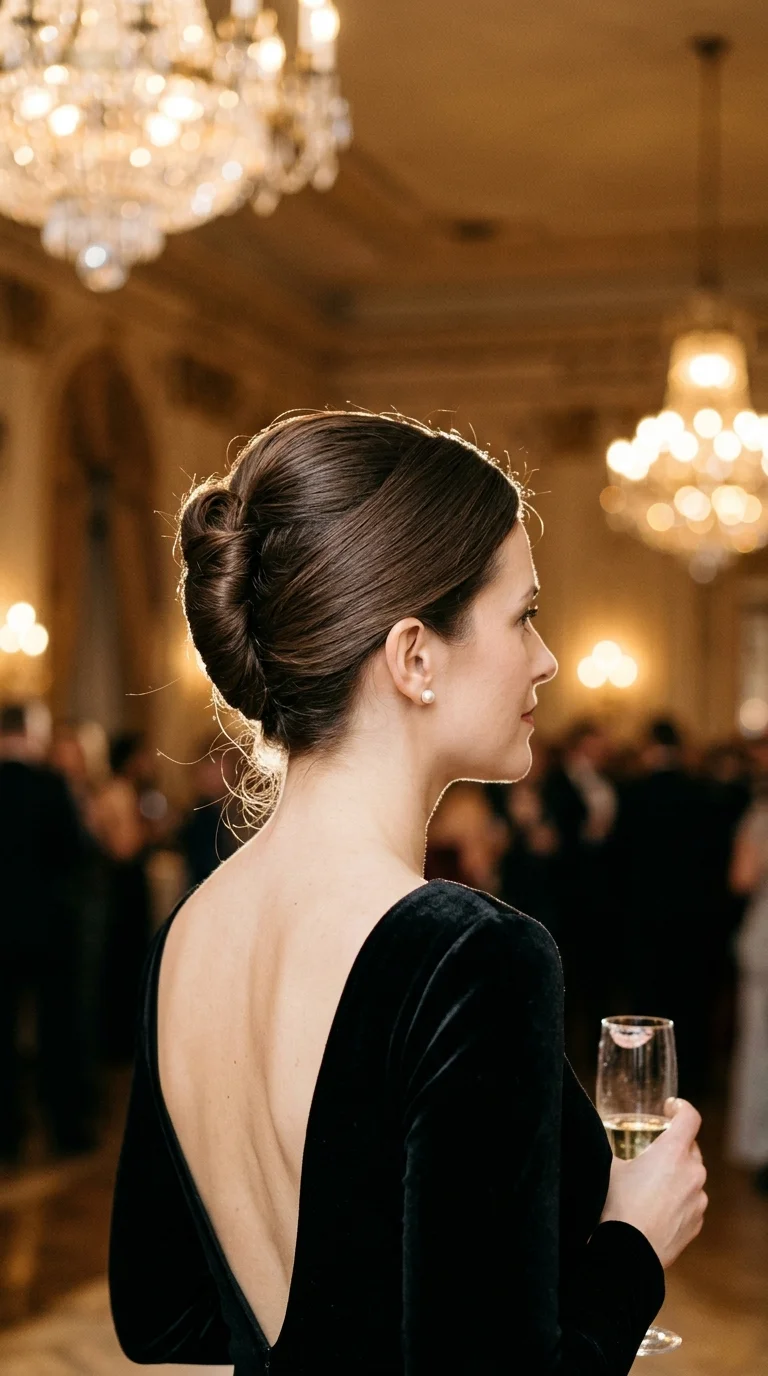
The French twist has been the go to formal updo for decades, and it still looks expensive. It is neat, sleek, and shows off earrings and a low back.
- Brush your hair smooth and mist it with a light hairspray so it has some grip.
- Gather all of it at the nape as if you were making a low ponytail, but do not tie it.
- Twist the hair upward and fold it in against the back of your head, so the twist runs up the center.
- Tuck the ends inside the fold.
- Slide bobby pins in along the seam of the twist, each one catching both the twist and the hair underneath.
Waist length hair can make the twist bulky. Braid the ends first so they tuck in flat.
Quick tip: hold the twist in place with one hand flat against your head while the other hand pins. Most twists fall apart because people let go to grab a pin.
3. Braided Crown
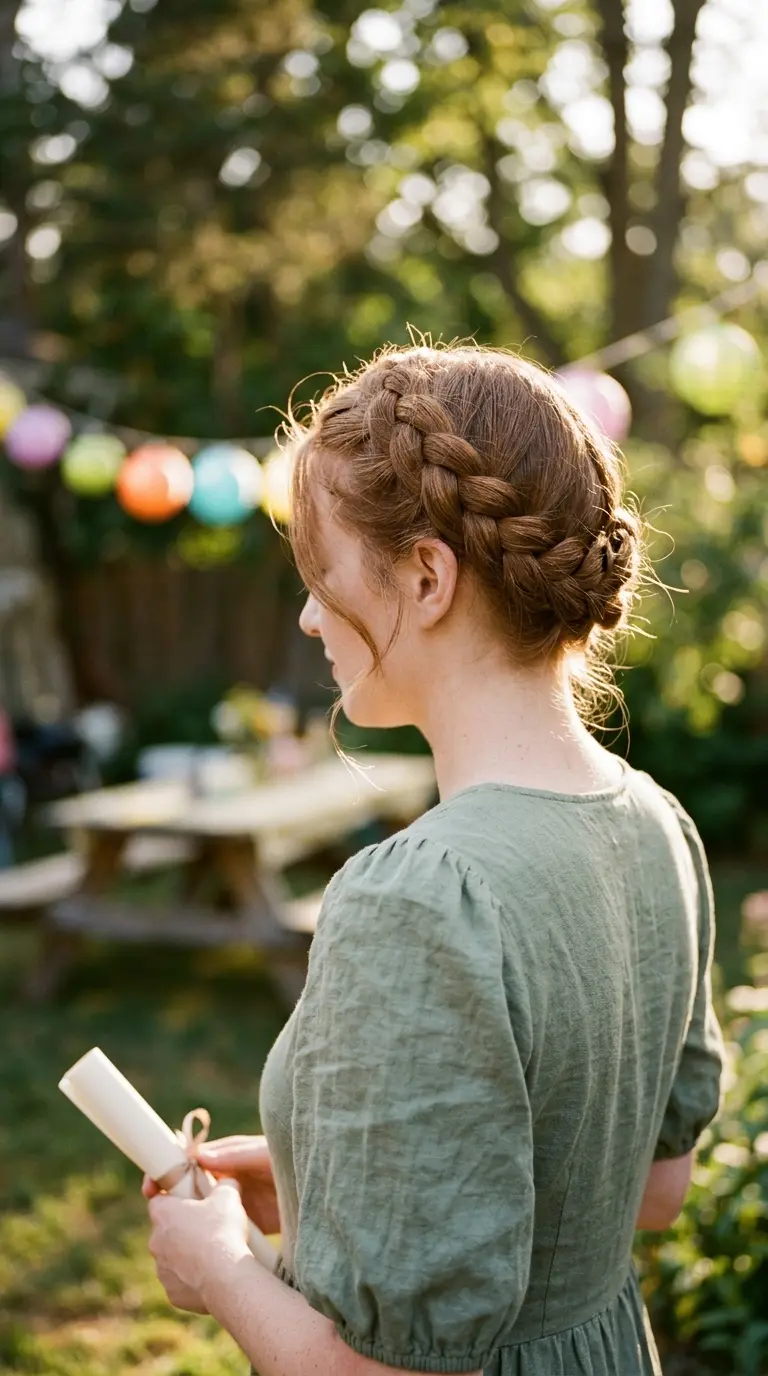
A braided crown looks like it took an hour. It takes about fifteen minutes once you have done it twice.
- Part your hair down the middle.
- Make a regular three strand braid on each side and tie the ends with clear elastics.
- Pancake each braid by pulling the outer loops gently so it gets wider and flatter.
- Lift the left braid over the top of your head and pin it along your hairline on the right.
- Lift the right braid up and over in the other direction, tucking its end under the first braid.
- Pin both braids every two inches.
This style needs hair that reaches at least the middle of your back, so the braids are long enough to cross over the top. If yours is shorter, use one braid and finish the other side with a twisted section pinned in place.
Quick tip: use bobby pins one shade darker than your hair. They hide in the shadows of the braid better than pins that match your highlights.
4. Sleek Low Chignon
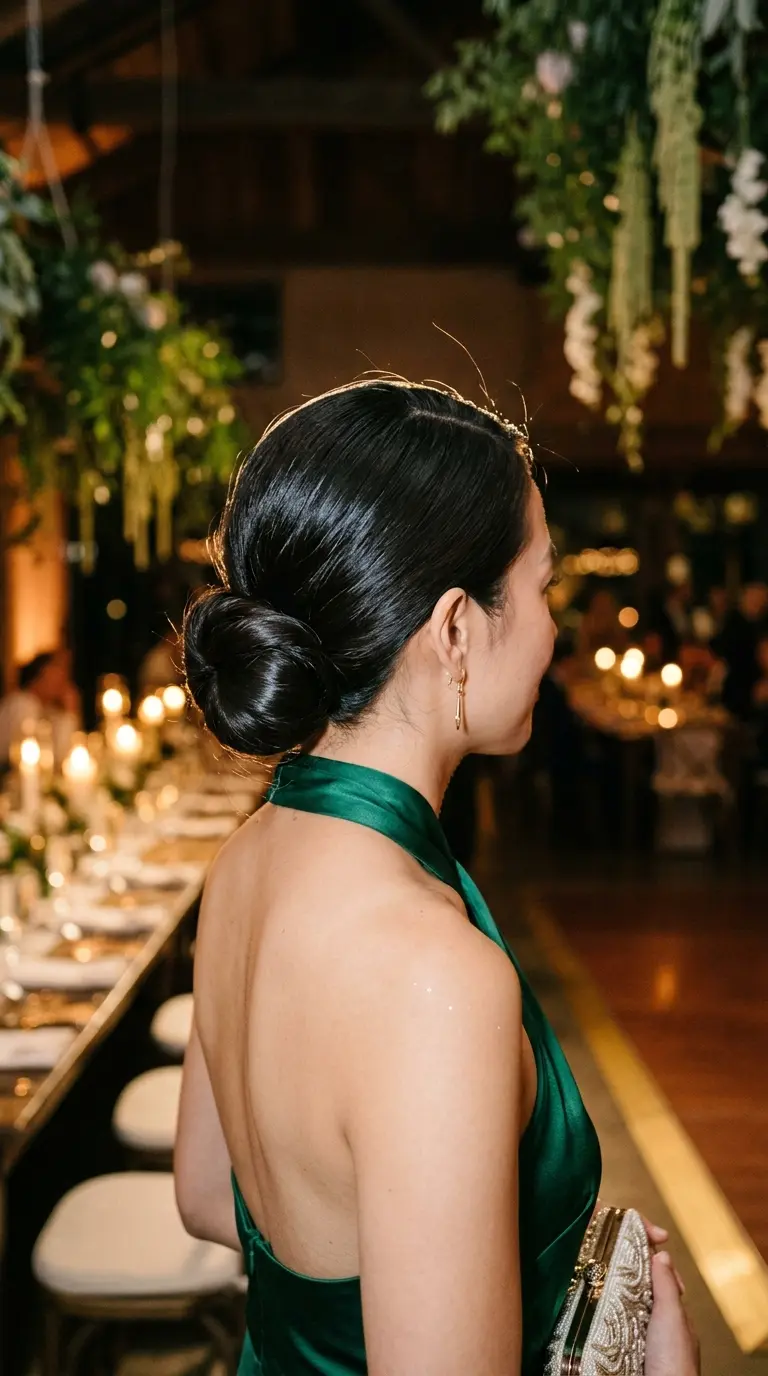
Clean, simple, and grown up. The sleek chignon works for black tie events, evening weddings, and any formal dinner where you want to look put together without trying too hard.
- Make a sharp center or side part with the tail of a comb.
- Smooth a little cream or serum over the front and sides, then brush everything back to the nape.
- Tie a firm low ponytail.
- Twist the ponytail tight and coil it flat around the elastic.
- Pin the coil with four or five pins pushed in toward the center.
- Spray a toothbrush with hairspray and brush down any flyaways along the part.
The toothbrush trick is one stylists use on every sleek look. It smooths small hairs without flattening the rest.
Quick tip: this style shows bumps. Brush the hair back while your head is tipped slightly up, so the hair at the nape sits tight when you tie it.
Freshly washed hair brushed back into a bun. The front looks puffy, short pieces keep popping out at the part, and the pins slide straight out of the silky ends.
The same bun on day old hair with a little cream at the front and texture spray on the ends. The part stays crisp, the sides lie flat, and the pins grip on the first try.
5. Twisted Low Bun
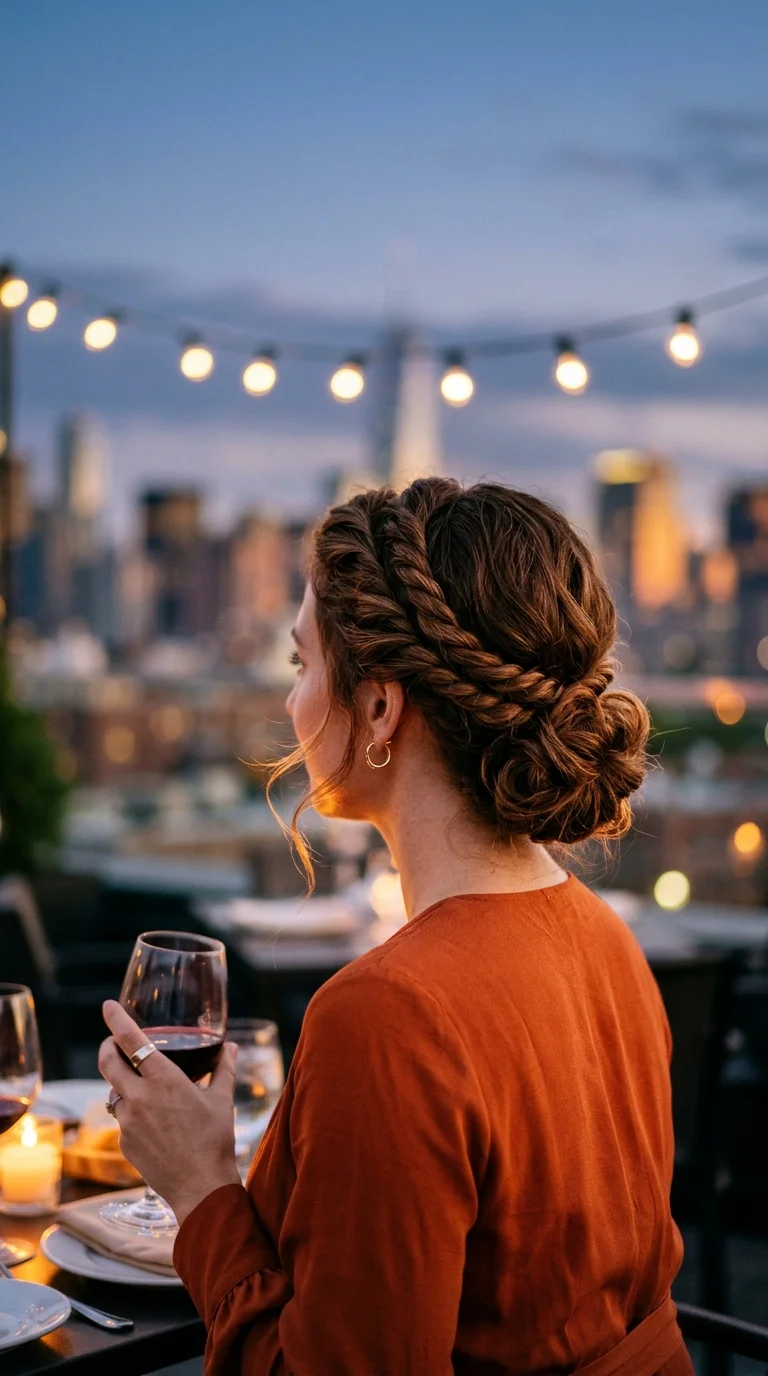
Two small twists turn a plain low bun into something that looks planned. This is a great choice if you are not confident with braiding yet.
- Take a two inch section above each ear and leave the rest loose.
- Twist each section away from your face, adding a little hair as you move back, like a rope.
- Bring both twists to the nape and tie them together with the rest of your hair in a low ponytail.
- Twist the ponytail into a bun and pin it.
- Gently pull at the side twists to make them fuller.
It suits medium and thick hair best. On fine hair, curl the sections first so the twists have more body.
Quick tip: twist in the same direction on both sides, always away from your face. Twisting toward your face makes the rope unravel as soon as you let go.
6. Dutch Braid Into a High Bun
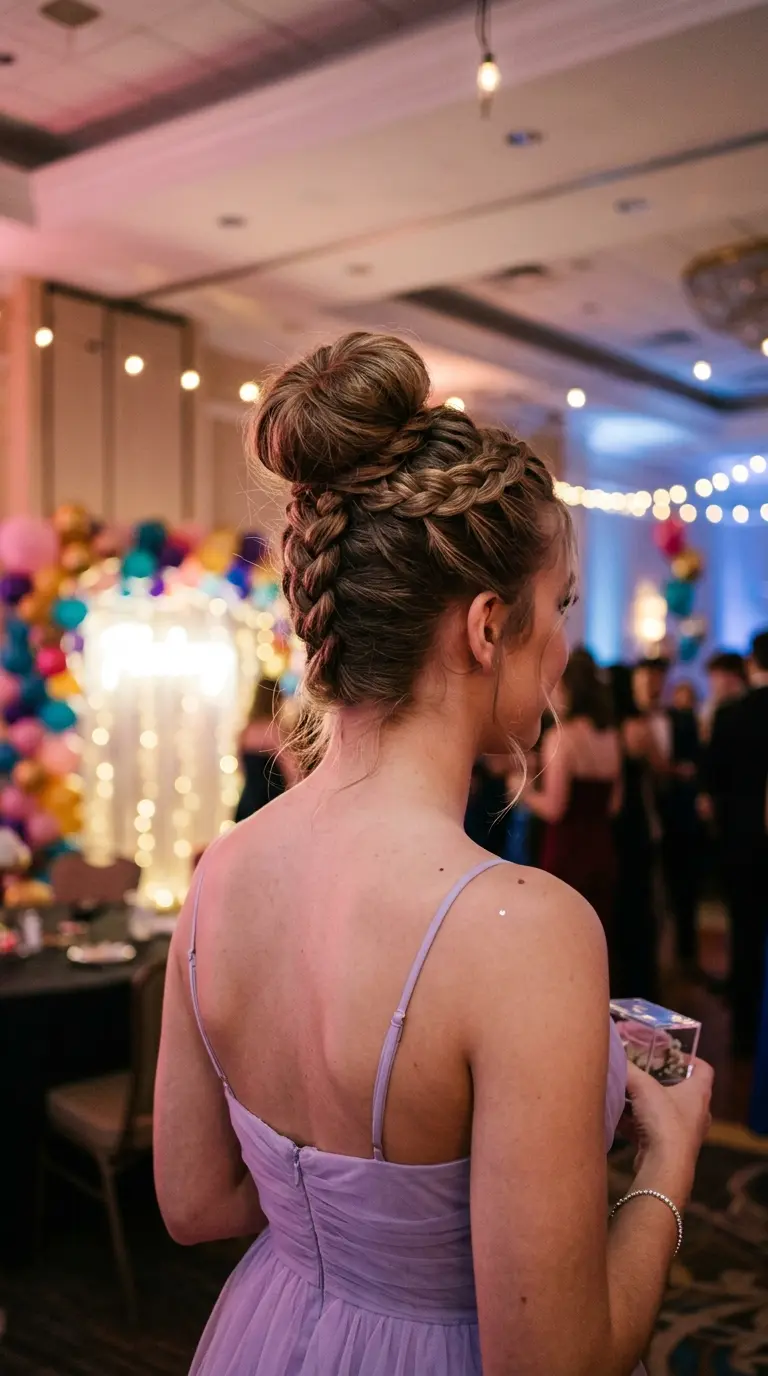
This one is popular for proms and dances because it looks great from every angle in photos and holds through hours of dancing.
- Flip your head upside down and brush all your hair forward.
- Start a Dutch braid at the nape, crossing each strand under the middle instead of over it.
- Braid up the back of your head until you reach the crown.
- Flip back up and tie the rest of the hair into a ponytail at the crown.
- Wrap the ponytail into a bun and pin it.
- Pancake the braid gently so it looks full.
If braiding upside down feels awkward, ask a friend or family member to do the braid while you pin the bun. It is a quick favor, and still costs nothing.
Quick tip: braid tighter near the nape than near the crown. The nape is where hair slips first, and a tight start holds the whole style up.
7. Topsy Tail Low Bun
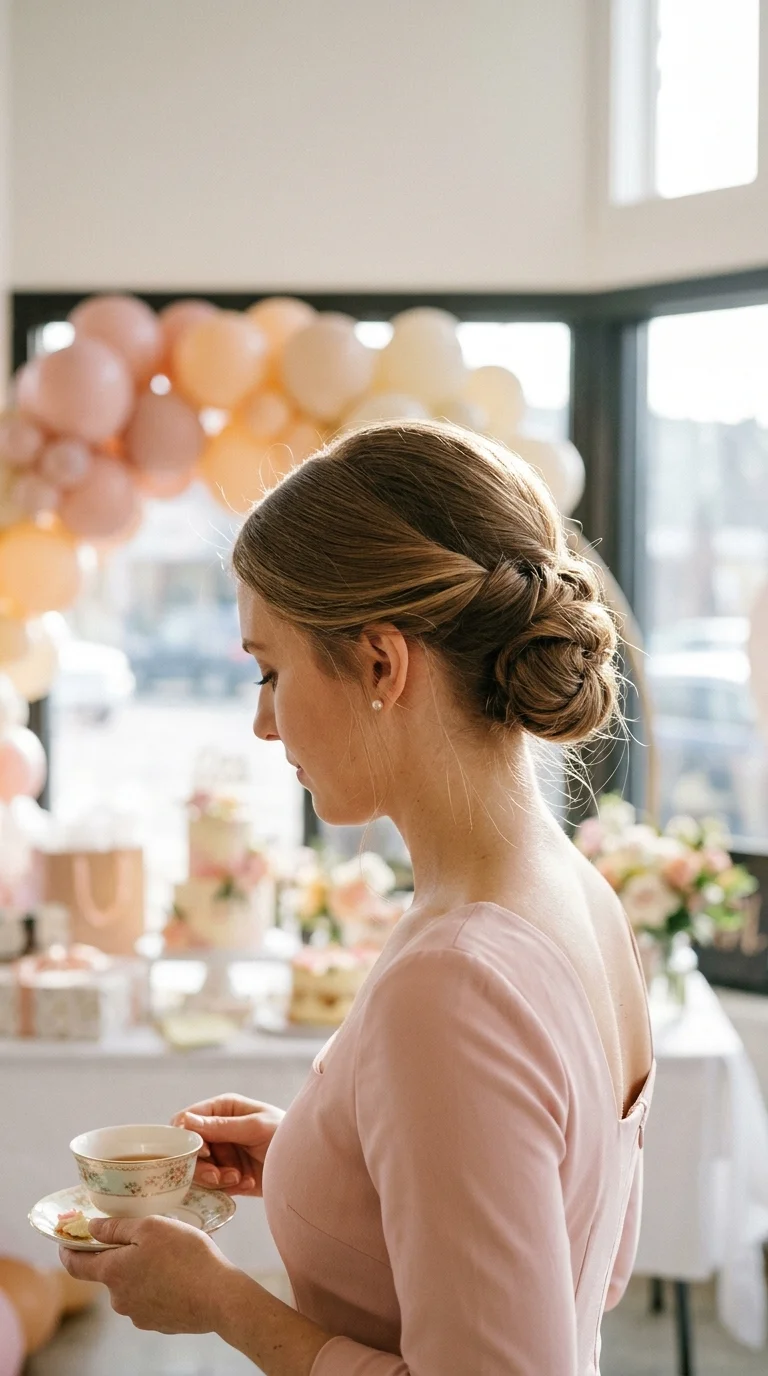
The topsy tail is the fastest way to make a bun look detailed. It takes one extra move and about thirty seconds.
- Tie a loose low ponytail.
- Make a small gap in the hair above the elastic with your fingers.
- Flip the ponytail up and pull it through the gap from the top, so the sides roll inward.
- Roll the ponytail up toward the gap and tuck it in to make a bun.
- Pin the bun in place and loosen the sides a little.
This is a top pick for beginners and for anyone with layers, because the roll hides shorter pieces.
Quick tip: keep the first ponytail loose. A tight elastic leaves no room to flip the hair through and creates a gap that shows your scalp.
8. Gibson Tuck With a Headband
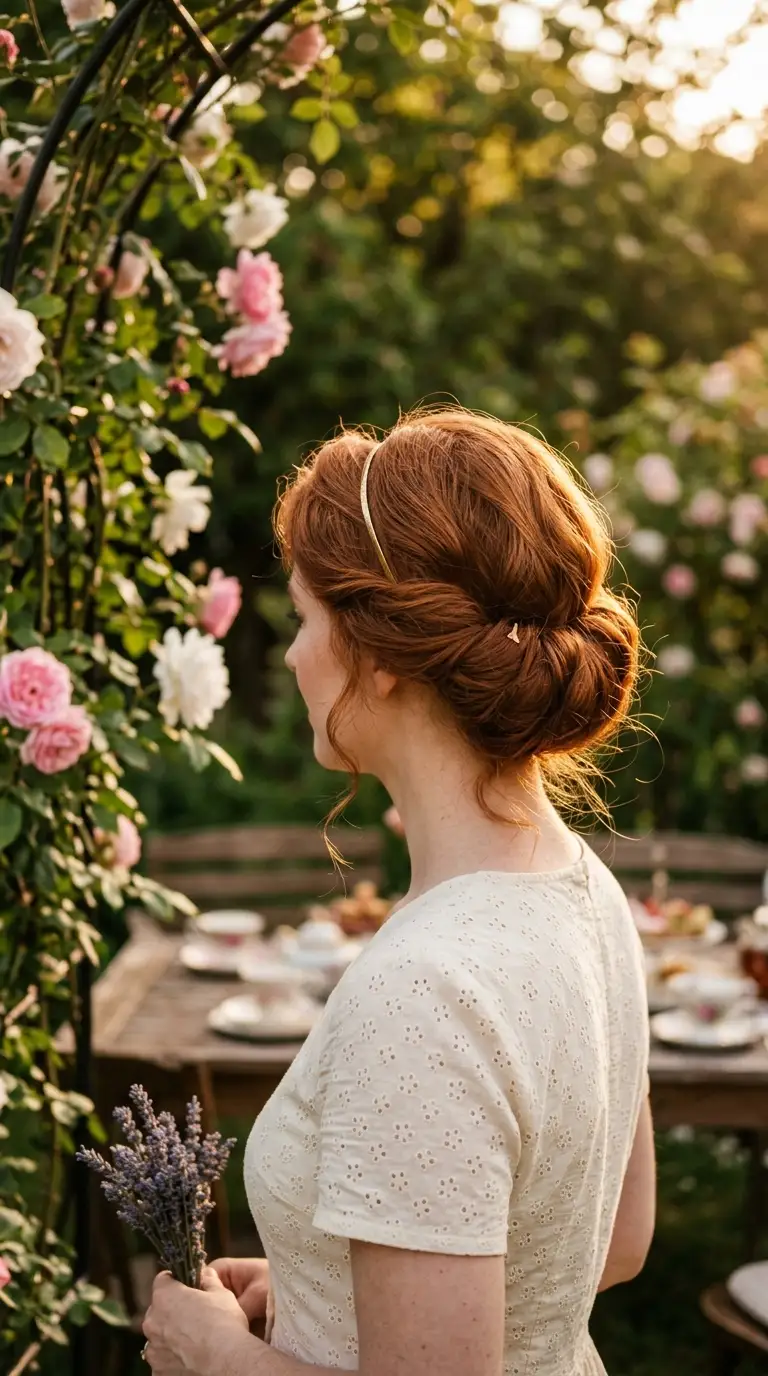
The Gibson tuck is the cheat code of event hair. A cheap stretchy headband does most of the work for you.
- Curl or wave your hair loosely and tease the crown a little.
- Place a thin elastic headband over your head so it sits on top of your hair at the back.
- Starting at one side, take a section, wrap it over the band, and tuck it under.
- Keep going around the back until all the hair is rolled in.
- Pin any loose ends and spray.
This works best on hair that reaches the shoulder blades. Long, thick hair can become heavy in the band, so split the ends into two rolls that meet in the middle.
Quick tip: choose a headband with grip on the inside, or wrap a thin strip of hair around a smooth one. A slippery band will slide down your forehead by the end of the night.
9. Ballerina Bun
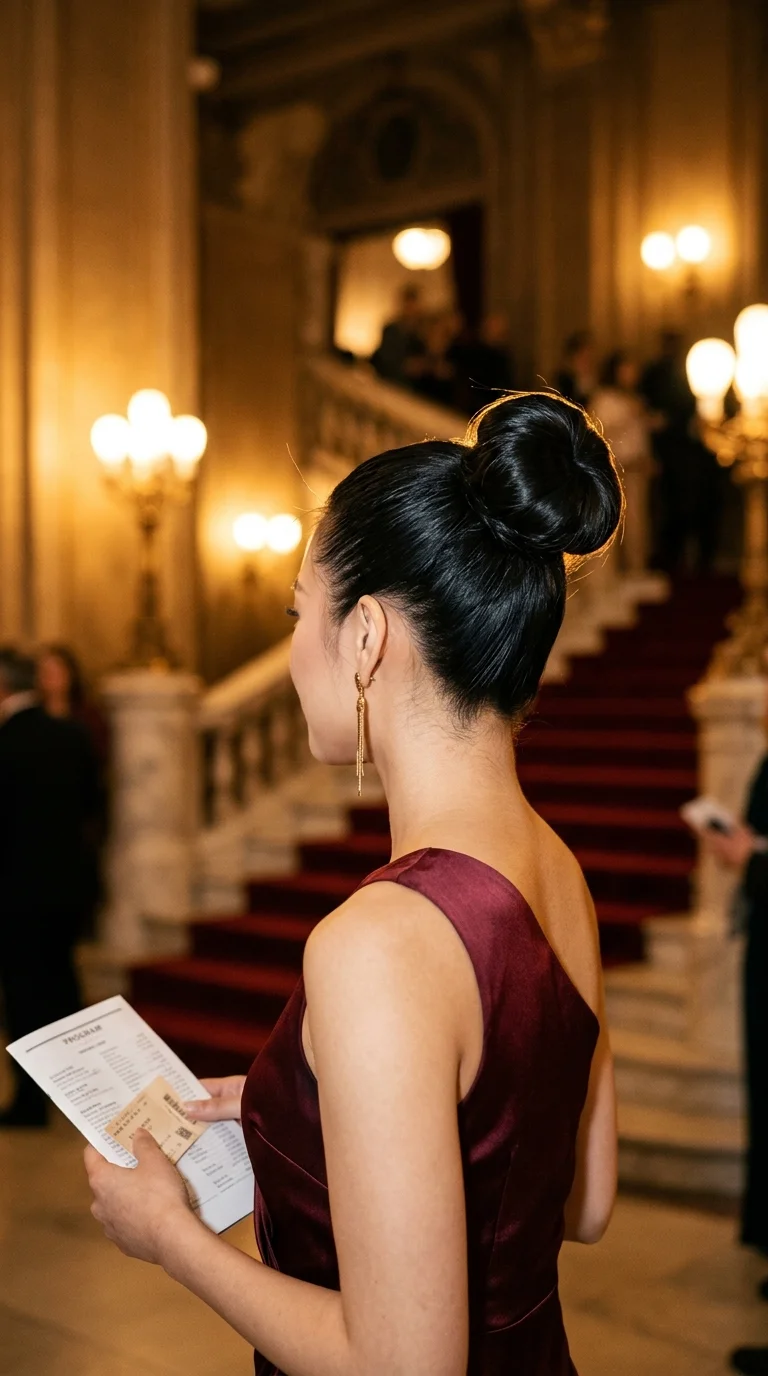
A sleek high bun stretches the neck and pulls focus to your face and earrings. It is also the most secure style on this list, which makes it a smart pick if you plan to dance.
- Brush your hair up to the crown, tipping your head back so the nape stays smooth.
- Tie a tight high ponytail with a strong elastic.
- Twist the ponytail and wind it flat around the base.
- Pin the bun with U shaped pins all the way around.
- Slip a bun net over it if your hair is fine or slippery.
For thin hair, a foam bun donut in your hair color gives the bun a round shape without needing more hair.
Quick tip: place the ponytail in line with the tops of your ears for a classic look, or slightly higher for drama. Lower than that starts to look like a sleepy bun.
10. Fishtail Braid Updo
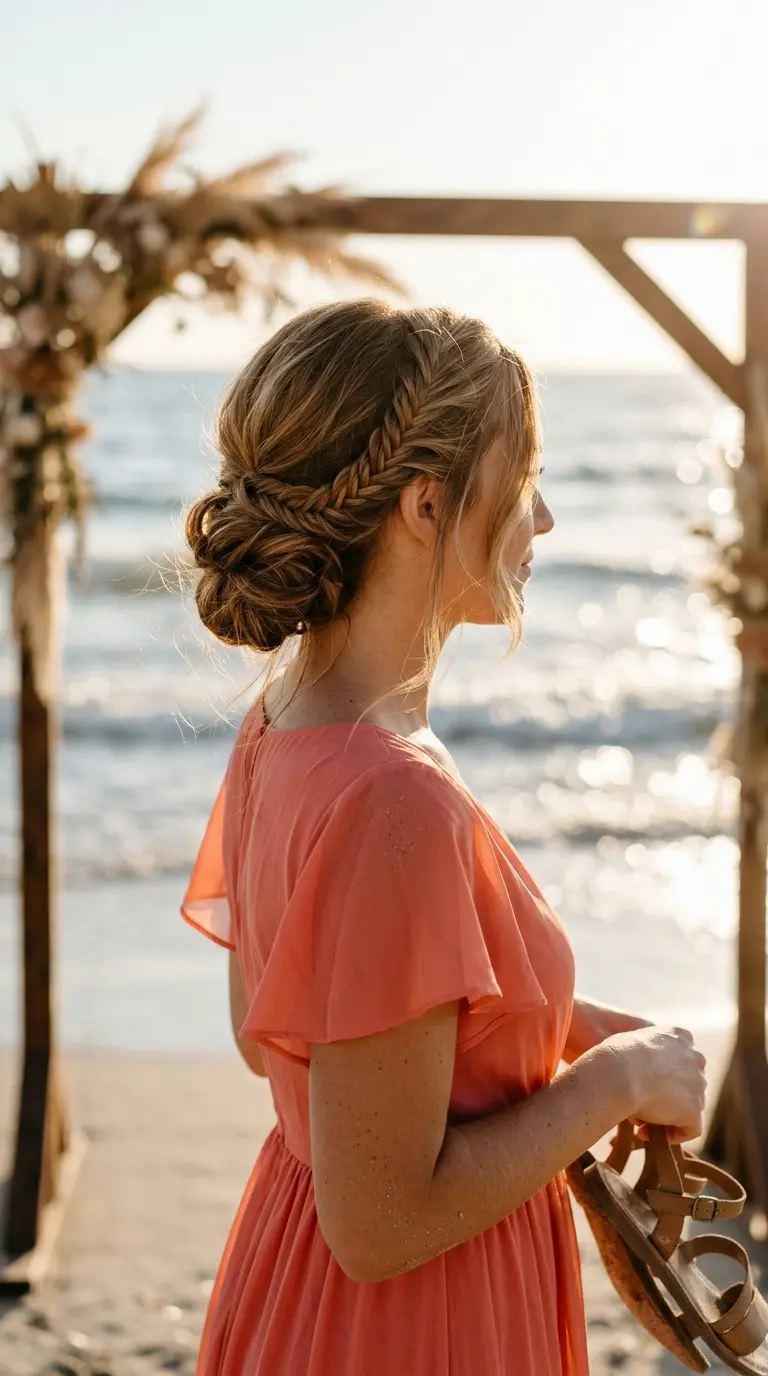
A fishtail braid has a finer, woven look than a regular braid. Wound into a bun, it looks like a detailed piece of work for little effort.
- Tie a low ponytail and split it into two halves.
- Take a thin piece from the outside of the left half and cross it over to the right half.
- Do the same from the right side over to the left.
- Repeat to the ends and tie off with a clear elastic.
- Pull the braid loose and wide, then wrap it around the base and pin it.
It is perfect for beach weddings and summer events, because a slightly messy fishtail looks better in the wind, not worse.
Quick tip: the thinner the pieces you cross over, the more detailed the braid looks. Thick pieces turn it into something that looks like a regular braid.
Wash your hair the day before, not the morning of. Clean, silky hair lets pins slide out.
Spray texture spray or dry shampoo through the lengths before you start, so the hair has grip.
Anchor every style to an elastic, then cross your bobby pins in an X so they lock against each other.
Shake your head hard in front of the mirror. Anything that moves now will fall later, so pin it again.
11. Knotted Low Updo
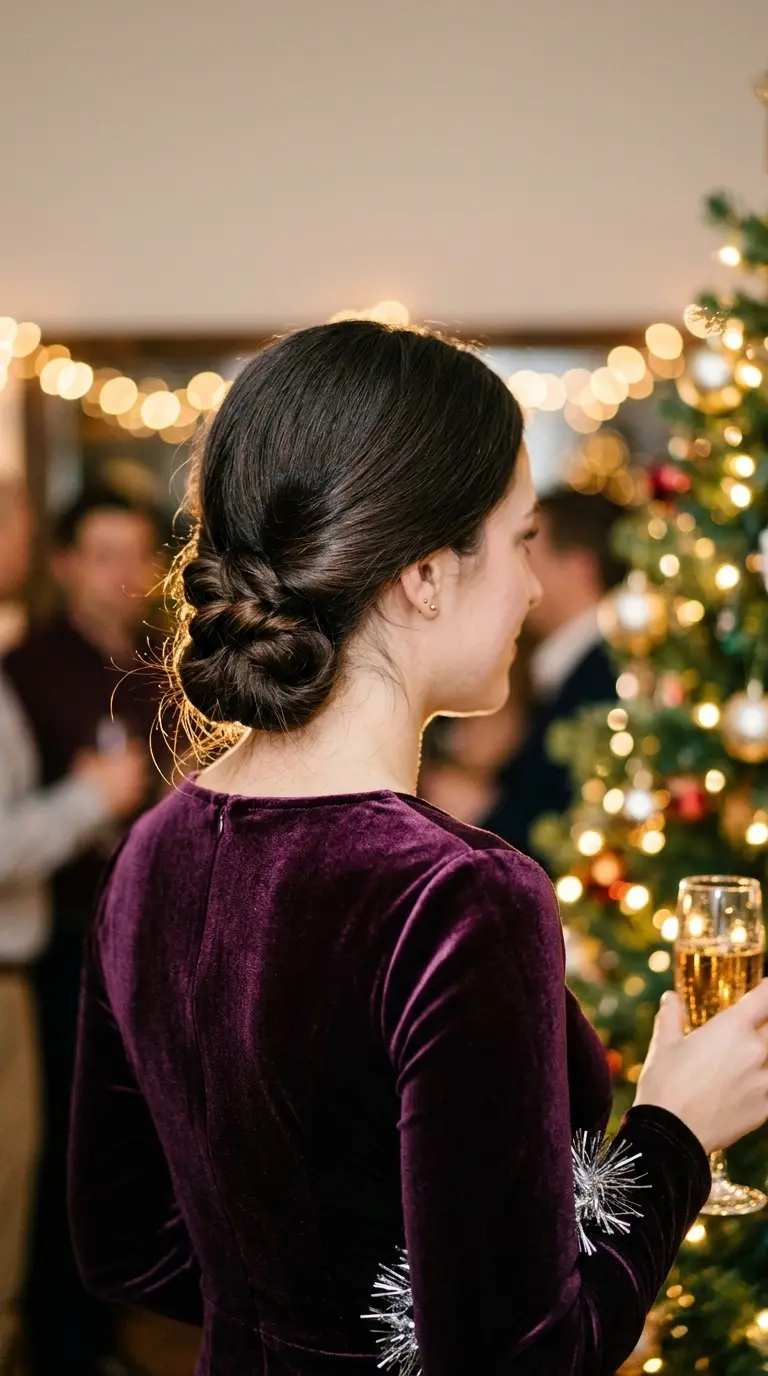
No elastic, no braid, and only a few pins. You tie your own hair in a knot, the same way you would tie a shoelace.
- Split your hair into two equal sections at the nape.
- Cross the left section over the right and pull it through, like the first step of tying a shoe.
- Tie a second knot on top of the first.
- Tuck the remaining ends under the knot and pin them.
- Loosen the knot gently with your fingers so it looks soft.
This only works on long hair, ideally past the middle of the back. Thick hair makes the fullest knot.
Quick tip: tie the knots on the loose side. A tight knot looks small and can pull at your scalp after a couple of hours.
12. Pull Through Braid Updo
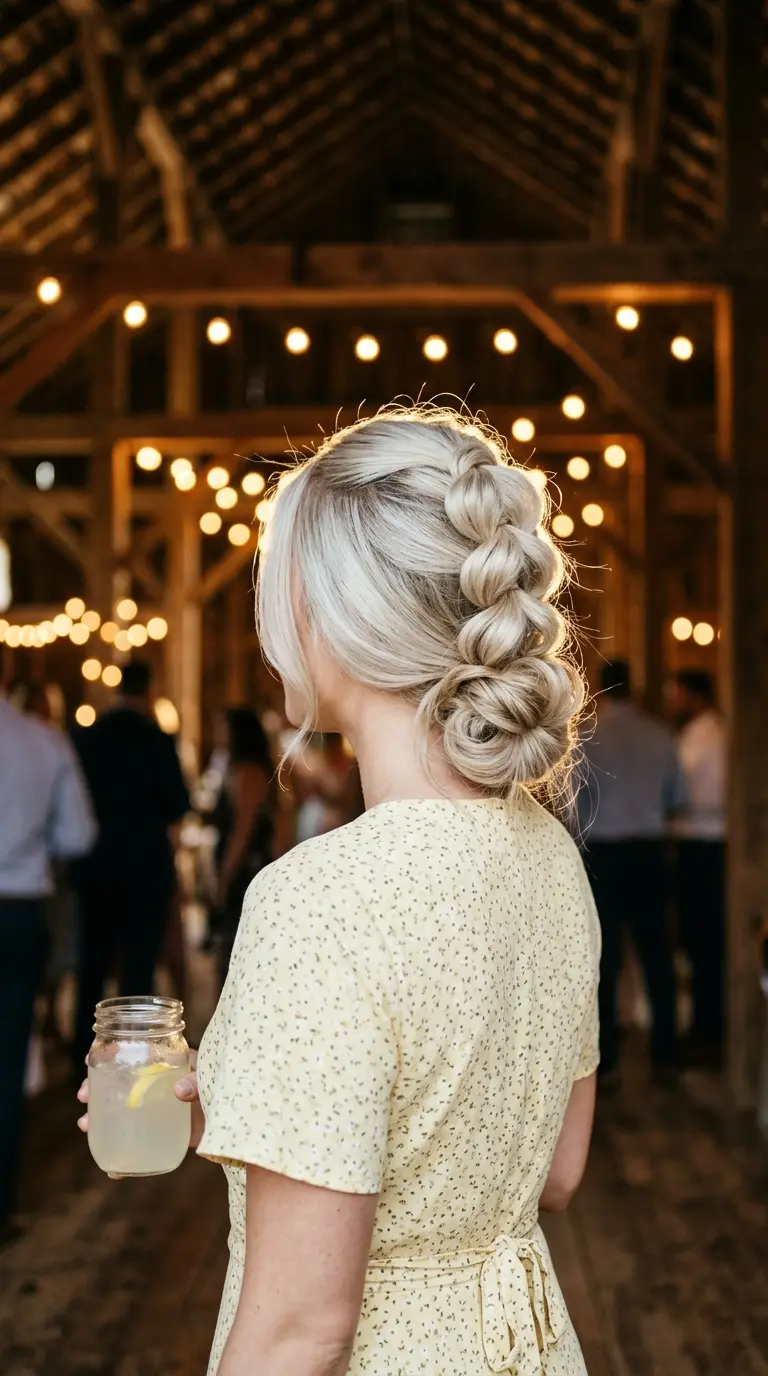
If you cannot braid, this is your braid. It uses only small elastics and looks like a thick, chunky plait.
- Tie a small ponytail at the crown.
- Tie a second ponytail below it, using hair from the sides.
- Split the first ponytail into two, pass the second ponytail up through the middle, and clip it out of the way.
- Bring the two halves down, add more side hair, and tie them into a new ponytail.
- Repeat to the nape, then pancake every section and wrap the ends into a low bun.
It looks more complex than it is, and it suits fine hair well because the puffing adds volume.
Quick tip: use clear elastics the same size all the way down. Different sizes make the sections look uneven.
13. Looped Low Ponytail Bun
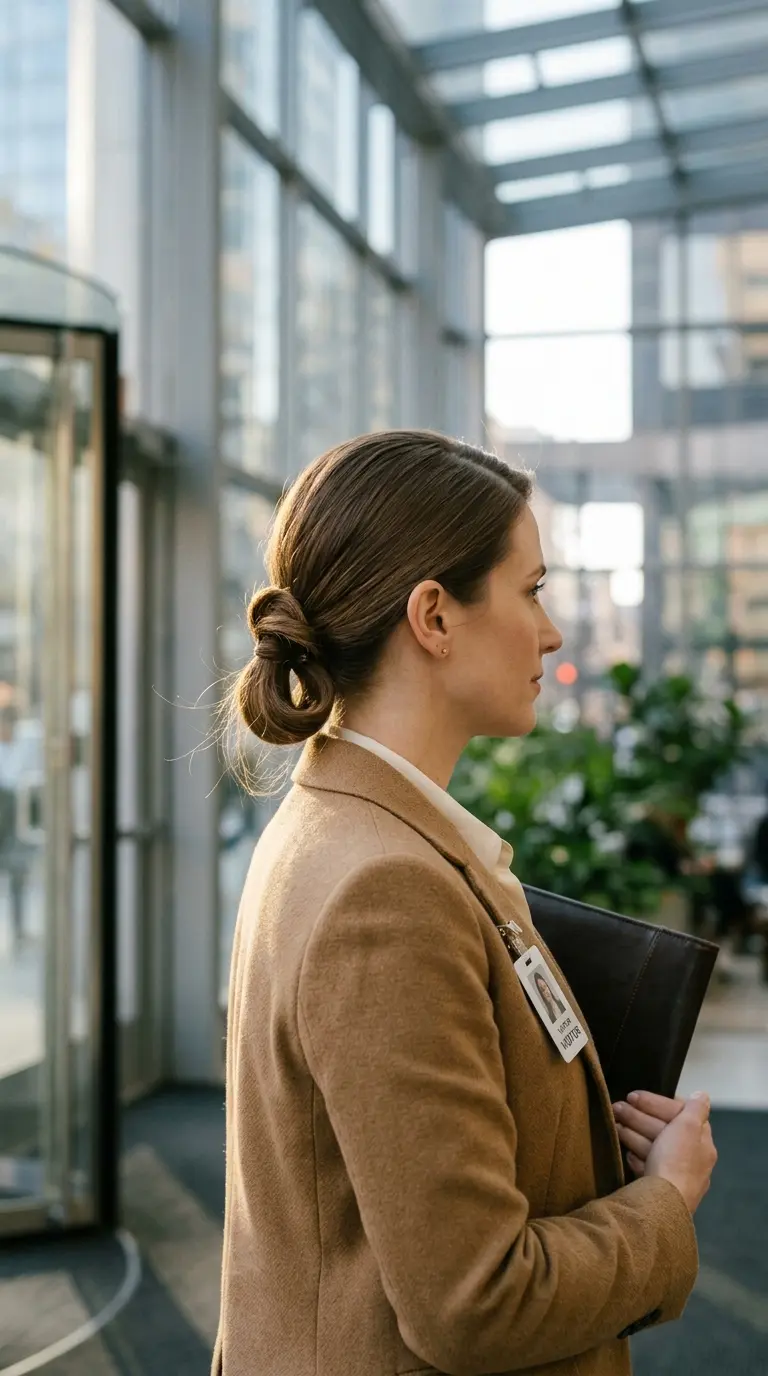
Not every event is a party. For job interviews, funerals, award ceremonies, and work dinners, you want hair that looks neat and does not draw attention. This is that style.
- Brush your hair into a smooth low ponytail and tie it firmly.
- Fold the ponytail up so the ends meet the elastic, making a loop.
- Tie a second elastic over the ends to hold the loop.
- Pin the sides of the loop flat to your head.
- Wrap a small piece of hair around both elastics and pin it underneath to hide them.
Quick tip: if your hair reaches your waist, fold it twice for a smaller, tidier loop. A loop that hangs below the collar looks less polished.
| Event | Updos to Try | Why It Works |
|---|---|---|
| Wedding guest | Low messy bun, twisted low bun, Gibson tuck | Soft and pretty without competing with the bride |
| Prom or dance | Dutch braid high bun, ballerina bun, braided bun | Holds through hours of dancing and looks good from behind |
| Black tie or gala | French twist, sleek low chignon, teased crown roll | Polished shapes that suit gowns and statement earrings |
| Job interview or work event | Looped low ponytail bun, side swept low bun | Neat and calm, with nothing to fidget with |
| Beach or outdoor party | Fishtail braid updo, messy top knot | Already a little undone, so wind and humidity help |
14. Messy Top Knot
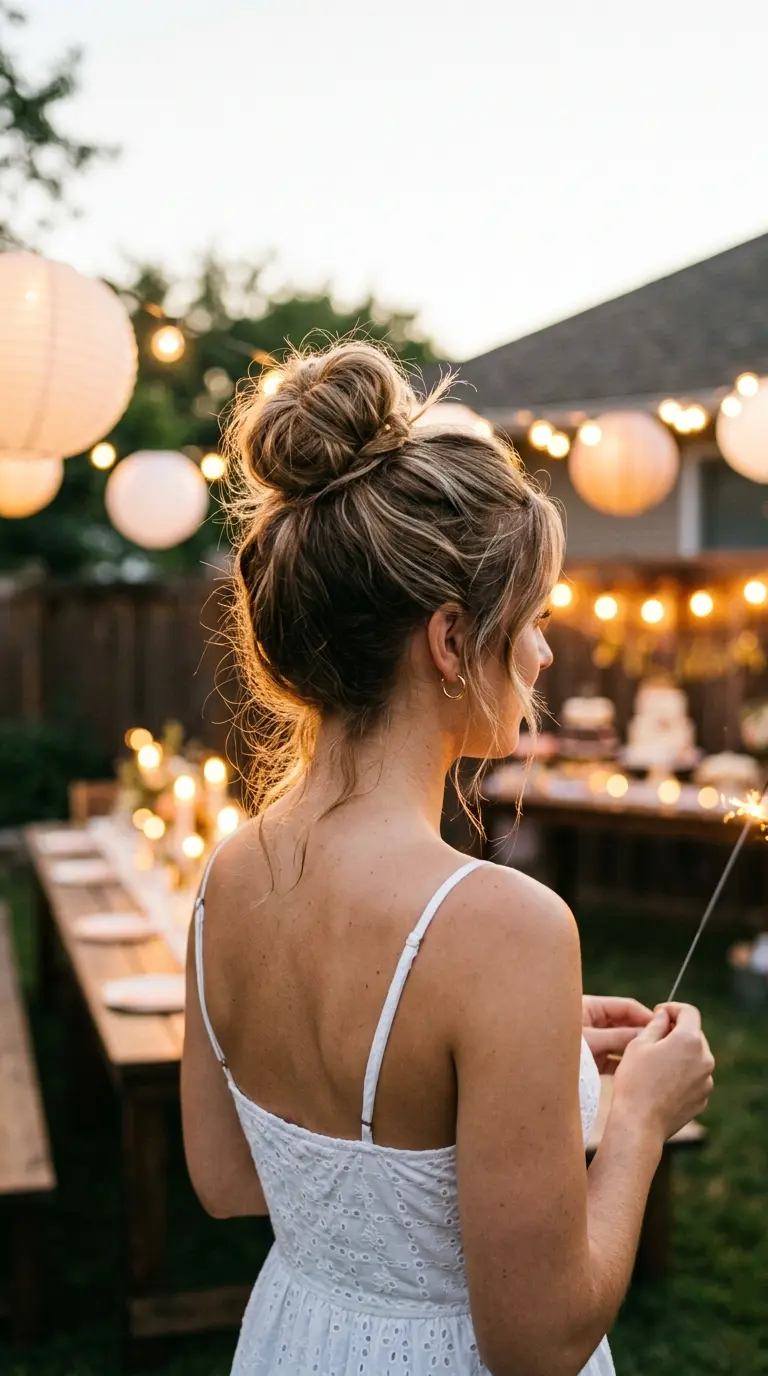
The everyday top knot can look dressy with the right texture and a couple of small changes.
- Tip your head forward and brush all your hair up to the crown.
- Tie a ponytail and spray the lengths with texture spray.
- Tease the ponytail lightly with a comb to add volume.
- Twist it loosely and wrap it around the base, pinning as you go.
- Pull at the edges of the knot to make it bigger and rounder.
- Pull out a few short pieces at the nape and temples.
For an event, swap the scrunchie for a hidden elastic and add a small jeweled pin to one side of the knot.
Quick tip: teasing is what makes a top knot look full and planned instead of rushed. Brush it on the outside only, so the inside stays fluffy.
15. Side Swept Low Bun
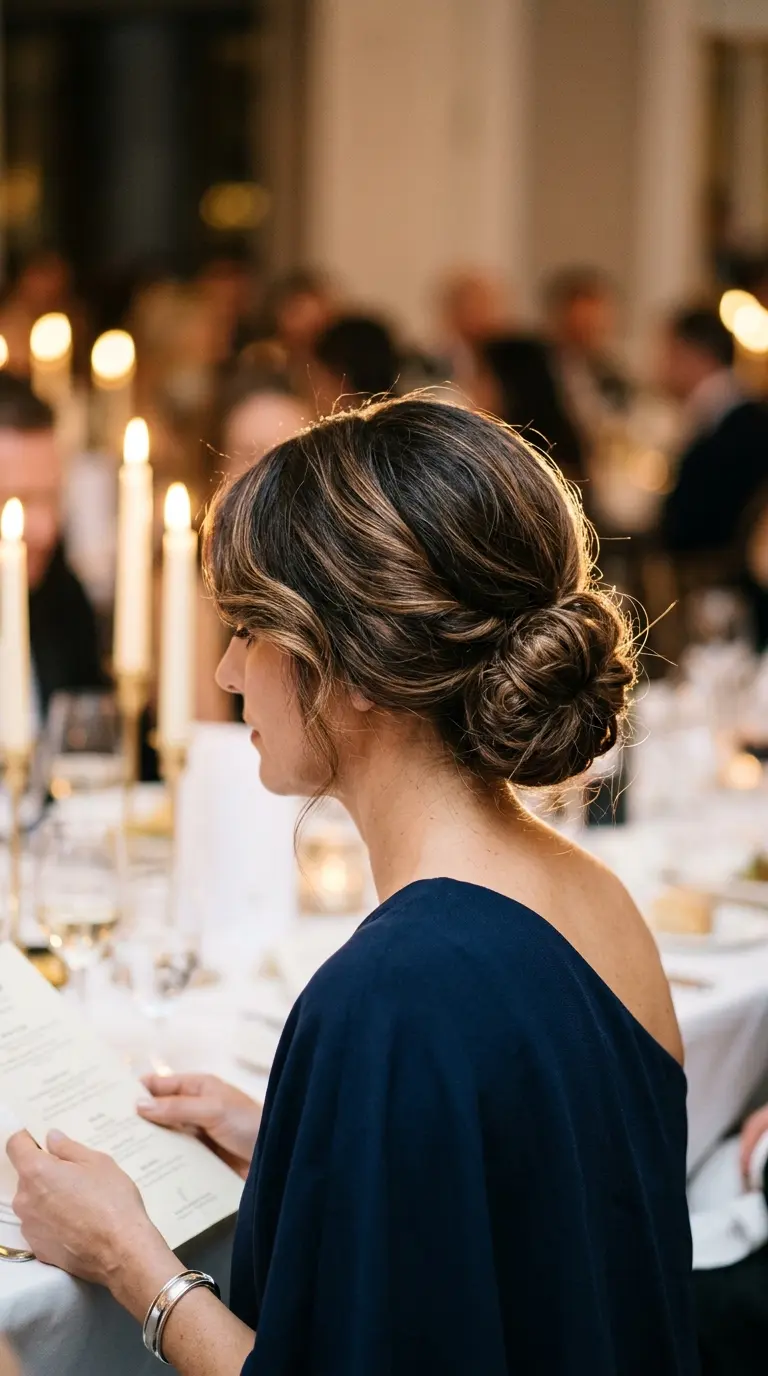
Moving the bun off center changes the whole mood. A side swept bun feels classic and a little vintage, and it looks lovely with one shoulder necklines.
- Make a deep side part.
- Curl the front section and sweep it across your forehead toward the opposite ear.
- Gather all your hair into a ponytail low on the side, behind the ear.
- Twist it into a bun and pin it.
- Pin the front wave in place behind your ear with two crossed pins.
Quick tip: put the bun on the side opposite your part. The swept front and the bun balance each other, and the shape looks deliberate.
16. Claw Clip French Twist
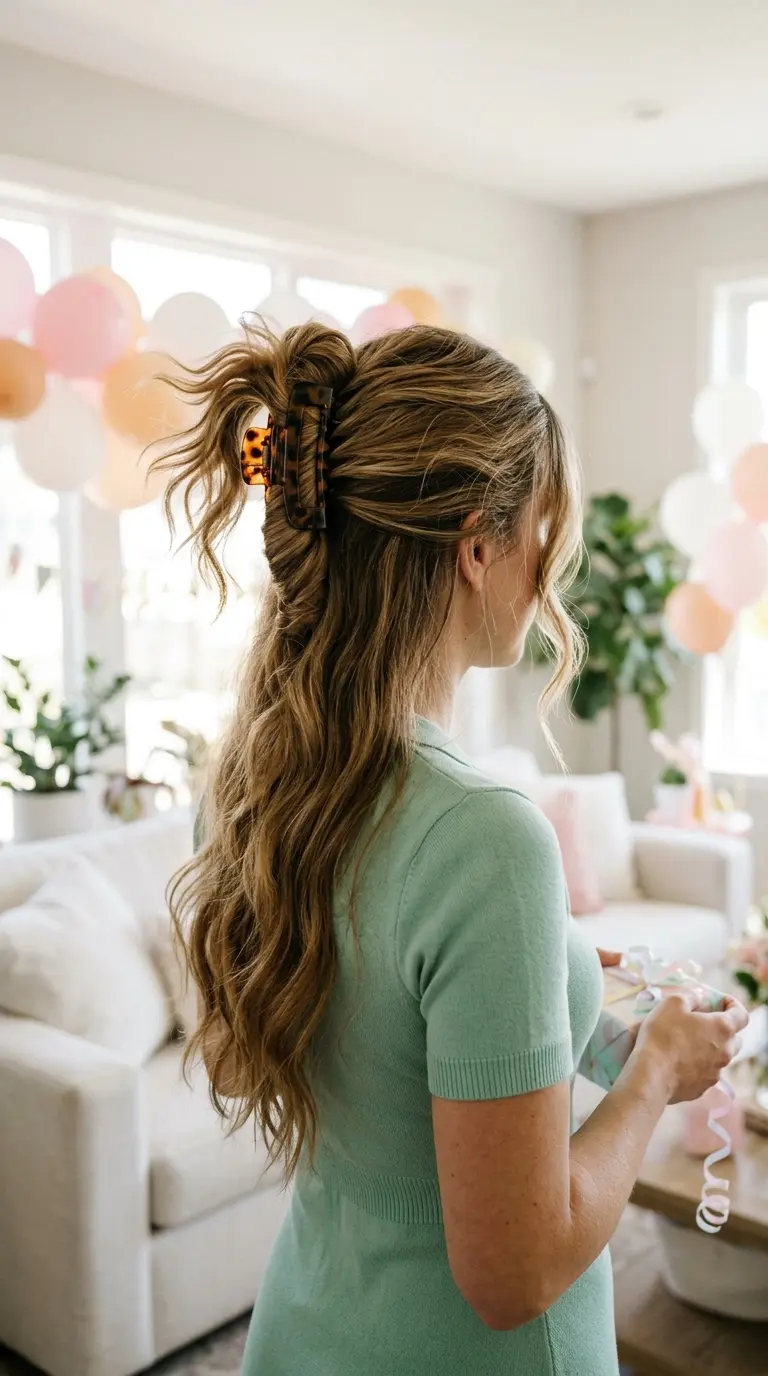
The claw clip is the easiest updo there is, and a good one looks elegant enough for daytime events, brunches, and showers.
- Gather your hair at the nape.
- Twist it upward the same way you would for a French twist.
- Fold the ends down over the twist or let them fan out at the top.
- Open a large claw clip and press it in over the twist, teeth facing your head.
Choose a clip big enough for your hair. Long, thick hair needs a clip at least four inches wide, or it will pop open.
Quick tip: add two bobby pins along the twist under the clip. The clip handles the look, and the pins handle the hold.
17. Curly Updo Pinned at the Crown
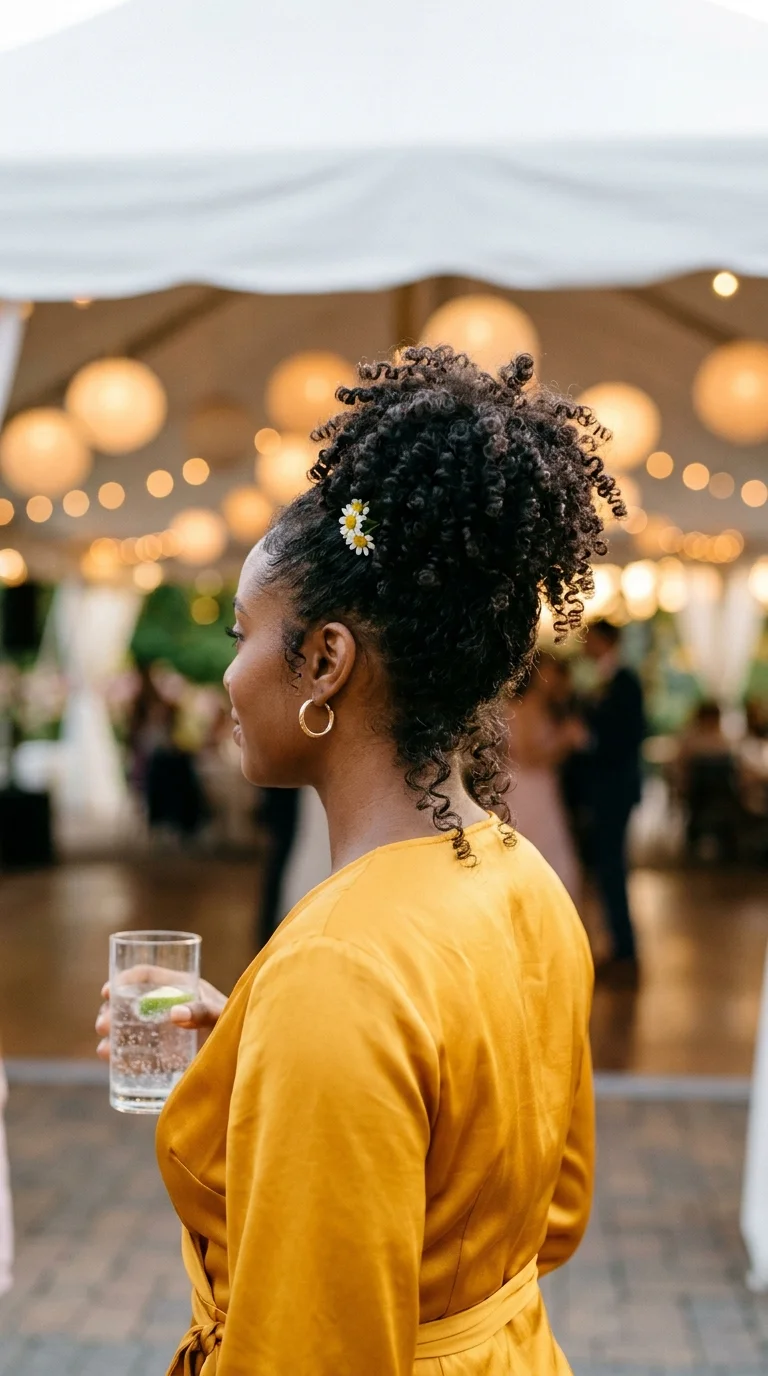
Curly and coily hair does not need to be straightened for an elegant updo. Natural texture holds pins better than straight hair, which makes curls a big advantage here.
- Refresh your curls with water and a little curl cream so they are defined.
- Smooth the edges with a soft brush and a small amount of gel.
- Gather the curls up toward the crown with your fingers instead of a brush, to keep the pattern.
- Secure the base with a satin scrunchie or a large U shaped pin.
- Arrange the curls on top and pin any that hang too low.
If you wear braids or twists, the same steps work. Gather them high and wrap the lengths into a bun at the crown.
Quick tip: do not brush curls when they are dry. It breaks the curl pattern into frizz, and you cannot undo it without wetting the hair again.
18. Braided Bun
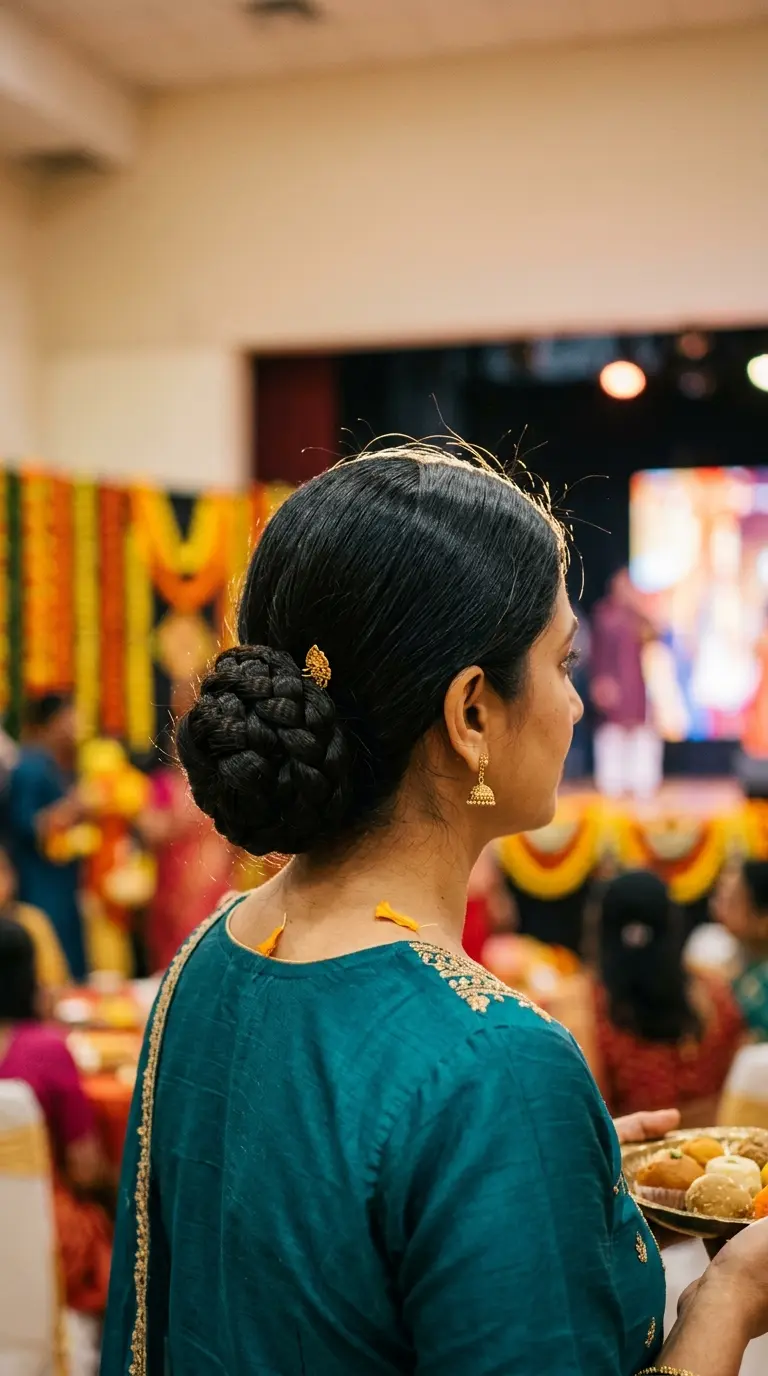
A braided bun looks more detailed than a plain one and holds better, because the braid gives the pins something to grab.
- Tie a low or high ponytail, depending on your outfit.
- Braid the ponytail into a regular three strand braid and tie off the end.
- Pancake the braid so it gets wider.
- Wrap the braid around the elastic in a circle and tuck the end under.
- Pin the bun all the way around.
It is a smart choice for waist length hair, because a braid packs all that length into a small, neat bun that will not sag.
Quick tip: for a fuller bun, split the ponytail into two and braid each one, then wrap them in opposite directions.
19. Twisted Double Low Buns
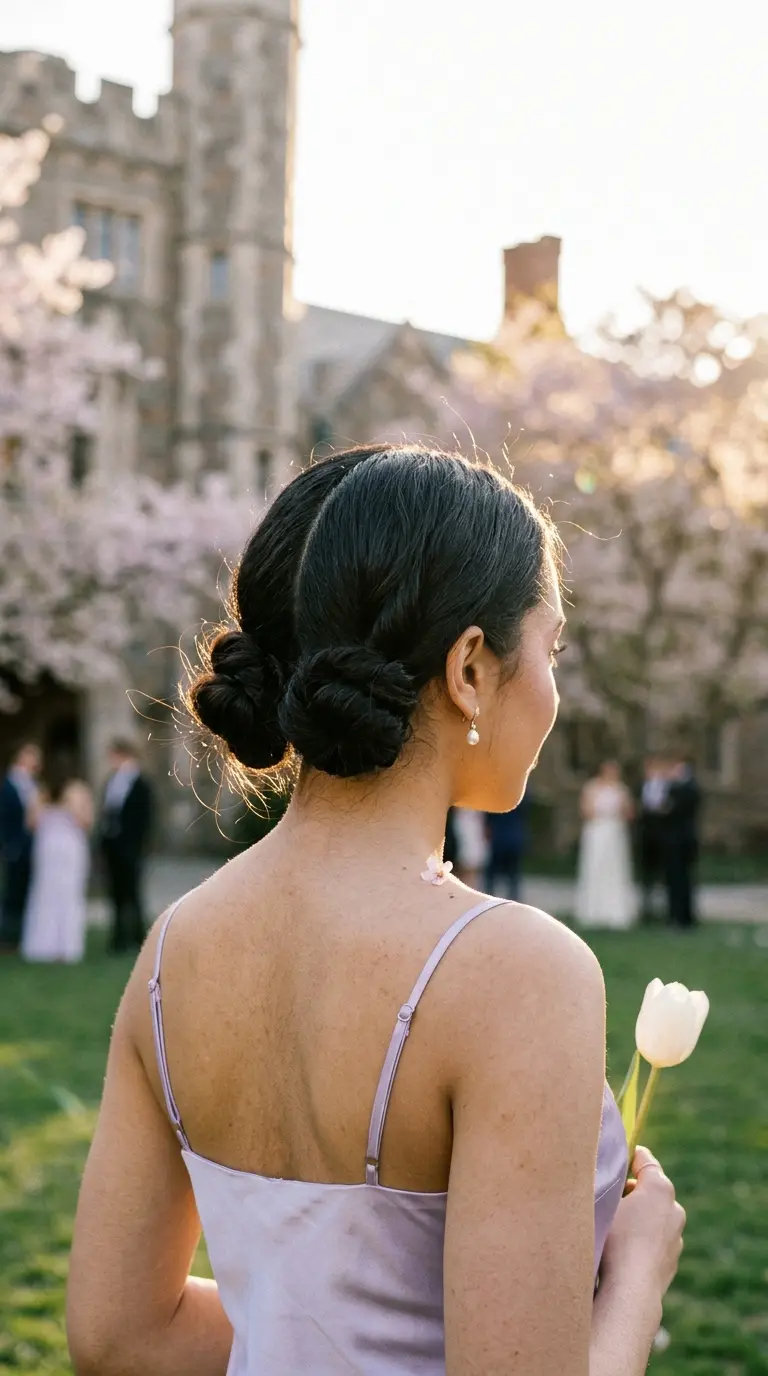
Two low buns read as fresh and youthful, and they spread the weight of heavy hair so your head does not feel pulled back all night.
- Part your hair straight down the back with the tail of a comb.
- Tie each half into a low ponytail behind each ear.
- Twist each ponytail into a rope and coil it into a bun.
- Pin each bun with three or four pins.
- Loosen the twists slightly so they look soft.
It is a nice choice for younger guests, spring events, and anyone who finds a single bun gives them a headache.
Quick tip: use a mirror behind you to check the back part. A crooked part is the one detail people notice in photos.
20. Teased Crown Low Roll
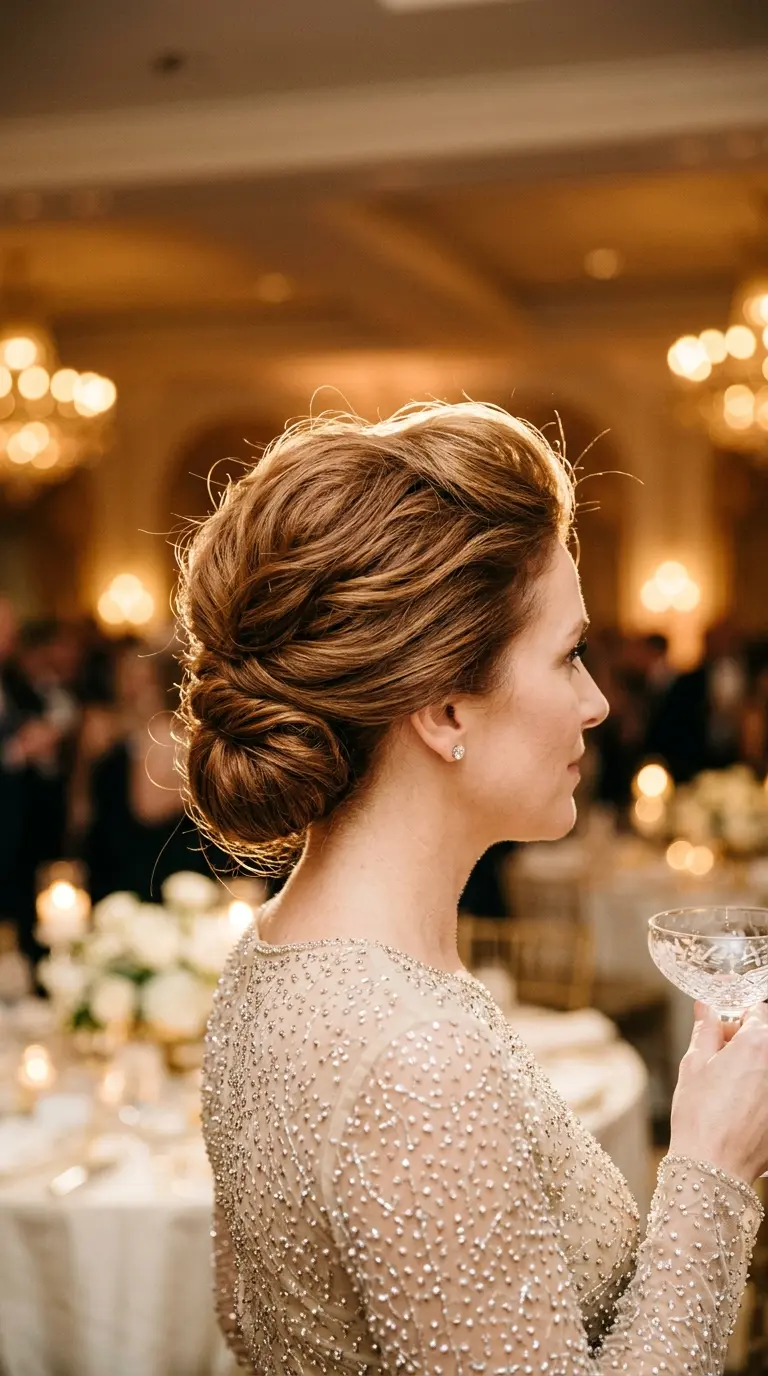
This is the most glamorous updo on the list and the one that most resembles a salon style. Volume at the crown and a smooth roll at the back give it a timeless, old Hollywood feel.
- Take a section at the crown and tease the roots with a teasing comb.
- Smooth the top layer over the teased section so the lift looks clean.
- Secure the crown with two crossed pins at the back.
- Gather the rest of your hair at the nape and roll it upward and inward, like rolling a towel.
- Pin the roll along its top edge and spray the whole style.
It suits thick or wavy hair best. Fine hair can do it with extra texture spray and a few more pins in the roll.
Quick tip: tease in small sections and push the comb toward your scalp, never pull it away. Pushing builds volume, pulling tangles it.
Do a practice run a few days before the event, with the same products and the same pins. The first try is always slower. The second try, on the day itself, is the one that looks like a stylist did it.
Your Hair, Your Event
You do not need a salon appointment to walk into an event with beautiful hair. You need second day hair, a card of bobby pins, a little texture spray, and one evening of practice.
Start with the easy styles on this list, like the low messy bun, the topsy tail, or the claw clip twist. Once those feel natural, move on to braids, crowns, and the teased roll. Every one of these updos for long hair uses the same handful of moves, so each one you learn makes the next one faster.
Take a photo of the back with your phone after each practice run. It is the only way to see what everyone else will see.
Save this list to your hair ideas board so it is ready the next time an invitation lands on your fridge.