
You grew your hair long so you could wear it down. Then you wear it down and spend the whole day pushing it behind your ears, pulling it out of your lip gloss, and fishing it out of your coffee. By lunch it is in a ponytail, and the length you worked so hard for is hidden.
Half up half down hairstyles for long hair fix that problem. The front and top come back off your face, the length stays down where everyone can see it, and you look like you made an effort even on the days you had ten minutes.
The best part is how little skill they take. Most of the styles below start with the same move: take the hair from your temples to your crown and do something with it. Twist it, braid it, knot it, clip it, or tie it in a bow. The rest of your hair stays loose.
This guide is for anyone with long hair who wants it down but out of the way: at work, at school, on a date, at a wedding, or on a hot day at the park. Each style has steps, how long it takes, and one tip that keeps it from slipping.
Start with the claw clip and the twist. Once those feel easy, try the braids.
Add a curling iron if you like waves in the loose lengths, and a hand mirror for checking the back. That is the whole kit.
1. Classic Twisted Half Up
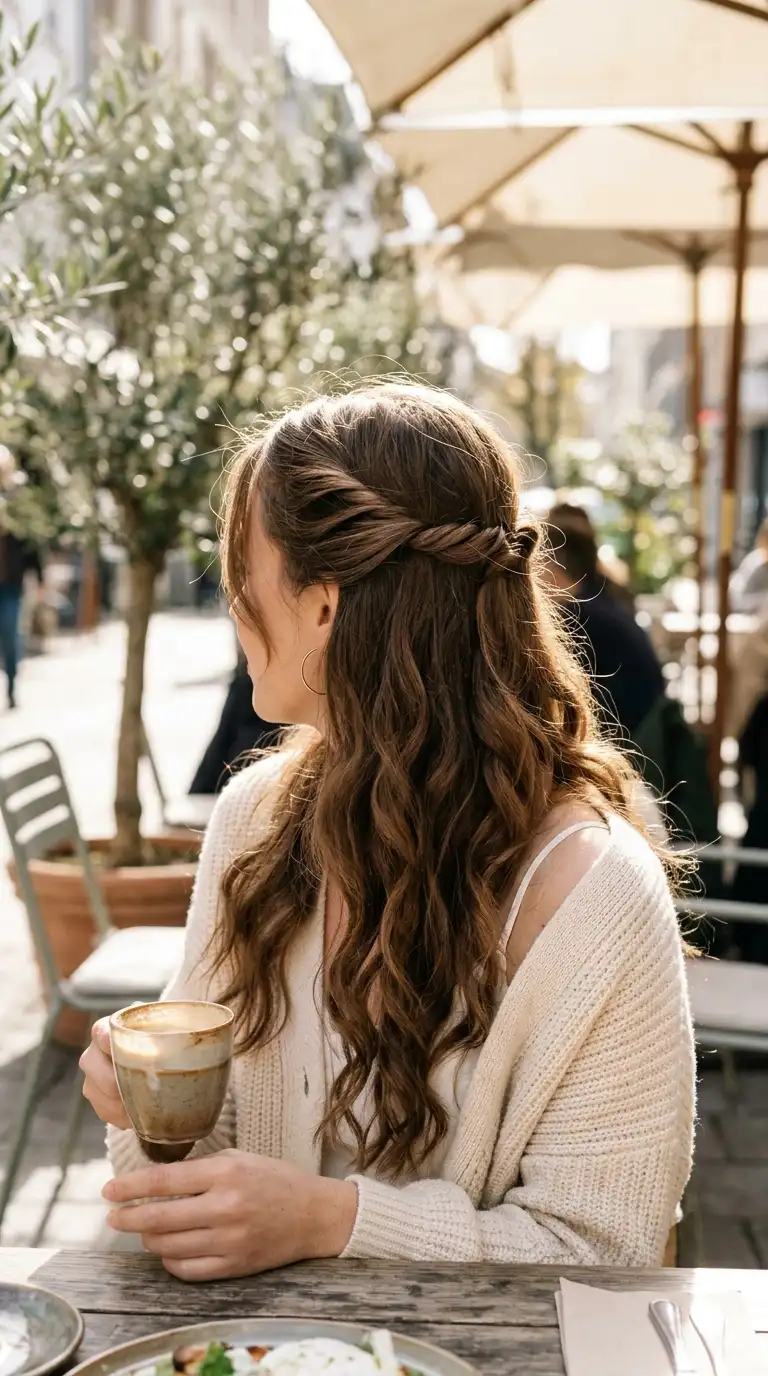
This is the half up style most people picture first, and for good reason. Two twists pull the hair off your face, meet at the back, and look neat from every angle.
- Take a two inch section of hair above your left ear.
- Twist it backward, away from your face, and keep twisting as you move toward the back of your head.
- Hold it with a pin or a small clip.
- Repeat on the right side.
- Bring both twists together at the center back and cross two bobby pins over them in an X.
- Pull gently at the twists to loosen them.
Quick tip: always twist away from your face. Twisting toward your face makes the section unwind as soon as you let go.
2. Half Up Top Knot
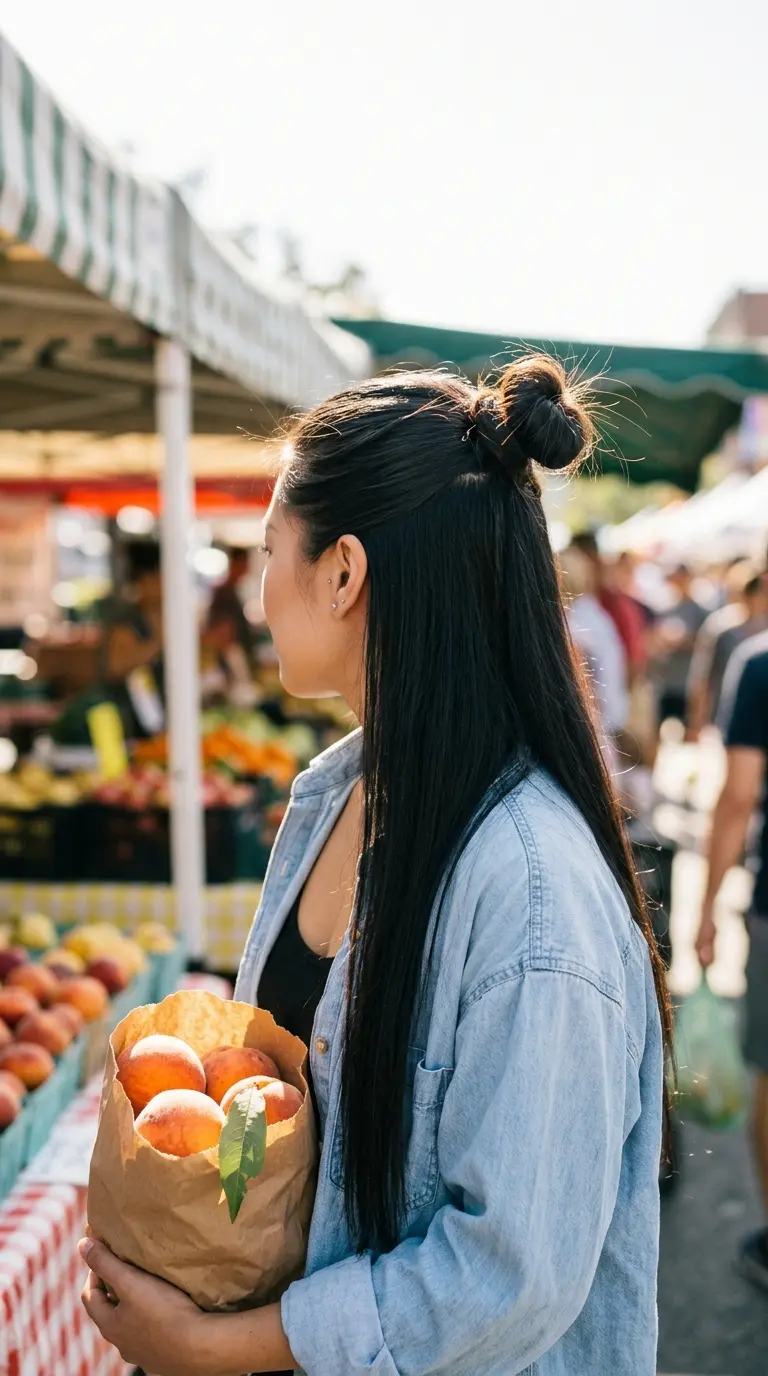
The half up top knot is the fastest way to get hair off your face on a busy morning. It looks casual on purpose, so a few bumps only help.
- Gather the hair from your temples to your crown with your fingers.
- Tie it into a small ponytail on top of your head.
- Twist the ponytail and wind it around the elastic.
- Secure the knot with a second elastic or two pins.
- Pull a few pieces loose around the knot so it looks soft.
For thick hair, take a smaller section than you think you need. A large section makes a knot that looks heavy on top of long loose hair.
Quick tip: tie the ponytail with your head tipped slightly forward. The knot sits higher and stays upright all day.
3. Claw Clip Half Up
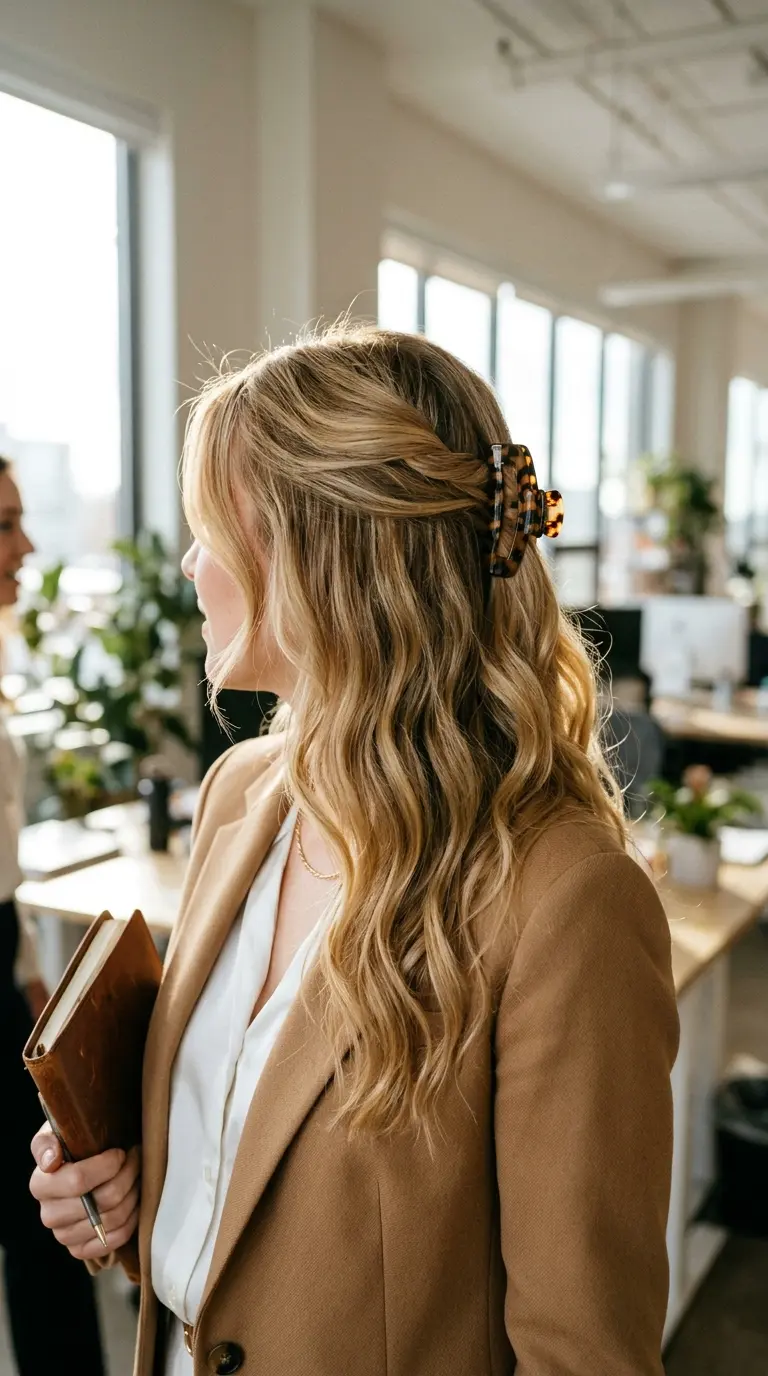
If you own one claw clip, you own this style. It takes thirty seconds and looks polished enough for an office.
- Gather the top third of your hair at the back of your head.
- Twist it once or twice so it forms a short rope.
- Fold the twist up against your head.
- Slide the claw clip over it, teeth pointing down, and close it.
- Fluff the loose hair below.
A medium clip suits most long hair. Thick hair needs a large clip with long teeth, or it will slide down by noon.
Quick tip: mist the section with texture spray before you twist it. Silky hair slips out of a clip, slightly gritty hair stays put.
4. Half Up Bow
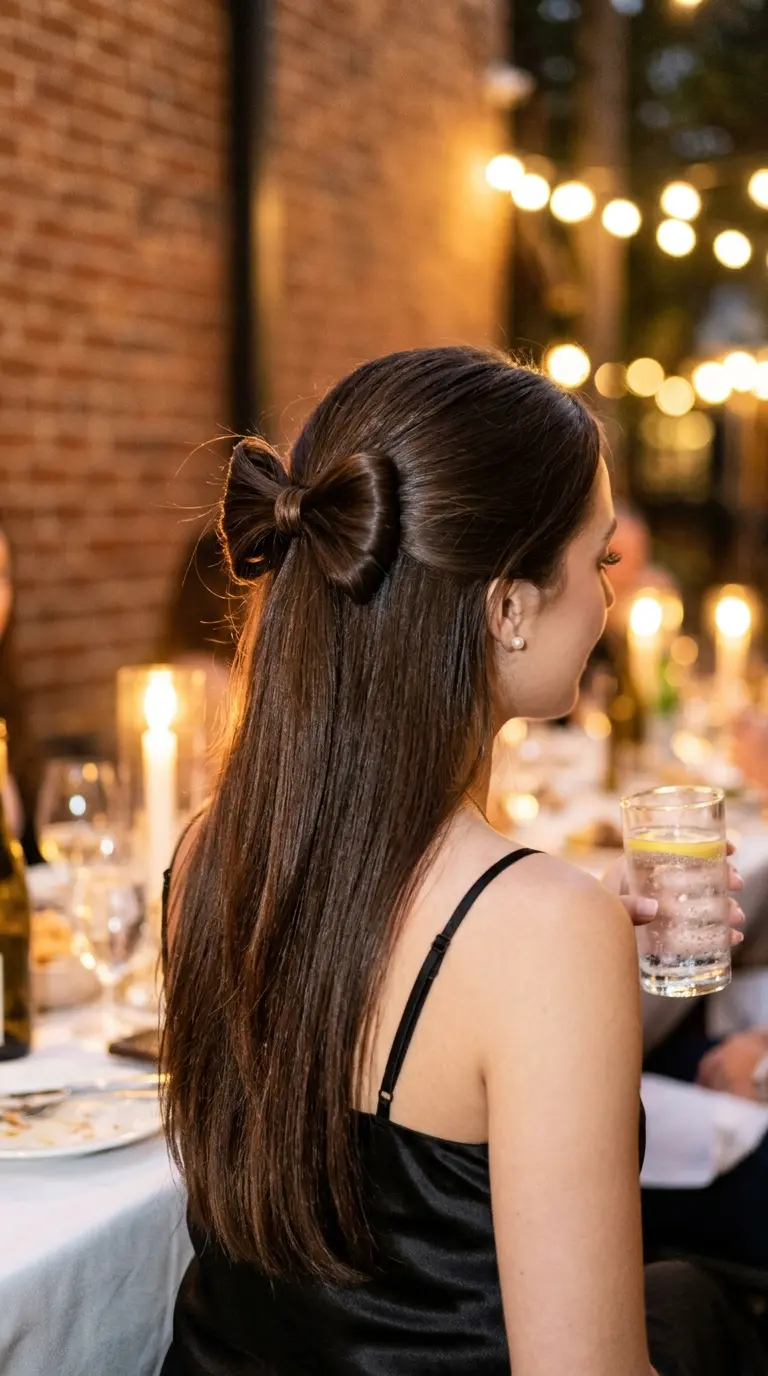
A bow made from your own hair looks clever and sweet. It takes a little practice, but you only need two elastics and a few pins.
- Gather the top section of hair and start a ponytail at the back of your head.
- On the last pass of the elastic, stop halfway so you have a loop with the ends hanging down.
- Split the loop into two equal halves and spread them out to the sides.
- Bring the hanging ends up through the middle of the two loops.
- Pin the ends underneath the bow so they are hidden.
- Spray lightly and shape the loops with your fingers.
Quick tip: smooth hair makes the cleanest bow. Run a straightener over the top section first if your hair is wavy.
5. Half Up Crown Braid
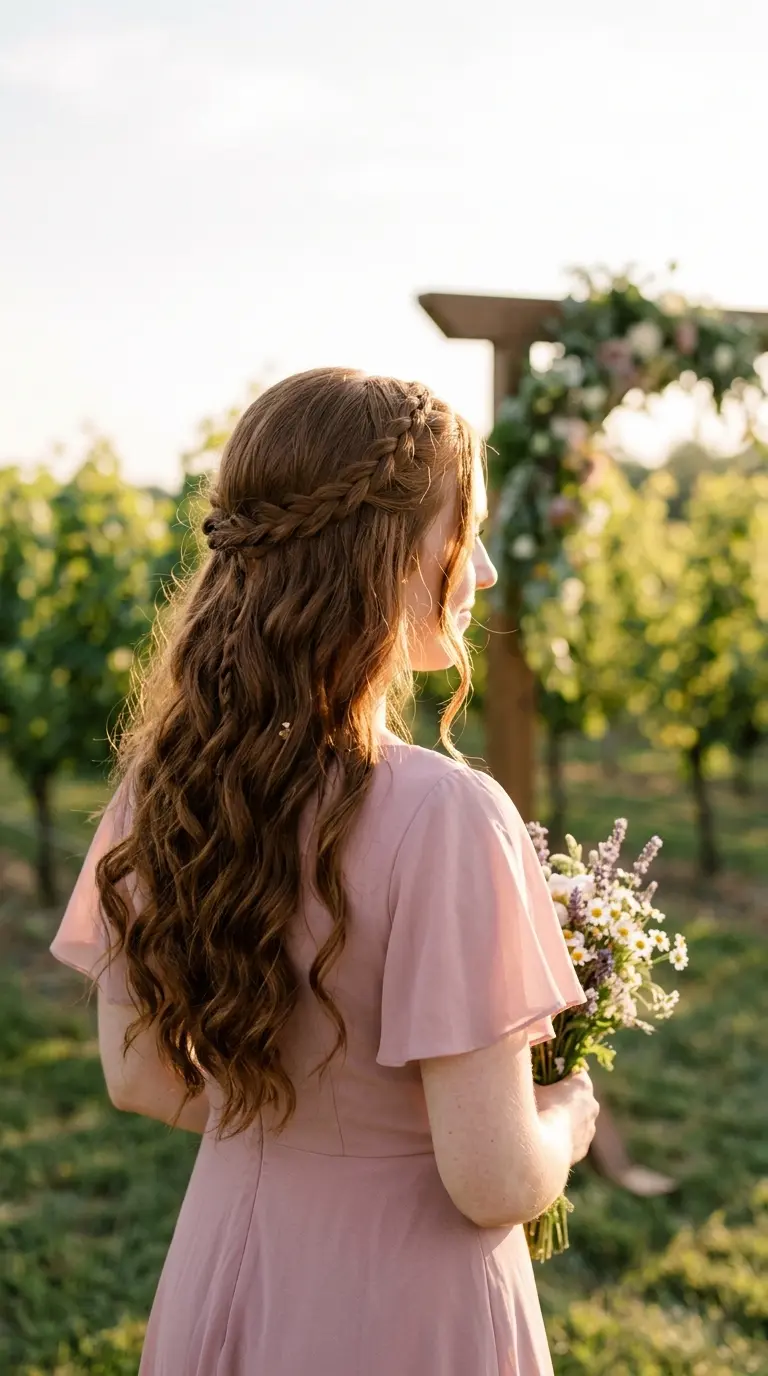
This one reads as romantic without trying. The braids frame the back of your head like a halo, and the curls below do the rest.
- Take a one inch section above your left ear and make a regular three strand braid.
- Tie the end with a clear elastic.
- Repeat above your right ear.
- Pancake both braids by pulling the outer loops gently.
- Bring the left braid across the back of your head and pin it under the right side.
- Bring the right braid across and pin it under the left side.
Quick tip: braid each side while looking down at your shoulder, not into the mirror. Your hands work better when you stop trying to follow the reversed image.
Freshly washed hair, half up with one bobby pin. The pin slides out within an hour, the top goes flat against the scalp, and the section droops toward the neck.
The same style on day old hair with texture spray at the roots, a small elastic as the anchor, and two pins crossed in an X. It holds its shape from breakfast to bedtime.
6. Half Up Fishtail Braid
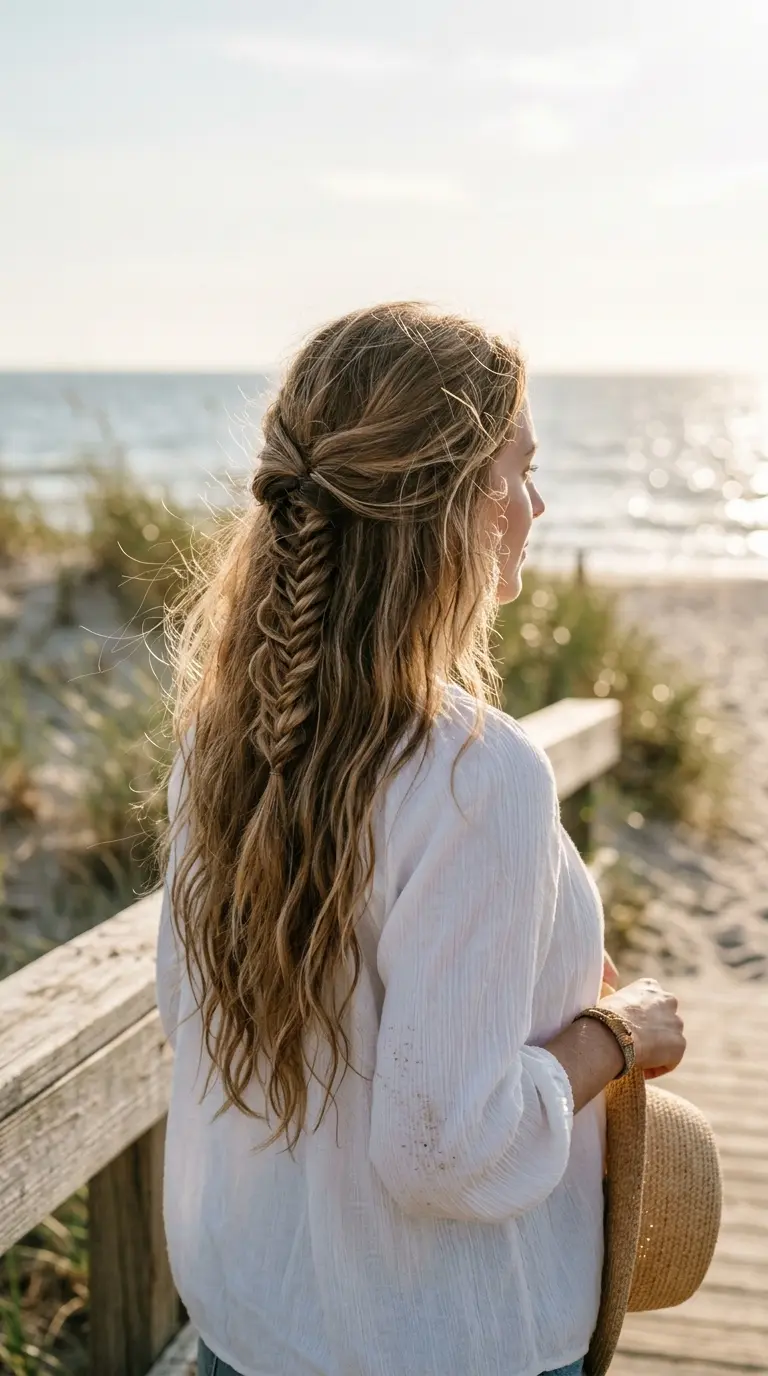
A fishtail looks detailed and suits beach days, festivals, and any day with wind. A messy fishtail looks better than a neat one.
- Gather the top section into a half ponytail and tie it loosely.
- Split the ponytail into two halves.
- Take a thin piece from the outer edge of the left half and cross it over to the right half.
- Take a thin piece from the right half and cross it to the left.
- Repeat to the ends and tie off with a clear elastic.
- Remove the first elastic and pull the braid wide.
Quick tip: thinner pieces make a finer braid. Thick pieces make it look like a regular three strand braid.
7. Bubble Half Up Ponytail
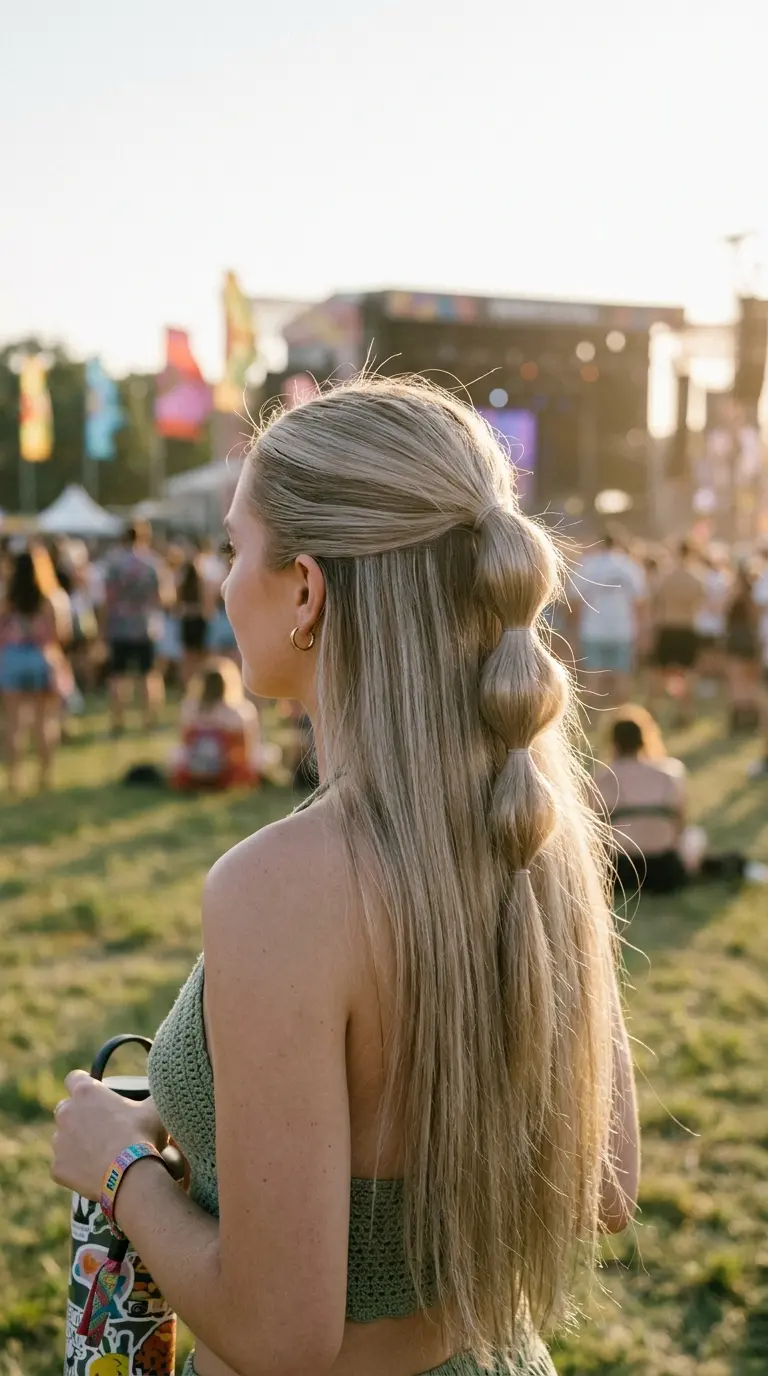
Bubbles add fun to a plain half ponytail without any braiding.
- Tie the top section into a half ponytail at the back of your head.
- Place a small elastic two inches down the ponytail.
- Pull the hair between the two elastics gently outward to make a round bubble.
- Add another elastic two inches lower and puff that section.
- Keep going until you reach the ends.
Quick tip: space the elastics the same distance apart. Measure the first gap with two fingers and use the same two fingers for every gap after it.
8. Topsy Tail Half Up
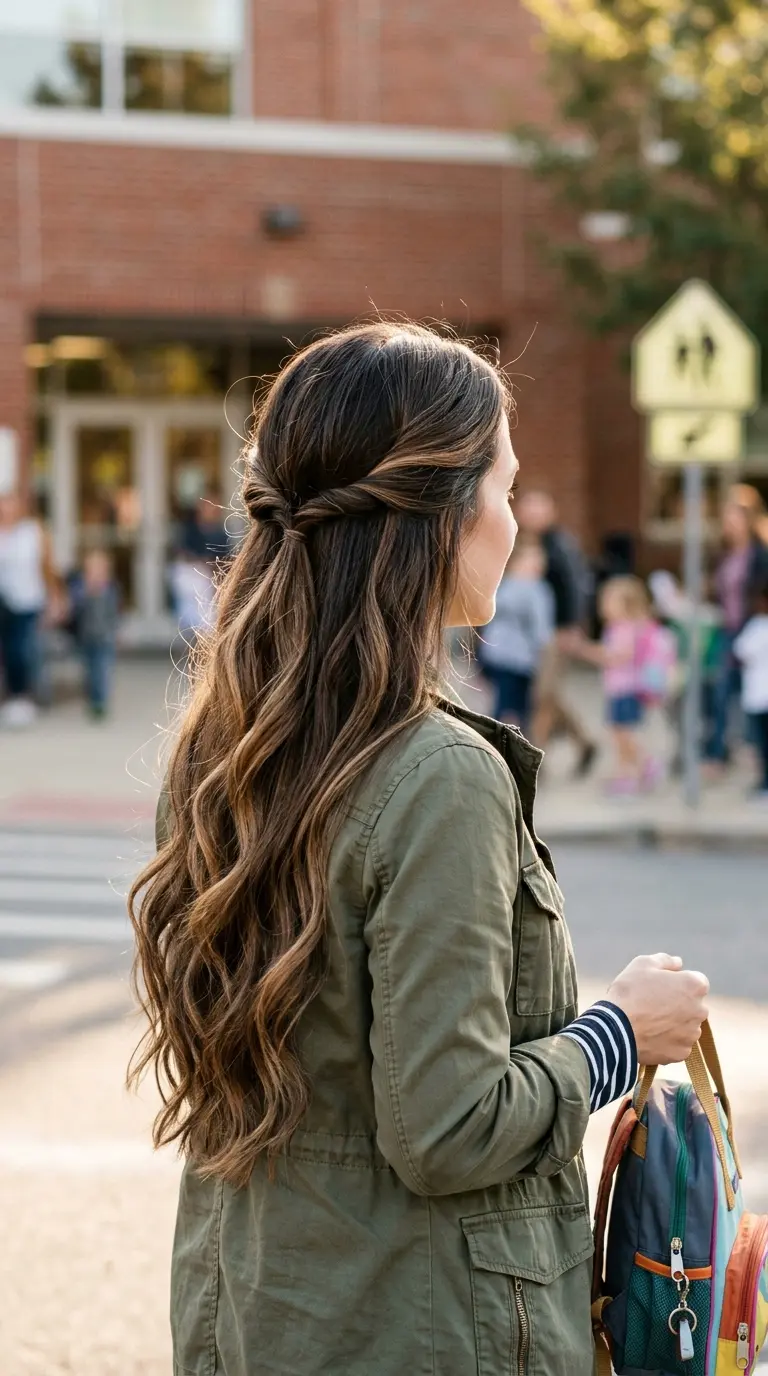
If you can tie a ponytail, you can do a topsy tail. The flip makes it look like a twist.
- Tie the top section into a half ponytail and slide the elastic down half an inch.
- Make a small opening in the hair above the elastic with your finger.
- Flip the ponytail up and push it through the opening from top to bottom.
- Pull both sides of the ponytail to tighten the twist.
- Loosen the twisted sides gently with your fingers.
You can repeat this two or three times down the length for a stacked look.
Quick tip: loosen the elastic before you flip. A tight elastic leaves no room and the flip ends up lumpy.
9. Rope Twist Half Up
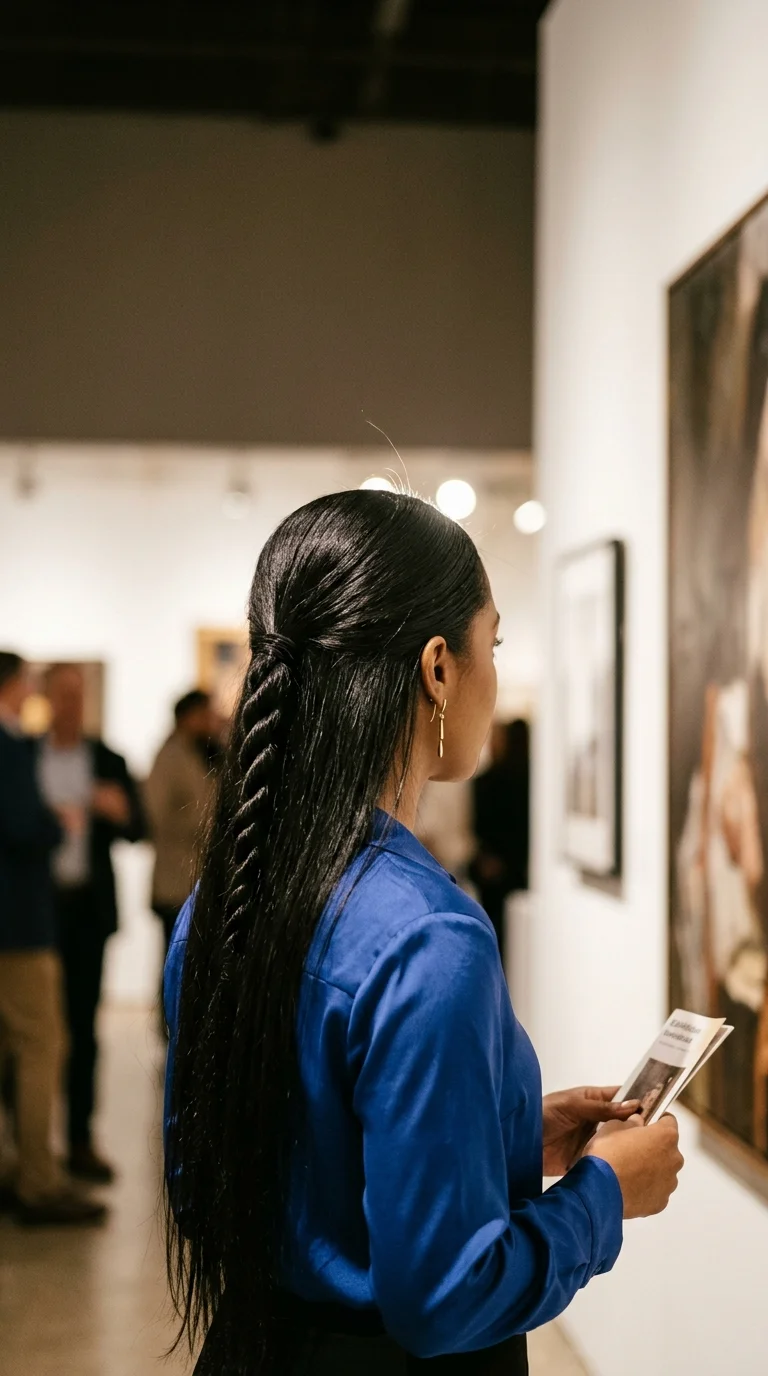
A rope twist looks sleek and graphic, and it suits straight hair that will not hold a braid.
- Tie the top section into a half ponytail.
- Split the ponytail into two equal strands.
- Twist each strand to the right, separately, until it feels firm.
- Cross the two strands over each other to the left.
- Keep twisting each strand right and crossing left until you reach the ends.
- Tie off with a clear elastic.
Quick tip: the twist only holds if the strands twist one way and cross the other way. If it unravels, you are twisting and crossing in the same direction.
10. Waterfall Braid Half Up
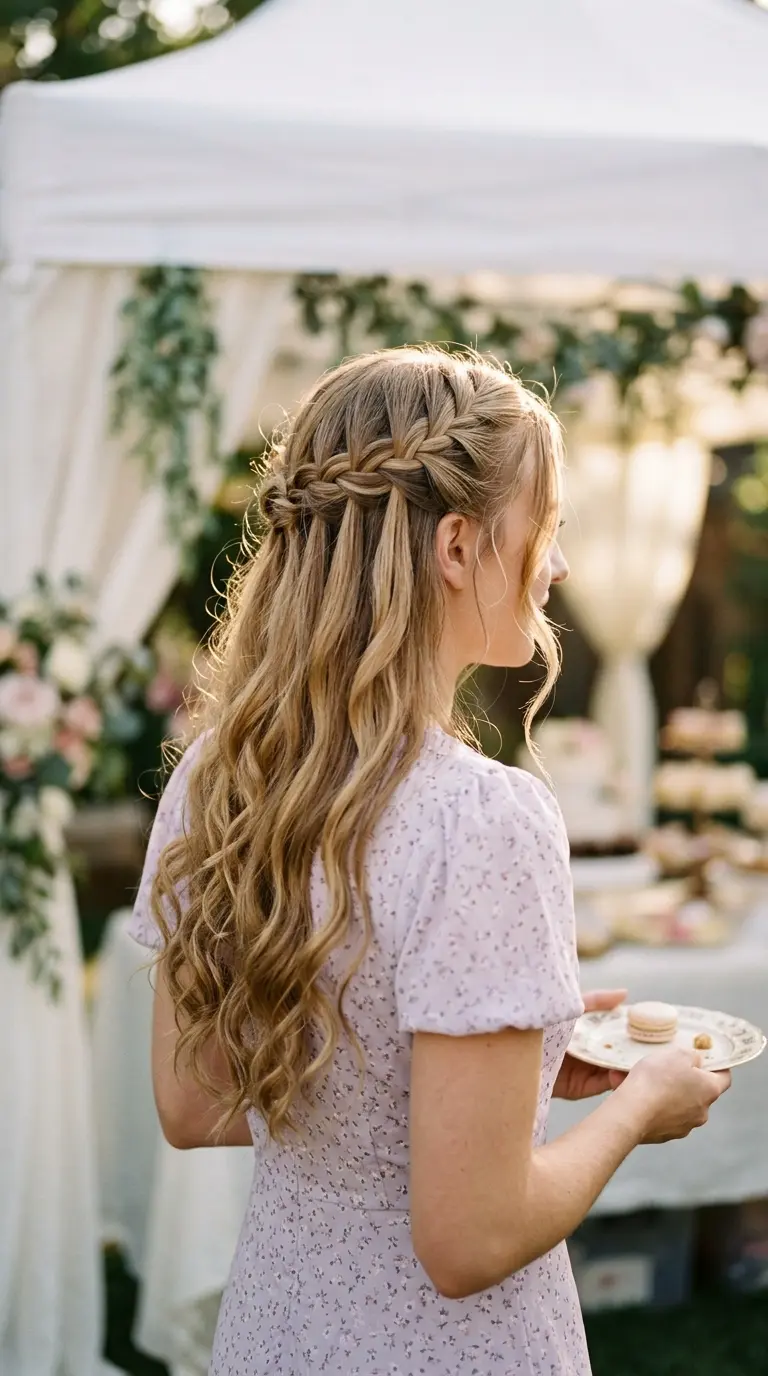
The waterfall braid looks the most impressive on this list, and it takes the most practice. Once you get it, it is the style people ask about.
- Take a section at your front hairline on one side and split it into three strands.
- Cross the front strand over the middle, then the back strand over the middle.
- Drop the strand that is now in the back and let it hang loose.
- Pick up a new strand of hair from right behind it and use it in its place.
- Keep braiding across the back of your head, dropping and picking up each time.
- Pin the end behind the opposite ear.
Quick tip: curl your hair first. The dropped strands blend into curls and hide any uneven spots in the braid.
Style on day old hair, or spray dry shampoo at the roots of clean hair. Grip is what keeps the top section from sliding.
Anchor the top section with a small elastic before you add a clip, bow, or bun. Pins and clips hold better on an elastic than on loose hair.
Cross your bobby pins in an X. Two crossed pins hold more than four pins laid side by side.
Shake your head in front of the mirror before you leave. Anything that moves now will fall later.
11. Half Up Space Buns
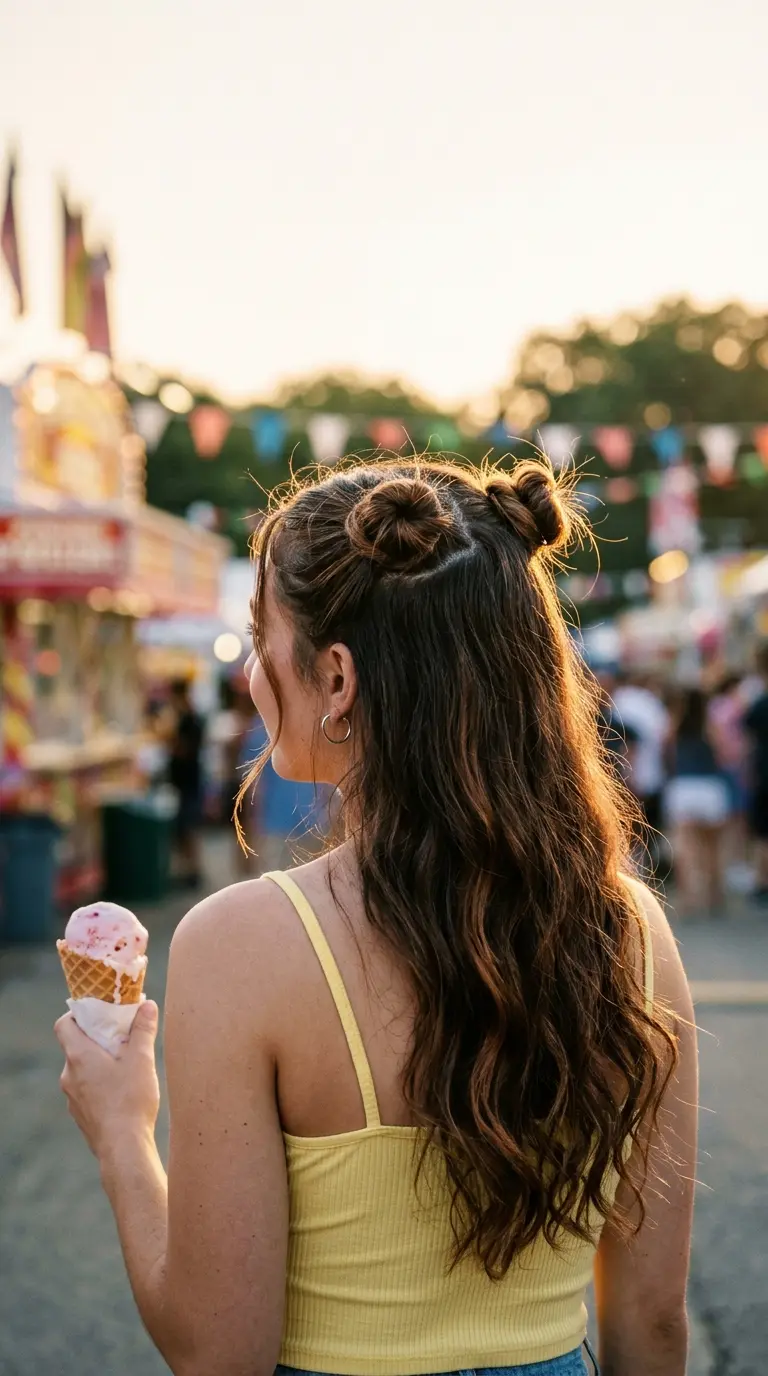
Two little buns on top feel playful and young. They also keep the front of your hair completely out of your face.
- Part the top section of your hair down the center from your forehead to your crown.
- Tie each half into a small ponytail, high on each side.
- Twist each ponytail and wrap it into a bun.
- Pin each bun with two or three pins.
- Tug the buns gently so they look full.
A zigzag part, made with the tail of a comb, makes the buns look more festive.
Quick tip: check the buns in a hand mirror from the side. If one sits higher, take it down and redo it now, before you have spent ten minutes on the other.
12. Half Up With a Silk Scarf
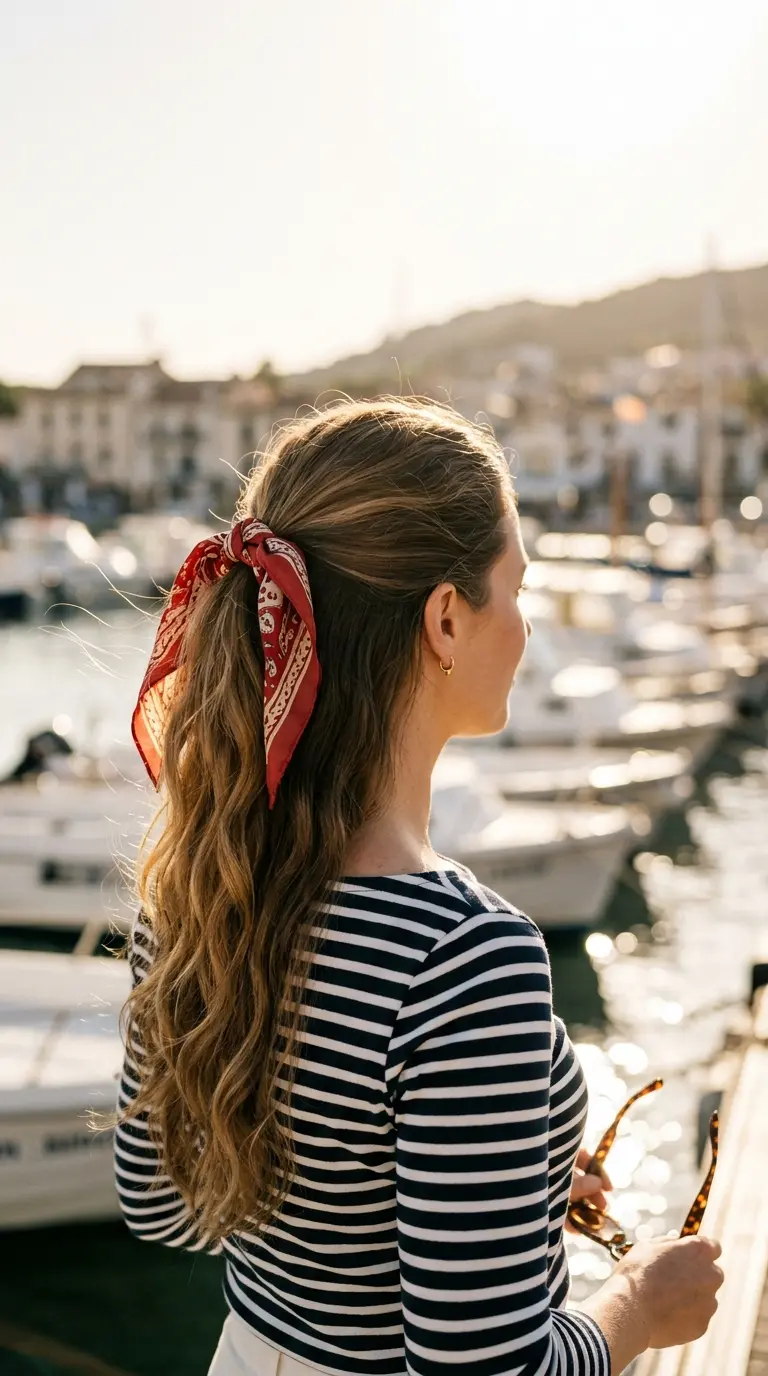
A scarf turns the plainest half ponytail into an outfit detail. It also hides an elastic that has seen better days.
- Tie the top section into a half ponytail.
- Fold a small square scarf into a long thin strip.
- Wrap the strip around the elastic twice.
- Tie it in a bow or a double knot.
- Let the tails hang down over the loose hair.
Quick tip: satin and silk scarves slide. Tie the scarf over the elastic, not over the hair alone, so it has something to grip.
13. Sleek Volume Half Up
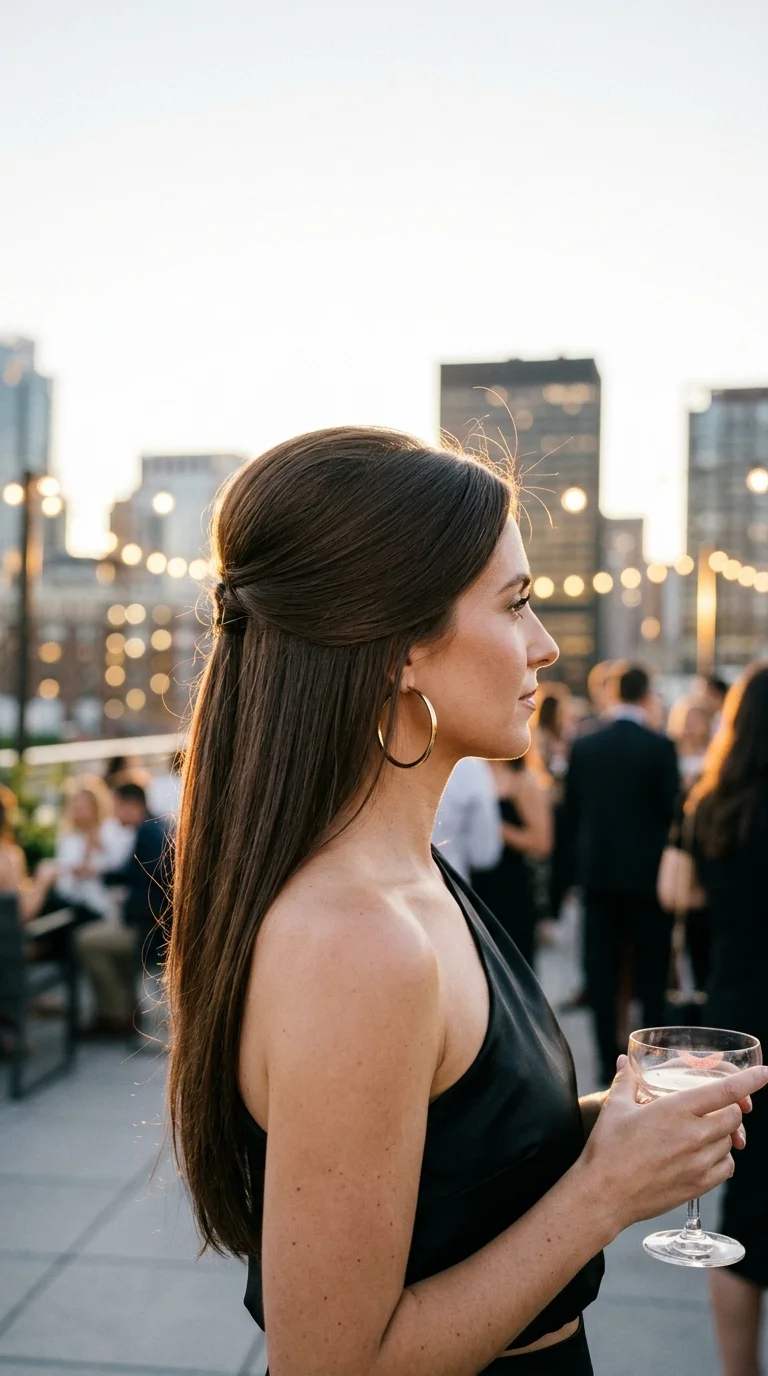
This is the half up style with a sixties feel. The lift at the crown makes it look glamorous, and the smooth lengths keep it modern.
- Blow dry your hair straight and smooth.
- Take a section at the crown and tease the roots with a teasing comb.
- Smooth the top layer over the teased hair.
- Gather the crown and the sides at the back of your head.
- Pin with two crossed pins, or tie with a small elastic hidden under a piece of hair.
- Mist with hairspray and smooth any bumps with your palm.
Quick tip: push the teasing comb toward your scalp, never pull it away. Pushing builds volume, pulling creates knots.
14. Half Up Dutch Braids
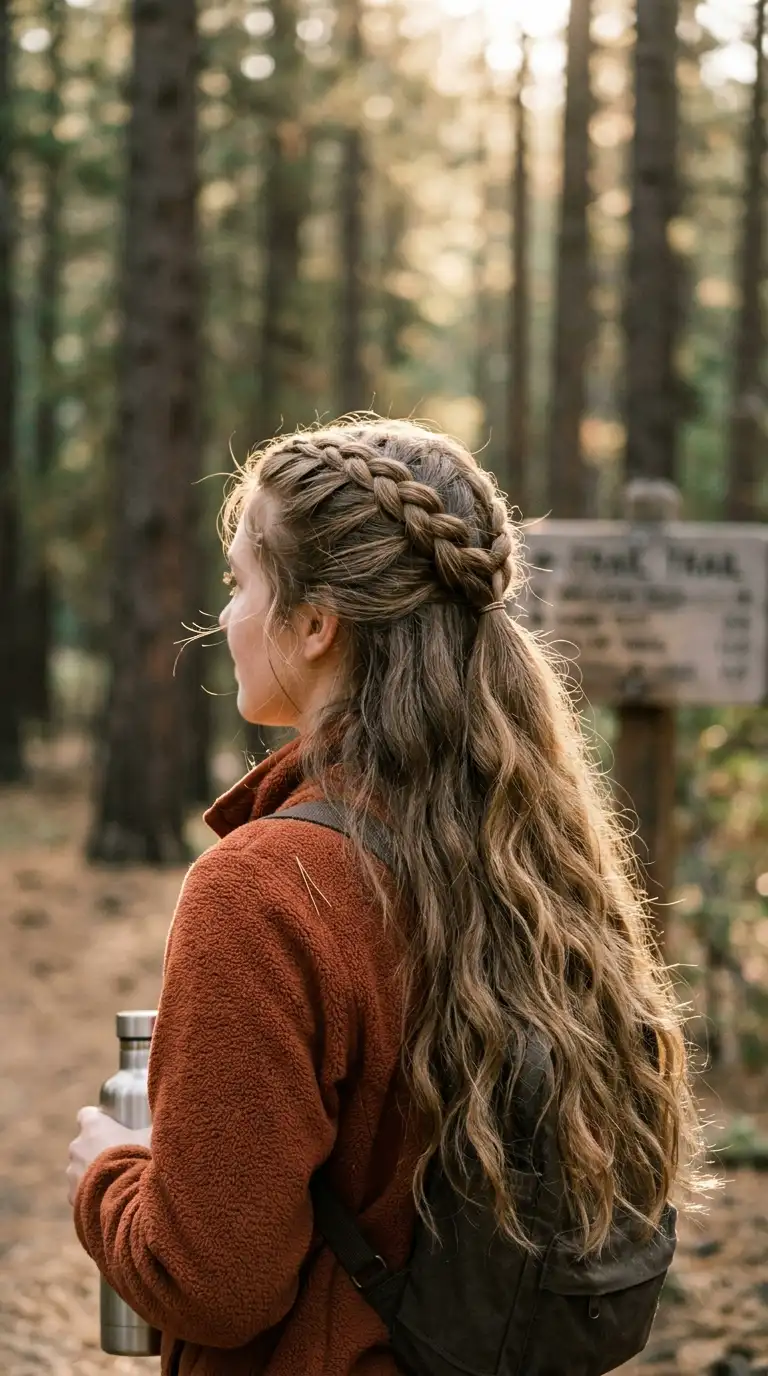
Dutch braids sit on top of your head instead of lying flat, so they look bold. They are also the most secure style here for active days.
- Take a section at your left temple and split it into three strands.
- Cross the outer strands under the middle, not over it.
- Add a little hair to each outer strand as you braid back.
- Stop at the back of your head and hold the braid with a clip.
- Repeat on the right side.
- Join both braids with one small elastic and let the tails hang into the loose hair.
Quick tip: if your braid looks flat, you crossed over instead of under. Under is what makes the braid stand out.
15. Curly Half Up Puff
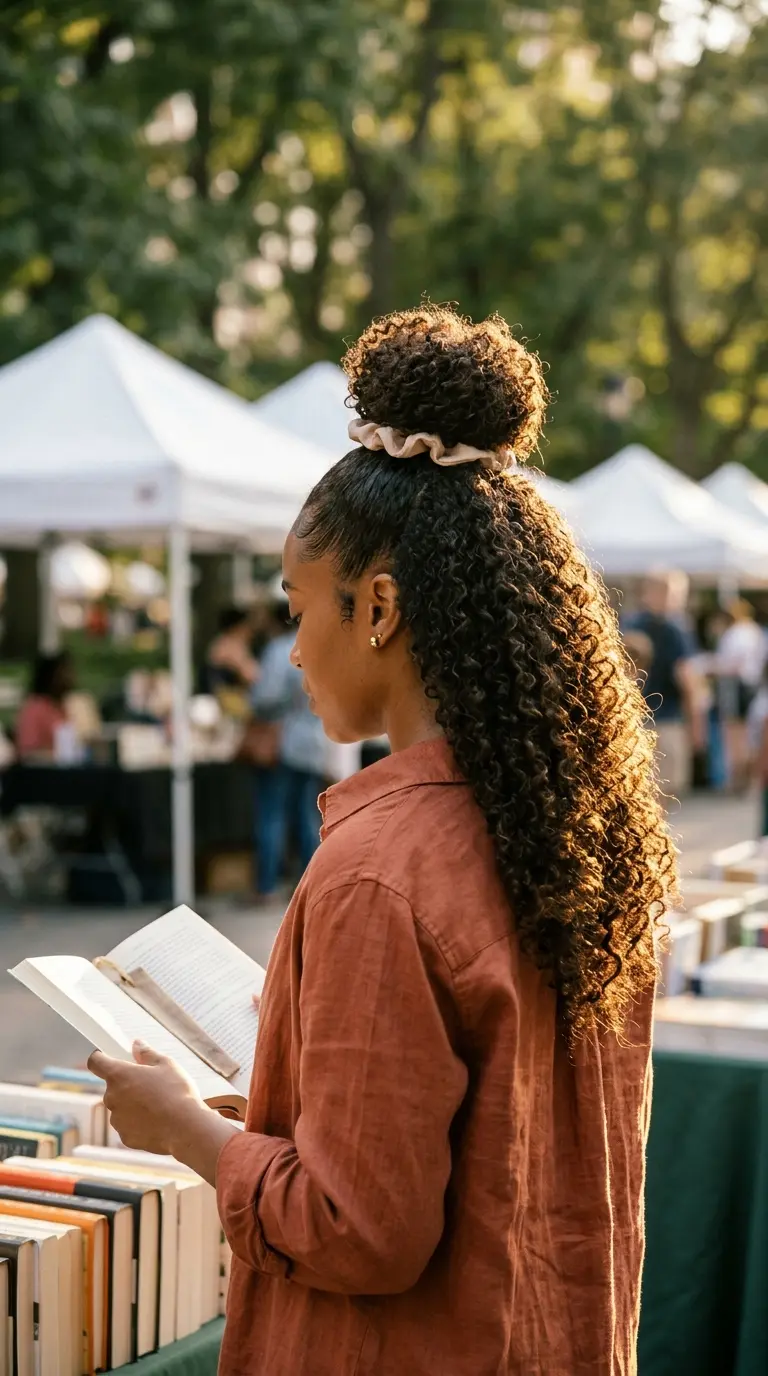
Curly hair has a natural half up style of its own. The puff shows off curl shape and keeps curls off your face without stretching them.
- Start with damp or refreshed curls and a little leave in conditioner.
- Gather the top section with your hands, not a brush, so the curls stay defined.
- Slip a fabric scrunchie or a satin band around the section.
- Smooth your edges with a soft brush and a small amount of gel.
- Fluff the puff with your fingertips.
Quick tip: skip thin elastics. They snap curly hair and leave a dent. A scrunchie or a satin band holds as well and is gentler.
| Hair Type | Styles to Try | Why It Works |
|---|---|---|
| Fine and straight | Sleek volume half up, bubble ponytail, pull through braid | Each one adds lift or bulk the hair does not have on its own |
| Thick and straight | Claw clip half up, rope twist, half up bow | Smooth shapes that show off shine and hold heavy hair |
| Wavy | Classic twisted half up, fishtail, boho mini braids | Texture hides bumps and makes loose styles look intended |
| Curly or coily | Curly half up puff, Dutch braids, half up space buns | Keep curls defined and need no heat |
| Layered | Half up top knot, scarf half up, face framing half up | Short layers can fall out around the section and still look good |
16. Knotted Half Up
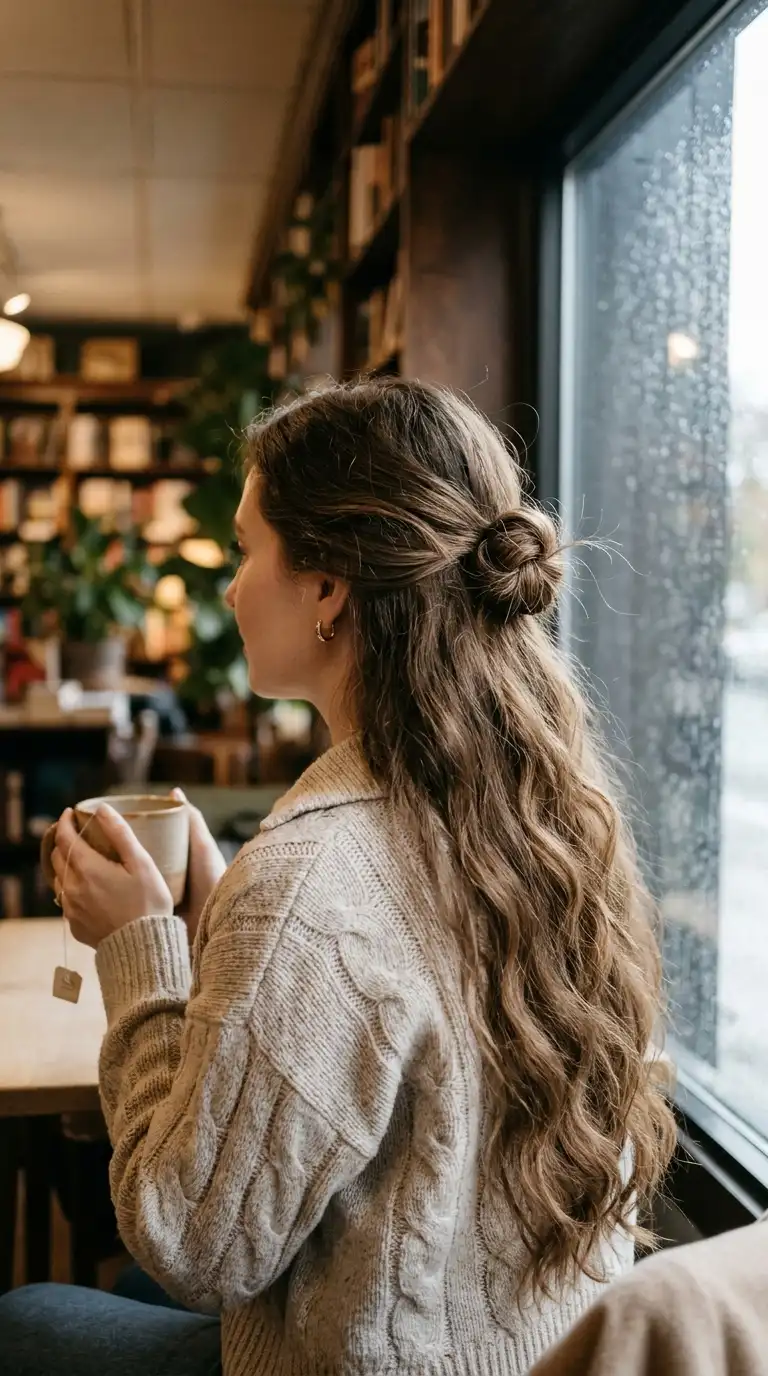
No elastic needed. You tie your hair to itself, the same way you start tying a shoelace.
- Take a one inch section from each side, above the ears.
- Bring both sections to the back of your head.
- Cross the left over the right and pull it through to make a knot.
- Tie a second knot on top if your hair is long enough.
- Pin the ends under the knot, or let them hang into the loose hair.
Quick tip: tie loosely. A tight knot looks small and pulls at the sides of your head after an hour.
17. Pull Through Braid Half Up
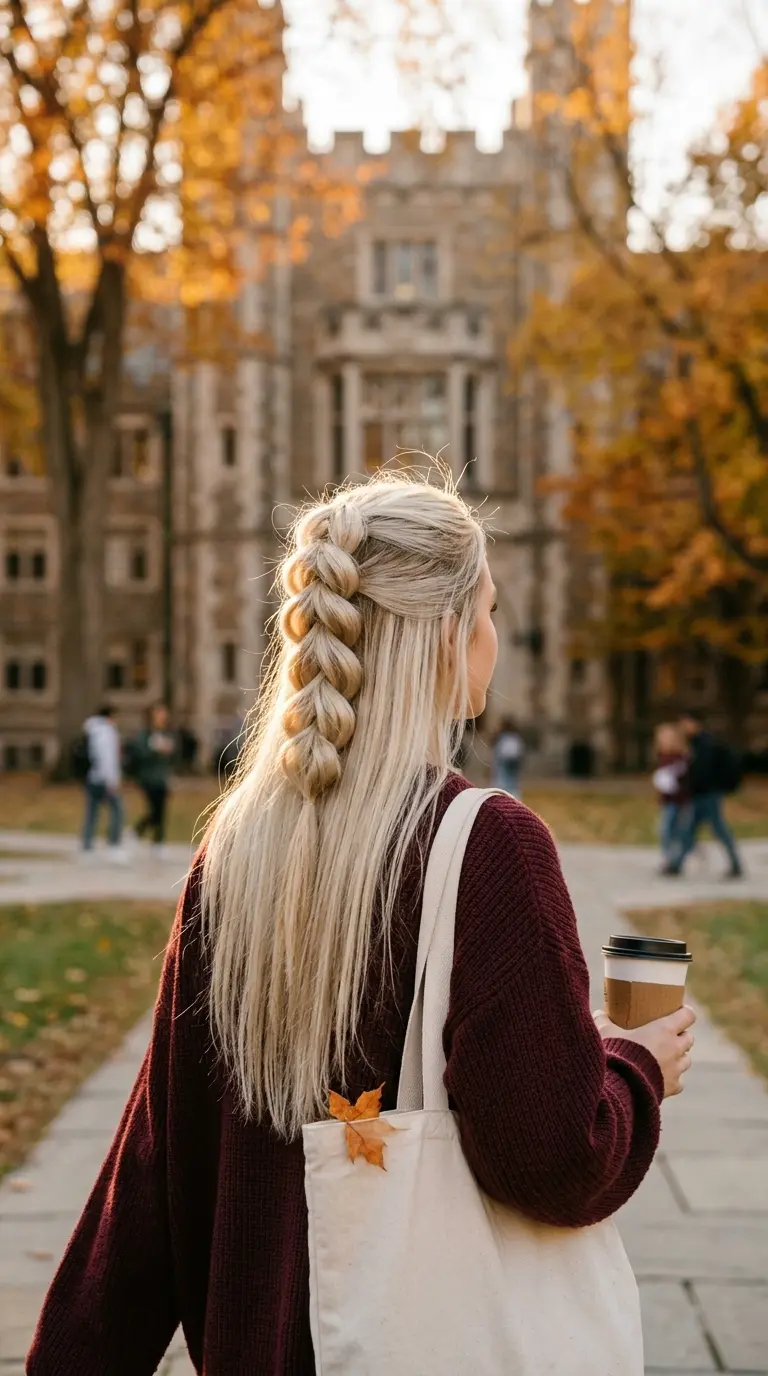
If you cannot braid, this is your braid. It uses small elastics instead of braiding, and it adds volume to fine hair.
- Tie a small ponytail at the top of your head.
- Tie a second small ponytail right below it, using hair from the sides.
- Split the top ponytail in two and pass the second ponytail up between the halves. Clip it out of the way.
- Bring the two halves down, add a little more side hair, and tie them into a new ponytail.
- Repeat two or three times, then let the ends hang loose.
- Pull the sections wider so they look puffed.
Quick tip: use clear elastics of the same size all the way down. Mixed sizes make the sections look uneven.
18. Face Framing Half Up
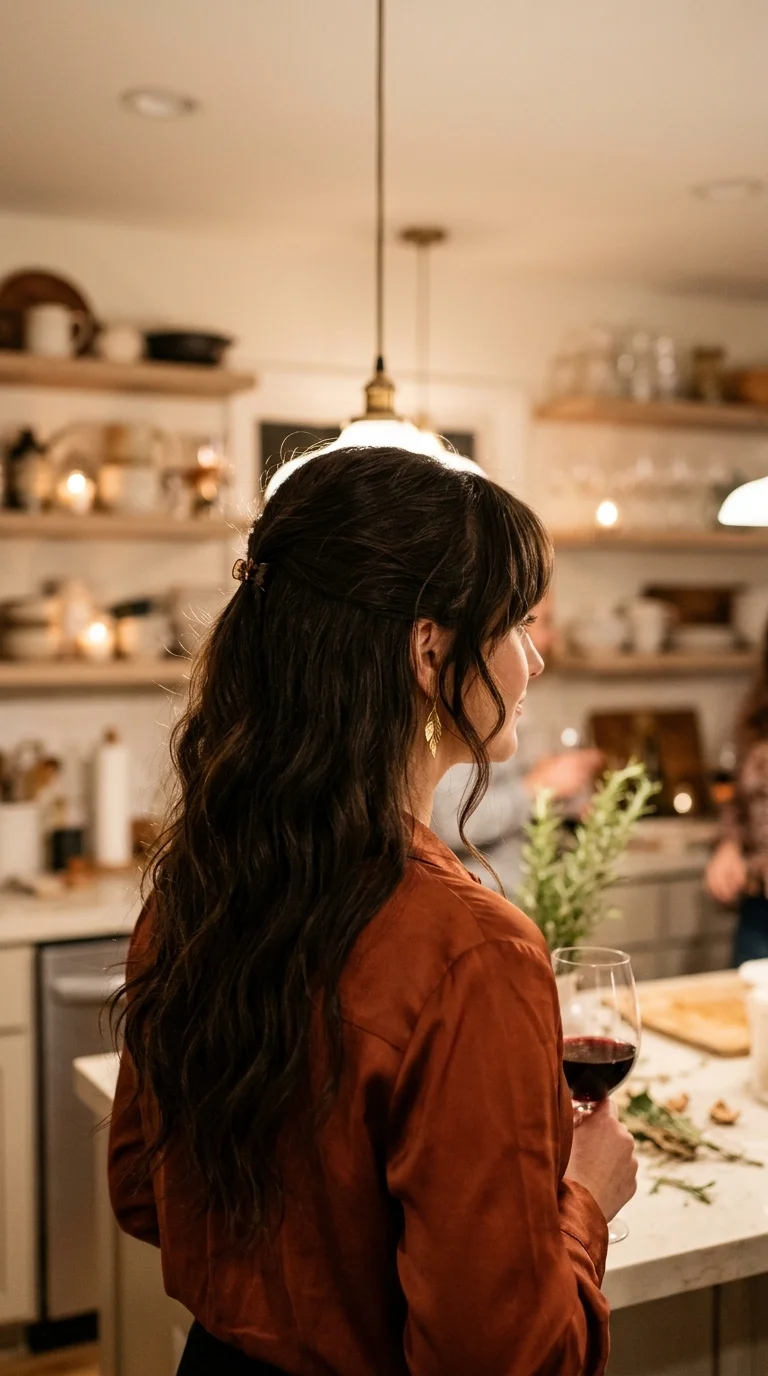
Pulling every hair back can feel severe. Leaving a few pieces out softens the whole look and flatters most face shapes.
- Curl or wave your hair with a 1.25 inch iron.
- Pull out two thin pieces at the front, one on each side, and set them aside.
- Gather the top section loosely at the back of your head.
- Secure it with a small clip or a pin.
- Curl the front pieces away from your face so they open up.
Quick tip: take the face framing pieces from in front of your ears, not behind them. Pieces from behind the ear hang flat and look like strays.
19. Boho Mini Braids Half Up
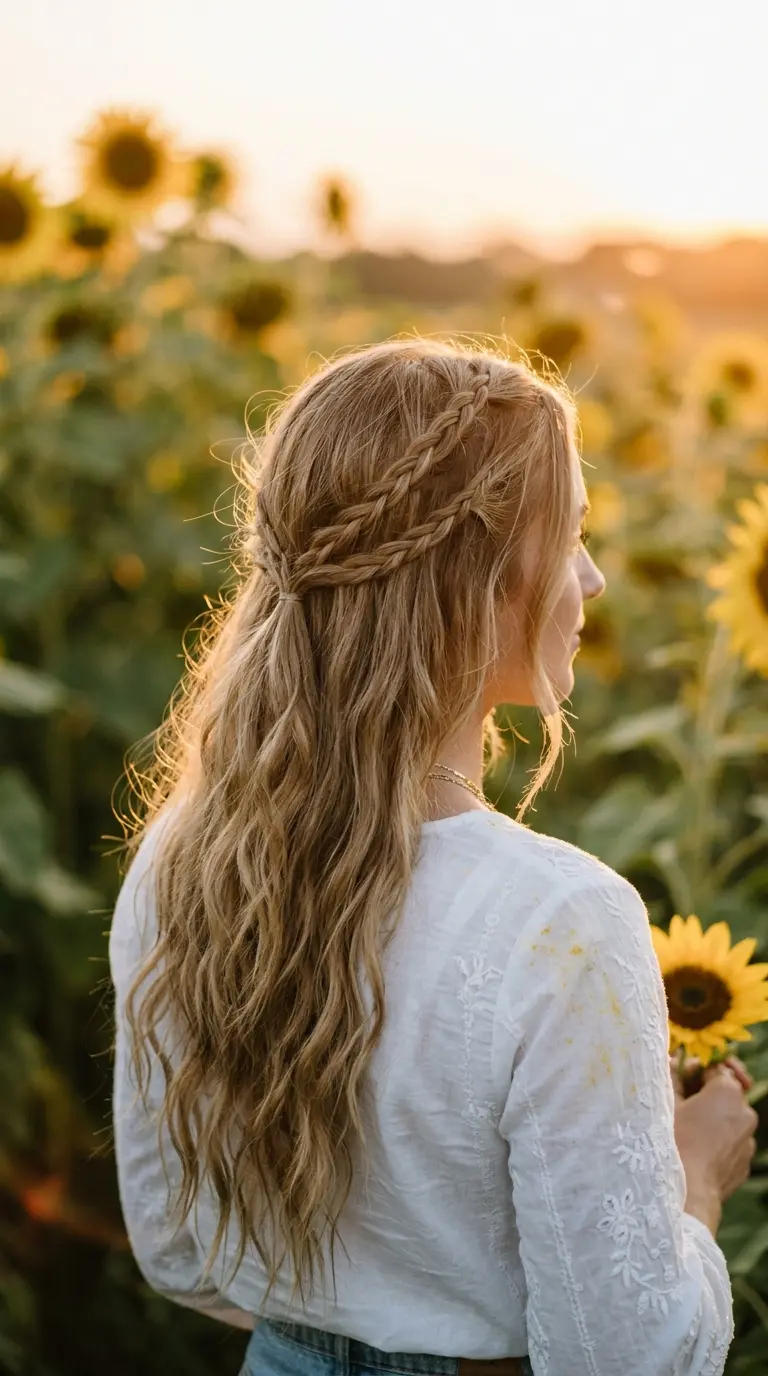
Small braids mixed with loose waves give a relaxed, festival look. They are also forgiving, because no single braid has to be perfect.
- Take four thin sections from around your hairline and crown.
- Make a small three strand braid in each one.
- Leave the braid ends unbound for now.
- Gather all four braids at the back of your head.
- Tie them together with one small elastic.
- Pull the braids gently so they look soft and wide.
Quick tip: braid each section only as far as the back of your head. Longer braids get tangled in the loose hair below.
20. Half Up Braided Bun
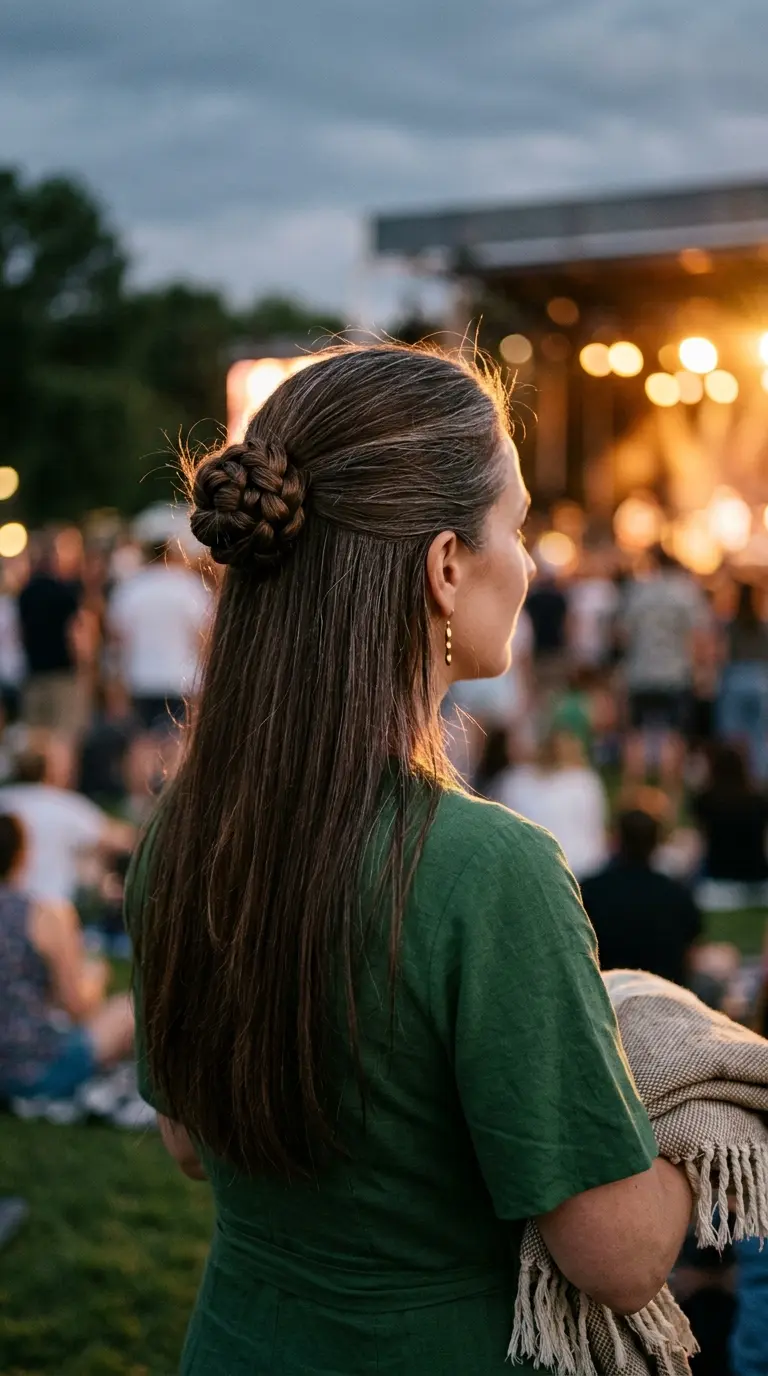
A braided bun looks more finished than a plain top knot and holds better through a long evening.
- Tie the top section into a half ponytail at the back of your head.
- Braid the ponytail with a three strand braid and tie the end.
- Pancake the braid a little to widen it.
- Coil the braid around the elastic.
- Pin it with three or four U shaped pins.
Quick tip: coil the braid in the same direction it was braided. Coiling the other way can make the braid twist and show the elastic.
21. Half Up With Pearl Barrettes
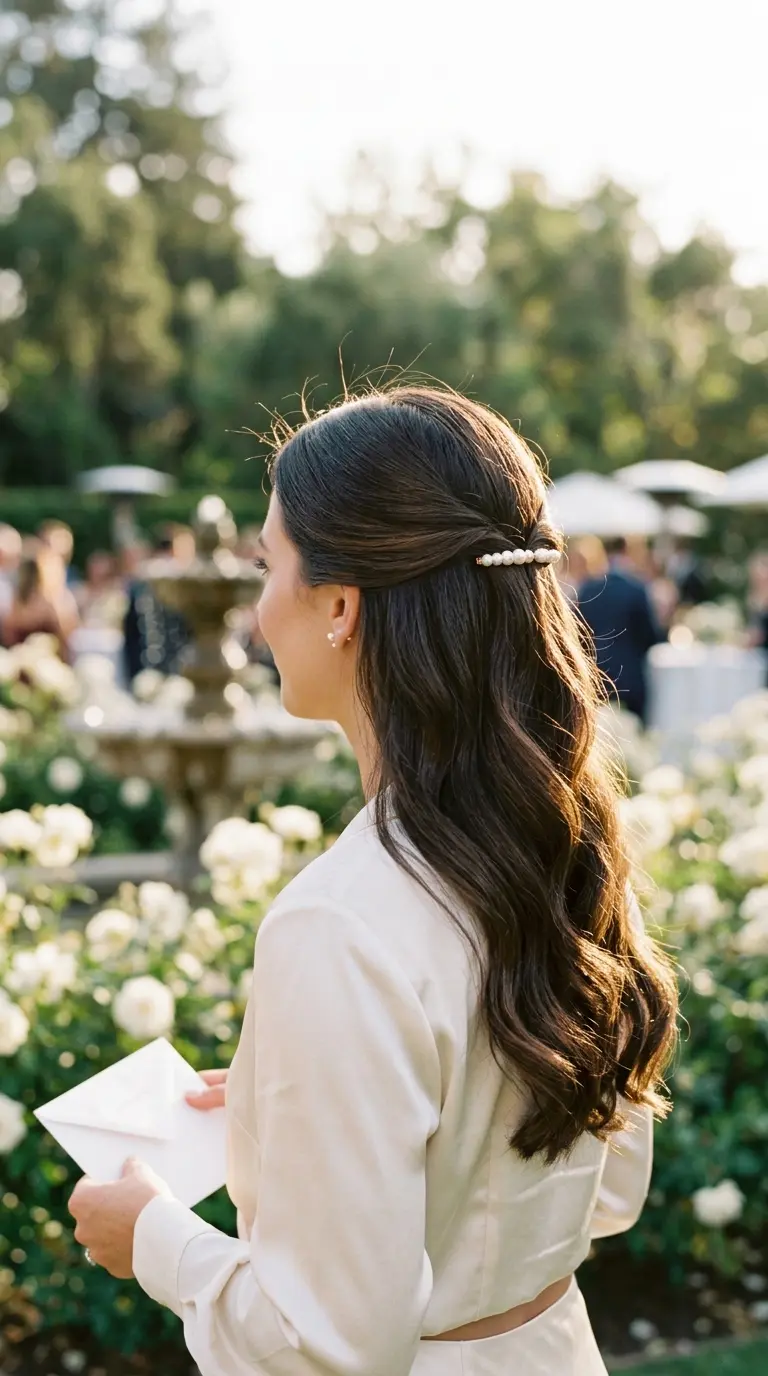
Hair accessories do the work in this one. A few pearl barrettes make a plain half up look dressed for a party.
- Brush the top section back and smooth it.
- Secure it with a small elastic at the back of your head.
- Slide three barrettes in a row across the elastic, slightly angled.
- Space them evenly, about a finger width apart.
- Smooth the loose hair below with a little serum.
Quick tip: place the barrettes so each one catches the elastic. Barrettes on loose hair slip down within an hour.
22. Layered Twists Half Up
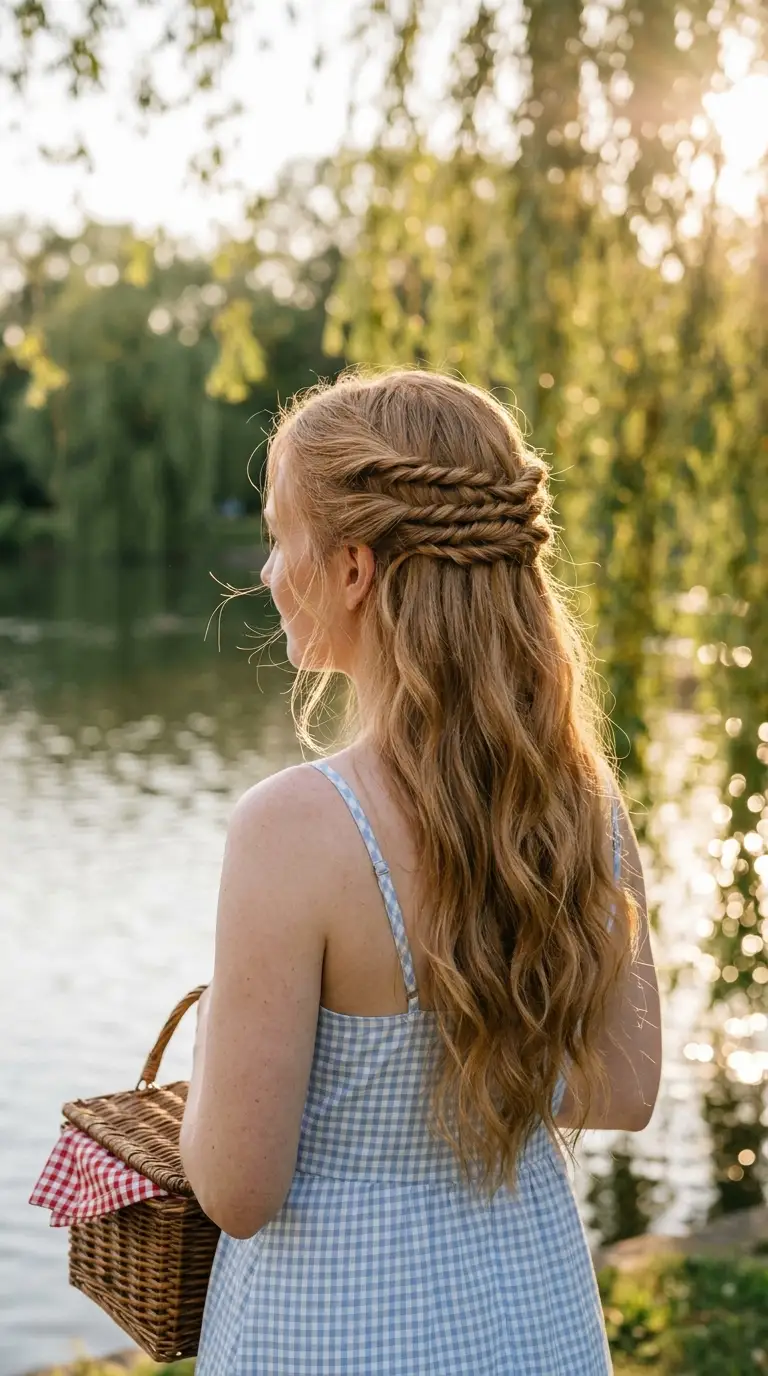
This looks like the classic twist with extra detail. Stack two or three rows of twists and the back of your head looks woven.
- Twist a small section from each temple back and pin them together at the center.
- Take a second section from each side, just below the first.
- Twist and pin them together under the first row.
- Add a third row below if your hair allows.
- Loosen each row with your fingers.
Quick tip: keep each row a little smaller than the one above it. Same size rows look heavy at the bottom.
23. Sleek Center Part Half Up
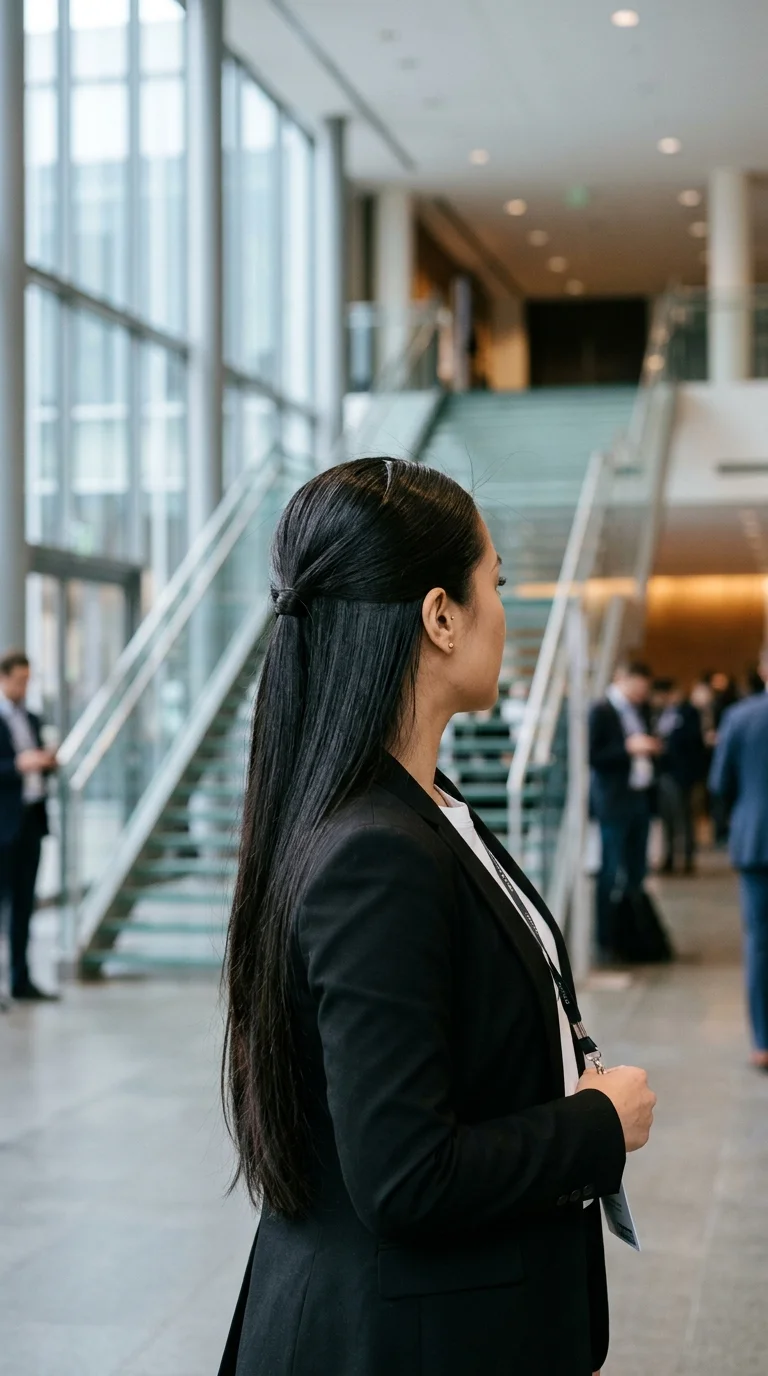
Clean, sharp, and grown up. This is the half up style for interviews, presentations, and formal dinners.
- Make a sharp center part with the tail of a comb.
- Smooth a little cream over the top and sides.
- Brush the top section straight back and tie it with a small elastic.
- Take a thin piece from underneath the section and wrap it around the elastic.
- Pin the end of the wrap underneath.
- Brush down flyaways with a toothbrush misted in hairspray.
Quick tip: brush the sides back with your chin lifted slightly. The hair sits tighter at the back and you avoid bumps above the ears.
24. Bridal Half Up Curls
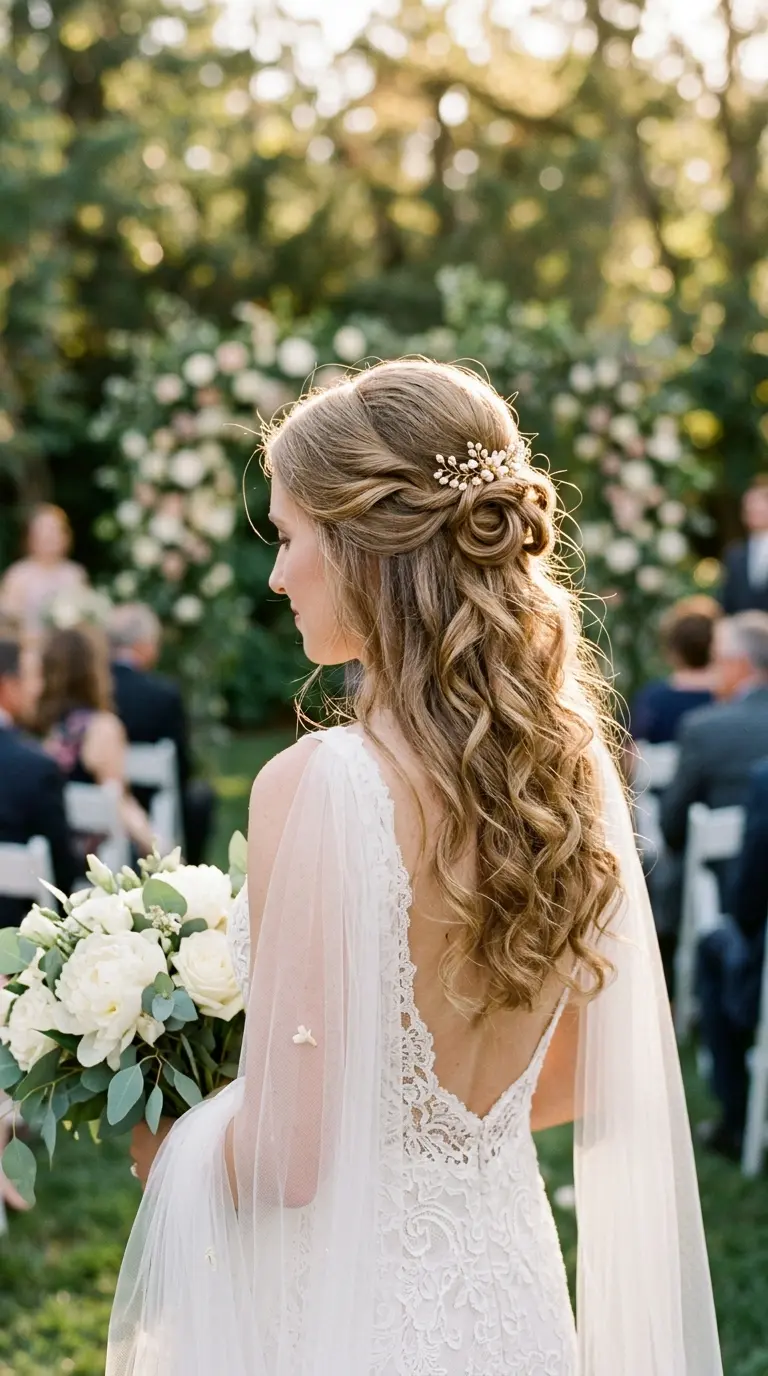
Many brides want the length down and the face clear. This style gives both, and it looks soft in photos from every angle.
- Curl all of your hair with a 1.25 inch iron and let the curls cool fully.
- Brush the curls gently with your fingers to loosen them.
- Tease the crown lightly for lift.
- Gather the top section at the back of your head and secure it with a small elastic.
- Pin a few curls from the section into loose loops over the elastic.
- Add a floral comb or a hair vine beside the loops and finish with flexible hairspray.
Quick tip: let every curl cool in your palm before you drop it. Curls that cool in place last through the ceremony, the photos, and the dancing.
Take the top section from your temples to your crown, never lower. Too much hair in the top makes the style heavy and the loose lengths look thin. Too little and it slips out by lunch.
Wear It Down, Keep It Back
Long hair should not mean choosing between showing it off and seeing where you are going. A half up style lets you do both, and most of these take less time than a coffee order.
Start with the claw clip, the classic twist, and the top knot. Once those feel easy, move on to the braids, the bow, and the waterfall. Every one of these half up half down hairstyles for long hair uses the same top section, so each one you learn makes the next one faster.
Take a photo of the back after each try. It is the only way to see what everyone else sees.
Save this list to your hair ideas board so it is ready the next time your hair keeps falling in your face.