
Your hair looks great at the roots. Then it falls past your shoulders and gets thinner with every inch, until the last few inches look like a handful of strands. Wear it straight and you can see through the ends. Pull it into a ponytail and the tail is the width of a pencil.
The good news is that thin hair does not need more hair to look full. It needs shape. A blunt edge, a bend in the lengths, a little grip at the roots, and styles that spread the hair out instead of squeezing it together all make the same hair look twice as thick.
These hairstyles for long thin hair are built around those tricks. Some take five minutes with a brush and a clip. Others use braids pulled wide so they look like they came from a much thicker head of hair. Every one has steps, how long it takes, and one tip that makes the biggest difference for fine strands.
This guide is for anyone with long hair that looks full at the top and stringy at the ends. Start with the bent waves and the stacked ponytail. They change how your hair looks the same morning you try them.
Add clear elastics, bobby pins that match your roots, and dry shampoo for clean hair that feels too slippery. That covers every style below.
1. Bent Waves With a Blunt Hem
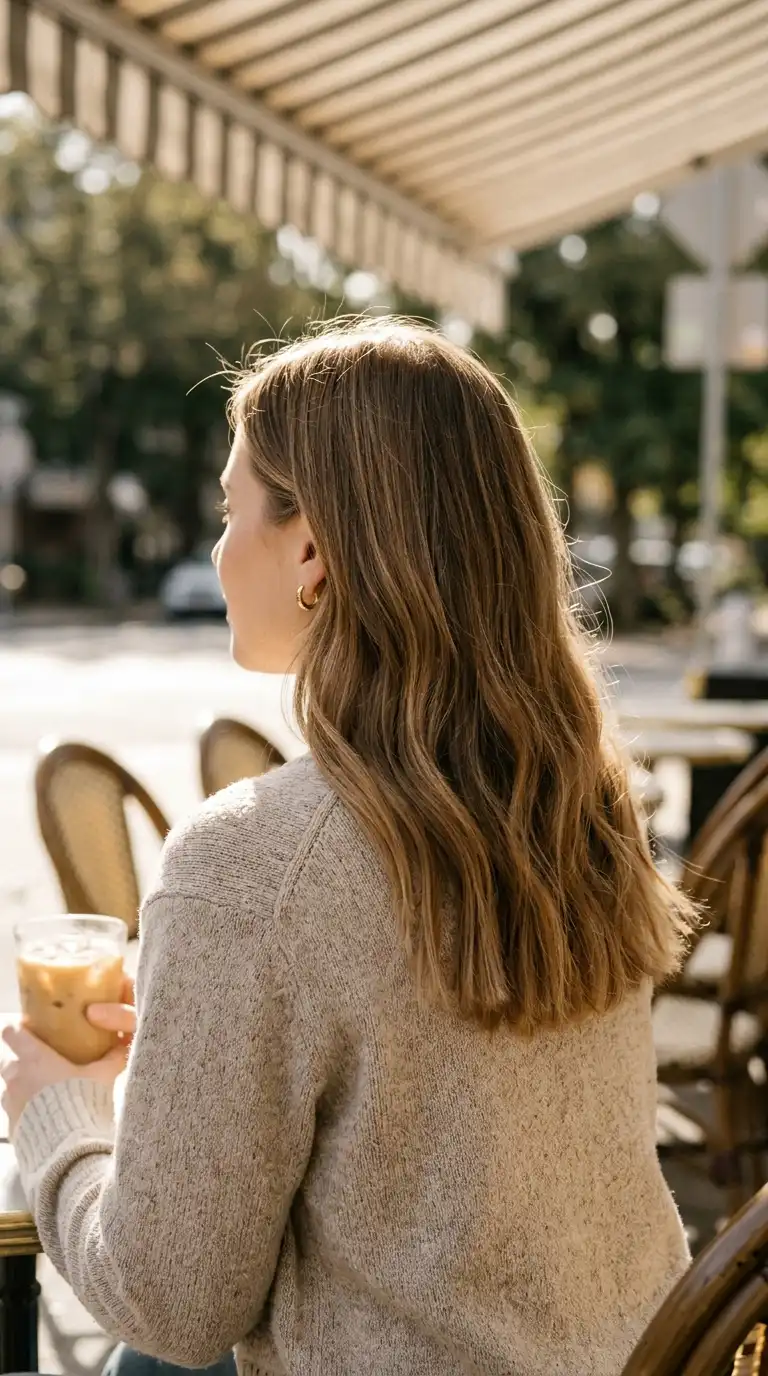
This is the fastest fix for stringy ends. Straight thin hair shows every gap. A bend in the lengths spreads the strands apart so they fill more space, and a blunt edge gives the bottom a solid line instead of a wispy fade.
- Ask for a blunt trim at your current length, with no thinning and no point cutting at the ends.
- Mist dry hair with texture spray from mid length down.
- Take a two inch section and clamp a flat iron at the top of the lengths.
- Turn the iron half a turn, glide down two inches, then turn it back the other way.
- Stop two inches above the ends so the hem stays straight.
- Repeat around your head and shake the waves apart with your fingers.
Quick tip: leave the last two inches straight. Curled ends shrink up and look thinner, while flat ends show off the blunt line.
2. Double Stacked Ponytail
One ponytail on thin hair looks small. Two ponytails, one stacked right above the other, look like one long, full tail. The top one hides the elastic of the bottom one, so nobody can tell.
- Split your hair horizontally from ear to ear.
- Tie the top half into a ponytail at your crown.
- Tie the bottom half into a second ponytail directly below the first one.
- Let the top ponytail fall over the bottom one.
- Tease the underside of the top ponytail lightly so it sits wider.
- Wrap a thin piece of hair around the top elastic and pin it underneath.
Quick tip: leave about one inch of space between the two elastics. Too close and the tail looks bunched, too far apart and the gap shows.
3. Bubble Ponytail
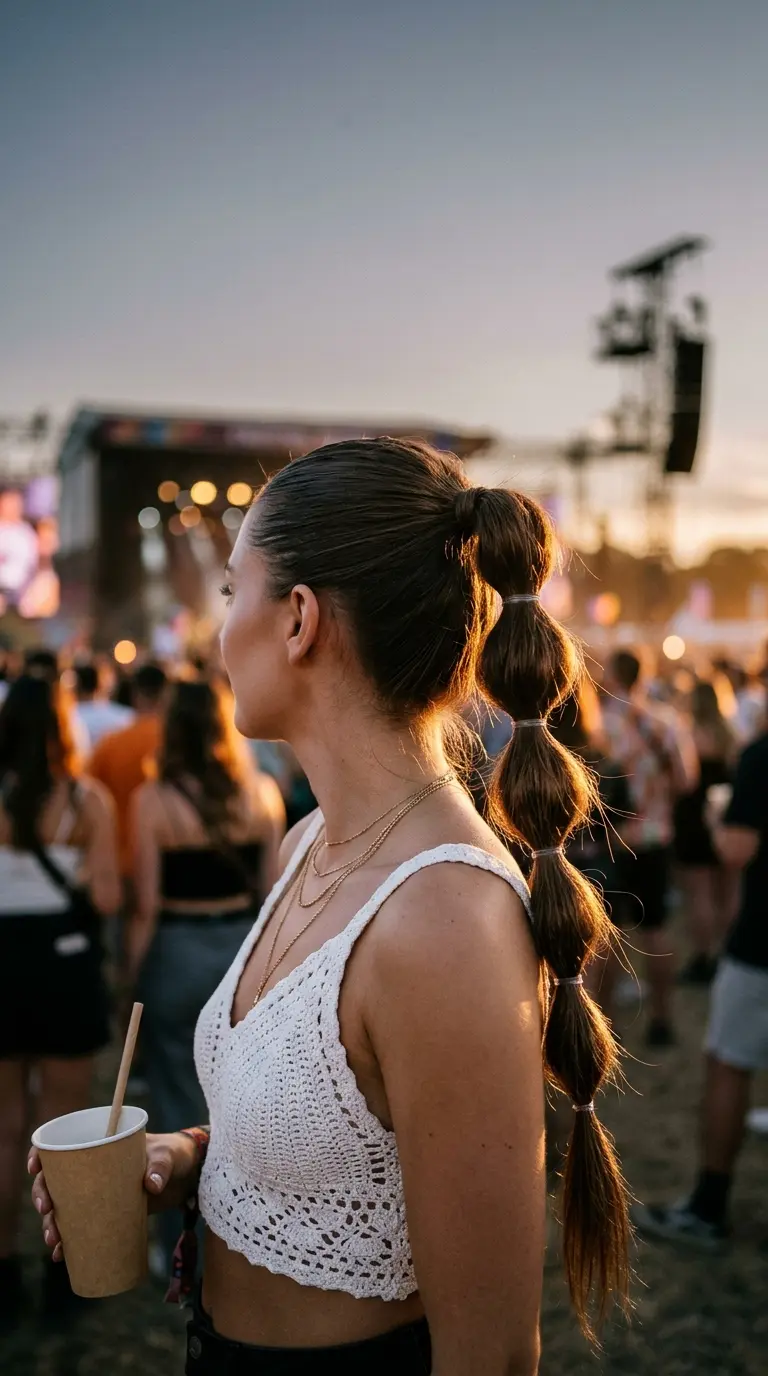
A bubble ponytail turns a skinny tail into a row of round puffs. Each puff is hair pulled outward, so the ponytail looks thicker from top to bottom.
- Tie a high or mid ponytail.
- Place a clear elastic two inches below the first one.
- Pull gently at the hair between the two elastics to make a rounded bubble.
- Add another elastic two inches lower and pull that section out too.
- Keep going until you are two inches from the ends.
- Mist with flexible hairspray.
Quick tip: spray texture spray on the ponytail before you add the elastics. Grip lets the bubbles hold their round shape.
4. Deep Side Part Flip
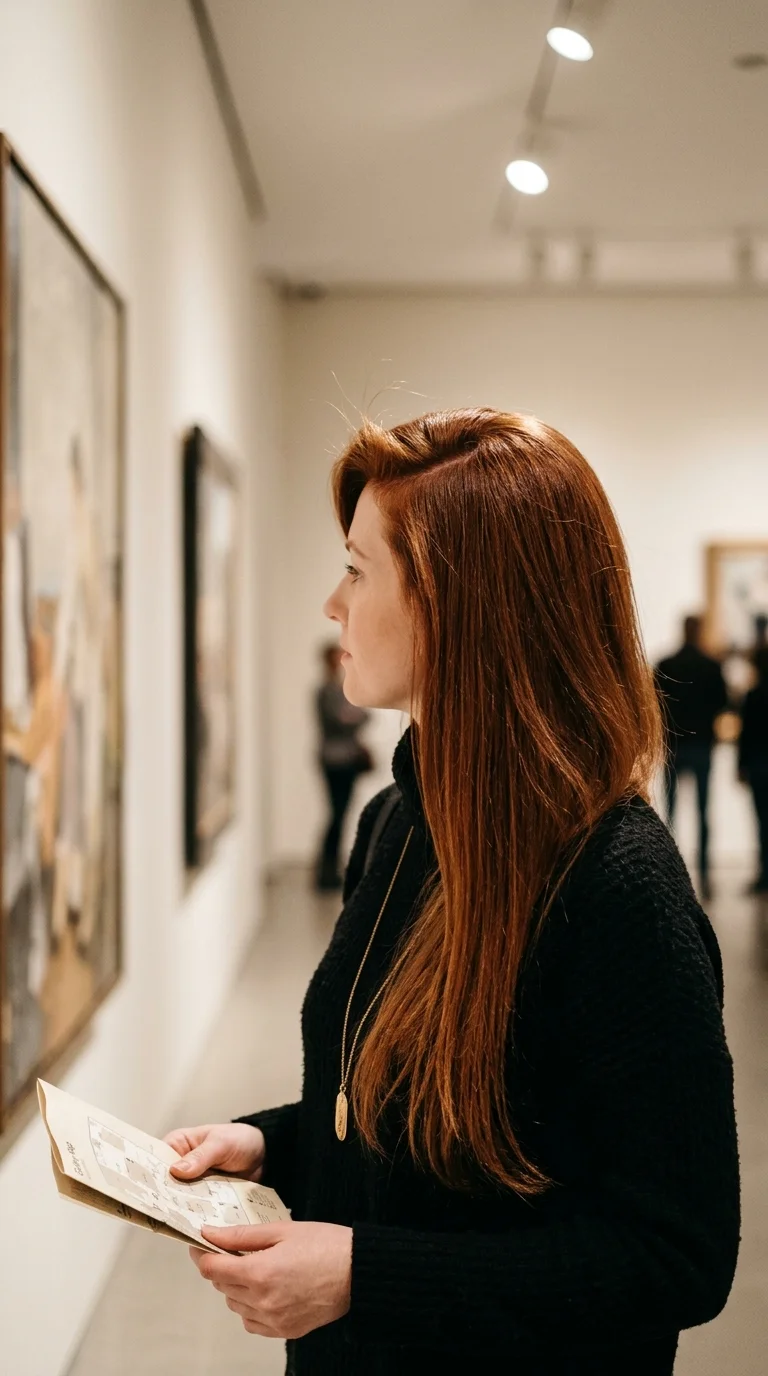
Hair that has parted in the same place for years lies flat there. Flip it to the other side and the roots stand up on their own, which adds height at the crown and makes the lengths look like they come from more hair.
- Find your usual part, then move it two inches to the opposite side.
- Spray volume mousse at the roots along the new part.
- Blow dry the roots against the direction they will fall.
- Flip the hair over the new part once the roots are dry.
- Brush the lengths smooth over one shoulder.
Quick tip: pin the heavy side flat with a duckbill clip for five minutes while it cools. The lift sets and lasts until the evening.
5. Big Roller Blowout
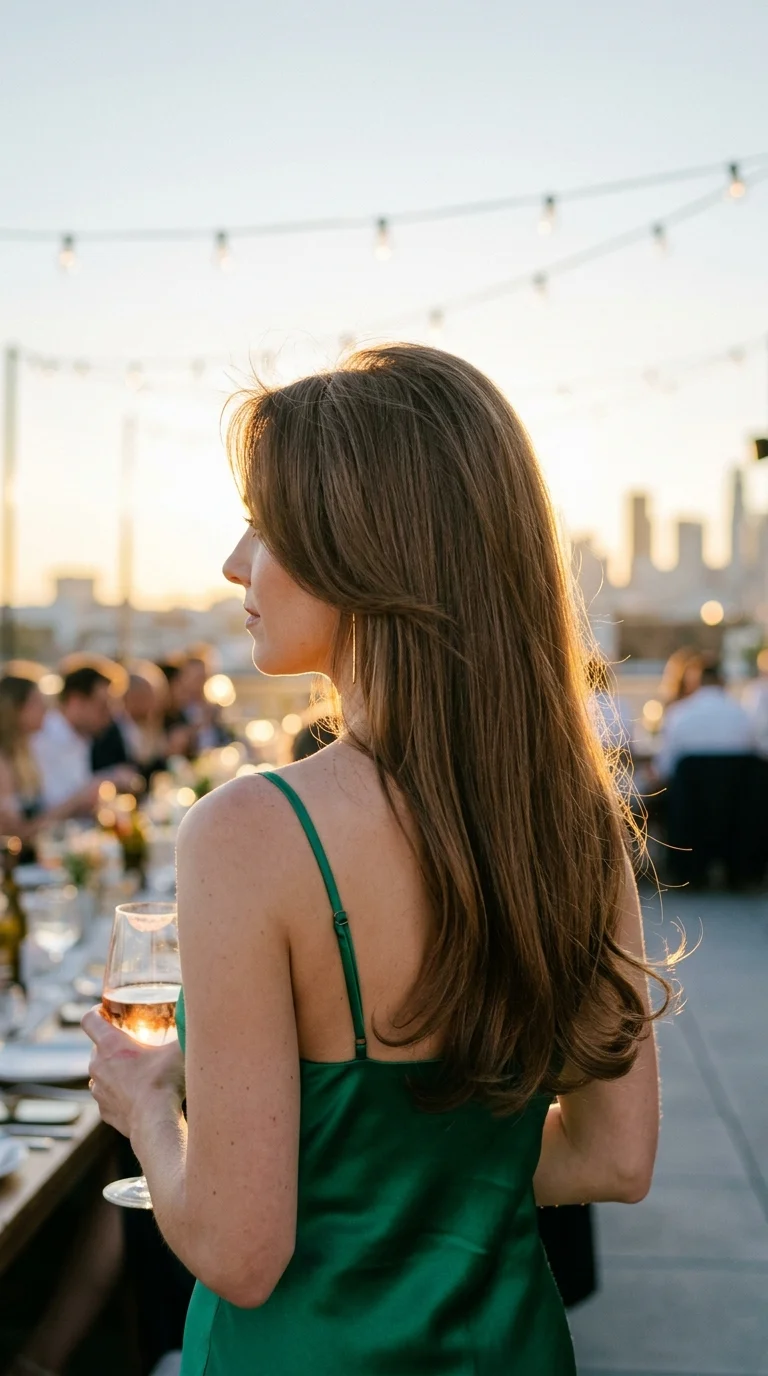
The salon blowout look comes mostly from the rollers, not the dryer. Big Velcro rollers lift fine hair at the root and set a soft curve in the lengths without the frizz a round brush can leave.
- Rough dry your hair until it is about 80 percent dry.
- Take a section the width of the roller at your crown.
- Roll it under, away from your face, all the way to the root.
- Roll the top, then the sides, then the back.
- Blast each roller with warm air for one minute and let everything cool for 15 minutes.
- Unroll gently and brush through with your fingers only.
Quick tip: use the biggest rollers on top and smaller ones underneath. The top gets lift and the bottom gets body that hides thin ends.
Long thin hair air dried straight with conditioner on the roots. The top lies flat against the scalp, the ends separate into strands, and you can see through the bottom four inches.
The same hair with conditioner on the ends only, mousse at the roots, a fresh blunt trim, and big rollers set for 15 minutes. The crown lifts, the lengths swing together, and the ends look solid.
6. Hidden Crimp Volume

Crimping only the hidden layers near your scalp props up the hair on top like scaffolding. The top layer stays smooth, so nobody sees the crimp, only the volume.
- Clip the top layer of hair, about one inch deep, out of the way.
- Take a thin section from the layer underneath.
- Clamp a mini crimper at the root for three seconds and move down two inches.
- Crimp only the first four inches from the scalp.
- Repeat through the crown and sides.
- Drop the top layer and smooth it over the crimped hair.
Quick tip: stay a finger’s width away from your part line. Crimped hair too close to the part shows through when you move.
7. Teased Crown Half Up
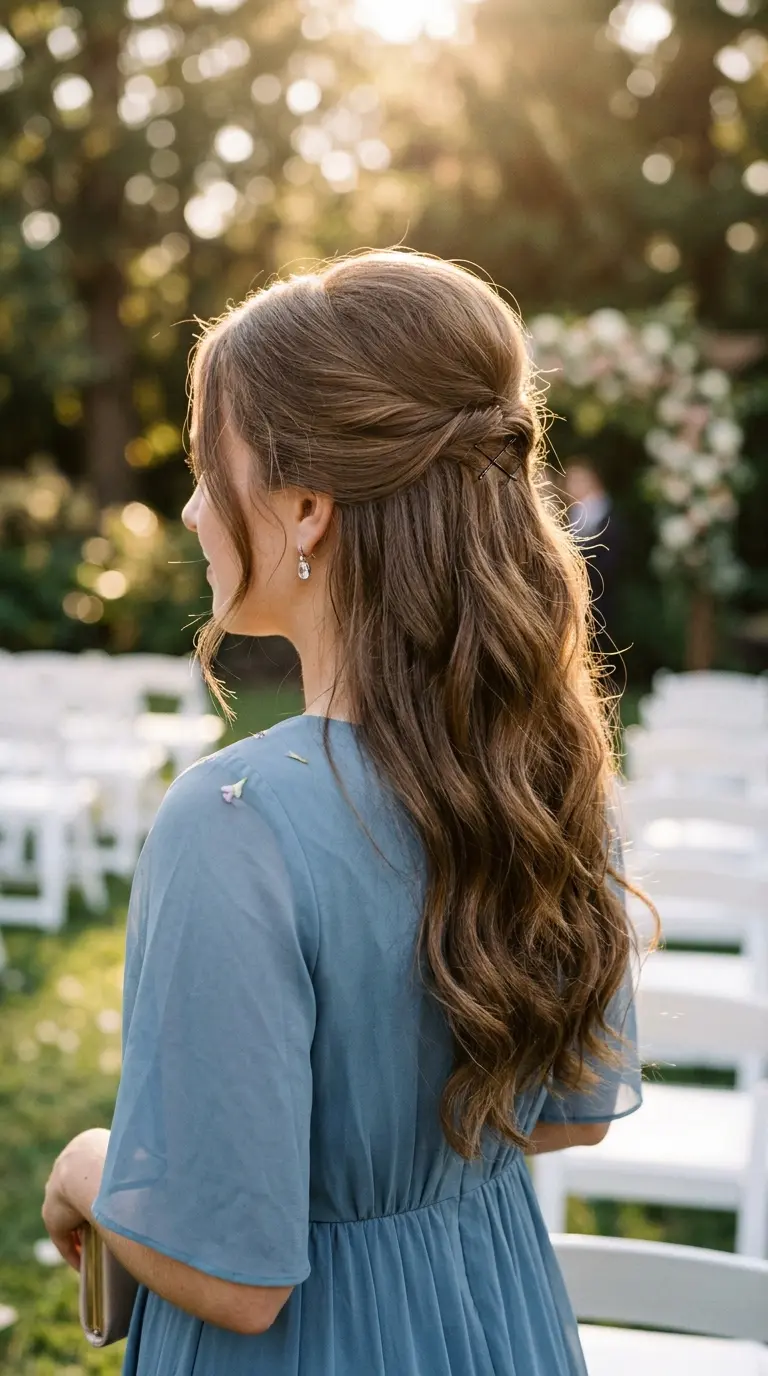
Lift at the crown changes the whole silhouette of long hair. The head looks fuller from the side, and the lengths look like they belong to a thicker head of hair.
- Take the top section from your temples to your crown.
- Hold it straight up and tease the underside at the root with a teasing comb.
- Lay the section back down and smooth only the top layer with a soft brush.
- Gather it loosely at the back of your head.
- Push it forward slightly to keep the height, then cross two pins over it.
- Wave the loose lengths below with a 1.25 inch iron.
Quick tip: tease only the underside of the section. Teasing the top layer leaves fuzz that is hard to smooth on fine hair.
8. Claw Clip French Twist

Thin hair often slips out of a claw clip by mid morning. Twisting it first gives the clip a solid roll to bite into, and the fanned ends at the top look full on purpose.
- Spray texture spray or dry shampoo through all of your hair.
- Gather it into a low ponytail with your hand.
- Twist the ponytail upward against the back of your head.
- Fold the ends down over the twist so they fan out on top.
- Slide a small claw clip in from the side, over the twist and the fold.
Quick tip: pick a small or medium clip. A large clip has nothing to grip on thin hair and slides down by noon.
9. Pancaked Dutch Braids
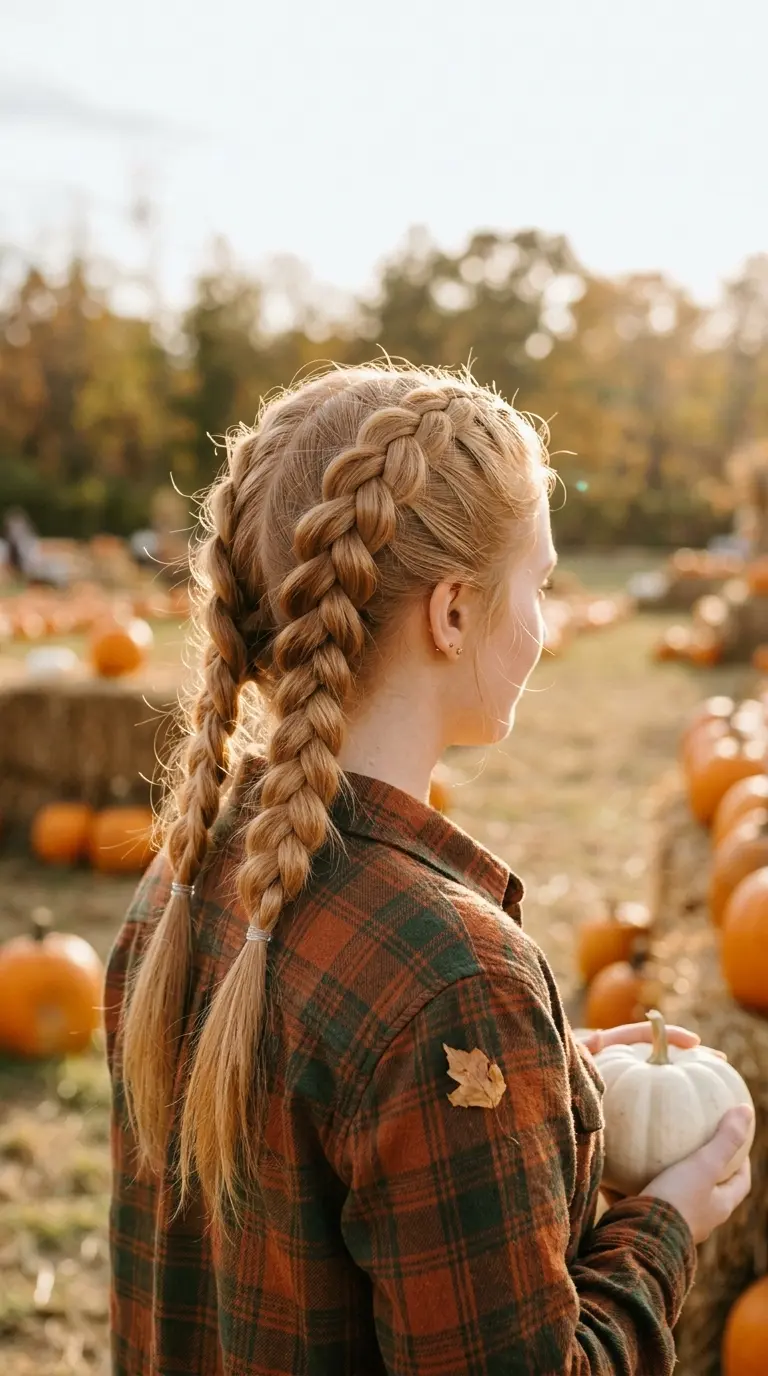
A Dutch braid sits on top of the head instead of lying flat into it. Pull the loops wide and two braids on thin hair can look like they hold twice as much hair.
- Part your hair down the center and clip one side away.
- Take three small strands at the front hairline.
- Cross each outer strand under the middle strand, adding a little hair each time.
- Braid to the nape, then finish as a regular three strand braid.
- Tie the end with a clear elastic and repeat on the other side.
- Starting at the bottom, pull the outer edge of each loop outward.
Quick tip: pancake from the ends up toward the scalp. Starting at the top pulls hair loose at the roots and the braid sags.
Put conditioner on the ends only. Conditioner at the roots weighs fine hair down and flattens the crown.
Work a golf ball sized puff of mousse into damp roots before you dry. It gives each strand a little more body.
Dry your roots upside down or against your part. Hair that dries standing up stays standing up.
Keep oils and serums on the last two inches only. A drop is enough to smooth the ends without making the lengths cling together.
10. Pull Through Braid
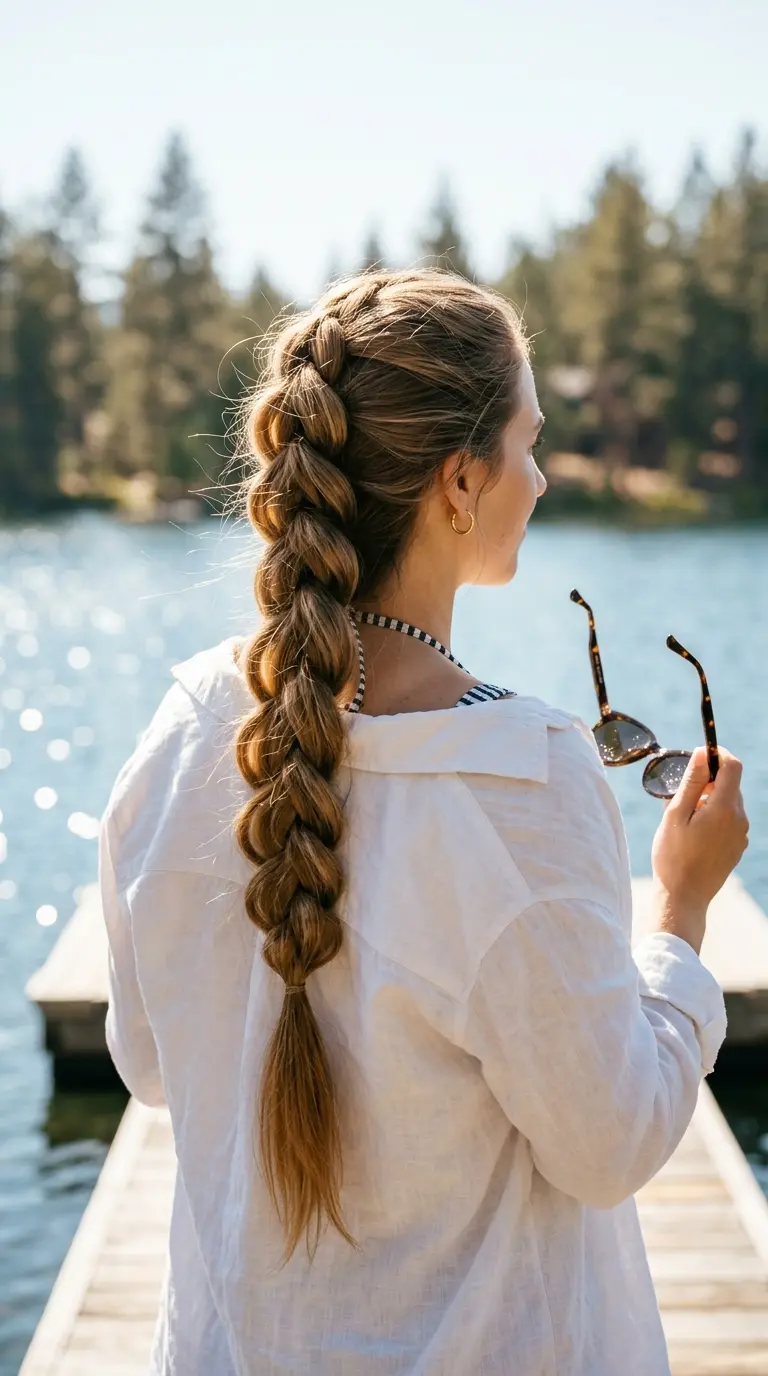
This looks like a fat braid but uses only elastics, so it suits hair that is too fine to hold a classic plait. Each loop can be pulled as wide as you like.
- Tie a ponytail at your crown.
- Split the tail into a top half and a bottom half.
- Tie the top half with a clear elastic two inches down.
- Split that top piece in two and bring the bottom half up through the middle.
- Tie the new top half two inches lower and repeat until you reach the ends.
- Pull each loop outward to widen it.
Quick tip: tie the elastics loosely at first. Tight elastics stop the loops from widening and the braid stays skinny.
11. Pancaked Fishtail Side Braid
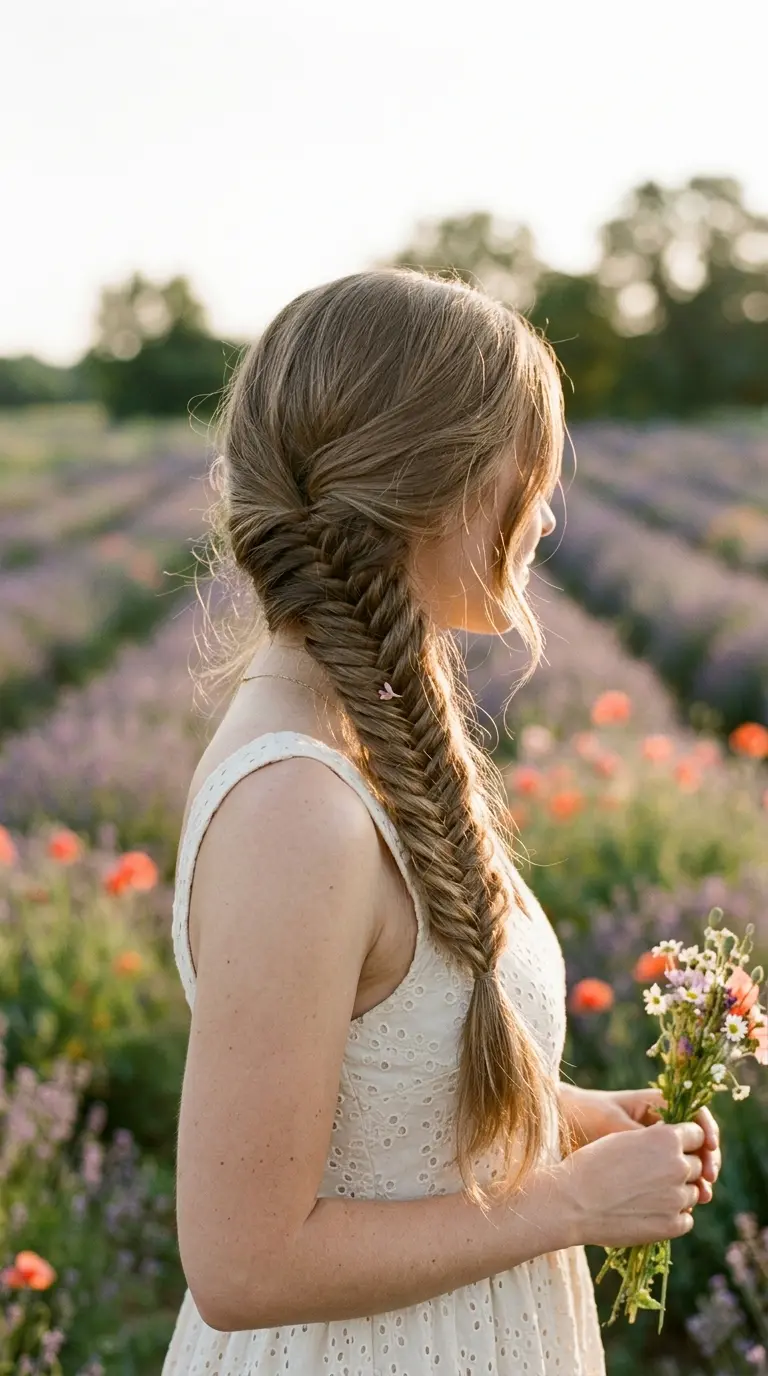
A fishtail has many small sections instead of three big ones, so the pattern looks rich even when there is not much hair. Loosened and worn over one shoulder, it hides thin ends completely.
- Sweep all your hair over one shoulder.
- Split it into two equal halves.
- Take a thin piece from the outer edge of the left half and cross it over to the right half.
- Do the same from the right half to the left.
- Keep going to the ends and tie with a clear elastic.
- Gently pull the edges outward along the full length.
Quick tip: braid it on second day hair. Fresh fine hair slides apart before you finish, while day old hair holds the small pieces in place.
12. Braided Headband With Loose Waves
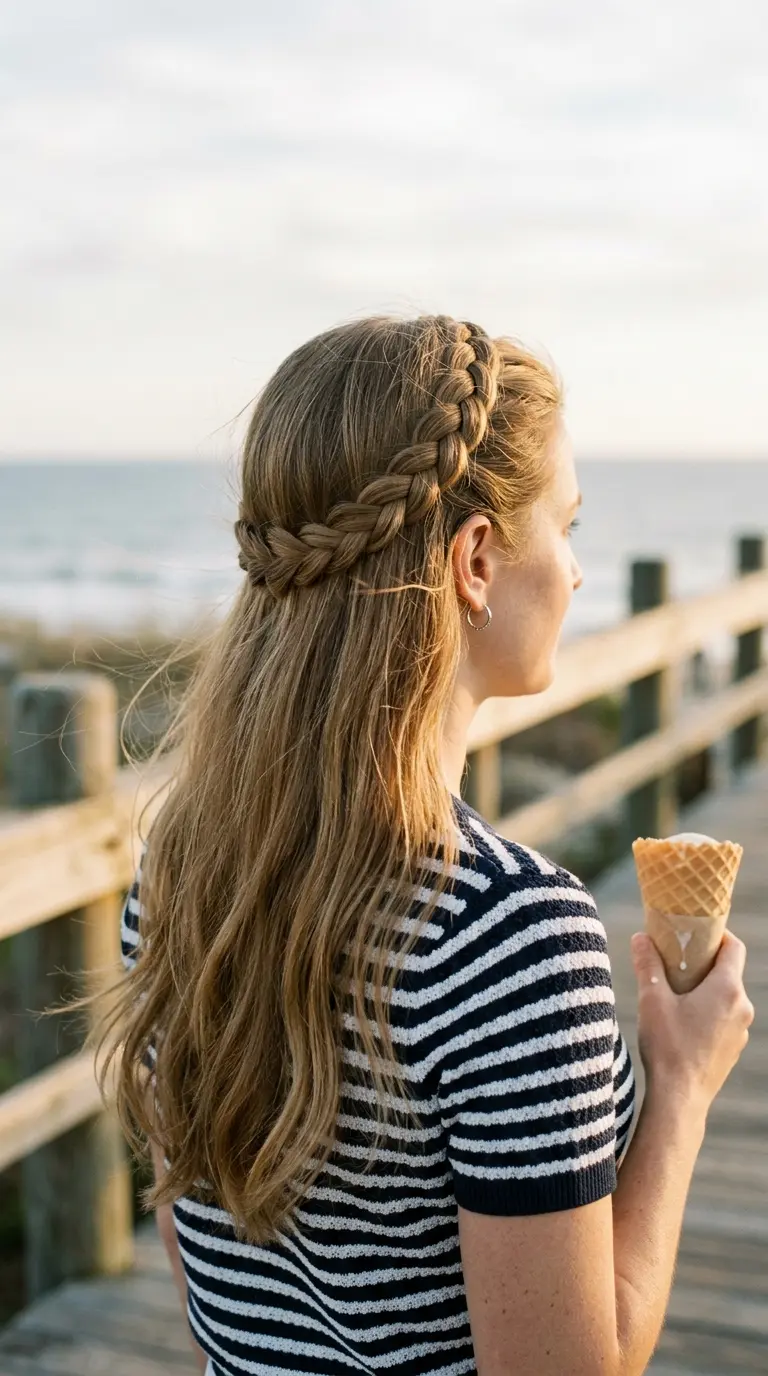
The braid pushes the hair behind it upward, which gives instant lift on top. It also hides a flat front hairline, one of the first places thin hair shows.
- Take a one inch section behind your left ear.
- Make a regular three strand braid and tie the end with a clear elastic.
- Pancake the braid by pulling the outer loops wide.
- Lay it over the top of your head, about two inches back from your hairline.
- Pin the end behind your right ear, under the loose hair.
- Wave the rest of your hair with a 1.25 inch iron.
Quick tip: push the hair behind the braid forward slightly before you pin it. The small bump adds height at the crown.
13. Heatless Robe Belt Curls
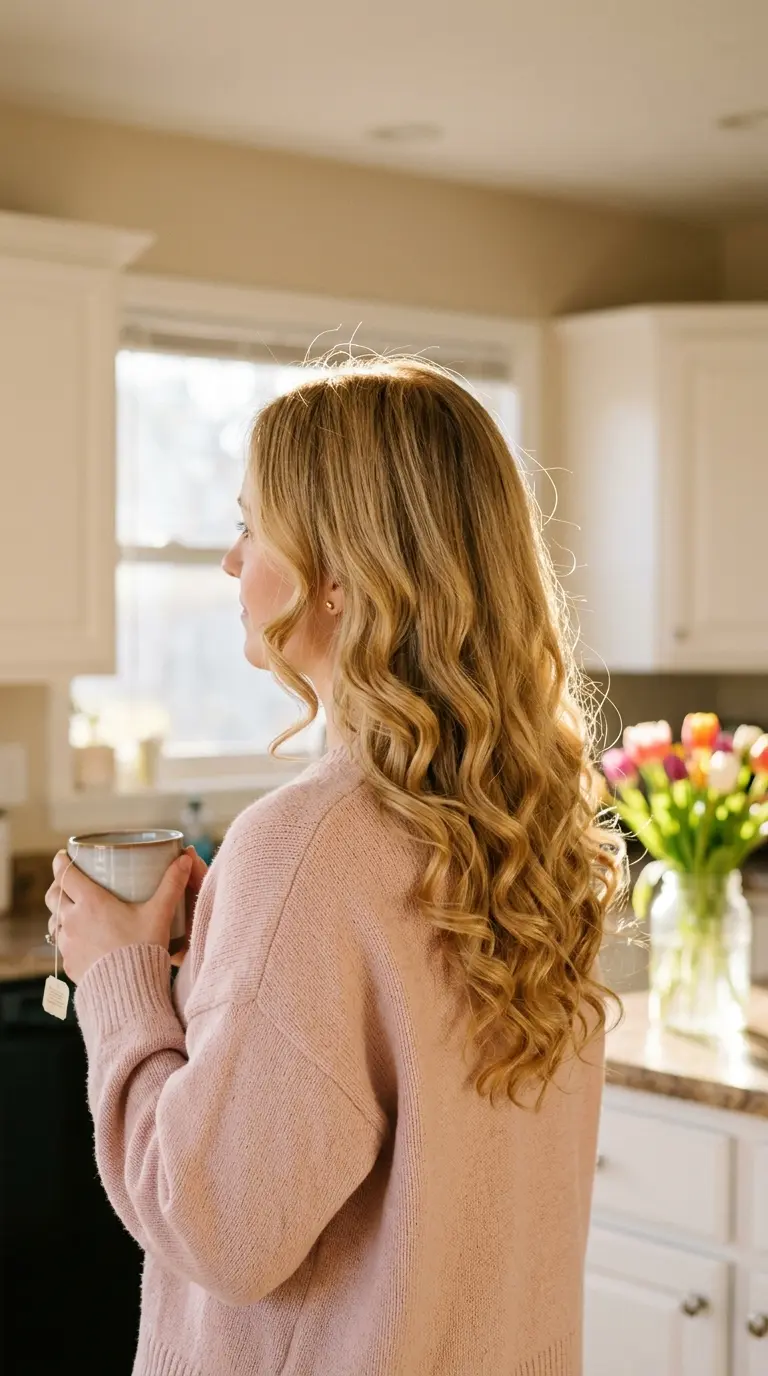
Fine hair burns easily, and heat damage shows first at the ends. Curling overnight around a soft robe belt gives bouncy curls with no heat at all, and curls make thin ends look much fuller.
- Start with hair that is about 90 percent dry.
- Place the middle of a soft robe belt on top of your head, the ends hanging by your ears.
- Take a section from the front left and wrap it around the belt, away from your face.
- Add a new piece of hair with each wrap, like a French braid.
- Tie the ends of the hair to the belt with a scrunchie and repeat on the right.
- Sleep on it, unwrap in the morning, and separate the curls with your fingers.
Quick tip: wrap the ends around the belt twice. Thin ends that are only wrapped once fall out straight and give away the trick.
| Your Problem | Styles to Try | Why It Works |
|---|---|---|
| See through ends | Bent waves with a blunt hem, heatless curls, fishtail side braid | Bends and a solid edge make the ends look denser |
| Flat crown | Deep side part flip, teased crown half up, hidden crimp | Lift at the roots adds height and fullness on top |
| Skinny ponytail | Double stacked ponytail, bubble ponytail, scarf wrapped ponytail | Stacking and puffing spread the tail out wider |
| Hair slips out of clips | Claw clip French twist, low twisted chignon, rope twist half up | Twisting first gives clips and pins something to grip |
| Braids look thin | Pancaked Dutch braids, pull through braid, braided headband | Loops pulled wide show more hair than a tight braid |
14. Curtain Bangs With Long Layers
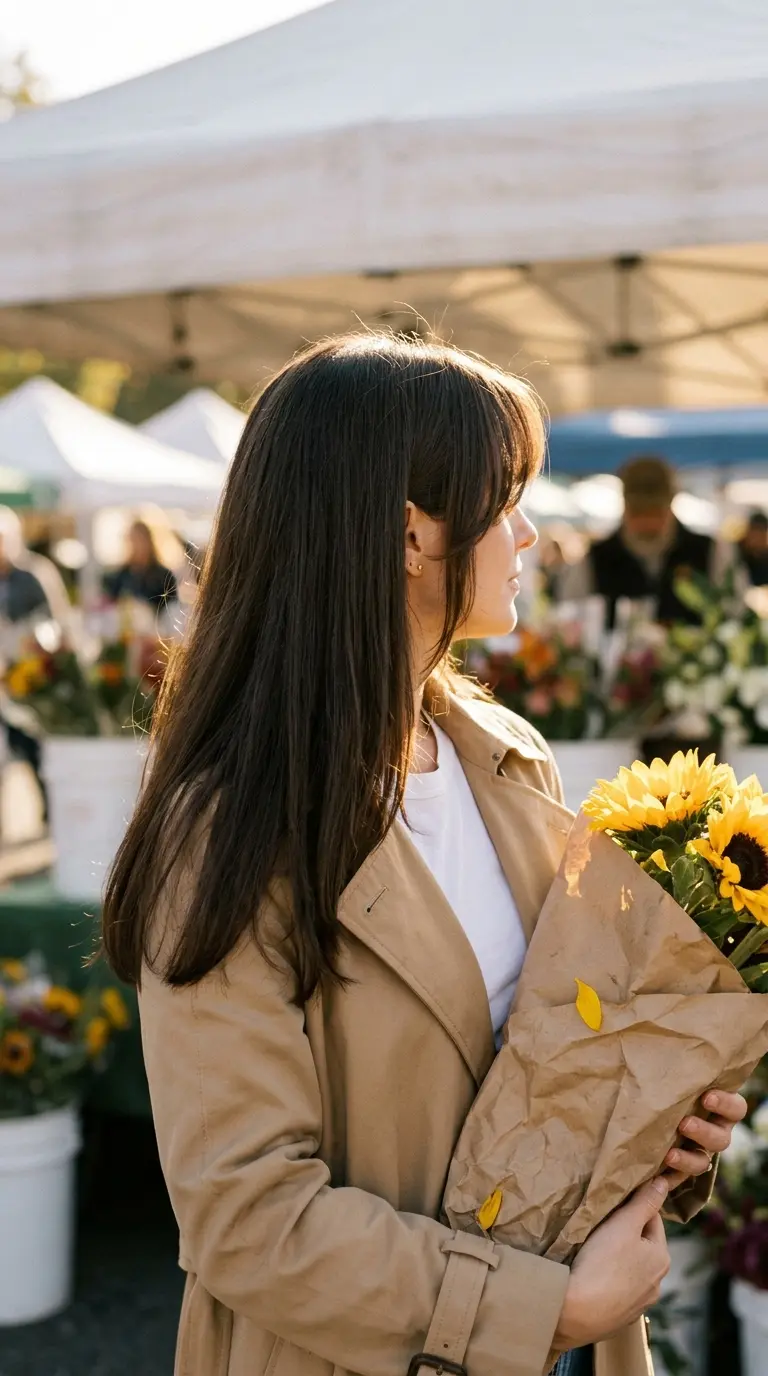
Curtain bangs put more hair near your face, which is where people look first. Layers kept only around the front add movement there while the back stays one length, so the ends keep their weight.
- Ask for curtain bangs that hit at the cheekbones.
- Ask for face framing layers starting at the chin, with the back left blunt.
- To style, blow dry the bangs with a small round brush, rolling them back and away from your face.
- Split them at the center and sweep each side outward.
- Smooth the face framing layers with a flat iron, bending them slightly away from your face.
Quick tip: skip layers through the back. Long layers all over remove hair from the ends, which is the exact place thin hair can least afford to lose it.
15. Messy Top Knot
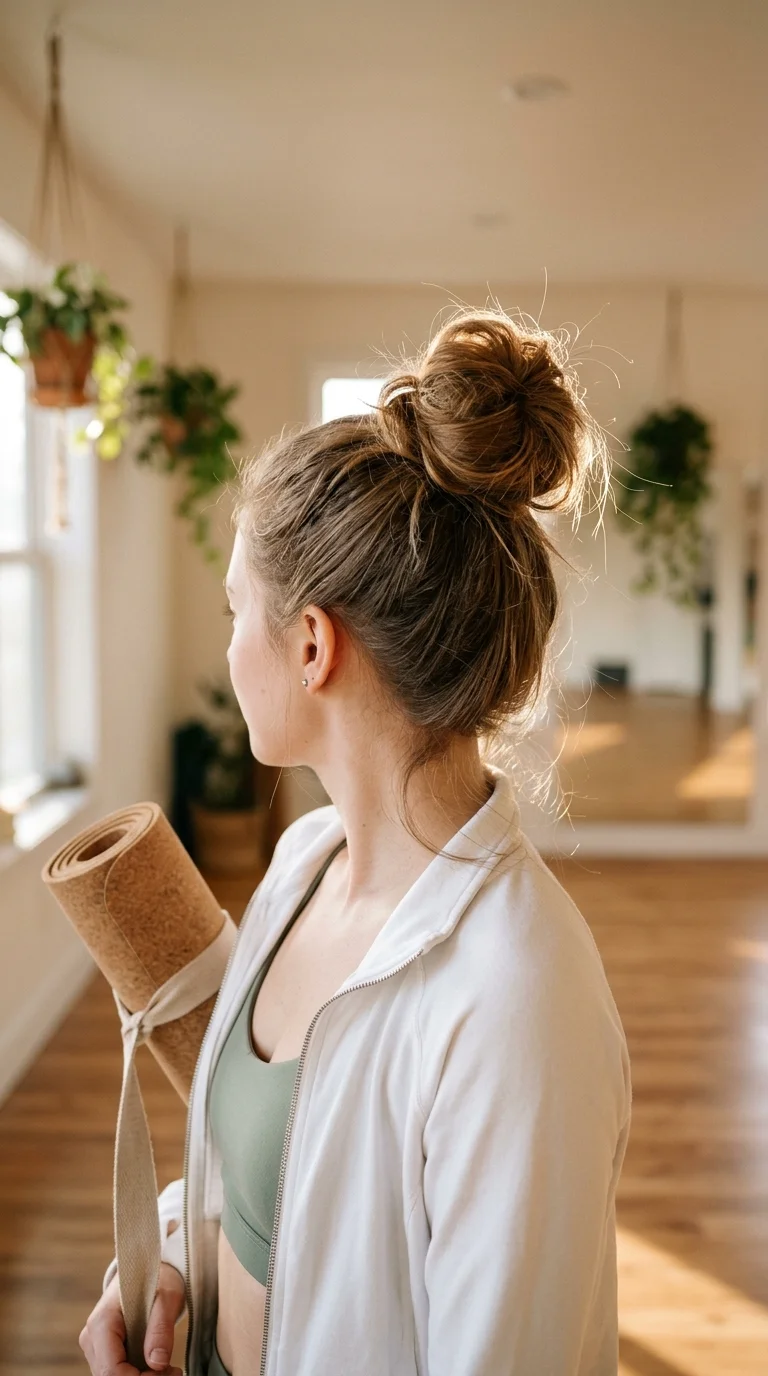
A top knot on thin hair often ends up the size of a walnut. Teasing the ponytail before you wrap it makes the knot two or three times bigger with the same amount of hair.
- Tie a ponytail on top of your head.
- Split the tail into three sections and tease each one at the base and middle.
- Smooth only the outside of each section with your hand.
- Wrap the ponytail loosely around the elastic.
- Secure with a second elastic or four pins.
- Pull at the edges of the knot to widen it.
Quick tip: use a scrunchie as the second elastic. Fabric adds a little bulk and grips fine hair without snagging.
16. Low Twisted Chignon
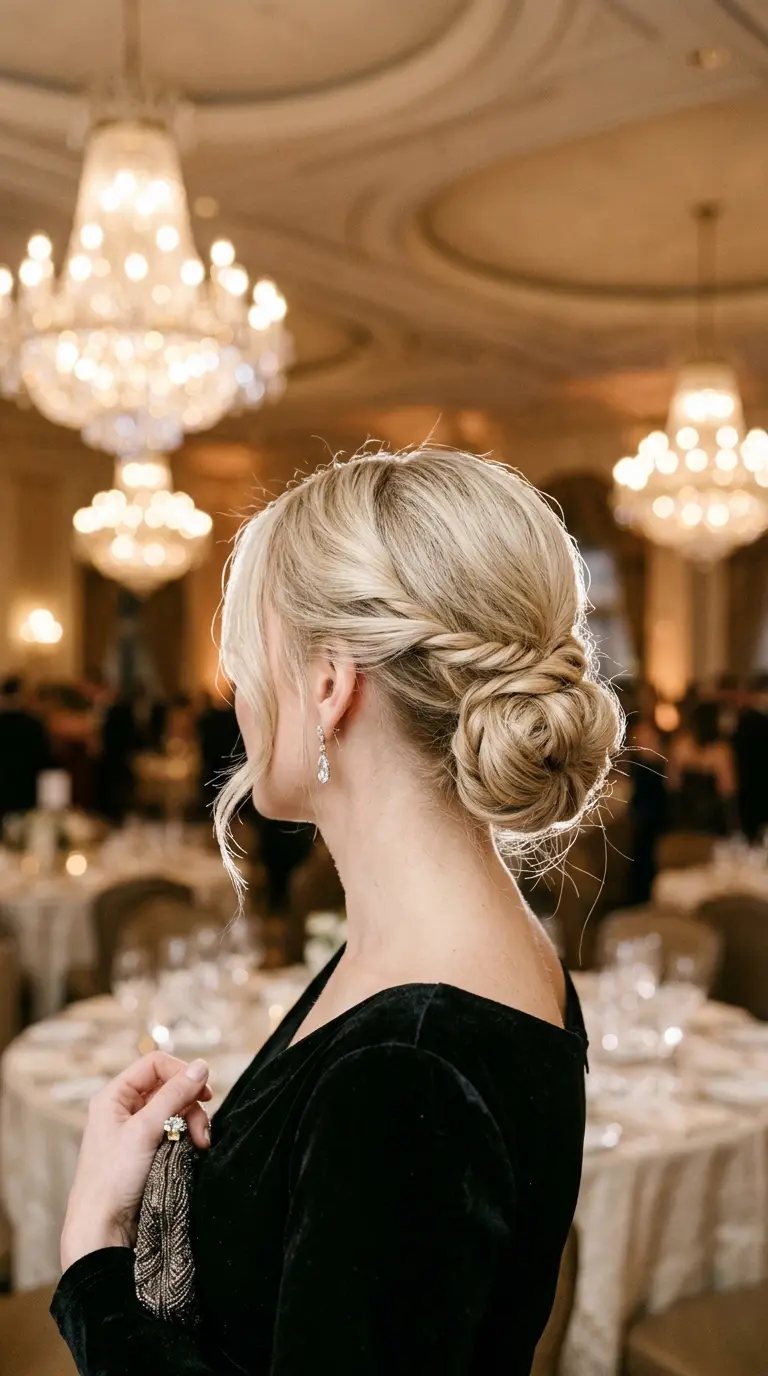
Twisting the sides before they meet at the nape adds texture and bulk, so the bun looks full and soft instead of tight and small. It works for weddings, galas, and dinners.
- Curl your hair loosely with a 1.25 inch iron and let it cool.
- Take a section above each ear and twist it backward toward the nape.
- Tie the two twists together with the rest of the hair in a low ponytail.
- Twist the ponytail and coil it around the elastic.
- Pin the coil every two inches, tucking the ends under.
- Pull gently at the twists and the coil to soften them.
Quick tip: if your hair is very fine, slip a small hair donut under the coil in a shade close to your hair. Nobody sees it, but the bun doubles in size.
17. Scarf Wrapped Ponytail
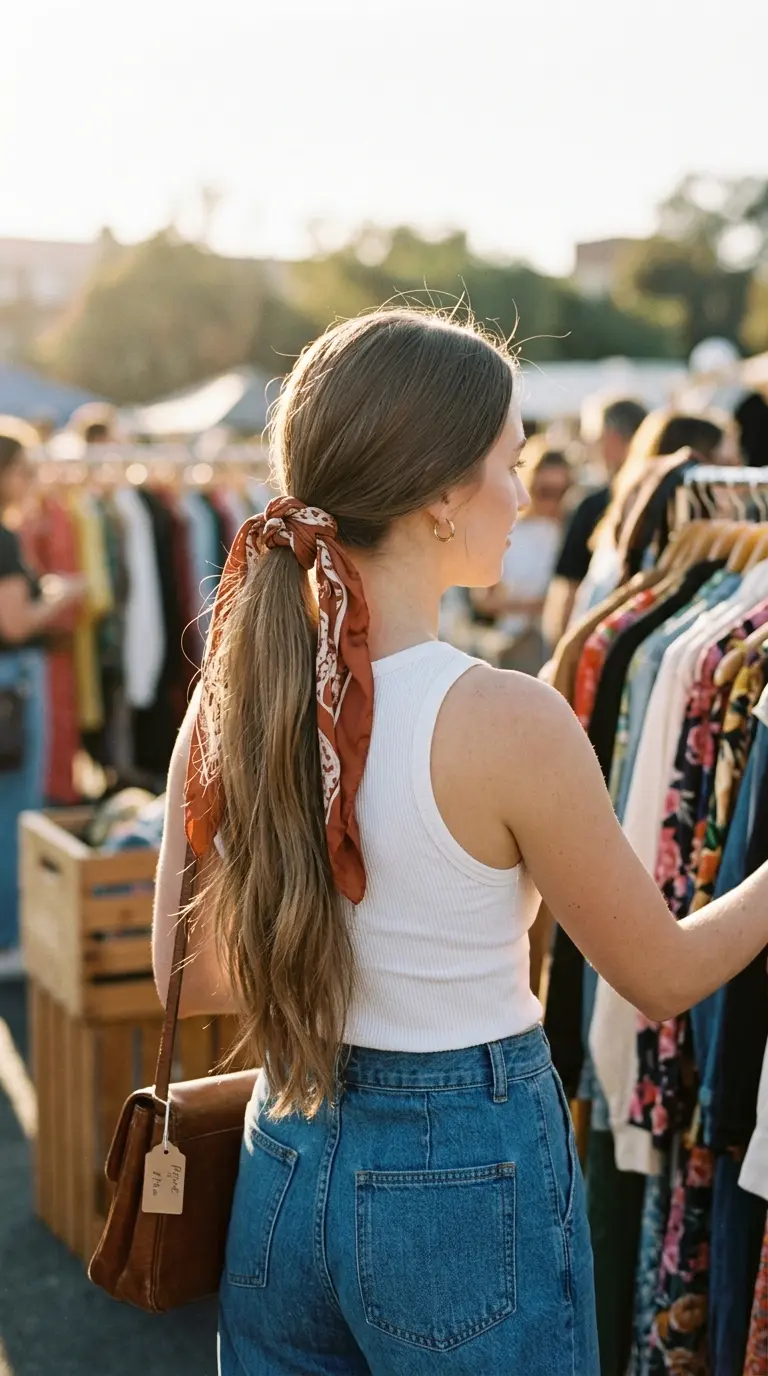
A scarf adds color and width beside the ponytail, so the eye reads the whole thing as fuller. The long ends of the scarf cover the thinnest part of the tail.
- Tie a mid ponytail with a clear elastic.
- Fold a long silk scarf into a thin strip.
- Wrap the middle of the strip around the elastic and tie a double knot.
- Let the two scarf ends hang down with the ponytail.
- Mix the scarf ends in with the hair so they move together.
Quick tip: choose a scarf close to your hair color in the main print. It blends in at the ends and makes the ponytail look longer and thicker.
18. Rope Twist Half Up
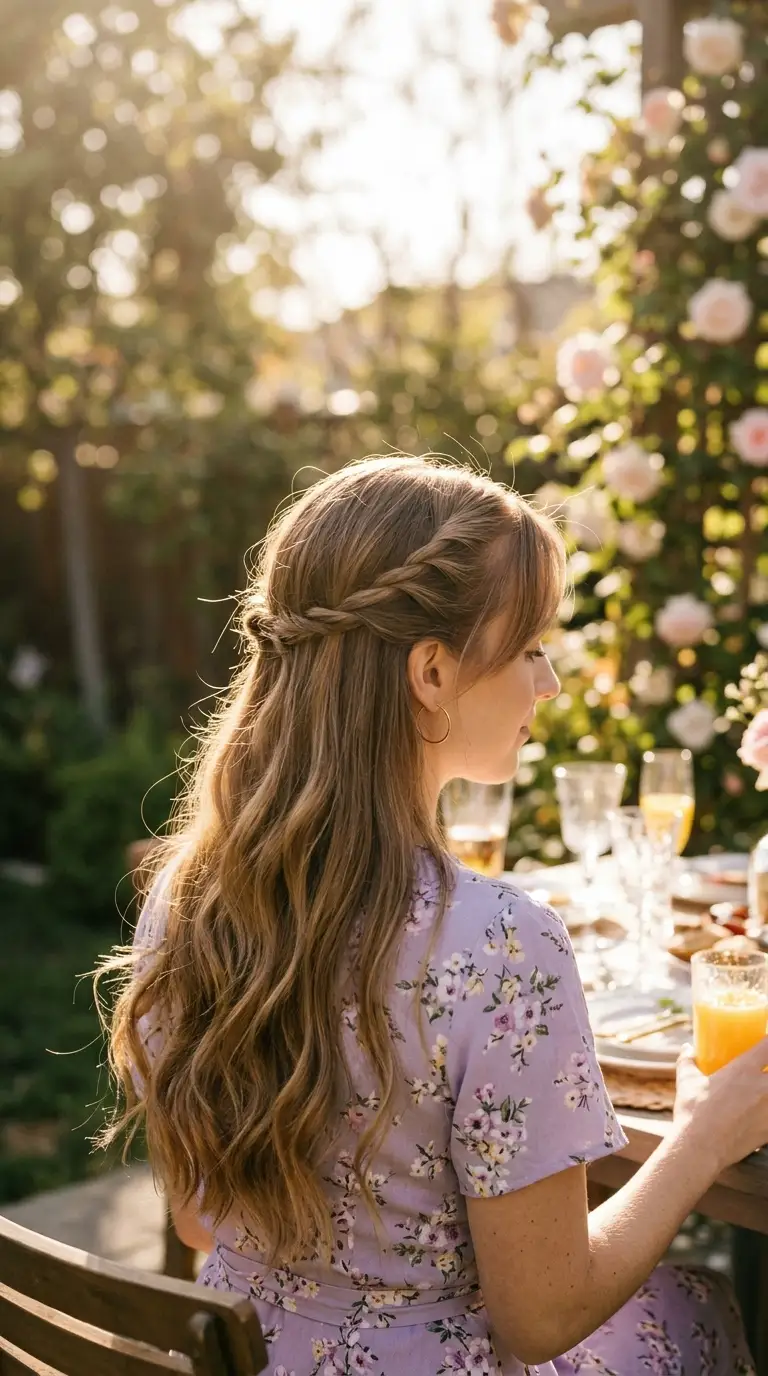
Rope twists make two thin sections look like thick cords. Pinned at the back, they keep hair off your face while the waves below do the work of filling out the length.
- Take a two inch section above your left ear and split it in two.
- Twist each strand to the right, then wrap them around each other to the left.
- Keep going toward the back of your head, adding a little hair to the top strand as you go.
- Hold the twist with a small clip and repeat on the right side.
- Bring both twists together at the back and tie them with a clear elastic.
- Pull gently at the twists to make them wider.
Quick tip: twist the strands in one direction and wrap them in the other. That opposite tension is what keeps a rope twist from unwinding.
Thin hair looks fullest when it is spread out, not squeezed together. Pull braids wide, bend the lengths, lift the roots, and keep the ends blunt. Every style here uses at least one of those four moves.
Same Hair, Fuller Look
Thin hair at the ends is common, and it does not mean cutting your length off. A blunt trim, a bend in the lengths, and a few styles that spread the hair out can make the same hair look like it belongs to someone with twice as much.
Start with the bent waves and the double stacked ponytail. Once those feel easy, try the pancaked braids and the chignon. Every one of these hairstyles for long thin hair works with what you already have, so the trick you learn in one carries over to the next.
Look at your hair from the side and the back after each try. Fullness shows most from those angles.
Save this list to your hair ideas board so it is ready the next time your ends look stringy.
Meta Title: 18 Hairstyles for Long Thin Hair That Fake Fullness
Meta Description: Hairstyles for long thin hair that make stringy ends look full. Easy steps, time, and tips for waves, ponytails, braids, and buns on fine hair.
Slug: hairstyles-for-long-thin-hair
Article Featured Image Prompt: Create a simple, clean aspect ratio 16:9 Pinterest blog featured image for an article about hairstyles for long thin hair. The image is a full bleed 4 photo collage with no text. COLLAGE LAYOUT: Four vertical editorial photographs fill the entire canvas in a clean 2 by 2 grid (top left, top right, bottom left, bottom right), separated by thin straight white dividers. No badge, no title, no graphics, no shapes, and no decorative elements. Only the four photographs and the thin white dividers. PHOTOS: Every photograph follows the same signature editorial front and back view style: the subject is seen in a three quarter or side angle with her head turned so that both the front of the style (the front hairline, the part, and any face framing pieces) and the back of the style (the waves, the ponytail, the braids, or the bun, plus the ends of the hair) are clearly visible, her face only softly visible and never the focus, the hairstyle is the hero of every shot and sits in the upper center of each photo, and each photo is cropped at the waist so the full length of the hair shows. Every woman has long fine thin hair styled to look full. Top left photo shows a woman about 29 years old with long fine light brown hair in loose flat bent waves ending in a straight blunt edge, at an outdoor cafe, seen in a three quarter back view while holding an iced coffee, wearing an oatmeal knit sweater, with cafe chairs softly blurred behind her, lit by warm late morning sun rim lighting the waves. Top right photo shows a woman about 26 years old with long fine ash blonde hair in a double stacked ponytail that looks like one full tail, at a tennis court, seen in a three quarter back view while holding a racket, wearing a pale blue polo, with the green court softly blurred behind her, lit by bright afternoon sun rim lighting the ponytail. Bottom left photo shows a woman about 23 years old with long fine strawberry blonde hair in two wide pancaked Dutch braids, at an autumn pumpkin patch, seen in a three quarter back view while holding a small white pumpkin, wearing a rust plaid flannel shirt, with hay bales softly blurred behind her, lit by warm low sun rim lighting the braid loops. Bottom right photo shows a woman about 36 years old with long fine champagne blonde hair in a full low twisted chignon, at an evening gala, seen in a three quarter back view while holding a beaded clutch, wearing a black velvet gown, with chandeliers softly blurred behind her, lit by warm ballroom light rim lighting the chignon. In all four photos, keep every wave, loop, twist, and edge crisp and clearly readable from the front and the back, with real fine hair texture, natural shine, and a few soft flyaways catching the light. Use a shallow depth of field so each background melts into warm, dreamy bokeh. Shot in the style of a Canon EOS R5 with an 85mm lens at f/1.8, candid natural moments rather than stiff poses, cohesive warm golden tones across all four photos with subtle film grain. There is no text, no logos, no lettering, and no watermark anywhere in the image. The final composition must be landscape 16:9, polished magazine look, suitable for a Pinterest blog featured image. Photorealistic photos, ultra-detailed, editorial quality, 4K resolution.