
It is 7:12 on the first morning back. Your new shoes are by the door, your backpack is packed, and you are standing at the mirror with a brush in one hand and no plan at all.
That moment is why this list exists. A new school year feels like a fresh start, and your hair is one of the easiest ways to show it. The trouble is that most cute styles online take forty minutes, fall apart by second period, or need a second person to do the back.
So these back to school hairstyles for girls had to pass a few real tests. They need to survive a hoodie, a bus seat, and gym class. Most take under ten minutes once you have practiced twice. Plenty work on yourself, and the trickier braids say so up front.
You will find quick ponytails for rushed mornings, braids for sports days, half up styles for picture day, and a few ideas for short hair too. Grab a brush, a pack of small elastics, and some bobby pins, and pick two or three to practice this weekend.
1. Sleek High Ponytail With a Hair Wrap
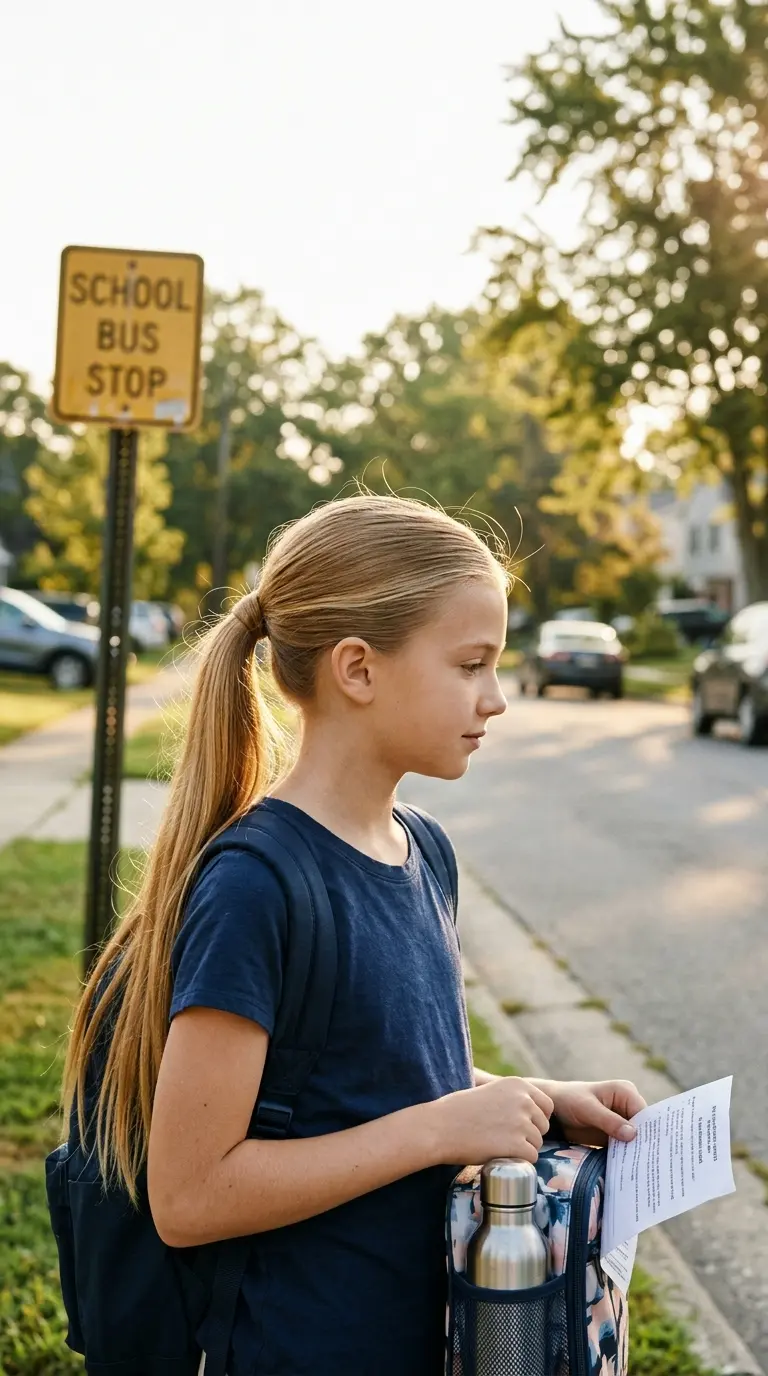
The secret to a ponytail that looks finished is hiding the elastic.
- Brush everything up to the crown while your head is tipped slightly back. That keeps bumps from forming at the nape.
- Tie it tight with a strong elastic.
- Pull a thin strand from the underside of the ponytail and wrap it around the elastic two or three times.
- Pin the end underneath with one bobby pin, sliding it into the elastic itself.
A little leave in spray on the brush helps smooth the short hairs by your ears without making them crunchy.
Quick tip: if the pin keeps slipping, cross a second one over it in an X. It will stay put through recess.
2. Two Dutch Braids for Gym Day
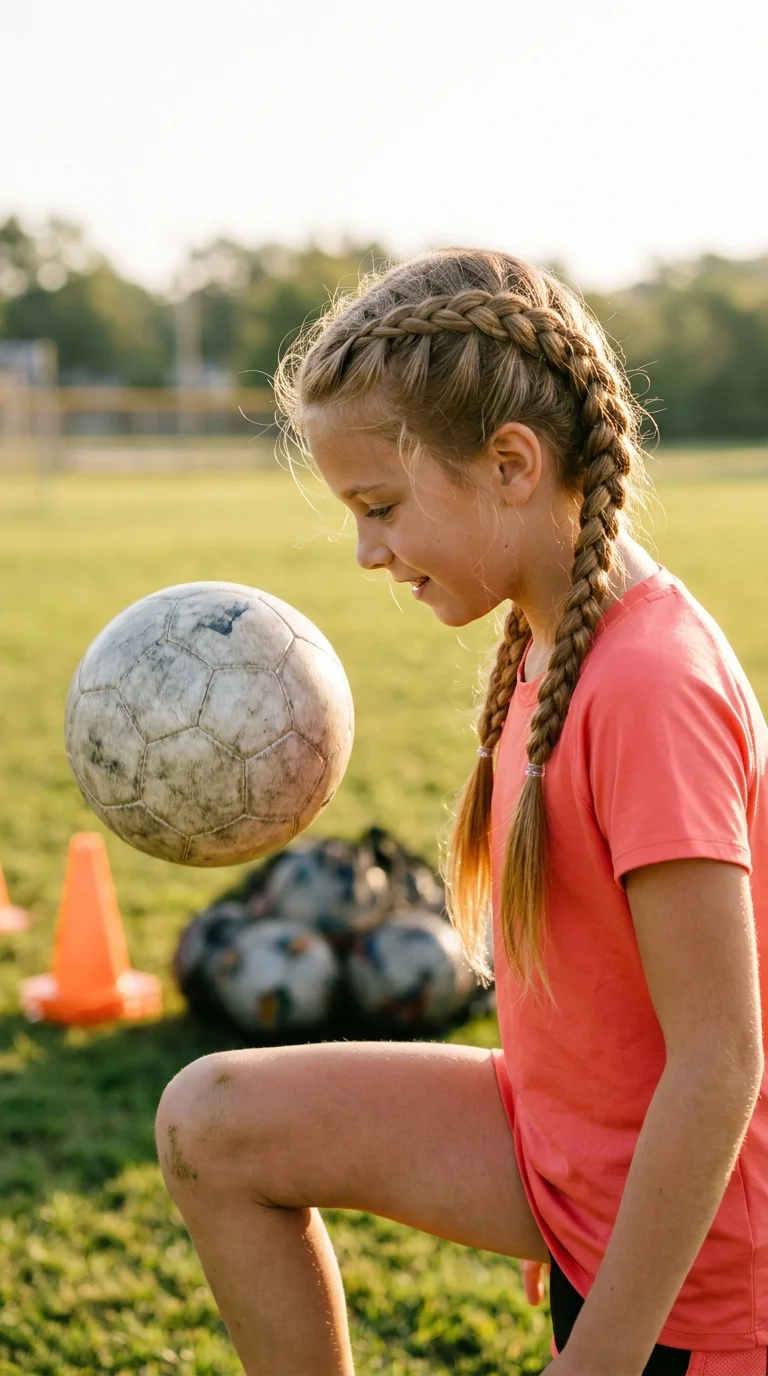
Running laps, a dodgeball game, and a long bus ride home. Two Dutch braids handle all of it, and they still look neat at 3 p.m.
A Dutch braid is just a French braid flipped. Instead of crossing the side strands over the middle, you cross them under. That makes the braid pop up from your head instead of lying flat.
For two of them, split your hair down the middle and clip one side out of the way. Braid the first side all the way down, tie it, and then match the second side to it.
Small slices of hair make the neatest braids. Big chunks look bumpy.
Good for: gym class, field trips, and any day you will be upside down on the monkey bars.
3. Half Up Top Knot With Hair Down

Half up styles keep hair out of your eyes during tests but still let you wear it down. A top knot is the fastest version.
- Grab the top section of your hair, the part above your temples.
- Twist it into a small ponytail and keep twisting until it coils on itself.
- Wrap the coil into a bun and tie it with a second elastic.
- Gently tug a few pieces loose so it looks soft, not stiff.
The loose hair underneath shows off any natural wave you have. On straight hair, a quick spritz of texture spray gives the bun more grip.
It takes about three minutes once you get the twist down.
4. Claw Clip Twist for the Rushed Morning
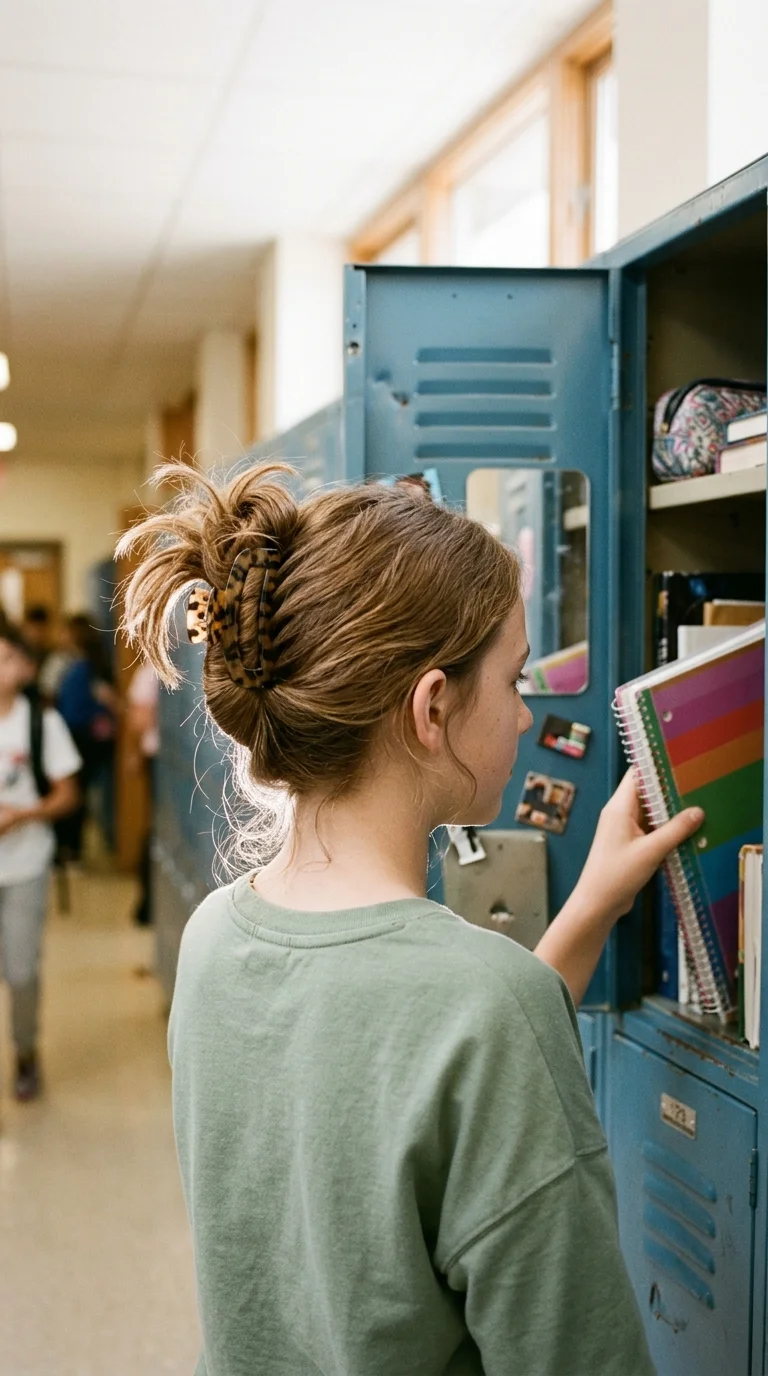
Overslept? This one takes about forty five seconds.
Gather all your hair at the nape like a low ponytail. Twist it upward against the back of your head, then snap a medium claw clip over the twist with the teeth facing down. Let the ends fan out over the top of the clip.
Medium to long hair holds this best. On very thick hair, pick a large clip with long teeth, or it will slowly slide down by lunch.
Keep a clip in your backpack even on days you wear your hair down. When it gets hot in a classroom with no air conditioning, you can put this up in your seat.
5. Bubble Ponytail That Stays Even
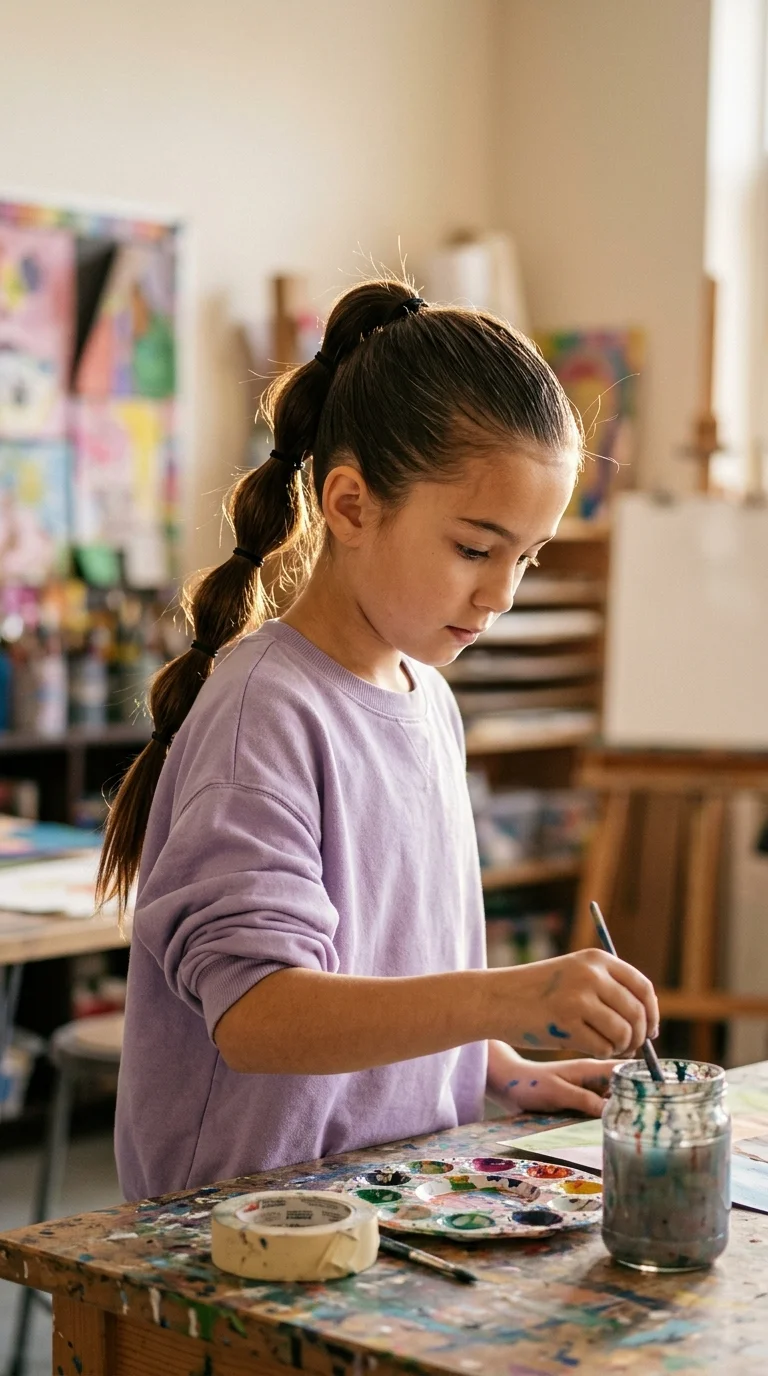
Most bubble ponytails go wrong in the same spot. The bubbles get smaller and smaller as you go down, until the last few look like beads.
Fix it by measuring with your hand. Place an elastic every two finger widths, every single time, no matter how much hair is left. Then gently pull the sides of each section out to puff it.
- Start with a high or mid ponytail as your base.
- Use clear or matching elastics so the bubbles stand out, not the bands.
- Puff each section before you add the next elastic.
Thick hair makes big round bubbles. Fine hair looks fuller if you tease each section lightly first.
6. Space Buns for a Fun Friday
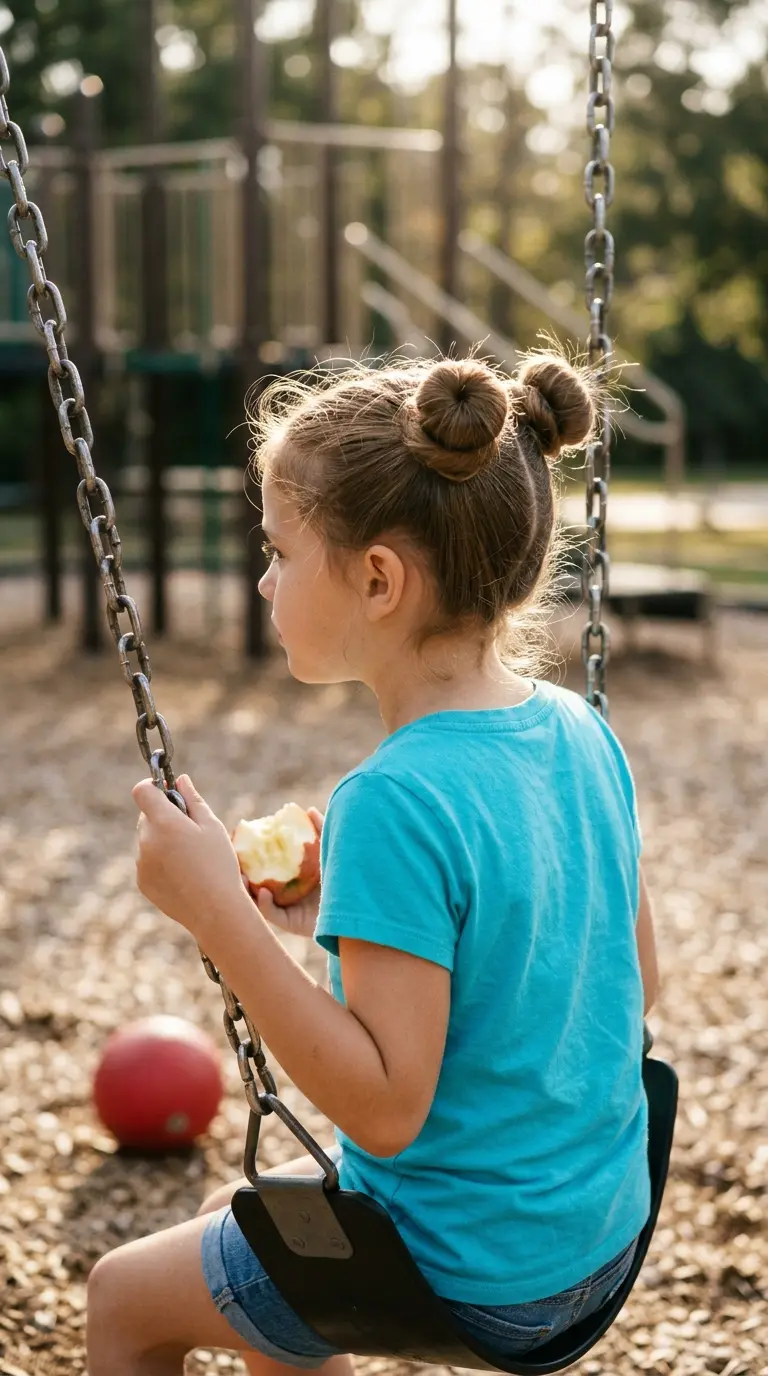
Two little buns, one on each side of your head. They are playful, they stay out of your face, and they take about five minutes.
Part your hair down the middle. A zigzag part made with the end of a comb looks extra fun here. Make a high ponytail on each side, twist it, and wrap it around itself into a bun. Pin the ends under.
Shorter hair can do half up space buns and leave the bottom down instead.
Watch out: buns placed too far back look like Mickey ears from the front. Put them just above and slightly behind each temple, about where a headband would sit.
7. Waterfall Braid With Hair Down
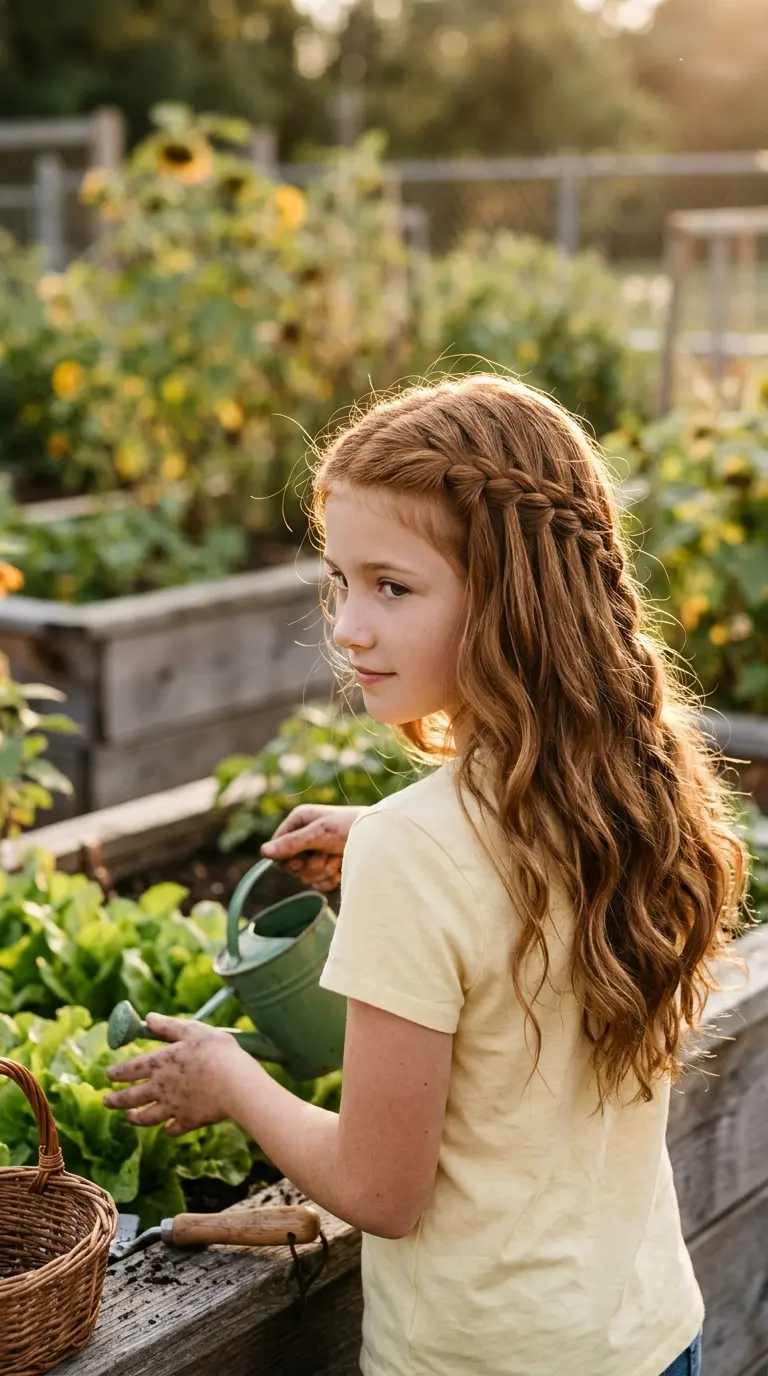
This braid looks hard, but it is mostly a regular braid where you drop one strand each time.
- Start a small three strand braid near your temple.
- After the first cross, let the top strand fall down and leave it.
- Pick up a new strand of hair right next to it and use that instead.
- Keep braiding sideways across the back of your head, dropping and picking up.
- Pin the end behind your opposite ear.
The dropped strands are the waterfall. They look best with a little wave, so this is a good one for day two of heatless curls.
It is easiest with a friend or a parent the first few times.
8. Side French Braid Into a Ponytail
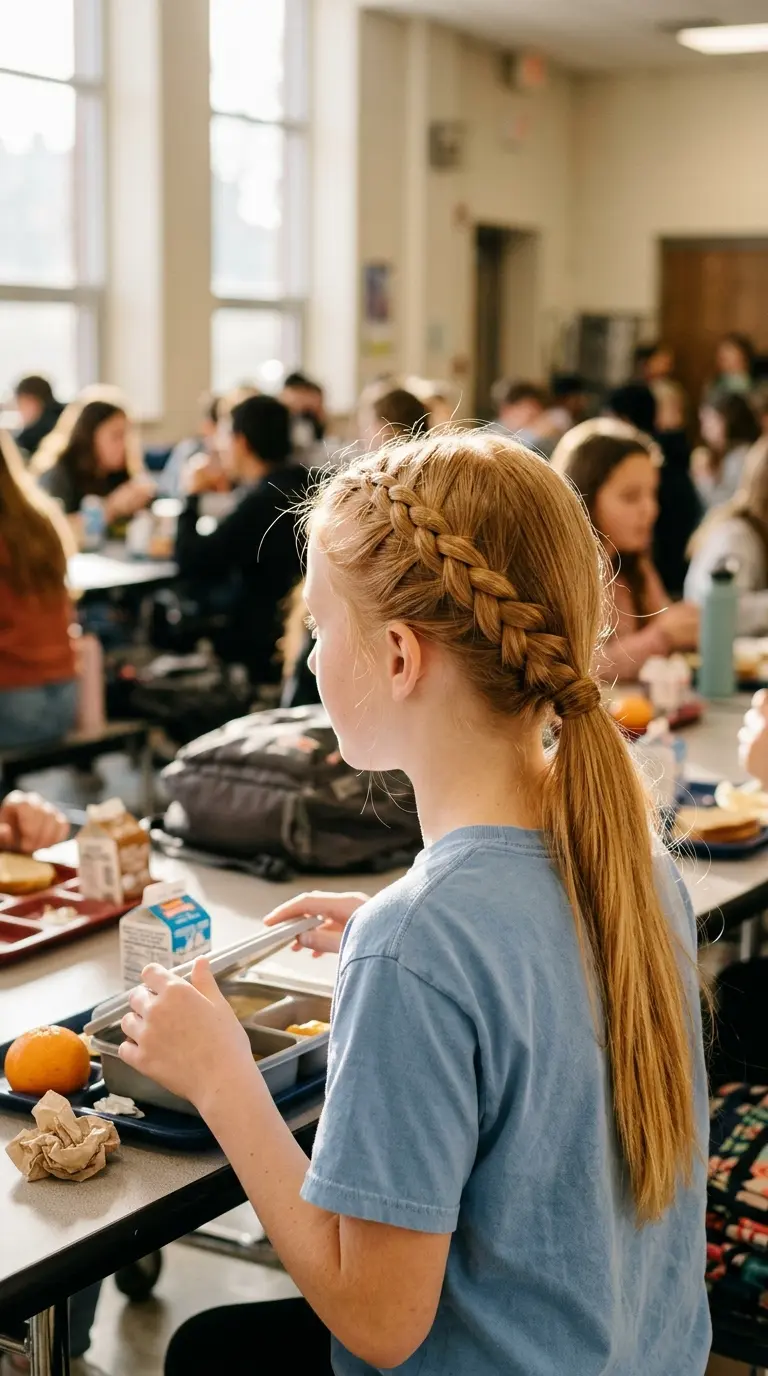
A braid that hugs one side of your head, then a ponytail. It looks like more work than it is.
Part your hair deep on one side. Start a French braid at the front on the heavy side and braid toward the back, angling down behind your ear. When you reach the nape, stop adding hair and tie everything into a low ponytail over the opposite shoulder.
It covers up second day hair really well, since the braid hides an oily part line.
Quick tip: braiding your own side is easier than braiding the back. Your arms do not have to bend as far, so this is a good first French braid to learn on yourself.
9. Rope Twist Crown With Pins
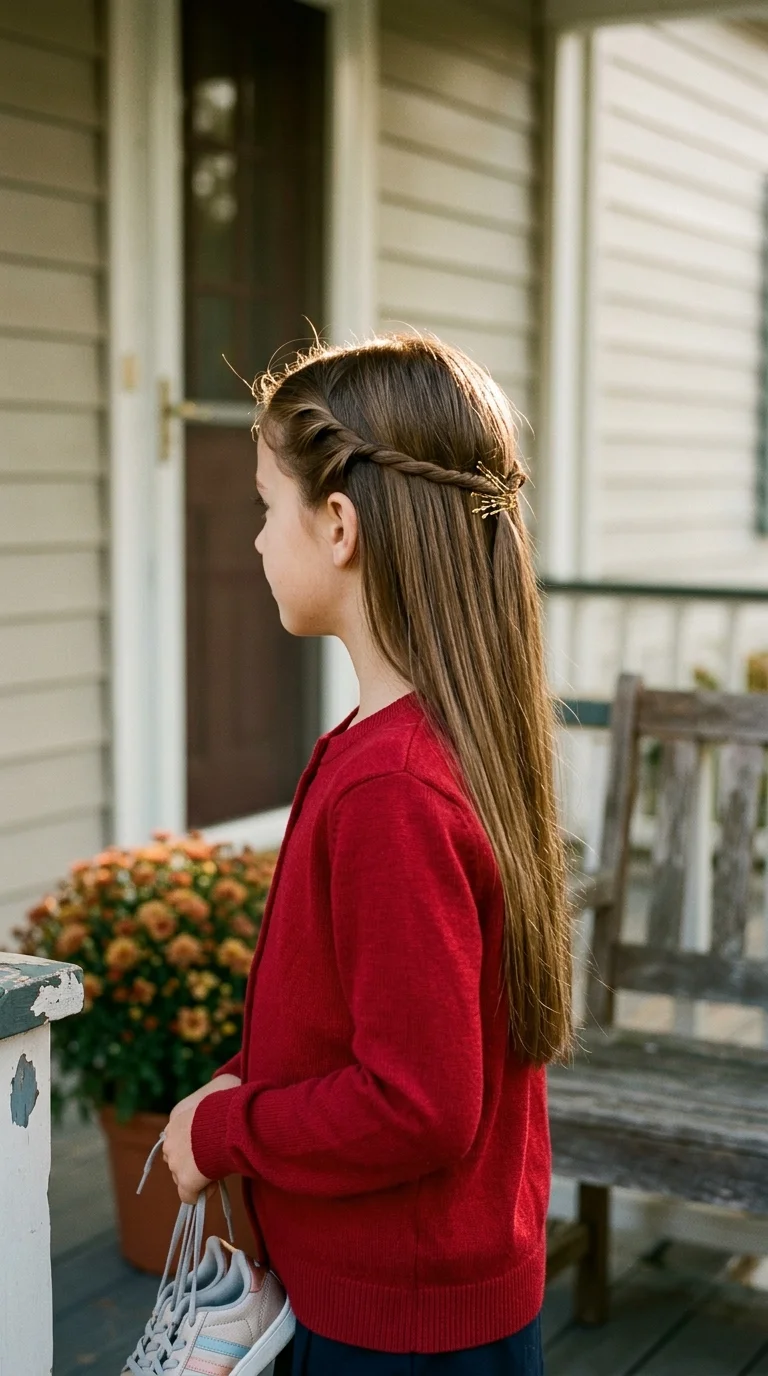
Two twists, a few pins, done. It looks sweet, and it keeps your bangs or front layers out of your face all day.
- Take a one inch section above your left temple.
- Split it in two and twist each piece the same way, away from your face.
- Wrap the two pieces around each other in the opposite direction. That locks the rope in place.
- Pin it at the back of your crown.
- Repeat on the right and cross the pins in an X where the twists meet.
Gold or pearl pins make it look dressy enough for picture day. Black pins disappear into dark hair if you want it subtle.
10. Ribbon Woven Into a Classic Braid
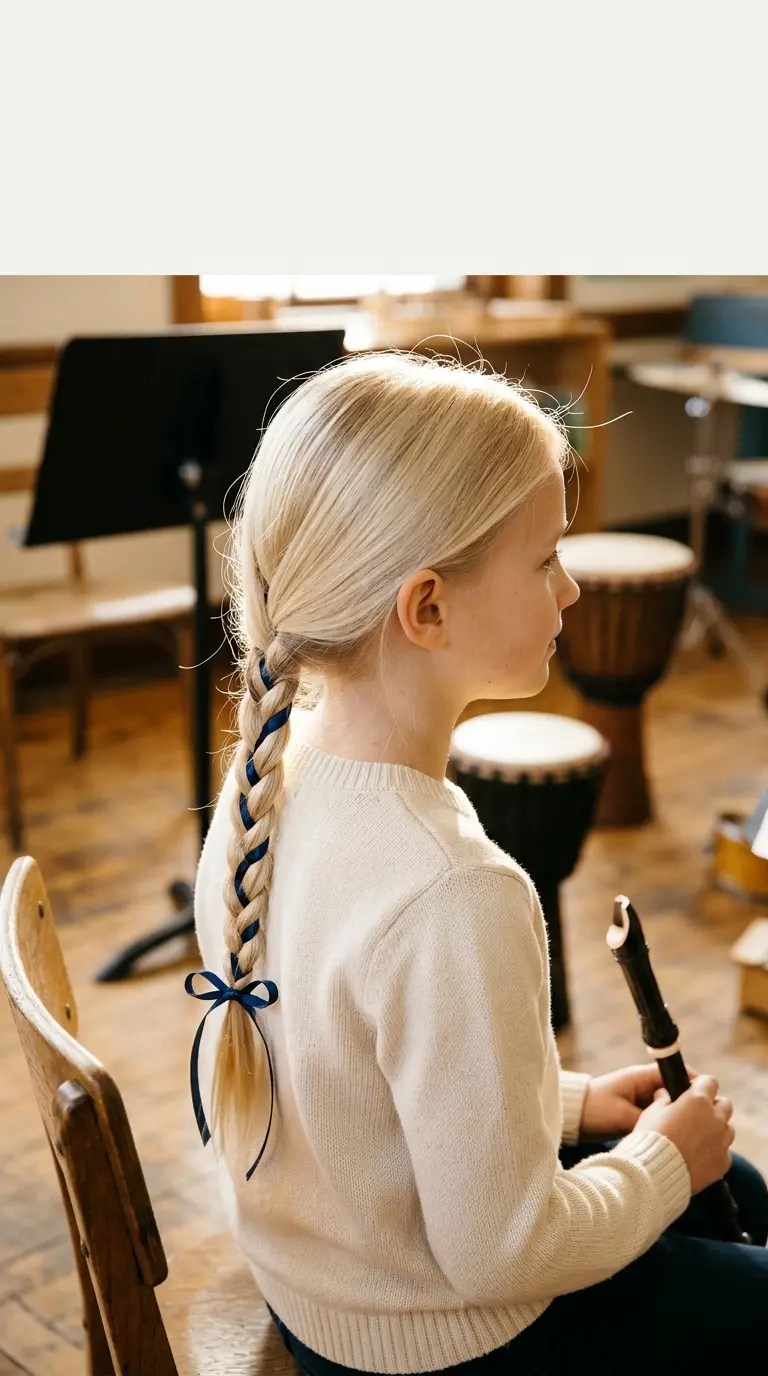
Tie a ribbon to the base of a ponytail, then braid it in as if it were part of one strand. That is the whole trick.
Pick a ribbon about a quarter inch wide. Wider ribbons fold and twist inside the braid, and thin ones get lost. Cut it twice as long as your hair so you have plenty to tie a bow at the bottom.
School colors look great here. So does matching the ribbon to your first day outfit.
Satin is soft and shiny but a little slippery. Grosgrain, the ribbon with tiny ridges, grips better and stays tight through gym.
11. Braided Headband for Growing Out Bangs
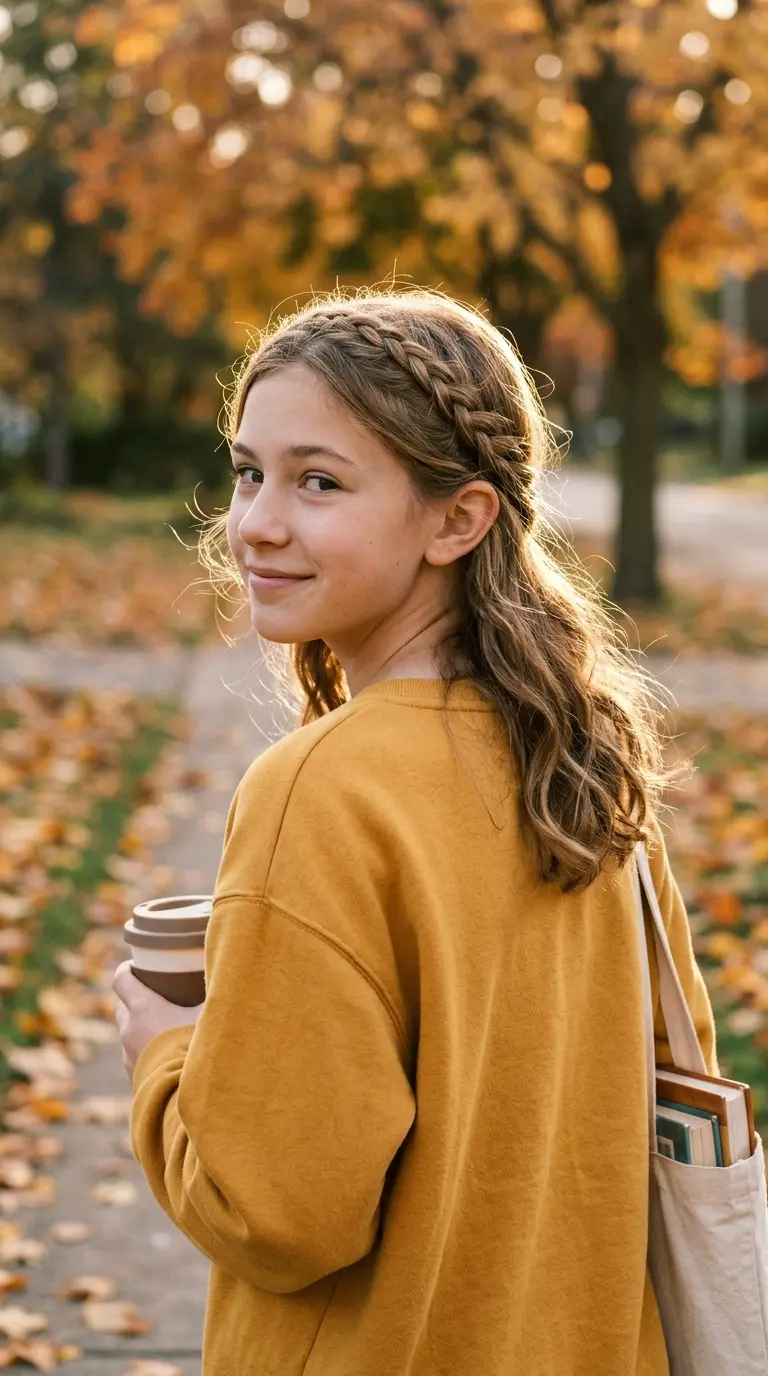
Bangs in that awkward in between length poke your eyes and will not stay tucked. A braided headband solves it.
Take a two inch section of hair right behind your hairline, reaching ear to ear. Comb the rest of your hair back so it does not get mixed in. Start braiding at one ear and French braid across the top, adding the bangs as you go. Pin the end behind the other ear.
On short or layered hair, a regular three strand braid pinned across the top works too.
Bangs that are almost grown out love this one. It hides the stage where they are too long to be bangs and too short to tuck.
12. Overnight Braids for Heatless Waves
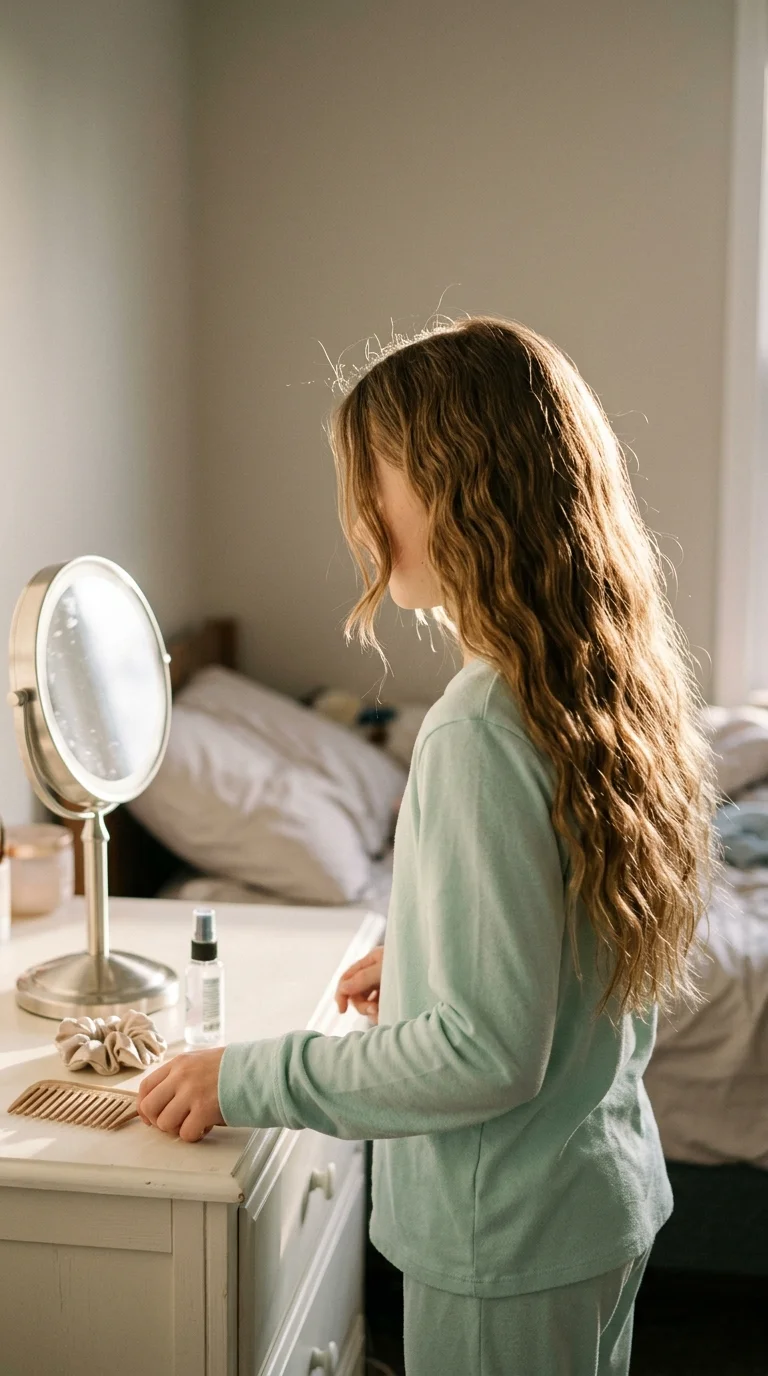
Waves without a curling iron, made while you sleep.
Before bed, dampen your hair until it is barely wet, about the feel of a towel an hour after a shower. Make two braids, one behind each ear. In the morning, take them out and break up the waves with your fingers instead of a brush.
Tighter, smaller braids give you tighter waves. Two loose braids give a gentle bend.
Sleep on a satin pillowcase if you have one. It cuts down on frizz around your face.
Start with hair that is damp, not dripping, so it dries by morning.
Braid all the way to the ends so the tips bend too.
Separate waves with your fingers and a tiny bit of lotion or leave in cream.
Going to bed with soaking wet hair. It stays wet and the waves fall flat.
Brushing the waves out. That turns them into a puff.
Braiding so tight it pulls at your scalp while you sleep.
13. Low Pigtails With Ribbon Bows
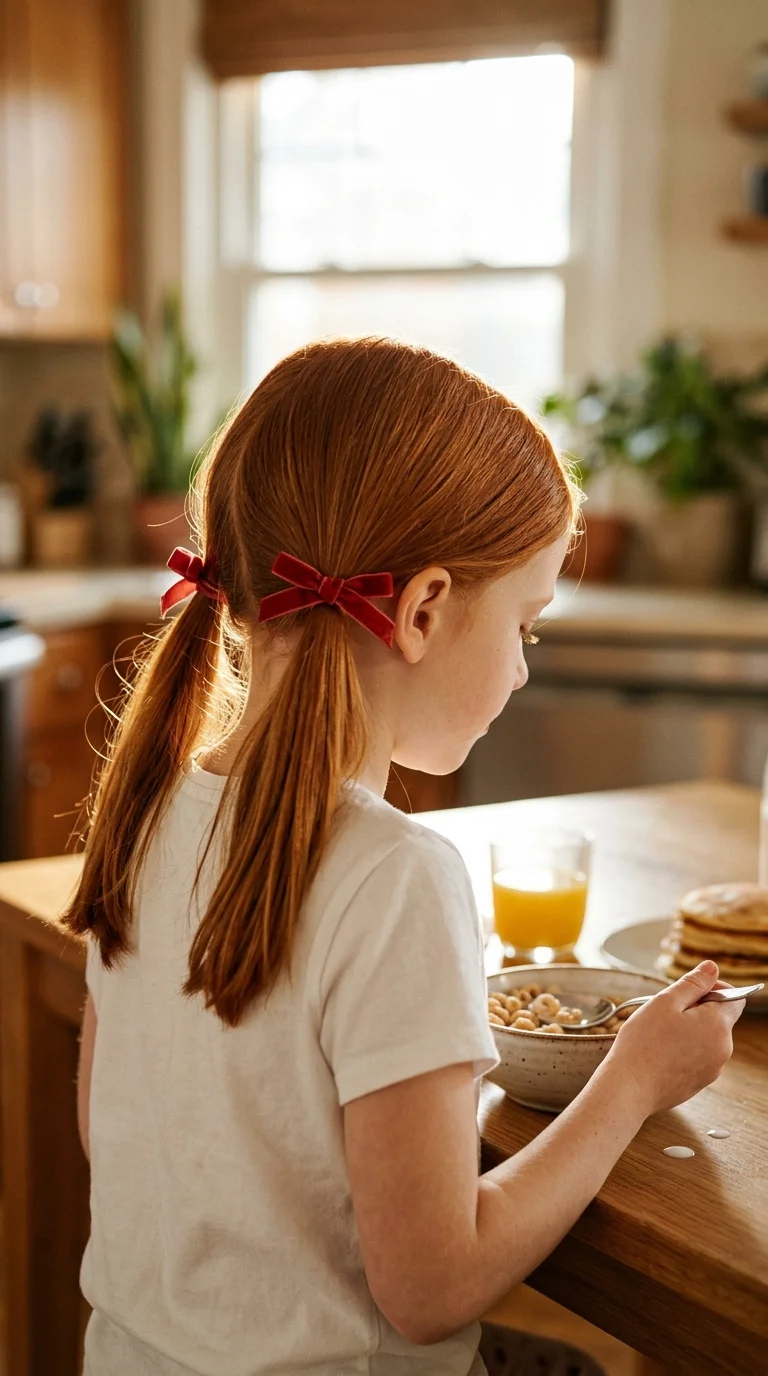
Low pigtails have made a big comeback, and the bows are the reason.
Here is the difference between cute and messy: the part. Use the tail of a comb to draw a straight line down the back of your head, all the way to the nape. Tie each side just behind and below the ear, then add a bow over each elastic.
A small velvet or satin bow looks more grown up than a big cheer bow. Clip on bows save time, since tying even bows on yourself is tricky.
Low pigtails also sit nicely under a bike helmet, which high ones do not.
14. Fishtail Braid Over One Shoulder
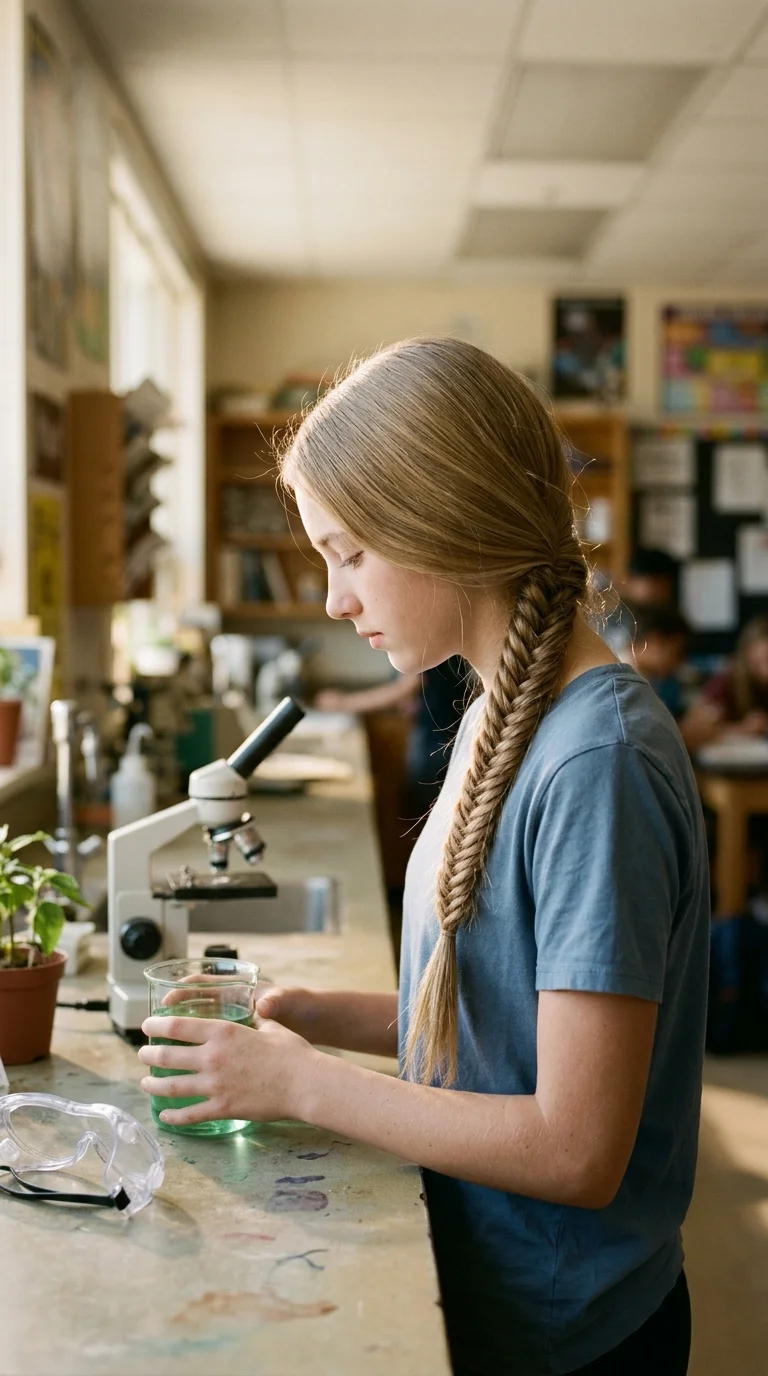
Fishtails look complicated, but they only use two strands instead of three. That actually makes them easier to do on yourself.
- Pull your hair to one side and split it into two equal halves.
- Take a thin piece from the outside of the left half and cross it over to the right half.
- Do the same from the right side over to the left.
- Keep going until you reach the end and tie it.
The thinner the pieces, the fancier it looks. Thick pieces finish faster but look more like a regular braid.
Slow and steady wins here. Expect about eight minutes the first time and four by the third.
15. Criss Cross Elastic Half Up
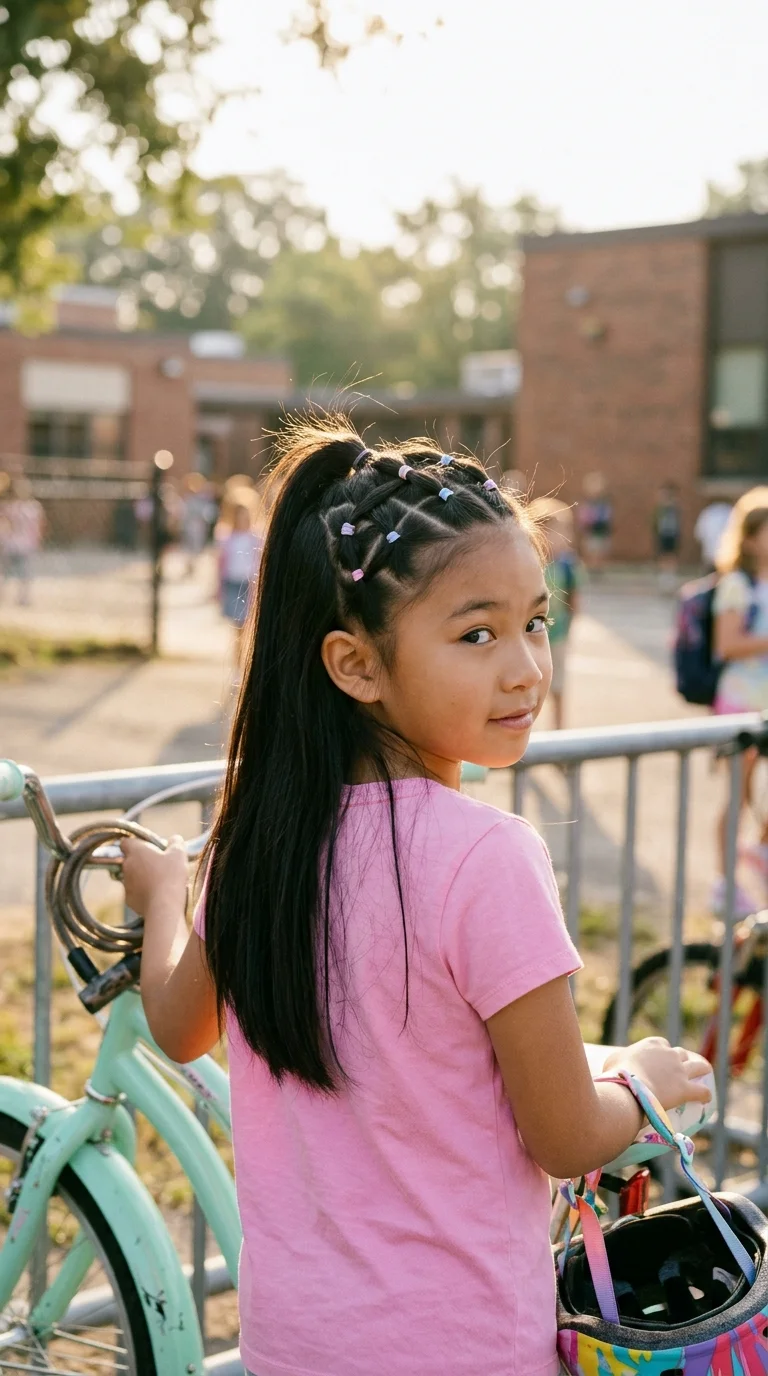
You need zero braiding skills for this one, just a pack of tiny elastics.
Make three small ponytails in a row along your hairline. Split each one in half and tie each half to the half next to it, a few inches back. Keep going, and a diamond pattern starts to form. After two or three rows, gather everything into one half up ponytail.
It is easier with a helper, but you can do the front row yourself in a mirror.
Watch out: tiny elastics can snag when you take them out. Snip them with small scissors instead of pulling.
16. Milkmaid Crown Braid for Cool Mornings
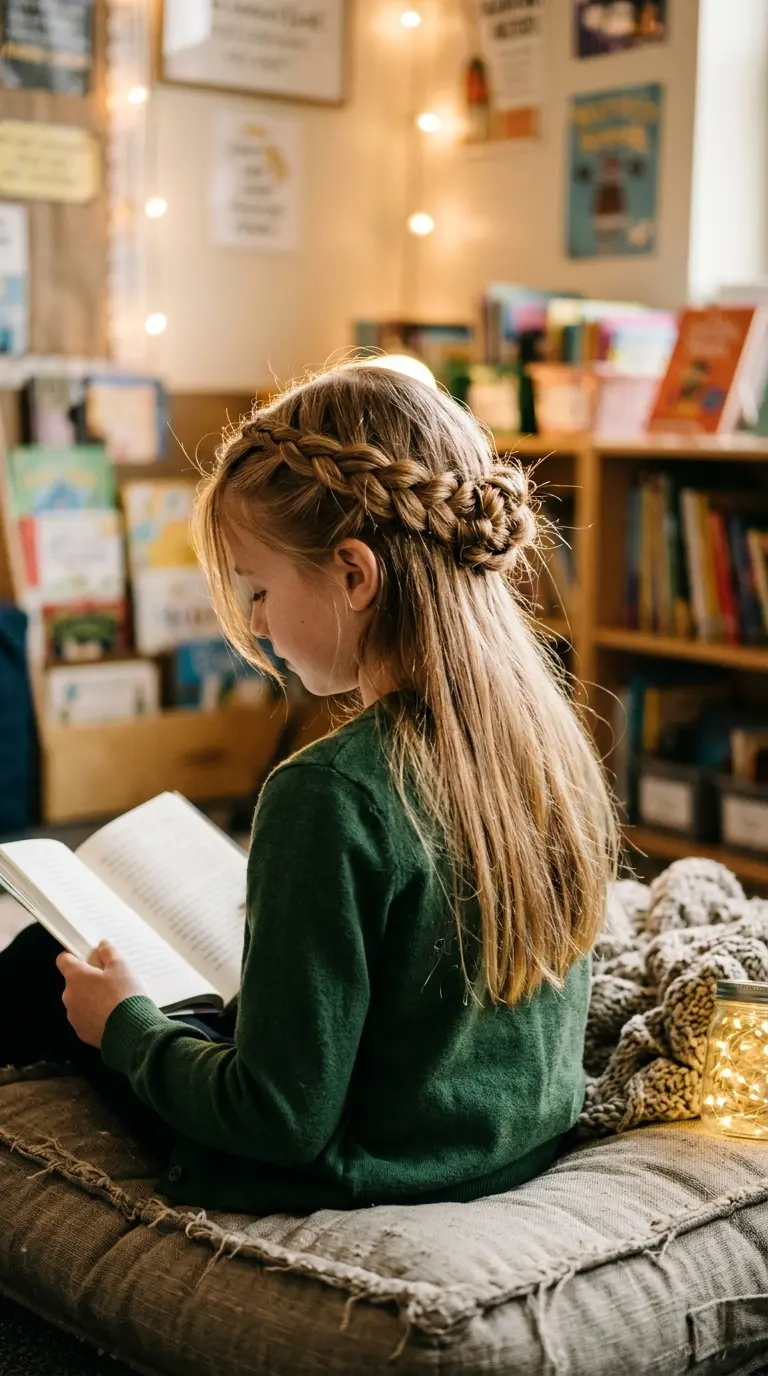
When it gets cold and you are wearing a hoodie, a ponytail gets squished. A crown braid sits on top of your head where nothing can flatten it.
Make two braids, one on each side, starting low behind your ears. Bring the left braid up over the top of your head like a headband and pin it. Bring the right braid up just behind it and pin that too. Tuck the ends under each other.
It needs hair that reaches at least past your shoulders.
Quick tip: pull the braid stitches wider with your fingers before you pin them. Fluffier braids cover more of your head and hide the pins.
17. Messy Bun With Face Framing Pieces
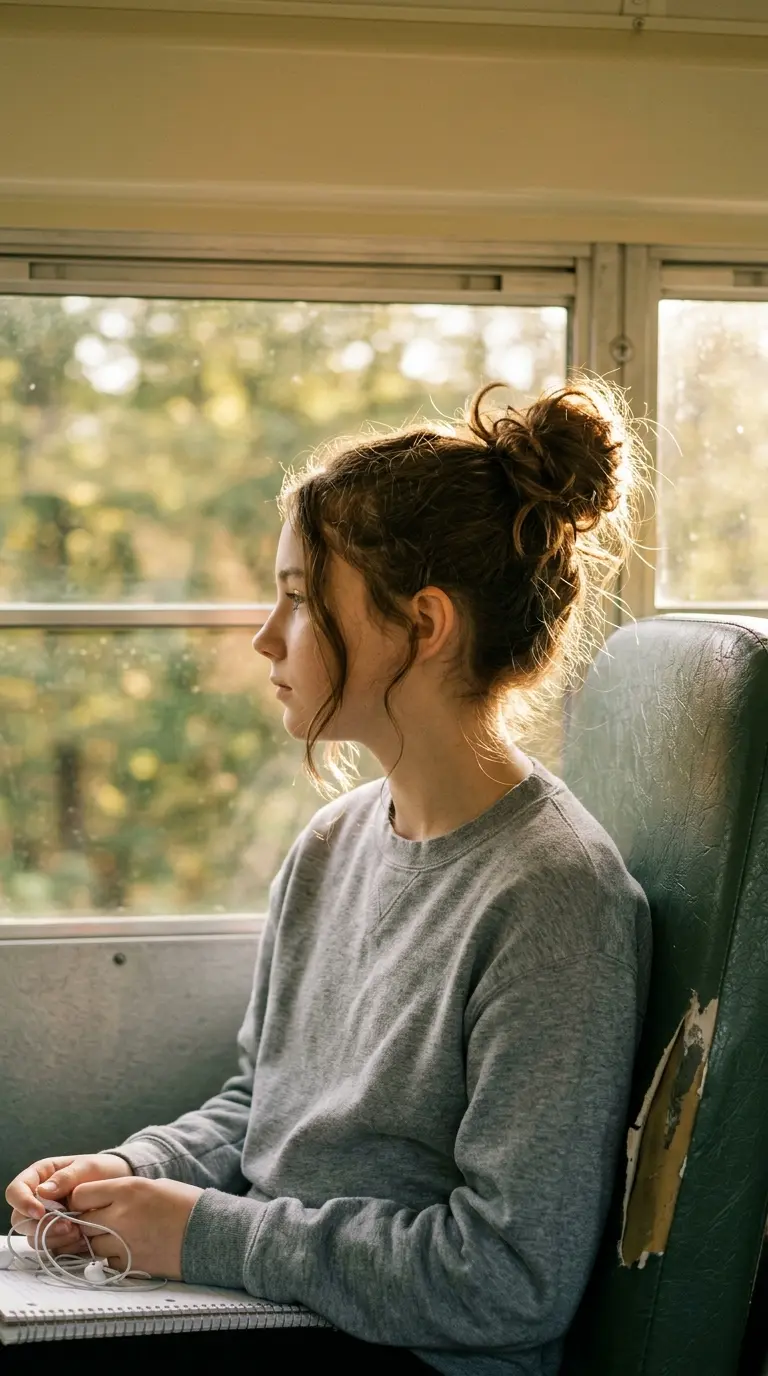
A good messy bun is a little planned. A bad one just looks like you woke up five minutes ago.
Pull your hair into a high ponytail but leave out two thin pieces by your face. On the last loop through the elastic, stop halfway so you get a folded bun. Wrap the leftover ends around the base and pin them. Then tug the edges of the bun to loosen it.
The face framing pieces matter more than the bun. Leave them about as thick as a pencil. Too thick and they fall in your eyes during class.
Day old hair holds this better than freshly washed hair.
18. Low Sleek Ponytail for Picture Day
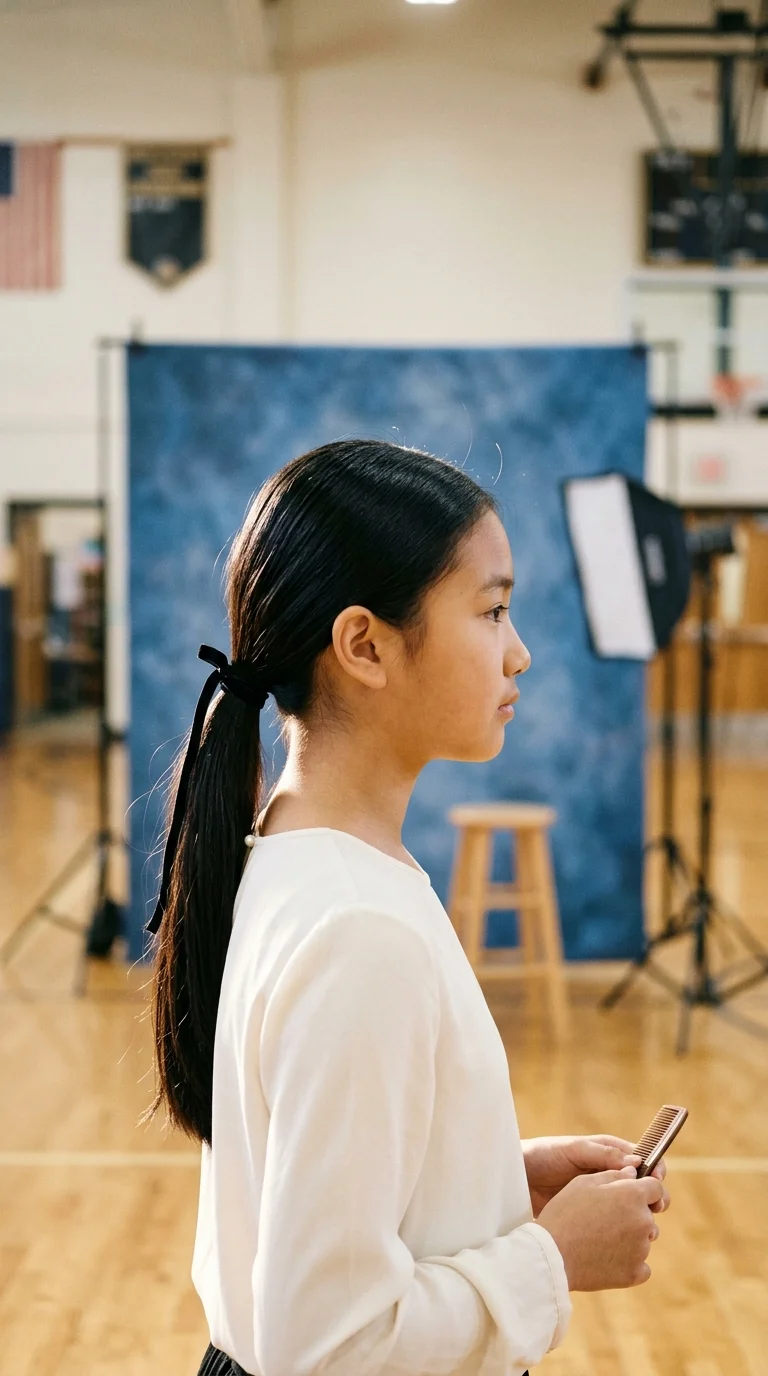
Picture day is not the day to try something new. Choose a style that looks good from the front and will not move.
A low ponytail fits. It shows your face, it does not cast shadows like a high bun, and nothing pokes up above your head in the photo.
- Brush a middle part with a fine tooth comb.
- Smooth the sides with a little gel or hair cream.
- Tie the ponytail at the nape and add a ribbon or a wrapped strand over the elastic.
Bring a tiny comb in your pocket. Gym before photos is a real risk.
19. Half Up Bubble Pigtails
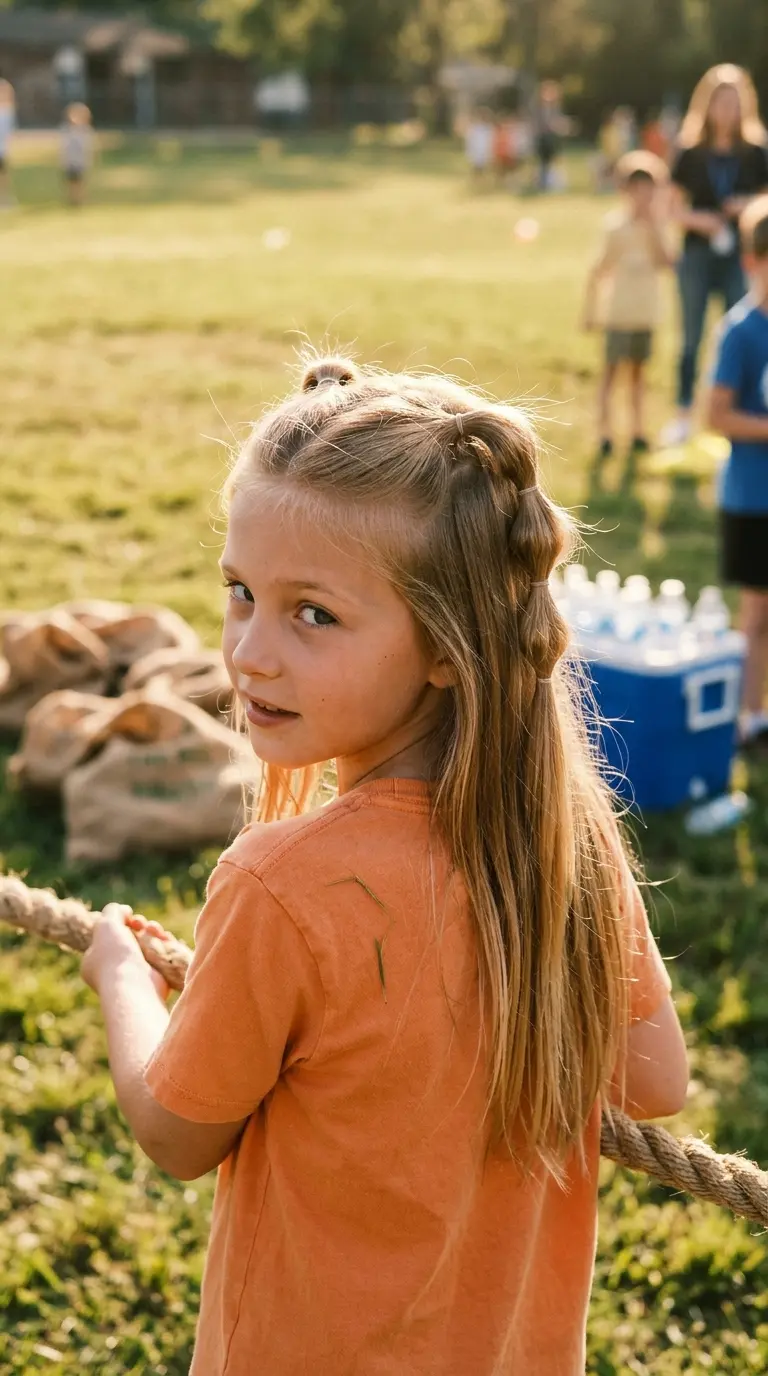
Half up, half down, and bubbly. It reads playful, and it suits younger grades and middle school alike.
Take only the top section of your hair, the part above your temples, and split it into two. Make a small pigtail on each side. Add two or three elastics down each pigtail and puff the sections.
The rest of your hair stays down, so it is quicker than full bubble pigtails.
Bright mini elastics in two colors look fun for spirit week. Clear ones look cleaner for a normal school day.
Best on hair that reaches at least your shoulders, so the bubbles have room.
20. Twisted Low Bun for Short Notice
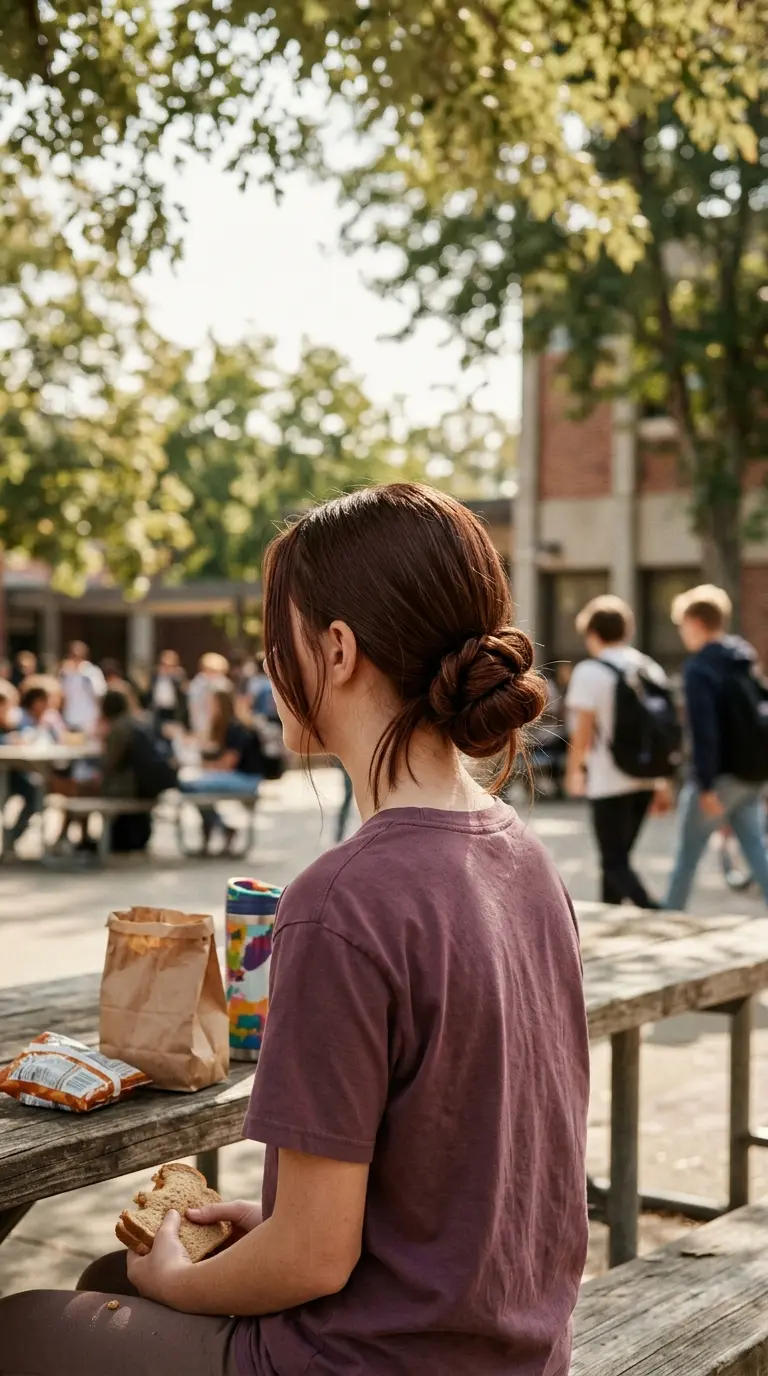
Got a school concert tonight, or an awards assembly you forgot about? This bun looks neat and takes about four minutes.
- Make a low ponytail at the nape.
- Split it into two pieces.
- Twist each piece tightly in the same direction.
- Wrap the two twists around each other the opposite way, like a rope.
- Coil the rope around the elastic and pin it in four spots, top, bottom, and both sides.
It is a lot like the rope twist crown, just at the back of your head.
On shoulder length hair, the bun will be small but still neat.
21. Pull Through Braid Without Braiding

If braids make your arms tired or never come out even, learn this one. It looks like a fat, fancy braid, but it is only ponytails.
Make a high ponytail. Split it into a top half and a bottom half. Tie a small elastic on the top half a few inches down. Then pull the bottom half up through the middle of the top half and tie it. Keep flipping and tying until you reach the ends. Gently stretch each loop at the end to make it puffy.
Thicker hair gives you bigger, rounder loops.
22. Hair Bow Half Up
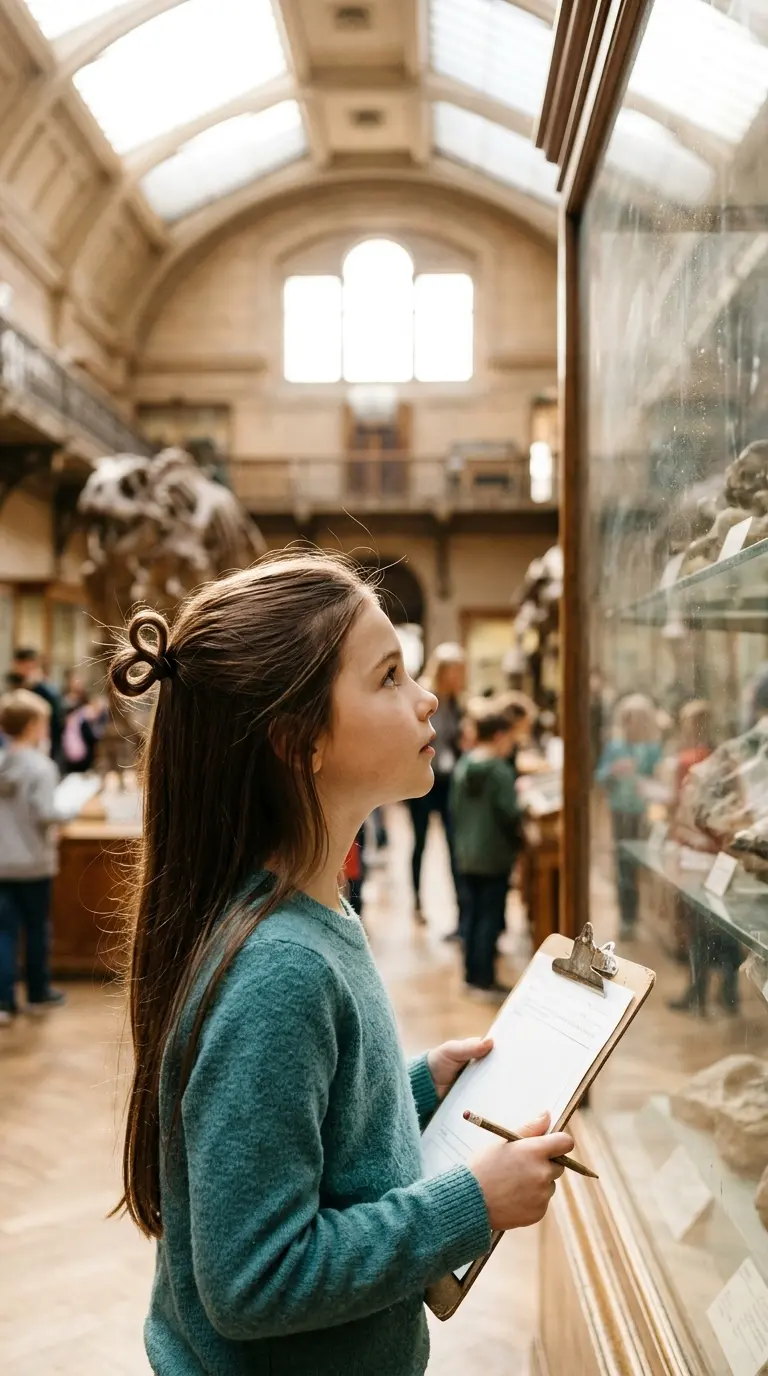
A bow made out of your own hair always gets a “how did you do that?” at lunch.
Gather the top half of your hair into a ponytail. On the last pull through the elastic, stop halfway so you have a loop. Split the loop into two equal halves, these are the sides of the bow. Fold the leftover tail up over the middle and pin it behind.
Straight, smooth hair shows the bow shape best. A little hairspray on the loops keeps them from flopping.
It takes a few tries. Practice on a lazy Sunday, not ten minutes before the bus.
23. Two Front Twists for Short Hair
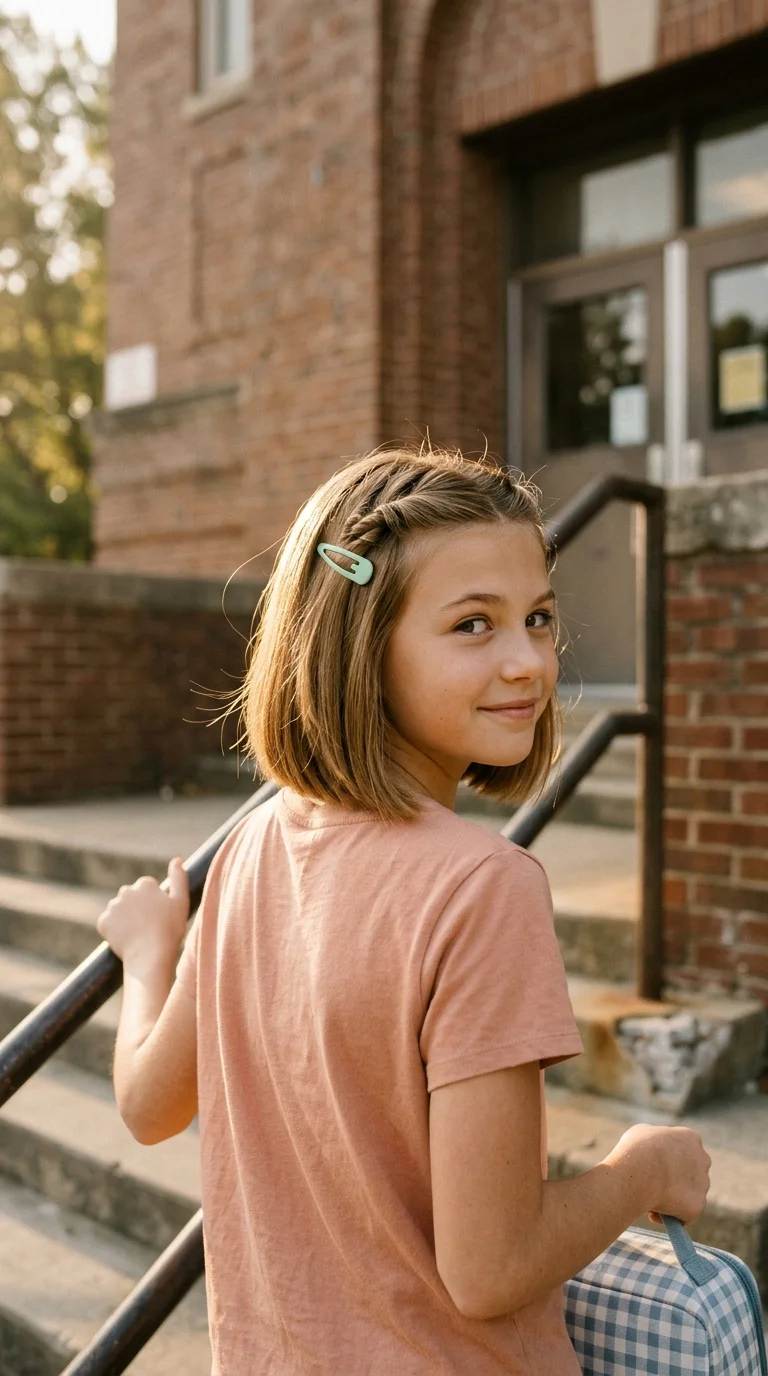
Short hair gets left out of a lot of back to school lists. This style is made for a bob or a lob.
- Take a small section at the front, right above your part.
- Twist it back toward your crown, adding a bit more hair after each turn.
- Clip it with a snap clip or a pretty barrette.
- Do a second twist right behind the first and clip it too.
Snap clips in fun colors are cheap and they grip short hair well. Line two up on one side for a neat, intentional look.
The back stays loose, so it is fine under a hat.
24. Lace Braid Along a Side Part
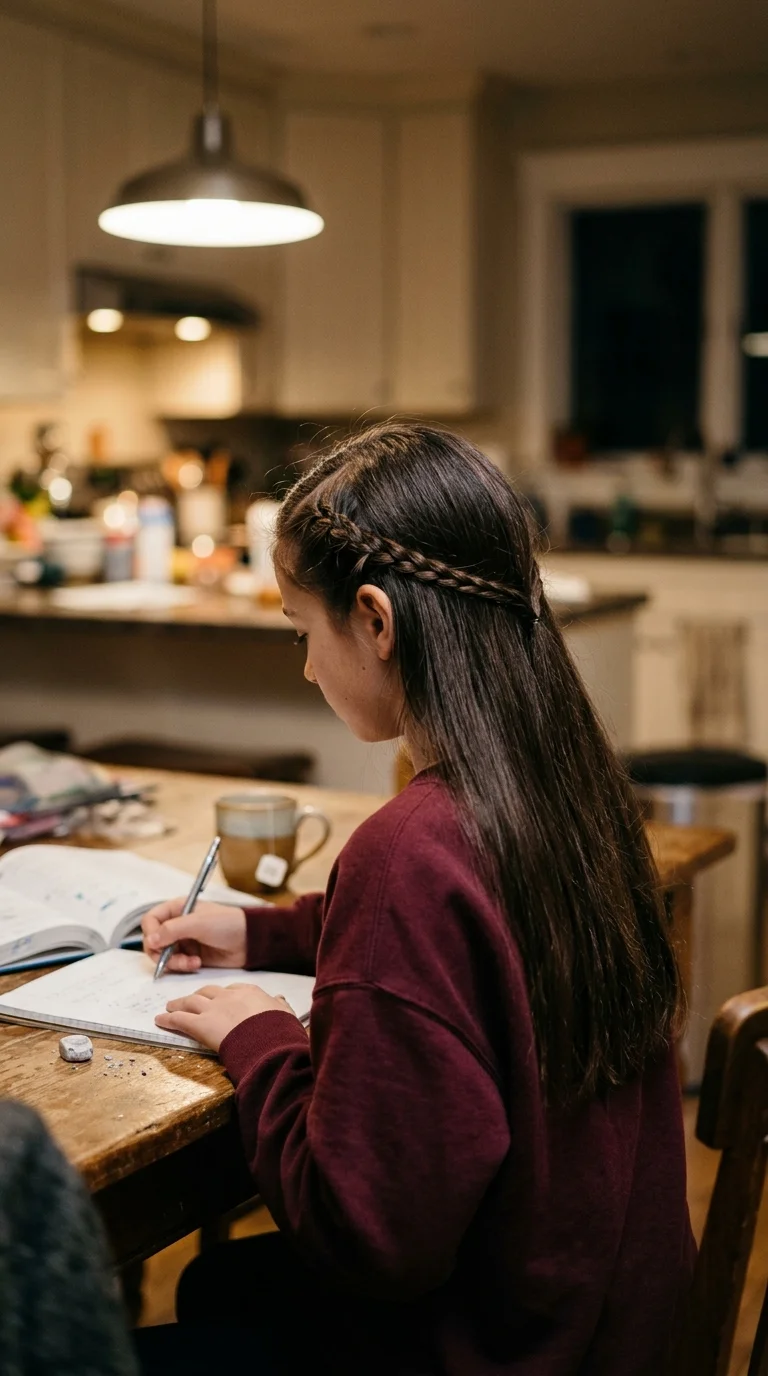
A lace braid is a French braid that only adds hair from one side, the side next to your part. It sits flat and looks delicate.
Start right at the part line at your front hairline. Braid back along the part, adding hair only from the part side each time. Keep it close to your head until you pass your ear, then finish with a plain braid and tuck the end under your loose hair with a pin.
This one works on straight, wavy, or layered hair.
Good for: keeping a heavy side part from flopping into your face while you write.
25. Braided Low Bun for Special School Days
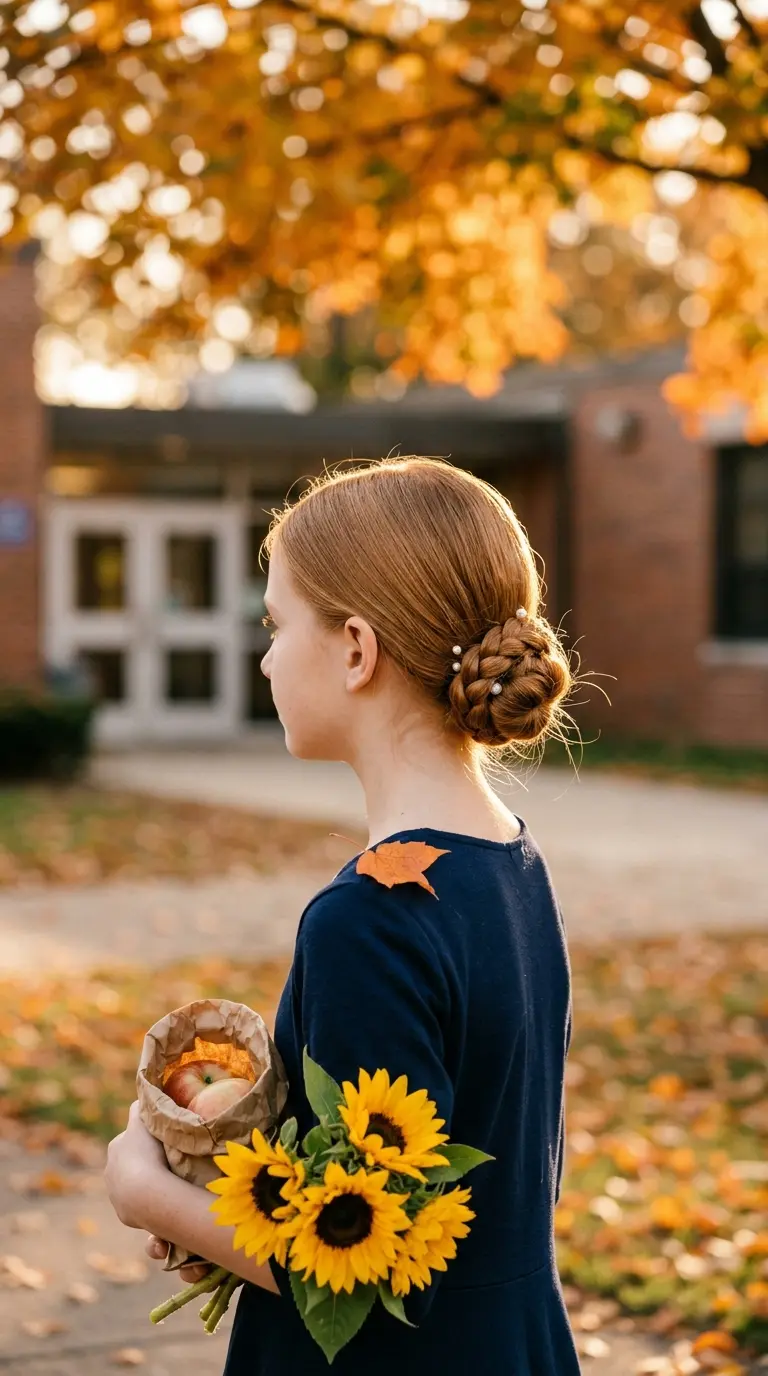
Save this one for the first day, picture retakes, or the winter concert.
Make a low ponytail and braid it all the way to the end. Wrap the braid around the elastic in a circle, tucking the end underneath. Pin it every couple of inches, sliding the pins into the braid so they hold the coil to your head.
Pearl pins turn it dressy. Plain brown or black pins keep it simple.
The braid gives the bun texture, so it looks finished even if your coil is a little lopsided. That makes it a forgiving choice for nervous hands at 7 a.m.
Your New Year, Your Hair
New school year, new hair, same you. Start with two styles from this list: one fast enough for sleepy mornings, and one a little fancier for days that feel special. Practice them on a weekend so your hands know the moves before the alarm goes off on a Monday.
The best back to school hairstyles for girls are the ones that still look good at the last bell. Keep a few spare elastics and a claw clip in your bag, and a frizzy afternoon becomes an easy fix.
Save this list to your school morning board so you have a fresh idea ready every week of the year.