
The ponytail looked great at 7:30. By the time the pickup line crawls forward, half of it is hanging over one ear and the hair tie is somewhere out on the playground.
Kids are hard on hair. They hang upside down on monkey bars, pull hoodies on and off, and rest their heads on desks during quiet reading. One big elastic holding all that hair simply loses the fight by lunch.
Small rubber bands work differently. Each one holds a little section, so the grip is spread across the whole head instead of resting on one point. That is why rubber band hairstyles for school tend to last until the bus ride home, and sometimes through a sleepover too.
They are also cheap. A tub of tiny elastics usually costs less than one fancy scrunchie and lasts for months.
Every style below uses the same basic kit: small hair elastics, a rattail comb, a spray bottle of water, and a few clips. Start with the easy ones, then work up to the fancy nets once your fingers know the moves.
1. Criss Cross Rubber Band Style Into Two Pigtails
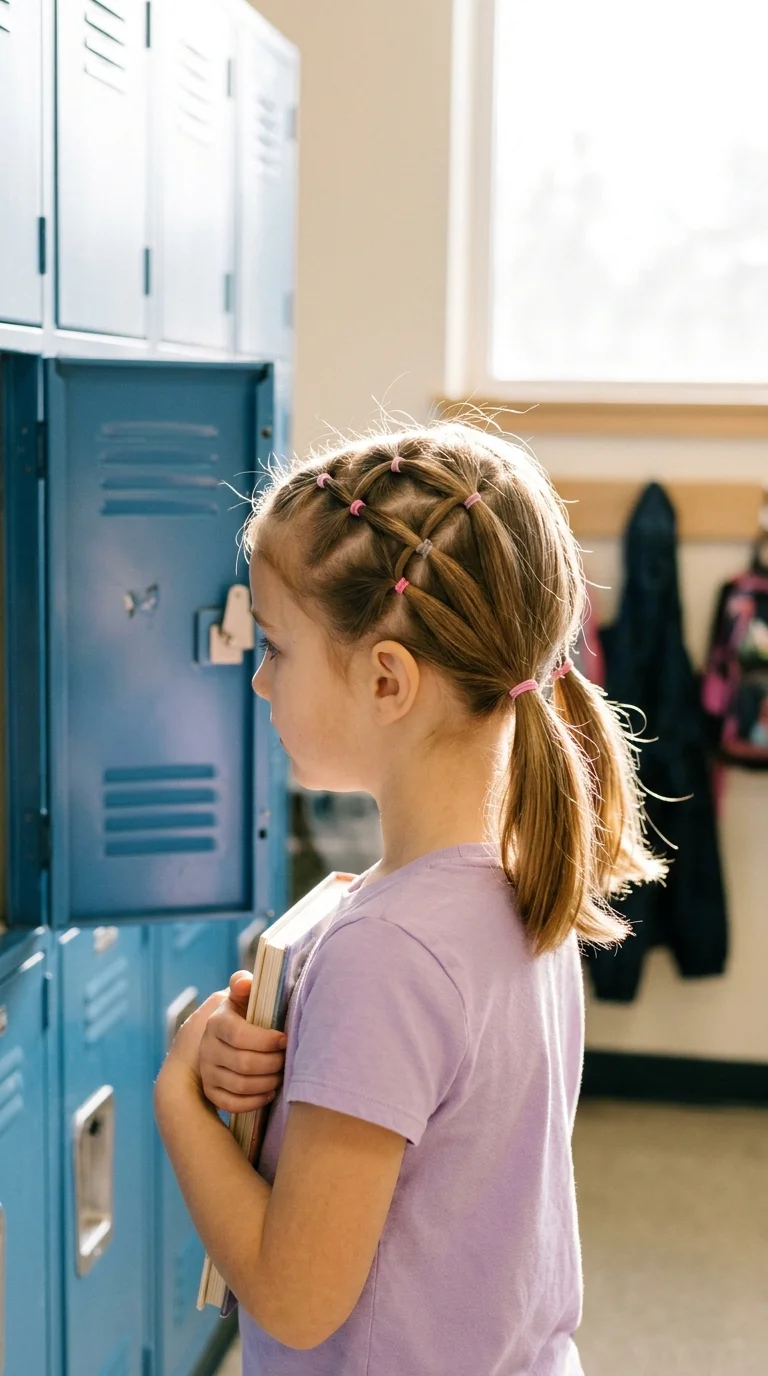
Start here. It is the style most parents learn first, and it teaches every move the rest of this list uses.
- Part the hair down the middle, then split each side into three small rows from front to back.
- Band each row into a tiny ponytail, so you end up with six little tails.
- Split the front tail in half and join each half with the tail behind it, crossing toward the other side.
- Band each new join, then gather the ends into two low pigtails.
The crossing is what makes the grid pattern. Keep each row about a finger wide so the X shapes look even.
Quick tip: wet the comb, not the whole head. Damp sections band cleaner and dry faster.
2. Bubble Ponytail That Survives Recess
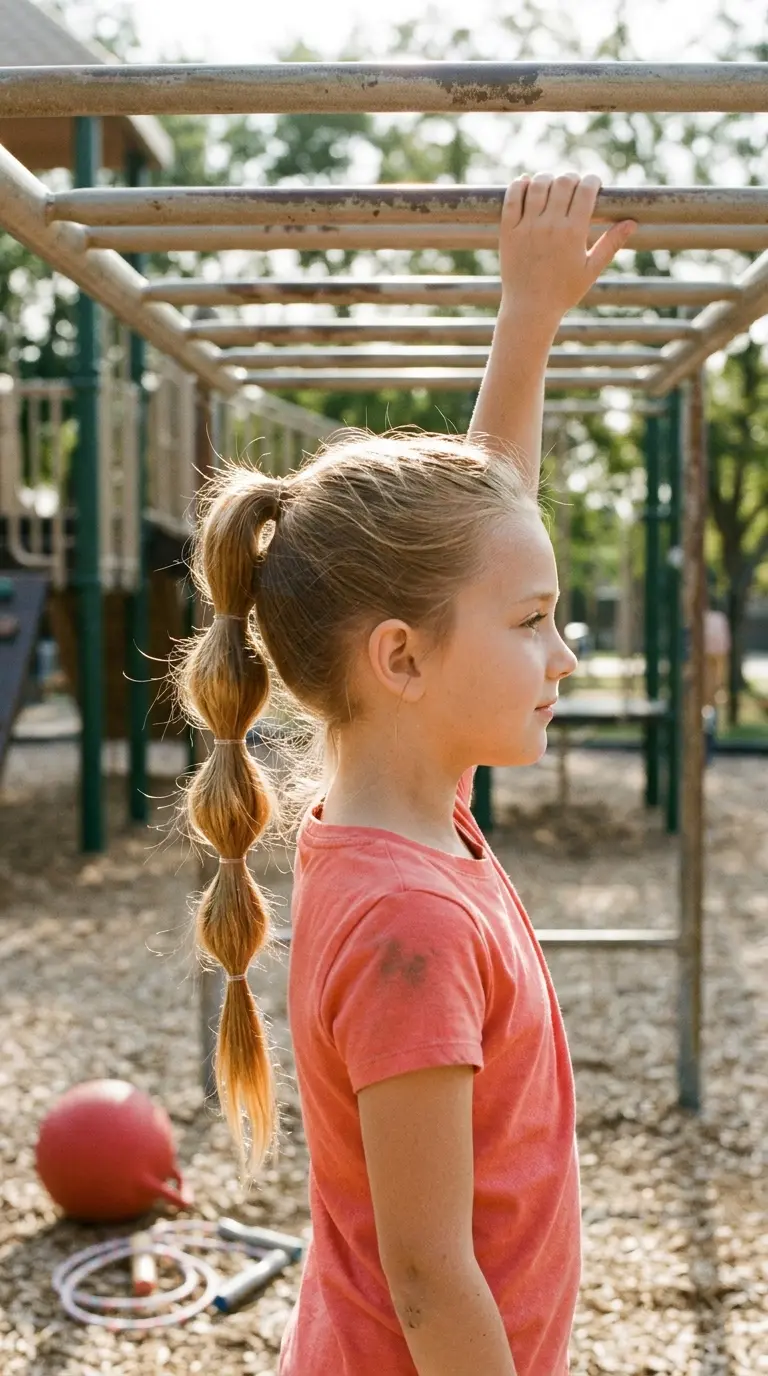
A plain ponytail swings and loosens with every run across the field. Add rubber bands down its length and each one acts like a small lock.
Tie a high ponytail with a sturdy elastic. Place small bands about two inches apart down the tail, then gently tug the hair between them so each part puffs into a round bubble.
- Fine hair: pull the bubbles open only a little, or they start to look thin.
- Thick hair: space the bands closer so each bubble stays neat.
- Long hair: stop a couple of inches above the ends for a soft little tail.
It holds up through tag, cartwheels, and the monkey bars, and it usually still looks round at pickup.
3. Rubber Band Headband Rows for Bangs in Her Eyes

Growing out bangs at school means a lot of hair in the eyes during spelling tests. These front rows fix that without a headband that slides off by recess.
Section a strip of hair about two inches deep along the hairline, from ear to ear. Split it into five small sections and band each one close to the scalp. Then join each tail with a little hair right behind it and band again, so the rows run back like stripes.
Leave the rest of the hair loose, or pull it into a low ponytail.
Small warning: band the first row a little loose at the hairline. The baby hairs there are delicate, and a tight band right at the edge pulls.
4. Topsy Tail Flip Ponytail

The usual mistake with a flip ponytail is pulling the band tight before the flip. Then there is no room to push the hair through.
Here is the better order:
- Make a low ponytail and slide the band down about an inch.
- Poke a finger above the band to open a small gap.
- Flip the tail up and through that gap.
- Tighten by splitting the tail and pulling the halves apart.
Repeat two or three more times down the tail with new bands for a twisty rope look. It takes under five minutes and reads like a braid from across the room.
5. Pull Through Braid for Kids Who Hate Braiding Time

Plenty of parents think a fancy braid needs nimble fingers and a child who sits still. This one only needs rubber bands.
Make a high ponytail. Split off two sections from the top, set one aside, and band the other. Bring the bottom section up through the middle and band it. Keep alternating, top and bottom, down the length.
Gently pull the loops wider as you go.
The result looks like a thick, puffy braid, but each piece is held by its own band. There is nothing to unravel, so it can often go a second day with a quick smooth at the top.
Best for kids with hair past the shoulders.
6. Half Up Rubber Band Web
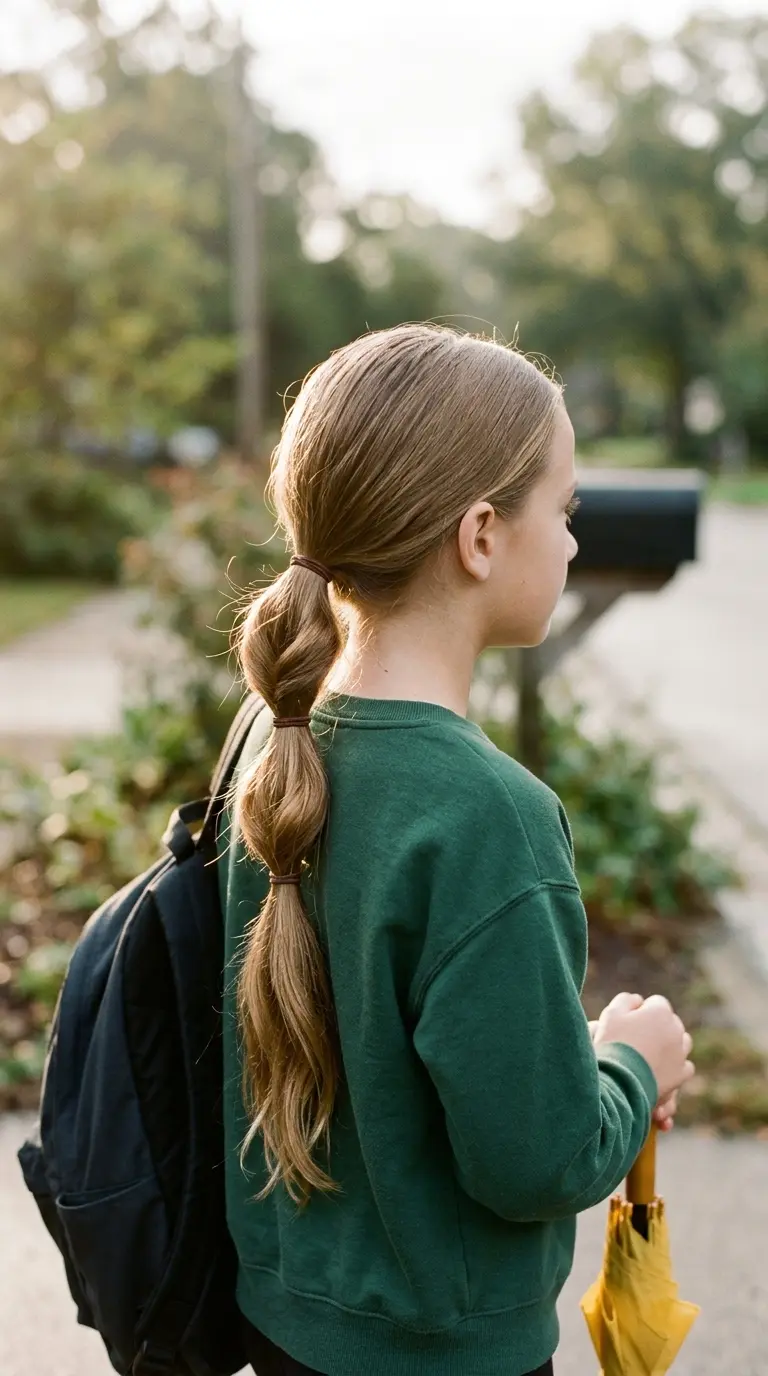
Look at the crown on this one: a little net of diamond shapes sitting on top of long, loose hair.
Take the top third of the hair only. Make three tiny ponytails across the front, then split each one and join neighboring halves into two new ponytails behind them. Join those two into one at the crown.
The rest of the hair stays down, which kids who like their hair long and swingy usually prefer.
Good for: picture day, class parties, and any morning when she announces that ponytails are boring.
7. Zigzag Part Banded Pigtails

Straight part or zigzag? Both hold the same way, but the zigzag hides a messy part and grows out more kindly between hair washes.
Draw the zigzag with the tail of a rattail comb, moving it left and right in small steps from forehead to nape. Make two low pigtails.
Then band each pigtail every inch or so down its length, without puffing the hair. This keeps the tails from tangling against a backpack all day.
A straight part looks crisp. A zigzag looks playful and forgives a wobbly hand at 7 a.m.
8. Mini Ponytails Into a Low Bun for Gym Day
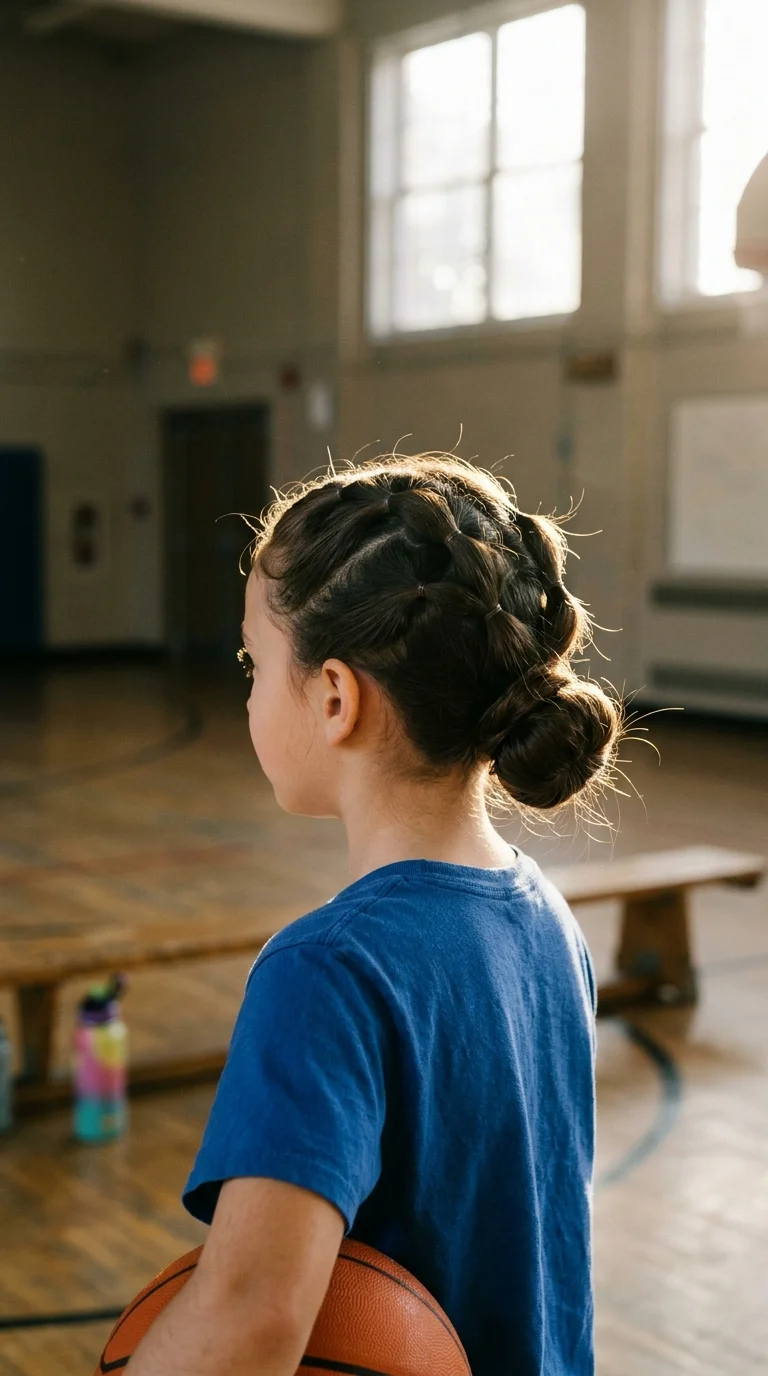
Gym class on Tuesday means dodgeball, relay races, and a ponytail that ends up sideways. A bun built on mini ponytails stays put.
Section the hair into four rows across the back of the head. Band each row into a small ponytail, then gather all four tails into one low ponytail at the nape. Twist that ponytail and wrap it into a bun, securing it with two more bands and a couple of bobby pins.
Because the rows anchor the hair first, the bun cannot drag the whole style down when she runs.
Smooth any flyaways with a dab of leave in conditioner on your fingertips.
Buy small elastics made for hair, such as polyband or soft silicone bands.
Rub a little conditioner on each band and roll it down the tail to take it out.
Snip stubborn bands with small blunt tip scissors, pointing away from the scalp.
Office rubber bands from the junk drawer. They grab and snap hair.
Yanking bands straight out of dry, tangled hair.
Wearing the same tight style night after night without a break.
9. Space Buns With Banded Sections

The rule here: band before you twist. Buns that start with sections underneath stay round instead of sliding down by lunch.
- Part the hair down the middle.
- On each side, make two small ponytails, one behind the other, and join them into one high ponytail.
- Twist each ponytail and coil it into a bun.
- Wrap a band around the base of each bun, then tuck the ends under.
It works on hair from shoulder length down. Shorter hair makes smaller buns, and honestly, the tiny ones get the most compliments in the classroom.
10. Sporty Rubber Band Mohawk Ponytails

Soccer parents know this one. It shows up at nearly every Saturday game for a reason.
Down the center of the head, make a line of four or five ponytails from the forehead to the nape. Then link them: take the first tail, add it to the second ponytail, and band again. Keep linking down the line.
The sides are brushed up into each ponytail, so nothing flaps into her face during a sprint or a corner kick.
It is snug, so check that no band pulls at the temples. If she winces, loosen that one before she leaves the house.
11. Heart Shaped Half Up Rubber Band Style
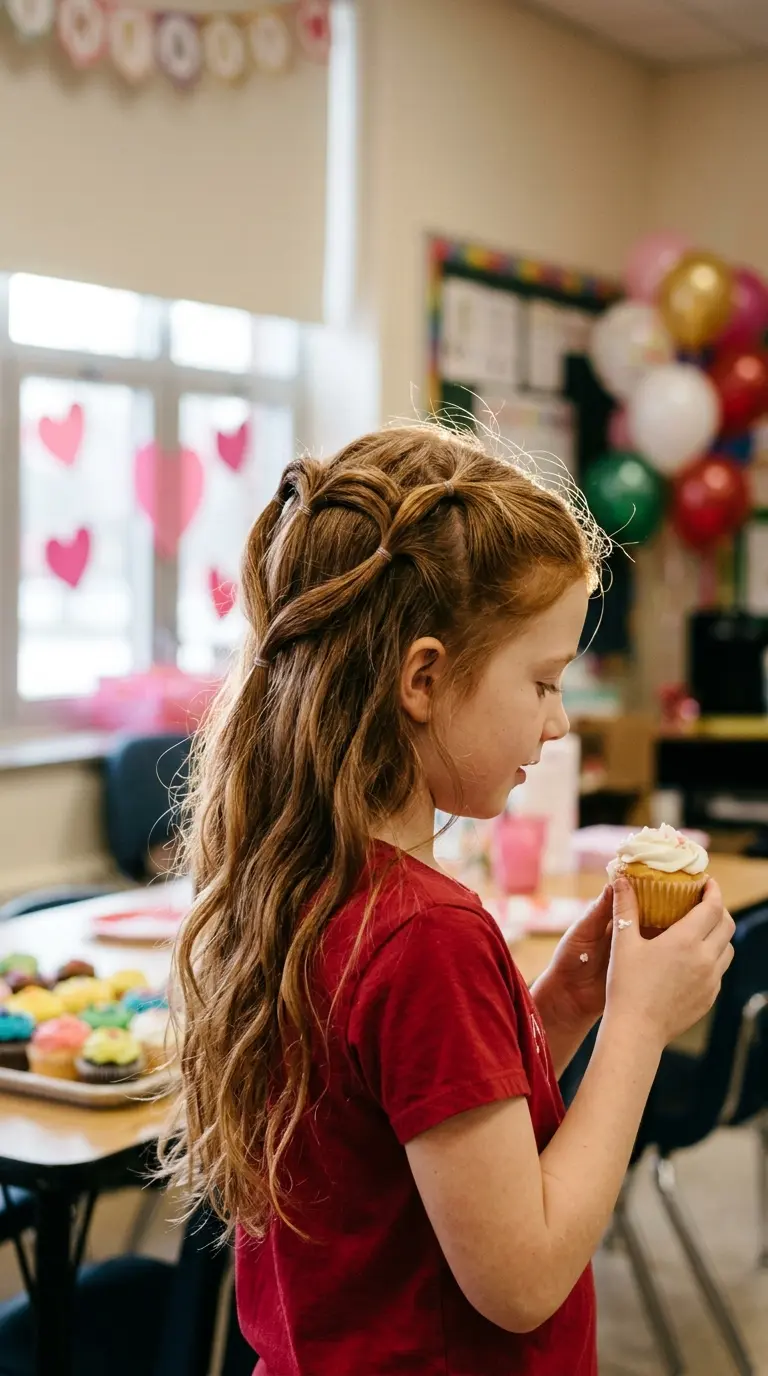
Valentine’s week, field trips, and birthdays all call for this one.
- Part off a section on each side of the top of the head, leaving the middle hair down.
- Band each section near the scalp, then a second time about an inch down.
- Bring both tails toward the back center, curving them outward first so they bow like the top of a heart.
- Join the tails with one band at the point of the heart.
Pull the curves gently with your fingertips to round out the shape. Hair at least to the shoulders gives the cleanest heart.
12. Diamond Net Low Ponytail
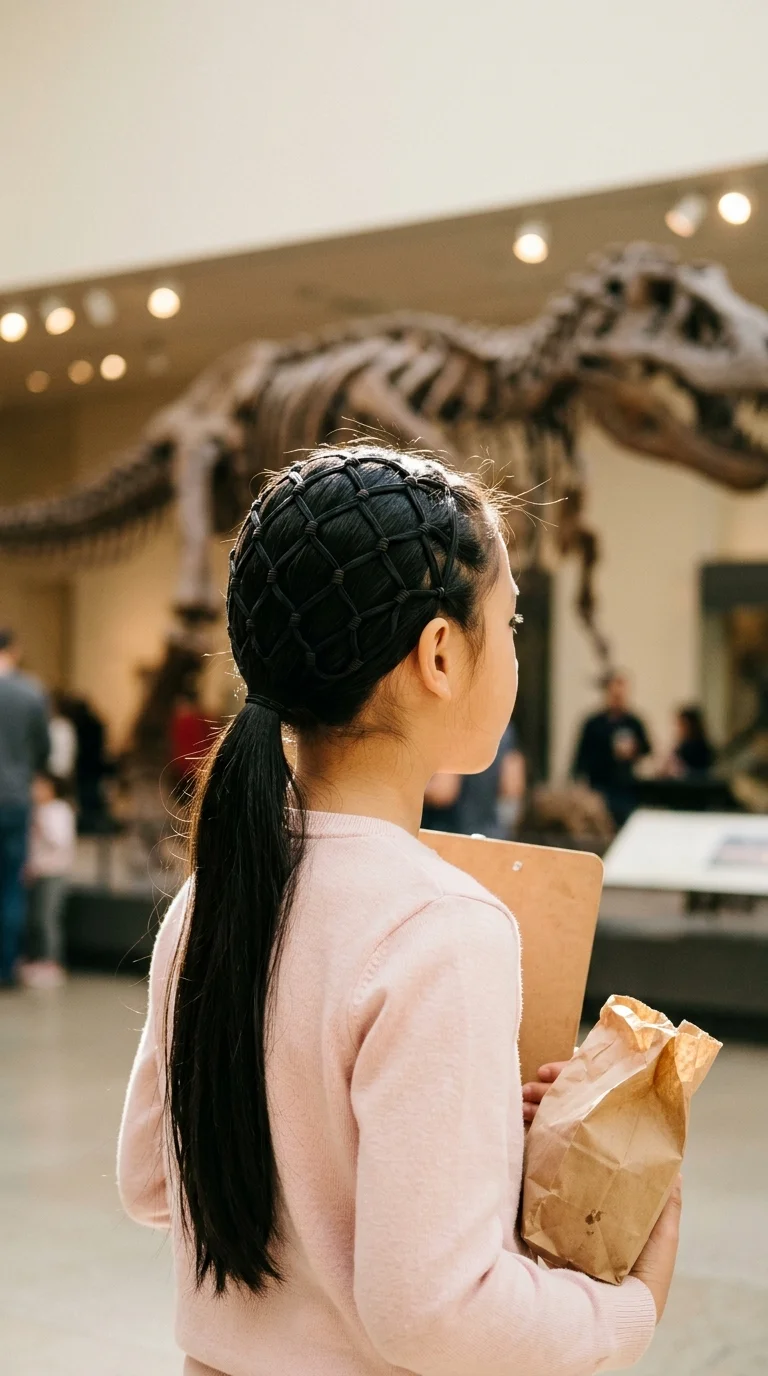
This full head net looks like a weekend project, but it is the same criss cross move from the first style, repeated.
Make three rows of small ponytails across the head, four in each row. Split every tail, cross the halves into the row behind, and band. Gather everything into a low ponytail.
The common mistake is making the first row too big. Big sections mean fewer diamonds and a bulky ponytail. Aim for sections about the size of a postage stamp.
Set up a cartoon and budget about 20 minutes. Many kids can sleep in it with a satin scarf and wear it again the next morning.
13. Twisted Side Ponytail With Rubber Bands
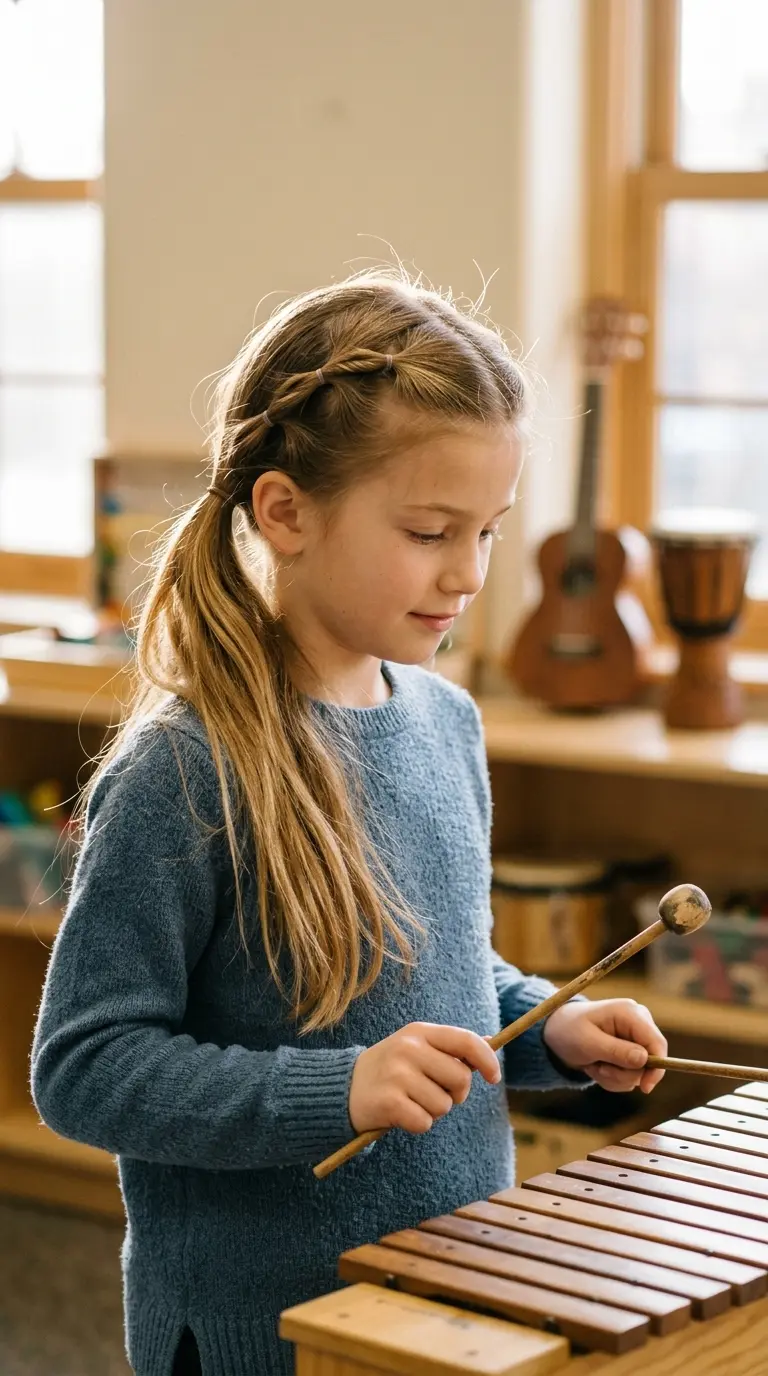
Twisted sections hide the bumps a regular side ponytail can show, so it looks tidy even on a rushed morning.
Make three small ponytails in a curved line from the far side of the part down toward the opposite ear. Twist each tail away from the face two times, then add it to the next ponytail down and band it. The last band sits just behind the ear.
Finish with a scrunchie over the final band if she wants it softer.
It sits off the back of the head, which helps kids who lean back in their chair all day.
14. Rubber Band Halo Into a Top Knot
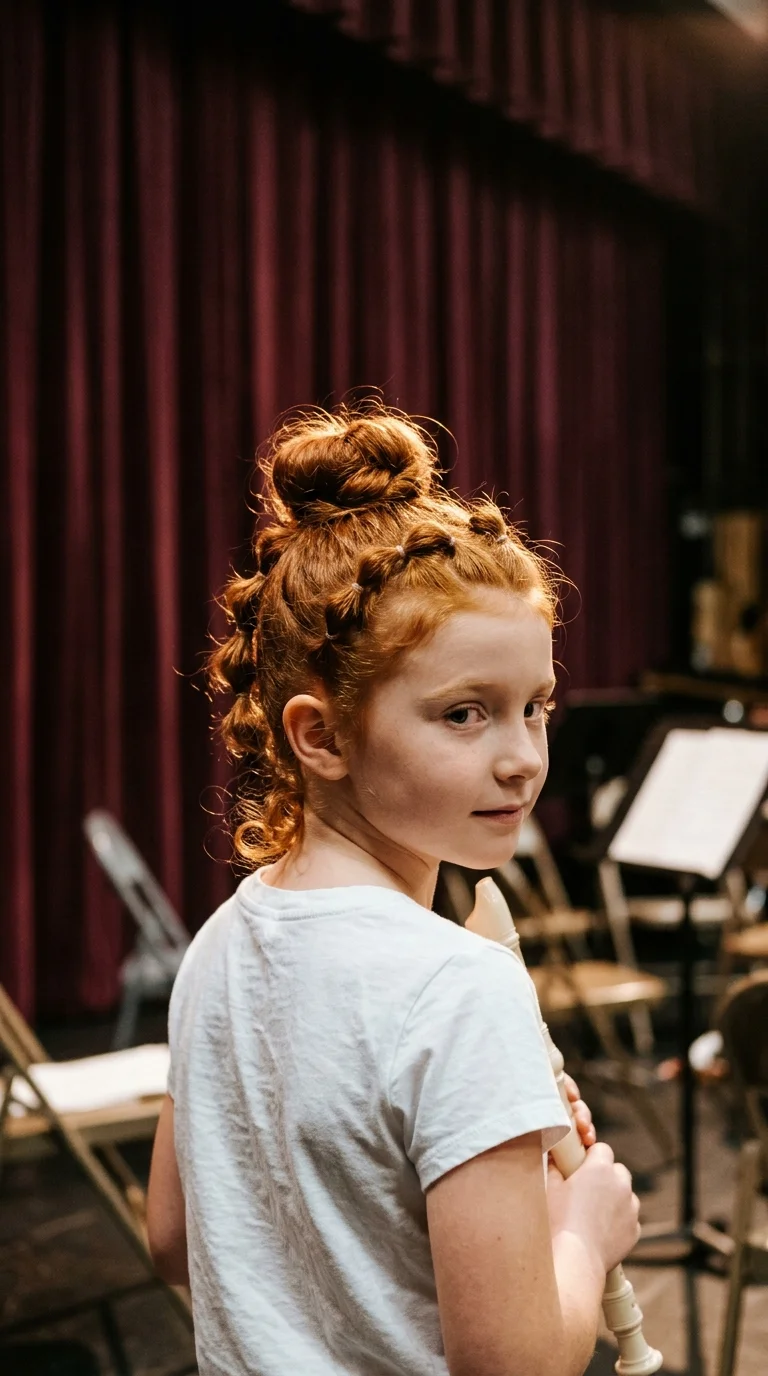
Hot classrooms and long hair are a sweaty mix in September. This halo lifts every strand off her neck.
Make a ring of six or seven small ponytails around the head, spaced like the numbers on a clock. Point each tail toward the crown and band them all into one center ponytail there. Twist that ponytail into a top knot and band it once more.
- Keep the ring about two inches in from the hairline so it does not pull.
- Use clear bands around the face and a bright one on the bun.
Kids with thick hair get the most out of this one.
15. Tiny Rubber Band Sections for Short Bobs

Short hair often gets left out of rubber band styles, yet a chin length bob has more options than most people expect.
Take only the top layer. Make four tiny ponytails across the crown in a row, then join each pair into two ponytails behind them. Let the ends stick out a little. On short hair, those little tufts are the cute part.
Leave the bottom layer loose and smooth.
Quick tip: buy the smallest elastics you can find for this one. Regular bands slide right off a two inch tail.
16. Two Ponytails Twisted Into a Rope
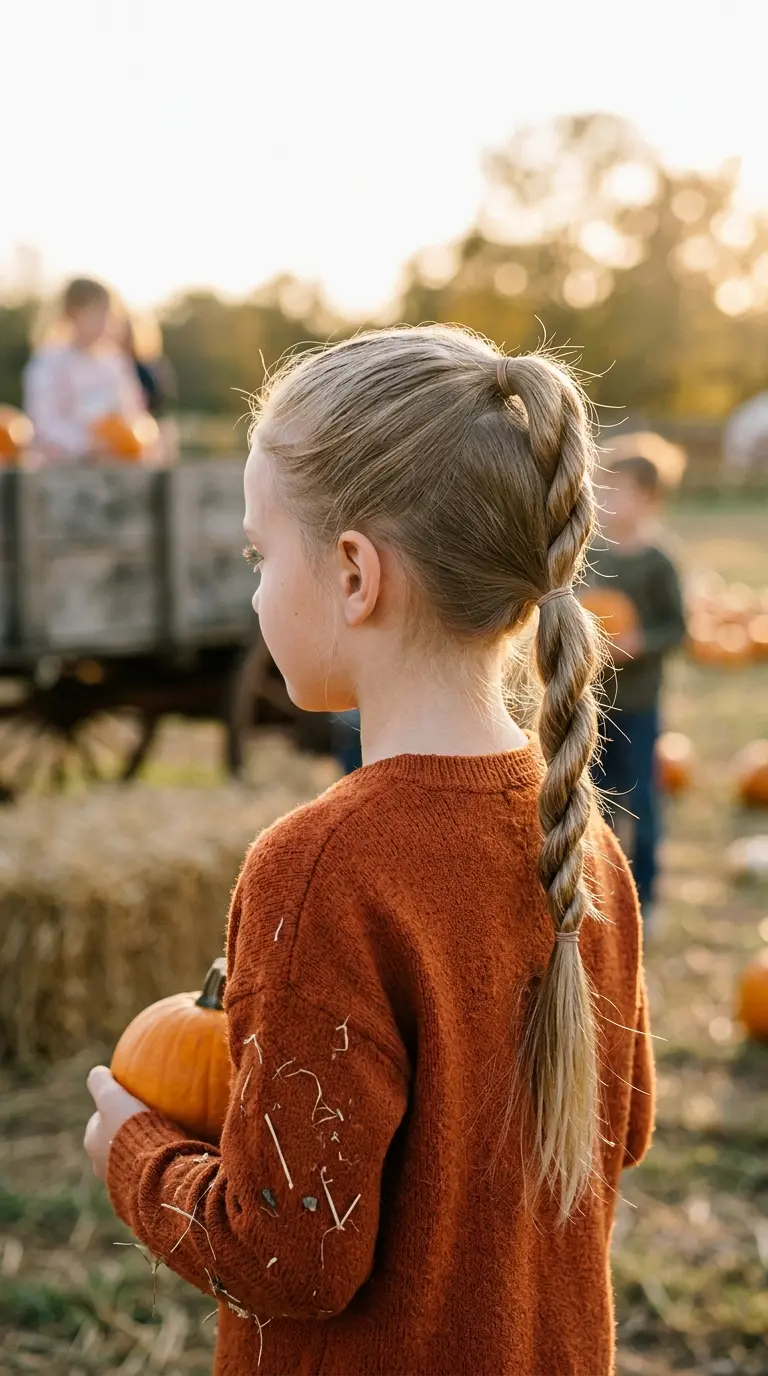
Fine, slippery hair is the hardest kind to keep in place. Twisting it into a rope gives the strands something to grip.
- Make a ponytail at the crown and a second one right under it at the nape.
- Band each one again about three inches down.
- Twist both tails to the right, then wrap them around each other to the left.
- Band the ends twice, an inch apart.
The opposite twists lock against each other, so the rope keeps its shape after a long bus ride.
Mist with a little water before twisting if the hair is very fine.
A tub of tiny elastics and a rattail comb can cover a whole school week. Start with the criss cross or the bubble ponytail until your hands know the motions, then save the nets and hearts for a slow Sunday night.
The real win with rubber band hairstyles for school is how little they ask once they are in. No fixing at lunch, no hair tie lost on the bus, and far less frizz at pickup.
Take the bands out gently with a little conditioner, and mix looser styles in between the tight ones.
Save this list for the next time the morning rush catches you with a brush in one hand and a lunchbox in the other.