
You blow-dried it flat, stepped outside, and the air turned it into a cloud by the time you reached the bus stop. Humid weather grabs your hair, swells the strands, and punishes anything loose. Most tips tell you to load up on serum and hope. That helps for a few minutes, and then the drizzle wins.
The smarter plan is to choose a shape that works with the weather. Braids lock sections in place. Low buns keep the ends away from damp air. A wrap or a clip keeps your hairline under control even when the sky does not cooperate.
These rainy day hairstyles are for anyone whose hair either frizzes or falls flat the second it gets wet. Most take under ten minutes, and many only need a few pins or one good elastic. Pick the one that matches your hair length and the forecast, then save the others for the next gray morning.
1. Tight Low Braid With a Wrapped Elastic
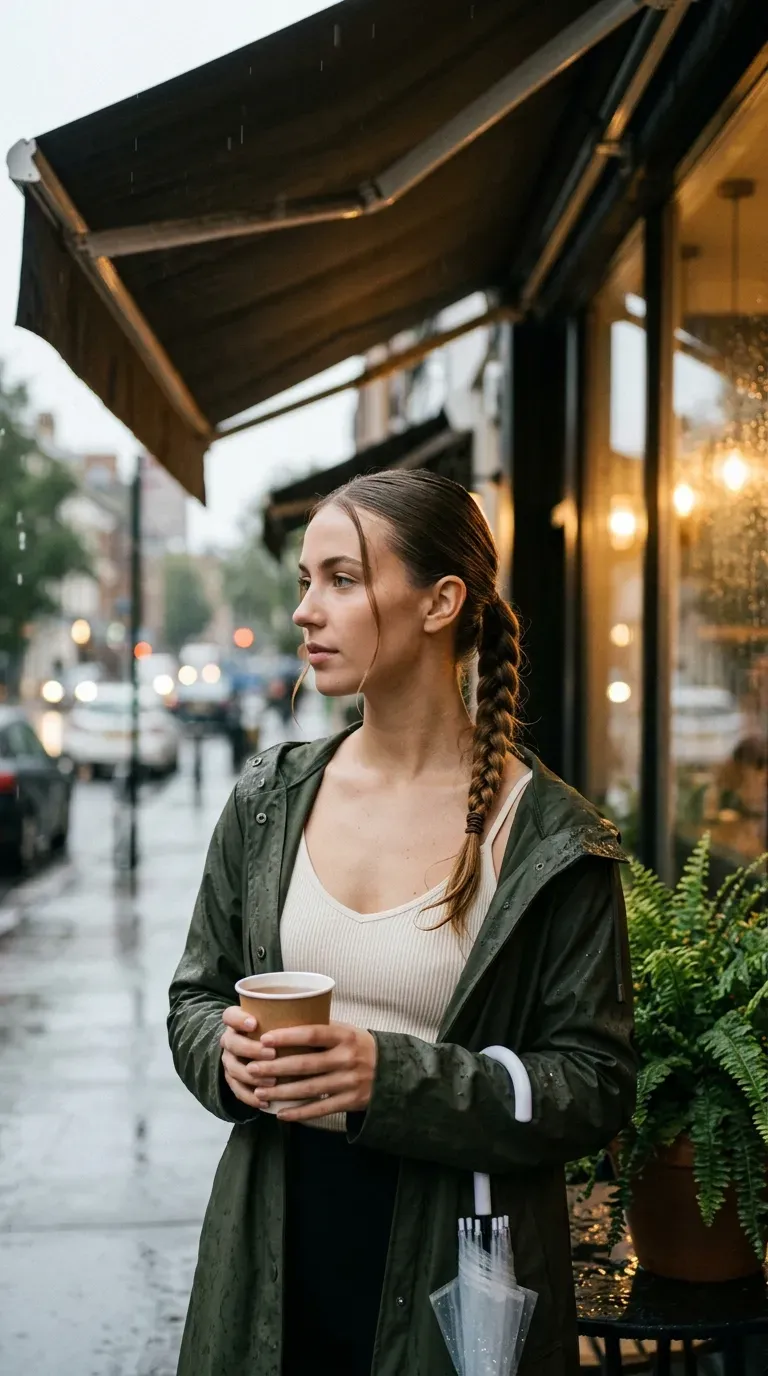
A braid is the simplest answer to frizz because it gives every strand a neighbor to hold on to.
Smooth a little leave-in cream through your hair, part it where you normally do, and braid from the nape down. Keep the plait snug, not painful.
- Wrap a thin strand around the elastic so no plastic shows.
- Rub a pinch of cream over the finished braid to flatten loose hairs.
- Pull the edges out only a little. Too much and the humidity takes over.
Quick tip: Braid your hair while it is fully dry. Damp hair keeps swelling after you tie it.
2. Slick Low Bun With Face Framing Strands
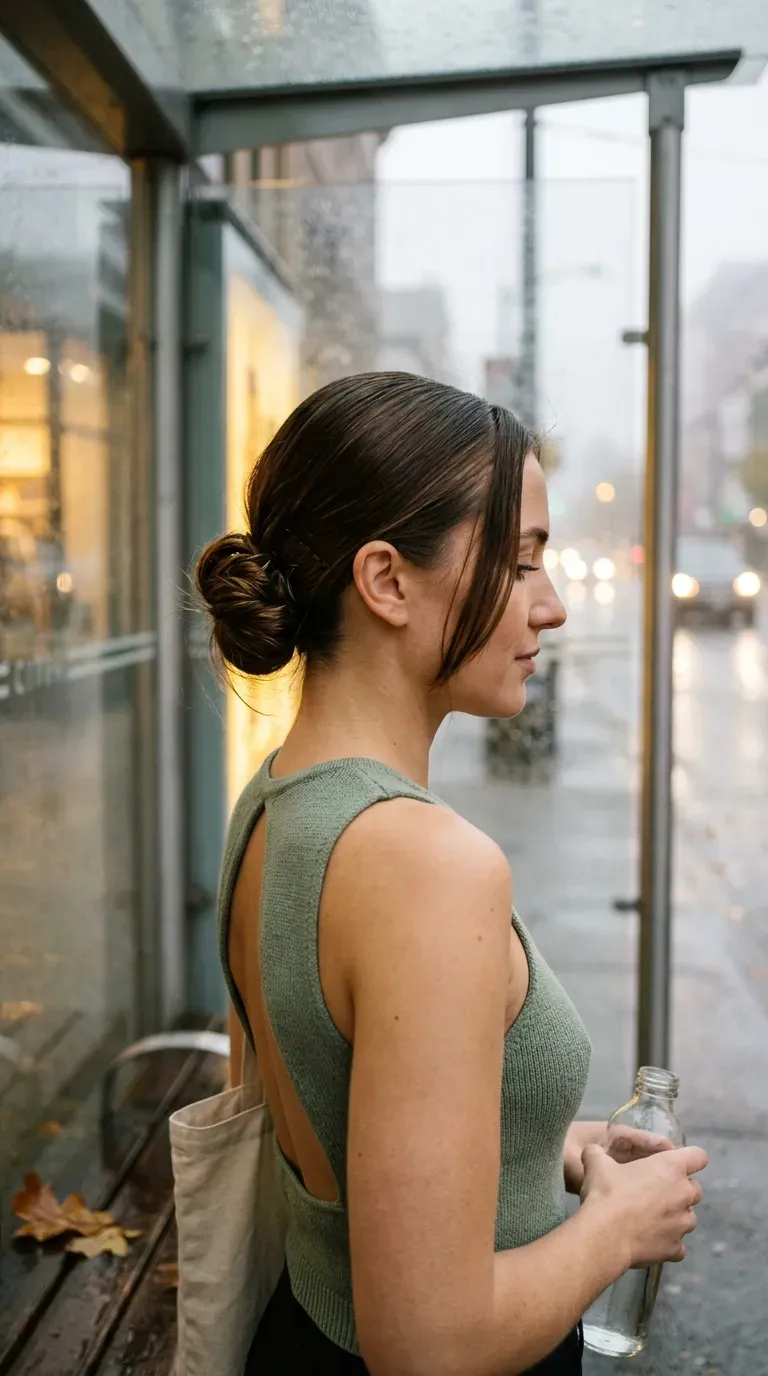
Frizz needs room to grow. A tight low bun takes that room away.
Brush your hair back with a small amount of styling cream, gather it at the nape, and twist it into a flat coil. Pin it in a circle, then press the surface smooth with your palm. Leave two thin pieces in front.
Those front strands look soft in the rain, and if they frizz a little, it reads as relaxed instead of messy.
Works best for shoulder length hair and longer.
3. Pinned Back Front Twists With a Loose Back

Wet air hits the front of your hair first, so start the style there.
Take a thin section from each temple, twist it away from your face, and pin it at the back of your head with a bobby pin. The rest of your hair stays down.
- Rub a little anti frizz cream between your palms.
- Smooth it over the twists.
- Pin them just above ear level.
<div style="display:flex; flex-wrap:wrap; gap:14px; margin:26px 0;"> <div style="flex:1 1 220px; background:#f3f1ee; border-radius:12px; padding:18px 20px; box-sizing:border-box;"> <div style="font-weight:800; color:#8a8a8a; font-size:13px; letter-spacing:1px; margin-bottom:8px;">BEFORE</div> <p style="margin:0; color:#333333; font-size:15px; line-height:1.6;">Loose hair swells around the face and the part opens up in the damp air.</p> </div> <div style="flex:1 1 220px; background:#EAF2EF; border:2px solid #3F7A6E; border-radius:12px; padding:18px 20px; box-sizing:border-box;"> <div style="font-weight:800; color:#2B5A50; font-size:13px; letter-spacing:1px; margin-bottom:8px;">AFTER ✨</div> <p style="margin:0; color:#333333; font-size:15px; line-height:1.6;">Twists hold the front in place and the loose back looks like it was meant to move.</p> </div> </div>4. Dutch Braid Pigtails for Heavy Humidity

Think of Dutch braids as a roof over your roots.
Part down the middle, start each braid at the front hairline, and cross the strands under, so the plait sits on top. Add small sections as you go and finish with an elastic.
- Spritz your hands with water, not your hair.
- Keep the sections small for a flatter braid.
- Tug the edges only after the braid is secure.
Good for long or medium hair that frizzes at the crown.
5. Claw Clip Twist Pulled Up High
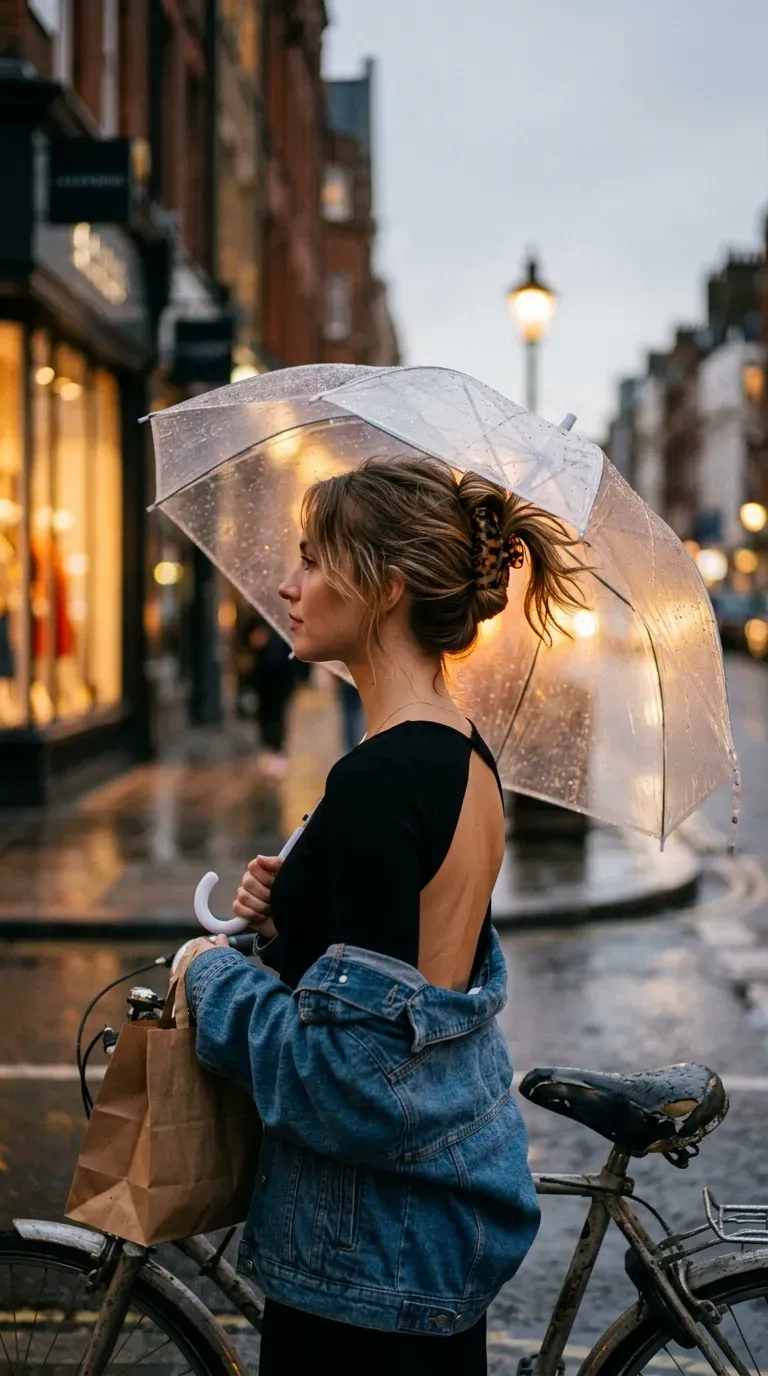
The fastest rainy day fix is already in your bag.
Twist your hair up from the nape, fold the ends toward the crown, and set the clip at the highest point it can grip. Done in under a minute.
Ends are the part that frizzes most in humid weather, and the clip tucks them out of reach.
- Pick a clip with wide teeth for thick hair.
- Choose a matte finish so the clip does not slide.
Quick tip: Smooth anti frizz cream over the outside of the twist before you clip.
6. Sleek Ponytail With a Wrapped Base

The elastic is the weak point of any ponytail.
On humid days, a loose hold lets the sides puff out and the base slips down. Fix both with a snug mid ponytail and a wrap.
- Brush the hair back with a boar bristle brush.
- Tie it at the middle of the back of your head.
- Wind a thin strand around the elastic and pin the end under.
<div style="display:flex; flex-wrap:wrap; gap:0; margin:26px 0; border:1px solid #3F7A6E; border-radius:12px; overflow:hidden;"> <div style="flex:1 1 120px; padding:16px; text-align:center; box-sizing:border-box; border-right:1px solid #EAF2EF;"> <div style="font-size:22px;">⏱️</div> <div style="font-weight:700; color:#2B5A50; font-size:15px; margin-top:4px;">Time</div> <div style="color:#333333; font-size:14px;">five minutes</div> </div> <div style="flex:1 1 120px; padding:16px; text-align:center; box-sizing:border-box; border-right:1px solid #EAF2EF;"> <div style="font-size:22px;">🧰</div> <div style="font-weight:700; color:#2B5A50; font-size:15px; margin-top:4px;">Skill</div> <div style="color:#333333; font-size:14px;">beginner</div> </div> <div style="flex:1 1 120px; padding:16px; text-align:center; box-sizing:border-box;"> <div style="font-size:22px;">💇♀️</div> <div style="font-weight:700; color:#2B5A50; font-size:15px; margin-top:4px;">Best for</div> <div style="color:#333333; font-size:14px;">straight and wavy hair</div> </div> </div>7. Messy Bun Under a Silk Scarf

Nobody asks about your frizz when there is a scarf.
Fold a small silk scarf into a triangle, lay it over your hairline, and knot it at the nape. Then pile the rest of your hair into a bun on top.
Silk resists moisture better than cotton, and the print pulls the eye away from stray hairs.
- Fold it into a thick strip for a headband look.
- Pick a print over a solid color.
8. Half Up Top Knot on Wavy Hair

Naturally wavy hair gets frizzy when you fight it. This style lets it do its thing.
Gather the top half of your hair at the crown and twist it into a small knot. Leave the bottom half loose, and scrunch a little curl cream through the waves.
The knot keeps the front off your face, and the waves clump together instead of puffing out.
Watch out: Brushing dry waves is the quickest way to get a halo of frizz. Use your fingers.
9. Fishtail Braid Over One Shoulder
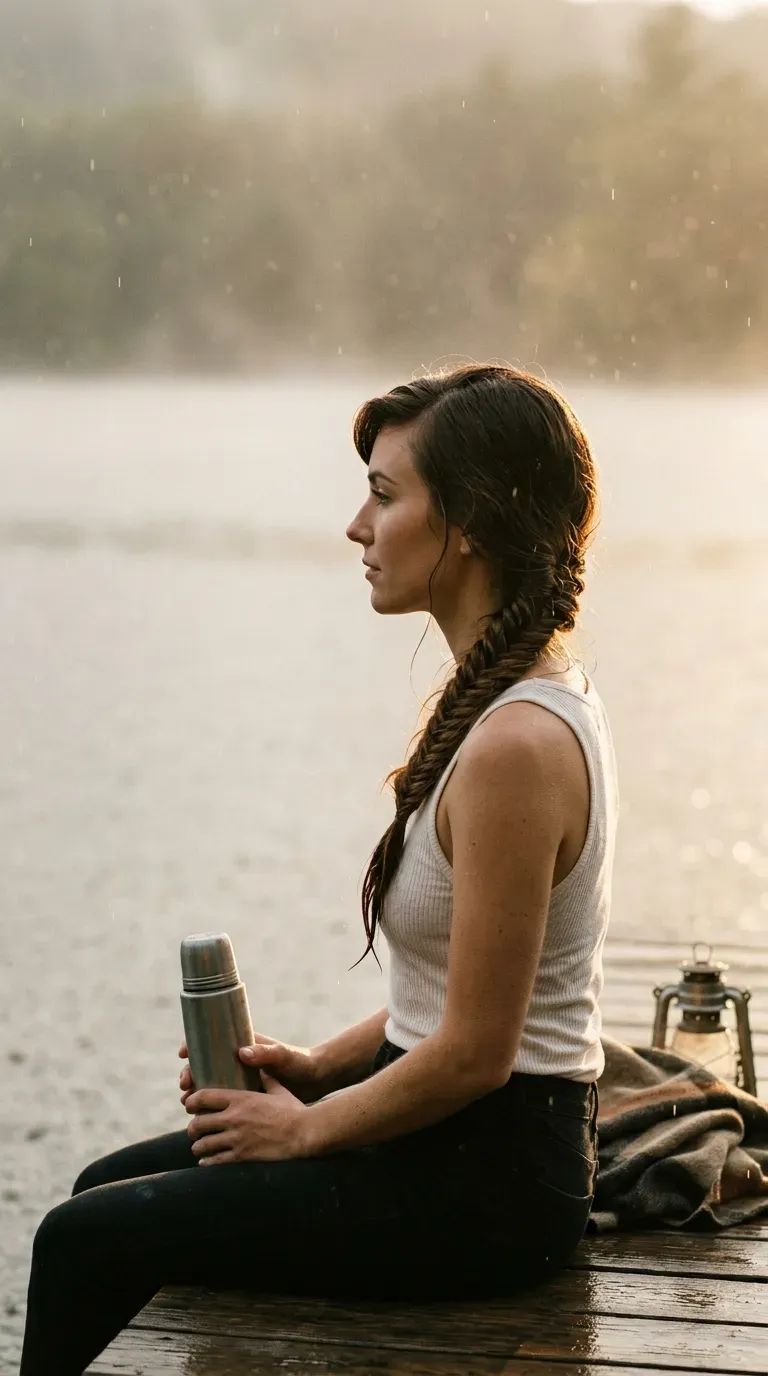
It is 7:50, the forecast says showers, and you have one free hand.
Part deep, gather everything over one shoulder, and split the hair into two halves. Take a tiny strand from the outside of one half and cross it over to the other, then repeat on the opposite side until you run out of length.
The crossing strands lock the surface down in many small places, so the braid keeps its shape in damp air. Finish with a clear elastic, then widen the sides with your fingertips.
<div style="display:flex; flex-wrap:wrap; gap:14px; margin:26px 0;"> <div style="flex:1 1 220px; background:#EAF2EF; border-radius:12px; padding:18px 20px; box-sizing:border-box;"> <div style="font-weight:800; color:#2B5A50; font-size:15px; margin-bottom:10px;">✅ Do this</div> <p style="margin:0 0 6px; color:#333333; font-size:15px; line-height:1.55;">Use tiny sections for a braid that holds its shape.</p> <p style="margin:0; color:#333333; font-size:15px; line-height:1.55;">Finish with a clear elastic that blends in.</p> </div> <div style="flex:1 1 220px; background:#f6efee; border-radius:12px; padding:18px 20px; box-sizing:border-box;"> <div style="font-weight:800; color:#9a4a3f; font-size:15px; margin-bottom:10px;">🚫 Skip this</div> <p style="margin:0 0 6px; color:#333333; font-size:15px; line-height:1.55;">Braiding damp hair that will keep swelling.</p> <p style="margin:0; color:#333333; font-size:15px; line-height:1.55;">Pulling the braid too wide before the rain hits.</p> </div> </div>10. Rope Twist Ponytail

Two strands, no braiding skills needed.
- Make a high or mid ponytail and tie it tightly.
- Split the ponytail into two equal halves.
- Twist each half to the right, then wrap the two halves around each other to the left.
- Secure with a small elastic and tug gently to loosen.
The opposing twists lock each other, so the rope stays tight when the air gets damp. Run a pinch of cream over the surface to calm the flyaways.
11. Slicked Back Wet Look Ponytail

Why fight the damp when you can style it?
A wet look ponytail turns humidity into a finish. Comb a small amount of firm gel through dry hair, brush it straight back, and tie it high. Smooth the flyaways with a clean toothbrush.
- Use gel, not a spray.
- Brush from the hairline to the crown in one direction.
- Hide the elastic with a quick wrap.
Works best on straight to wavy hair. Curly textures need more product for the same slick finish.
12. Low Twisted Chignon With Pearl Pins

The evening plan is still on, even if the sky is not.
Brush your hair back loosely, twist it into a rope at the nape, and coil it into a low chignon. Pin through the coil from both sides so it sits flat against your neck.
A low shape keeps the long strands away from the humid air around your face. Pearl pins add a finished detail without extra effort.
Quick tip: Slide each pin in against the grain of the coil. It grips much better.
13. Bandana Tied Half Up

A bandana covers the front hairline, where humidity does its first damage.
Fold it into a triangle, lay it over the hair, and tie it at the nape. Pull the top section back and secure it in a small clip.
- Choose a pattern over a solid color, since prints hide stray hairs.
- Fold it into a strip for a thinner headband look.
<div style="background:#3F7A6E; border-radius:12px; padding:22px 24px; margin:26px 0; box-sizing:border-box;"> <div style="font-size:13px; letter-spacing:1px; color:#ffffff; opacity:0.85; font-weight:700; margin-bottom:6px;">THE ONE THING TO REMEMBER</div> <p style="margin:0; color:#ffffff; font-size:clamp(16px,2.6vw,19px); line-height:1.55; font-weight:600;">Control the front hairline first. The rest of your hair can move a little and still look styled.</p> </div>14. Double Space Buns With Crown Texture
Fine hair goes flat in the rain, and space buns give it somewhere to go.
Part the hair down the center, then pull each side into a bun at the high point of your head. Tease the crown with your fingertips first, so the roots stand up instead of lying down. Wrap and pin each bun.
Pull a few front strands loose to soften the part.
Watch out: Buns placed too low look sleepy. Higher placement looks intentional.
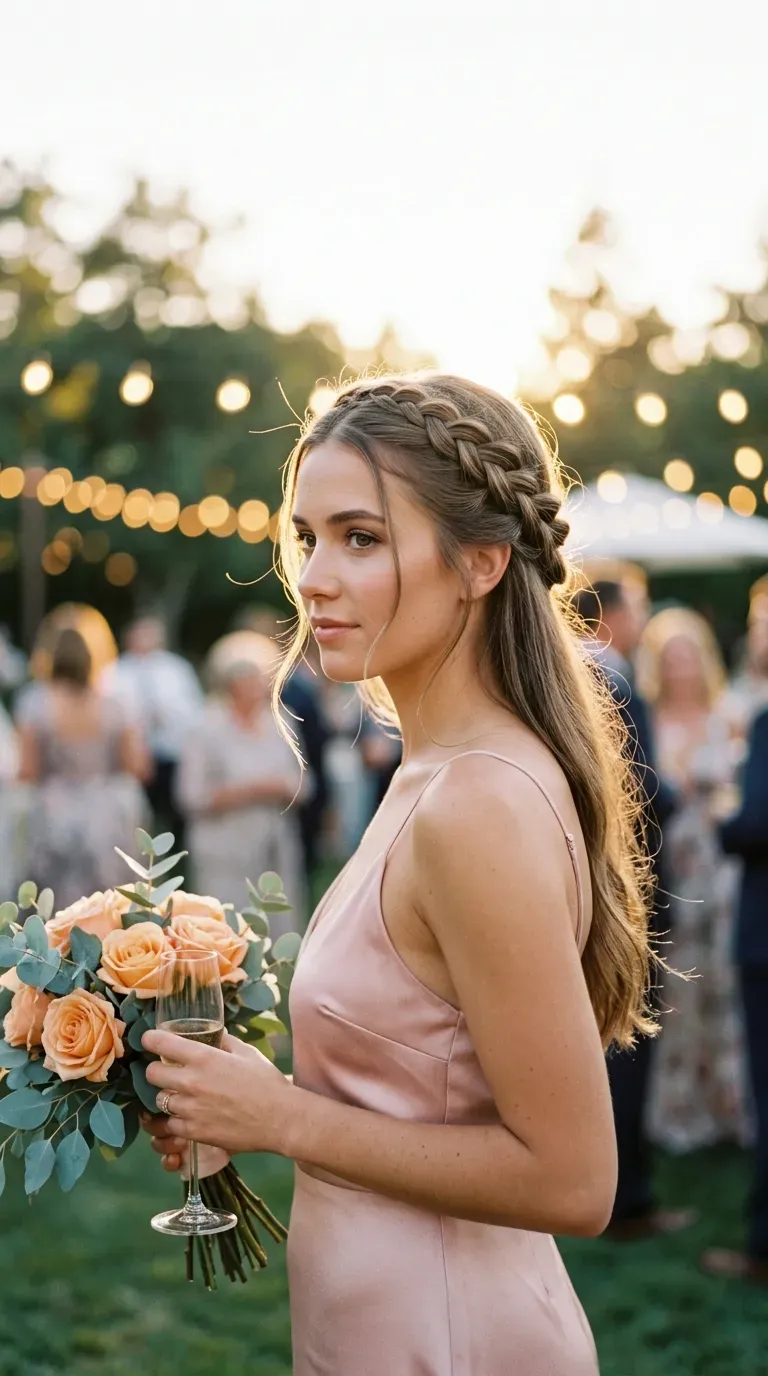
15. Braided Crown That Hides Frizzy Roots
[[IMAGE: h2=”15. Braided Crown That Hides Frizzy Roots” filename=”braided-crown-frizzy-roots-garden-party” alt=”Three quarter view of a braided crown hairstyle at an evening garden party” prompt=”A vertical 2:3 Pinterest style photo of a woman in a three quarter front side view at an evening garden party, her head turned slightly toward her shoulder so the smooth front hairline, the center part, and the braid wrapping across the top of her head are visible while the braid tails are pinned low at the back with the long length falling down her back, wearing a blush satin slip dress with thin straps, holding a champagne flute and a bouquet of peach roses with eucalyptus, warm golden sun and string lights behind her rim lighting the hair, shot on a Sony A7R IV with an 85mm lens at f/1.8, ISO 200, eye level with the hairstyle in the upper center showing both the front braid and the back length and cropped at the waist with open space at the top for pin text, romantic candid editorial aesthetic with warm tones and dreamy bokeh from softly blurred guests, a few flyaways catching the light, a slightly loose strand at the temple, subtle film grain, photorealistic, ultra-detailed, editorial quality, 4K resolution”]]
Frizz starts at the roots and the hairline, so cover both.
Part your hair down the middle and braid each side behind the ear. Bring both braids up and across the top of your head like a headband, then pin the ends under the opposite braid.
- Braid each side loosely, not tight.
- Cross them over the crown.
- Pin every few inches with matching bobby pins.
The crown covers the area that swells most, and the rest of your hair stays down or can be pulled into a low tail.
Conclusion
Humid weather does not have to cancel your plans. It needs a shape that holds. A tight braid, a flat bun, a bandana, or a claw clip each keeps your hair from reaching for the damp air. Start with the style that matches your hair length, and keep a few bobby pins and a small anti frizz cream in your bag. The more you try these rainy day hairstyles, the less you will check the forecast with dread. Your hair stays in place, and you get to enjoy the weather.
Save this list to your hair board so the next gray morning already has a plan.