
Shoulder length hair has a habit of going flat by lunchtime. You leave the salon with bounce, and a week later it hangs in one heavy shape that flips out at the shoulders for no reason.
Layers fix that, but only when they match your hair. Fine hair needs a different plan than thick hair. Waves need room to spring, and straight hair needs soft edges so it does not look chopped. A cut that flatters your sister can fall flat on you. That is why the best medium length haircuts with layers are never one size fits all.
Below are 30 cuts, some soft and subtle, some big and shaggy. Each one tells you who it suits, what to ask your stylist for, and how to style it in a few minutes. Pick by hair texture first, then by how much time you want to spend each morning. Save your favorites and screenshot your top two for the salon.
1. Soft Face Framing Layers On A Collarbone Cut

Hair that stops at the collarbone often sits like one solid block. The fix is two or three soft pieces that start at the chin and blend back into the length, so your face gets a frame without losing the shape.
Ask your stylist for:
- Front pieces cut around chin and lip level
- Long layers through the back, only a little shorter than the rest
- Ends left slightly soft, never razor sharp
Blow dry the front sections away from your face with a round brush and let the back fall as it wants. This cut behaves best on straight to slightly wavy hair.
2. Hidden Layers Under A Long Bob

The long bob keeps its clean outline while the weight comes out underneath. Your stylist removes length from the inside layers, so the top looks solid and the bottom moves.
It is the layered cut for people who say they hate layers. You will not see the steps, only feel how light the hair is.
- Ask for hidden or internal layers
- Keep the outer length as one blunt line
- Skip thinning shears near the ends
Quick tip: If your ends feel puffy a few weeks after a trim, say so. It usually means the weight sits in the wrong place.
3. Shaggy Medium Cut With Choppy Ends

Choppy ends and short crown layers give a shag its messy, lived in outline. The top sits a few inches shorter than the bottom, so the hair stacks and flicks instead of dropping straight down.
Style it in three steps:
- Rough dry with your fingers until the hair is almost dry.
- Twist small sections around two fingers and spritz with sea salt spray.
- Rub a pea sized bit of paste between your palms and tousle the ends.
Best on straight or wavy hair with some body. Very fine hair can look sparse here, so ask for longer crown layers.
4. Curtain Bangs With Shoulder Length Layers

Curtain bangs do half the styling for you. They part in the middle and sweep to each side, then blend straight into the first layer near your cheekbones, so a grown out cut never looks stuck mid transition.
Keep the layers underneath long and loose so the bangs do not look like a separate haircut.
- Ask for bangs that start around the arch of your brow
- Blend them into pieces that hit the cheekbone
- Book quick bang trims, since they get in your eyes fast
Watch your cowlicks. A strong one at the hairline will pull the bangs apart in the wrong place.
5. Butterfly Cut At Shoulder Length

Most people think the butterfly cut needs hair past the shoulder blades. It does not.
At shoulder length, the short face framing layers sit around the chin while the longer back layers keep a soft rounded shape. The result looks like two haircuts blended, with volume near the face and clean length behind.
- Ask for the shortest layers to start at the chin
- Keep the back layers long and blended
- Blow dry the front layers outward with a round brush
Straight or wavy hair that falls flat at the roots gets the biggest lift from this one.
6. Longer Front Pieces For Fine Hair

Tiny rule: keep the layers long when the hair is thin. Short layers on fine hair thin out the ends and leave the bottom see through.
Keep the bottom edge full and cut only the front pieces longer and softer, landing around the collarbone. That puts movement near your face and leaves the bulk where it counts.
- Ask for long, minimal layers
- Keep the perimeter blunt
- Cut a few face framing pieces, not a whole shelf
A volumizing mousse at the roots will do more here than any extra layer.
7. Wavy Shag With A Textured Crown

The usual mistake with wavy shags is cutting the crown too short. The hair springs up and sits like a helmet.
A good textured crown layer is only a little shorter than the layer under it, so waves stack instead of puff. Dry with a diffuser on low heat and leave it alone until it sets.
- Ask for the cut to follow your wave pattern
- Keep the top layers soft, not stepped
- Let the face framing pieces curl on their own
Touch it too much while it dries and frizz wins.
8. Wolf Cut Lite For Beginners

The full wolf cut has very short crown layers and a stringy tail. The lite version softens both. Crown layers sit around cheek level, and the back keeps enough length to look tidy at work.
- Full version: strong contrast, needs daily styling
- Lite version: gentle contrast, forgiving as it grows
Ask your stylist to blend the crown into the back instead of cutting a hard step.
It suits anyone who wants edge without committing to a statement cut.
9. Curly Layers In A Rounded Shape

The curly cuts that look best are cut curl by curl, not as a pile. Curly hair shrinks as it dries, so a cut that looks fine wet can end up a few inches higher than planned. A rounded layered shape lets each curl sit on top of the next without making a triangle.
- Ask for a curl by curl cut, ideally on dry hair
- Keep layers long enough for the curls to clump
- Skip razors, which can fray curls
Plan on leaving more length than you want, since curls spring up.
Detangle with conditioner in the shower.
Scrunch in gel while the curls are soaking wet.
Brushing curls when they are dry.
Rubbing your hair with a rough towel.
10. Feathered Ends On Straight Hair

Light, wispy ends that curve slightly under or out keep straight hair from looking like a curtain. Feathering turns a flat edge into something with movement.
Ask for ends cut at a slight angle with point cutting, so the bottom looks soft rather than ruled.
Style it in three steps:
- Blow dry with a medium round brush.
- Roll the ends under or out on the last pass.
- Finish with a light spray, not a stiff one.
The best part is how it grows out, since there is no hard line to show.
11. Deep Side Part With Swept Layers

On a windy day, a center part gets blown into a mess. A deep side part holds its shape.
It throws the weight to one side and lets layers sweep across the forehead in a long diagonal. The look stays polished at dinner and survives a walk by the water.
Part it from the arch of your brow, then run a flat iron through the heavier side.
- Ask for longer layers on the part side
- Tuck the lighter side behind your ear
- Dust texture spray at the roots so the part does not flop
Flip the part to the other side when you want a quick change.
12. Layered Bob With Flicked Out Ends

Flicked ends need layers, because a blunt edge is too heavy to bend. With a few short layers around the jaw, the hair lifts and kicks out on its own.
How to get it:
- Dry your hair fully and smooth it with a paddle brush.
- Clamp a flat iron near the ends, turn it away from your face, and slide down.
- Press the flick into place with your fingers while it cools.
It suits a chin or collarbone bob best. Any longer and the ends tend to drop.
13. Blowout Layers With Crown Volume

Volume at the crown lifts the whole look. A blowout cut keeps its bounce because the layers are cut to curve under a round brush.
Short layers at the crown give lift, and long layers through the back keep the swing. Dry with the nozzle pointed down the hair shaft and lift the roots as you go.
- Ask for crown layers that finish around the cheekbone
- Keep the back layers long and curved
- Go easy on heavy conditioner near the roots
Quick tip: Set a few velcro rollers on the crown for ten minutes after drying, then brush out. The curve holds longer.
14. Stacked Layers At The Back

Check the back of your head in a bathroom mirror and you will see where flat hair begins.
Stacked layers build a small shelf of shorter hair at the nape, which pushes the layers above it outward. The back gains shape while the front stays long and clean. Ask for the stack to be soft, not stair stepped.
- Short layers at the nape, graduating upward
- Longer pieces left in the front
- A round brush pass at the back to finish
It works best on hair that hangs straight and limp in the back.
Hair hangs straight down the back, tucks under at the neck, and sits flat against the shoulders.
A soft curve builds at the back, the ends sit lighter, and the shape holds when you turn your head.
15. Textured Lob With Beach Waves
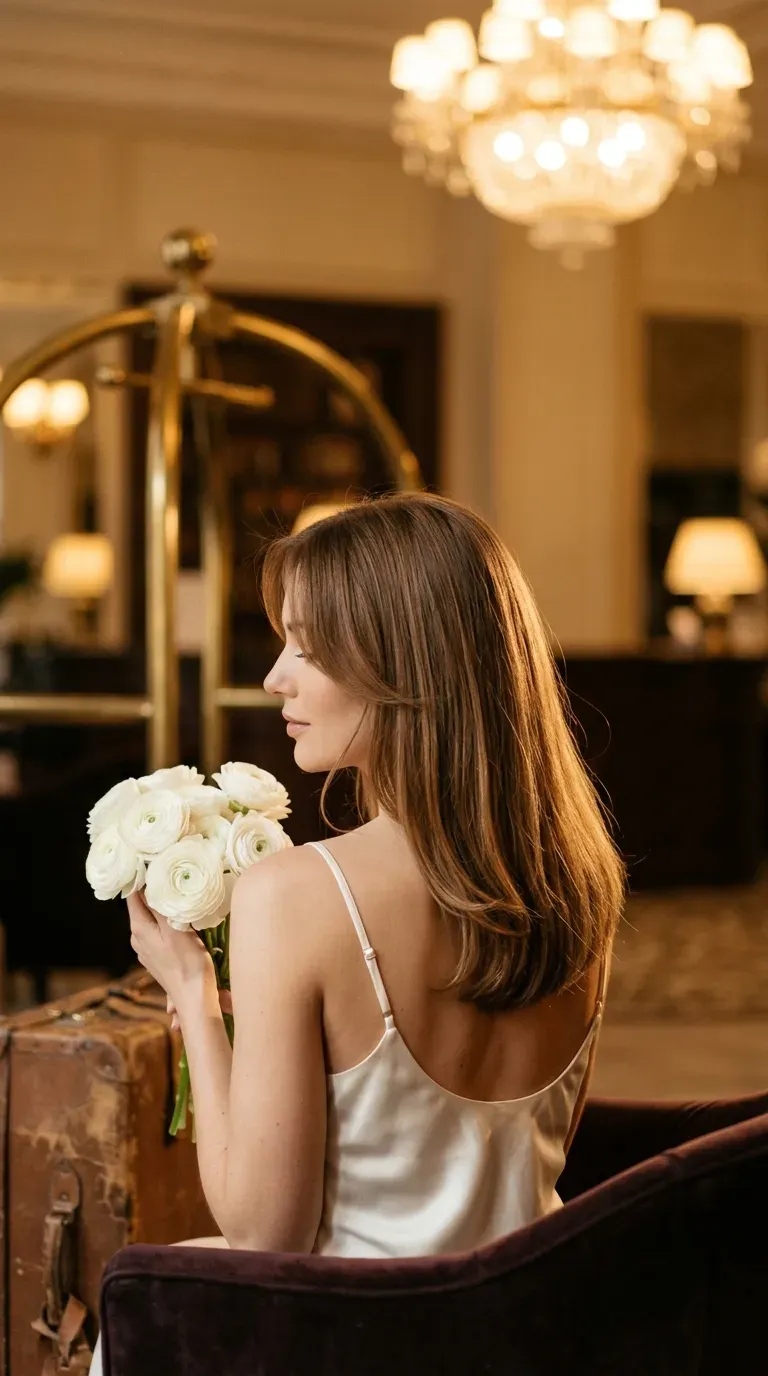
Bend, do not curl. Beach waves do not need a hot iron on every strand, and a textured lob has enough layered length to take a wave from a few simple steps.
- Braid damp hair into two loose plaits before bed
- Spray lightly with salt spray
- Undo the braids in the morning and shake
Waves hold best on hair with a little grip, so skip silky conditioners right before styling.
16. V Cut Layers For A Pointed Back

A V shape at the back points down the center while the side layers frame each shoulder. The V cut shortens the sides and leaves the middle longest, so medium hair looks longer than it is.
- Ask for a soft V, not a deep one
- Keep the front layers cut for face framing
- Point cut the ends so the V does not look drawn on
Get it dusted every couple of months to hold the point.
17. U Cut Layers For A Rounded Back

Where a V points, a U curves. The U cut rounds the back edge so the hair falls in a smooth horseshoe.
It feels fuller than a V and wears better on fine or straight hair, because the ends stay a little weightier.
- V cut: pointed back, more drama
- U cut: rounded back, more body
Ask for the curve to follow your shoulder line, then check it in a hand mirror before you leave the chair.
18. Wispy Bangs With Light Layers

Tiny rule: keep wispy bangs thin enough to see skin through them.
They sit sheer across the forehead and soften the whole face. Pair them with light layers so the face framing pieces pick up where the bangs stop.
- Ask for see through bangs cut in a soft curve
- Leave the sides long for blending
- Dry the bangs first so they do not crease
Oily forehead? Dry shampoo on the bangs between washes keeps them light.
19. Bottleneck Bangs With Medium Layers

The usual miss with bottleneck bangs is cutting them too short. They are narrow at the top and flare out at the cheekbones, like the neck of a bottle. Cut too short, they look like a mistake.
Start long, around the cheekbone, and let your stylist shorten them in stages.
- Ask for the narrowest point at the brow
- Let the bangs flare out to the cheeks
- Blend them into layers that fall past the chin
They suit oval and heart shaped faces especially well.
20. Thick Hair Cut With Weight Removed

Thick hair at shoulder length can feel like wearing a hat. The weight pulls everything out into a triangle, and layers in the wrong spot make it worse.
Weight removal means taking bulk from the inner layers while the top stays full.
- Ask for long, slide cut layers
- Remove weight from the mid lengths, not the ends
- Avoid short layers on top, which tend to stick out
Drying time drops too, which you will notice on busy mornings.
21. Air Dry Layers For Wavy Hair

Hair that dries well on its own gives you back real time every morning. An air dry cut follows your wave pattern, so the layers curl up where they want to.
It works because the shortest layers sit at a length your waves can lift, usually near the cheekbones.
- Cut on dry or lightly damp hair so the stylist sees the wave
- Scrunch in a lightweight mousse while the hair is wet
- Let it dry completely before you touch it
Keep the ends slightly blunt so the waves do not frizz into points.
22. Glossy Sleek Layers
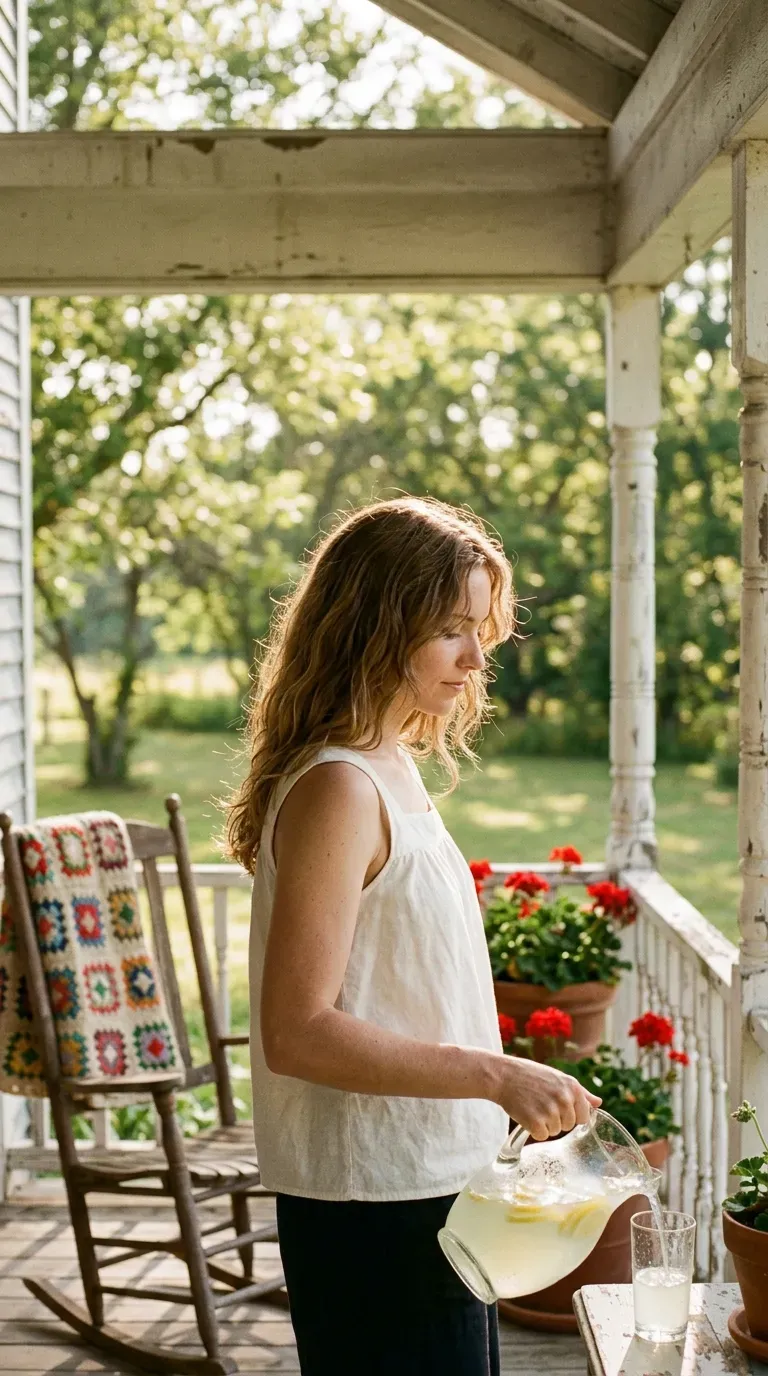
Shine does most of the talking here. Sleek layers rely on a clean line and healthy ends, with long, nearly invisible layers adding movement without breaking the smooth look.
- Ask for long layers with minimal graduation
- Use heat protectant before every flat iron pass
- Add one drop of shine serum to the ends only
Regular trims matter more than product with this cut, since split ends show up fast on a sleek finish.
23. Soft Mullet Back With Face Framing Waves

The mullet got a soft reboot, and it looks nothing like the old one. The modern version keeps short, shaggy layers around the face and crown, with a slightly longer back that still ends at the shoulders. Loose waves smooth the transition.
- Ask for soft crown layers, not a hard step
- Keep the nape a few inches longer than the front
- Add loose waves with a medium barrel iron
If you are nervous, request half the contrast now and add more at the next trim.
24. Side Bangs With Layers For Round Faces
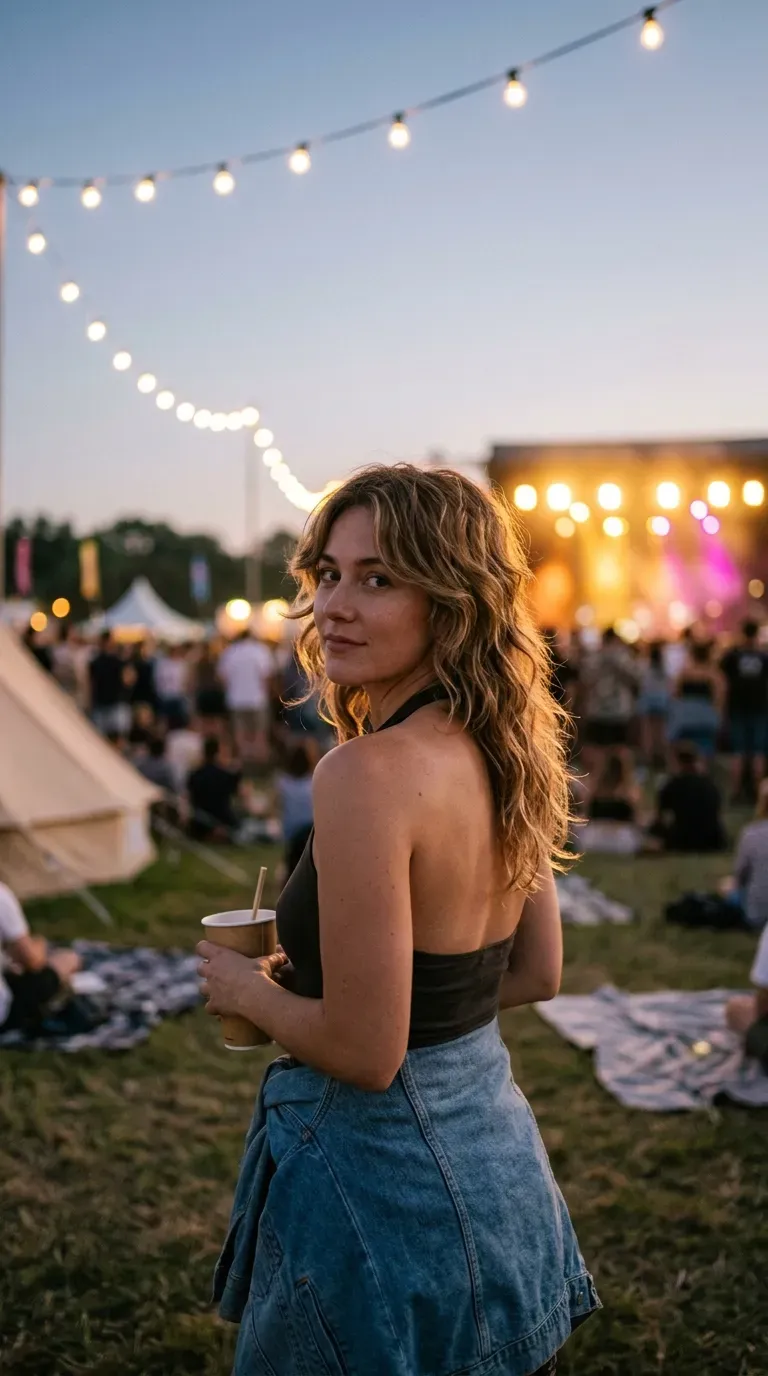
A diagonal line makes a round face look longer. Side swept bangs cut across the forehead and end near the cheekbone, then blend into layers that start below the chin.
- Ask for bangs that slant from the brow down to the cheekbone
- Keep the layers long and vertical
- Avoid short layers at the jaw, which add width
Brush the bangs to the side while they are still damp, and they will stay put as they dry.
Layers that start below the chin make a round face look longer. Layers that start at the cheeks add width.
25. Chin Length Pieces For Heart Shaped Faces
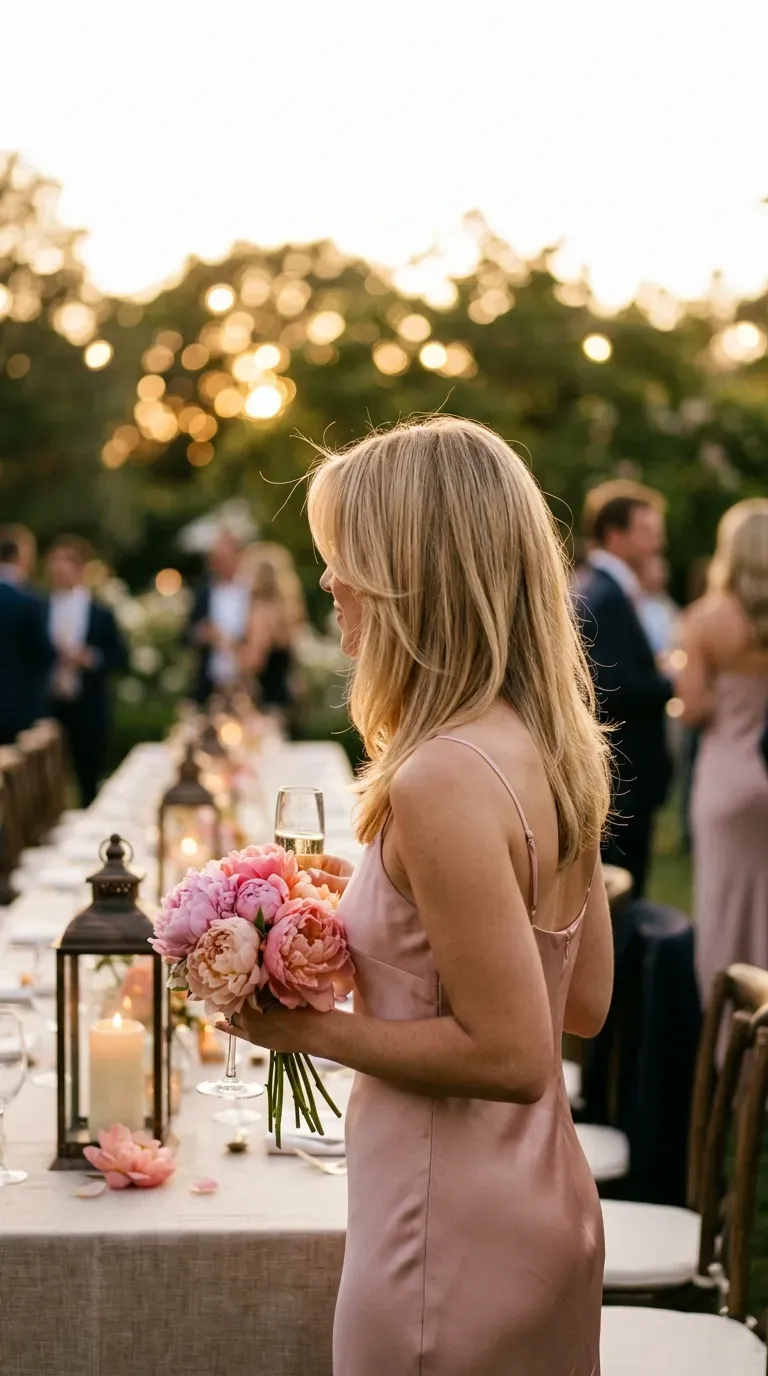
A narrow chin needs a little width at the bottom. Heart shaped faces are wider at the forehead, so the goal is to add fullness near the jaw.
Chin length face framing pieces do exactly that, and soft layers underneath keep the bottom from looking heavy.
- Ask for pieces that land right at the chin
- Keep the top layers lighter to avoid adding width at the forehead
- Tuck one side behind your ear for balance
Curtain bangs or a soft side part both pair well with this shape.
26. Cheekbone Width Layers For Long Faces

Width at the cheekbone shortens a long face. Cut the layers to start at the cheeks so the hair spreads sideways instead of dropping straight down. Add waves or a slight bend and you get even more width.
- Ask for the shortest layer to sit at the cheekbone
- Skip a center part, which stretches the face
- Curl the front sections with the iron turned away from your face
Bangs work well here too, since they shorten the forehead and give the cut a focal point.
27. Grow Out Layers That Hide The Messy Stage

Month three of a grow out is the hard one. Everything is too long to be short and too short to be long.
Layers hide the in between stage because the shorter pieces catch up while the rest keeps growing. Light shaping every few months keeps the outline tidy without costing you length.
- Ask for the longest layer to stay at your goal length
- Blend the shorter pieces into the back
- Lean on headbands and clips during the awkward weeks
Do not cut the ends all at once. Dust them lightly instead.
28. Money Piece Layers With Color Around The Face

Two bright strips frame the face and show off every layer. The money piece is a color move, not a cut, but it only works because of the layers. The face framing pieces are cut at different lengths, so the highlight catches the light as you move.
- Ask for two lighter sections at the very front
- Go only a few shades lighter than your base
- Use a purple shampoo if you go blonde
It grows out gently, because the color sits at the front and does not leave a harsh line at the roots.
29. Half Up Clip On Layered Hair

Layers can look scattered in a ponytail, and half up is the friendlier move. A claw clip at the crown lifts the top and keeps hair off your face while the lower layers stay loose and visible.
The trick is to clip only the top section and leave the front pieces out. That keeps the face framing layers doing their job instead of disappearing into the clip.
Quick tip: Pick a clip that matches your hair thickness. A clip that is too big slides out, and one that is too small pinches and leaves a dent.
Section your hair from ear to ear across the crown.
Twist the top section once and secure it with a medium claw clip.
Pull out two face framing pieces and loosen the crown with your fingers.
30. Soft Layers That Show Off Gray Roots
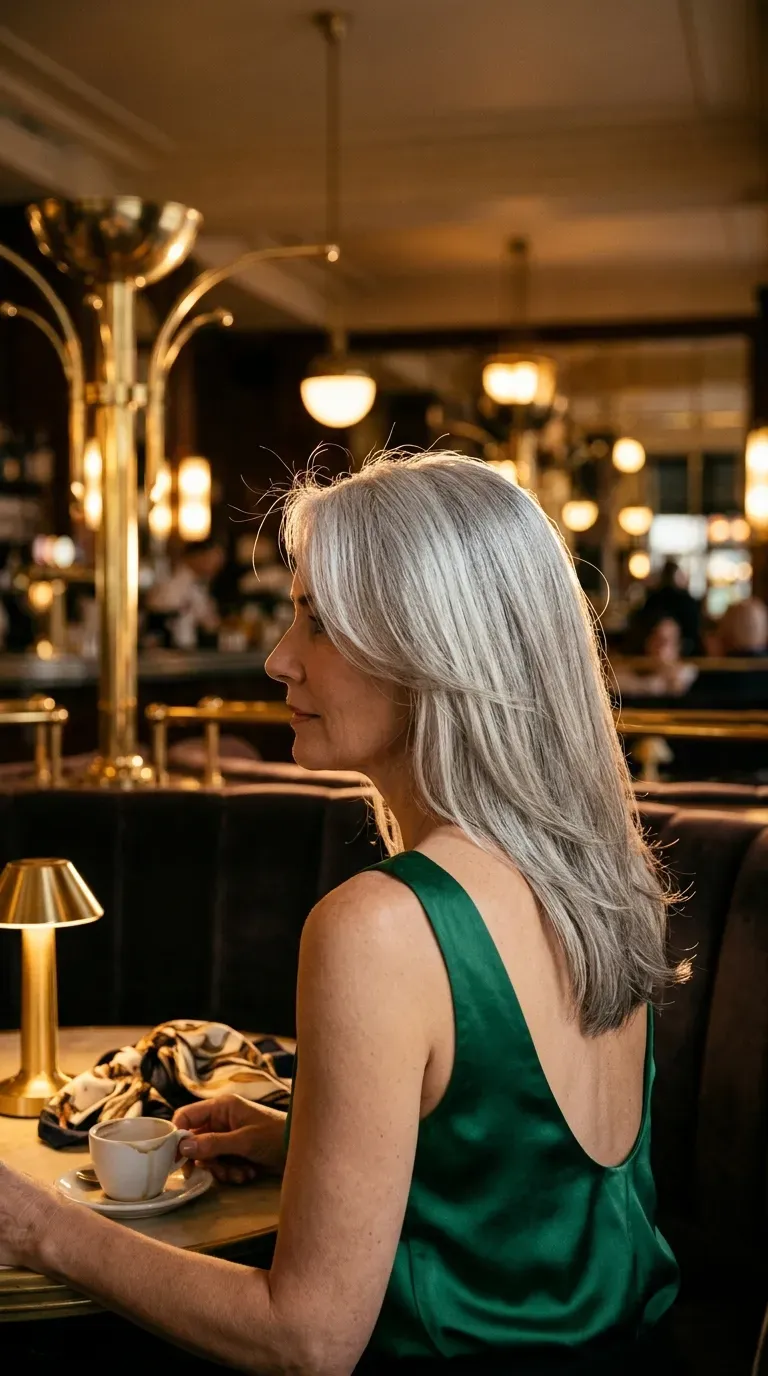
Gray hair has its own texture and often runs a little drier. Soft layers add movement so silver looks shiny instead of wiry.
Leave the face framing pieces long enough to show off the gray at the front, and let the layers soften the line between roots and ends.
- Ask for long, soft layers with a smooth finish
- Use a hydrating mask once a week
- Add a violet toned shampoo to keep yellow tones away
Skip heavy styling cream, which can dull silver.
The Layers That Fit Your Hair
The right layers do not change who you are. They just give your hair somewhere to go. Start with your hair type, pick one cut from this list, and bring two photos to your stylist so you both see the same shape.
If you are unsure, begin with long, soft layers and add more at the next trim. It is easier to go shorter than to wait for regrowth. The best medium length haircuts with layers feel easy on a regular Tuesday, not only on salon day.
Save this list to your hair ideas board so it is ready for your next appointment.