
Somewhere along the way, short hair got a bad reputation. People assume that once you cut it above your shoulders, your only choices are “down” and “down with a headband.”
That is not true, and you probably already suspect it. The real problem is that most styling videos are filmed on hair that reaches the middle of someone’s back. A chin length bob cannot do a fishtail braid, so it starts to feel like nothing works.
What actually works on short hair is smaller and faster. A twist pinned at the temple. A half up knot the size of a walnut. A bent wave that takes four minutes with the flat iron already sitting in your bathroom drawer. Short hair also holds a shape better than long hair does, which is good news when you have five minutes before you need to leave.
These easy hairstyles for short hair cover pixies, bobs, and lobs that stop at the collarbone. Most need only bobby pins, a small elastic, or one clip. A few need a bit of product. None need a second pair of hands.
1. Deep Side Part With Crossed Bobby Pins

Two bobby pins crossed into an X can make a plain bob look finished. It takes about a minute.
- Flip your part to one side, roughly above the outer corner of your eye.
- Tuck the lighter side behind your ear.
- Slide one pin up just behind the ear, then cross a second pin over it.
Gold pins on brown hair or dark pins on blonde hair make the X stand out on purpose. Matching pins hide it, which suits the office better.
Quick tip: Mist the pins with hairspray before you slide them in. They grip short, slippery hair much better that way.
2. Half Up Space Buns on a Chin Length Bob
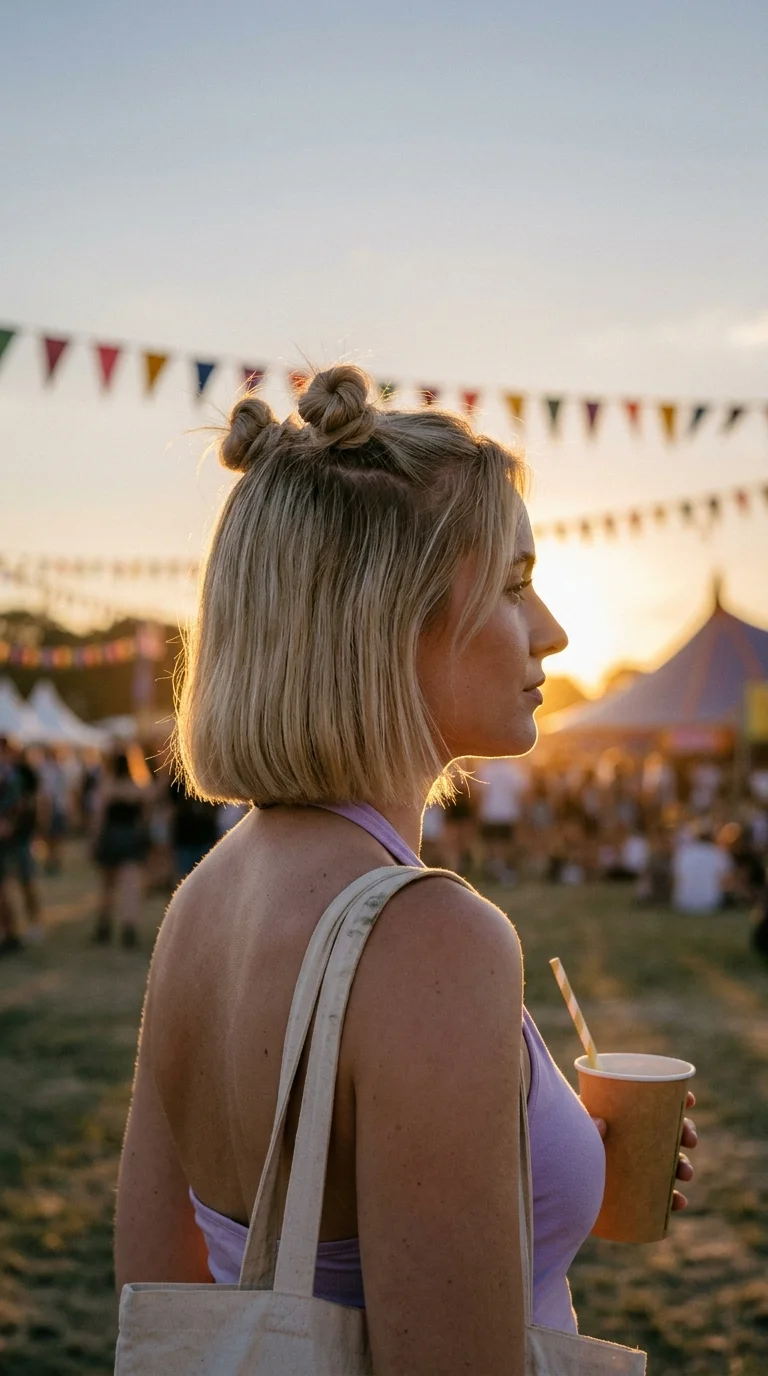
Small knots sit high on the crown, about two inches apart, with the rest of the bob hanging loose. On short hair they look playful instead of costume like, because each bun stays tiny.
- Split the top section down the middle with your comb.
- Twist each half tight, coil it around itself, and wrap a clear mini elastic around the base.
- Push one bobby pin through each bun toward the scalp.
Keep them no bigger than a walnut. If your bob is very blunt, pull a few pieces loose at the hairline first. It reads softer and hides any bumps along the part.
3. Rope Twists From the Part to the Crown

Short front pieces fall into your eyes the second you look down at your phone. Rope twists fix that and look intentional.
Take a one inch section at your part. Split it in two, twist both strands to the right, then wrap them around each other to the left. Add a little more hair from the hairline every inch or so. Stop at the crown and pin it with two crossed bobby pins.
Repeat on the other side for a balanced look, or keep it to one side for something less formal.
Second day hair grips better here. Fresh, silky hair tends to unwind before lunch.
4. Flat Iron Bent Waves on a Collarbone Lob

Curling irons make tight, round curls that can look a bit prom on a lob. A flat iron gives you soft S bends that look like you air dried after a beach day.
How the two compare on short hair:
- Curling iron: rounder curls, more bounce, more time, and often too much volume at the ends.
- Flat iron: flatter bends, about four minutes total, and ends that stay straight and modern.
Clamp a two inch section, turn the iron away from your face, glide down a few inches, then turn it back. Leave the last inch straight.
Shake it out with your fingers. Never brush it.
5. Slicked Back Wet Look Pixie
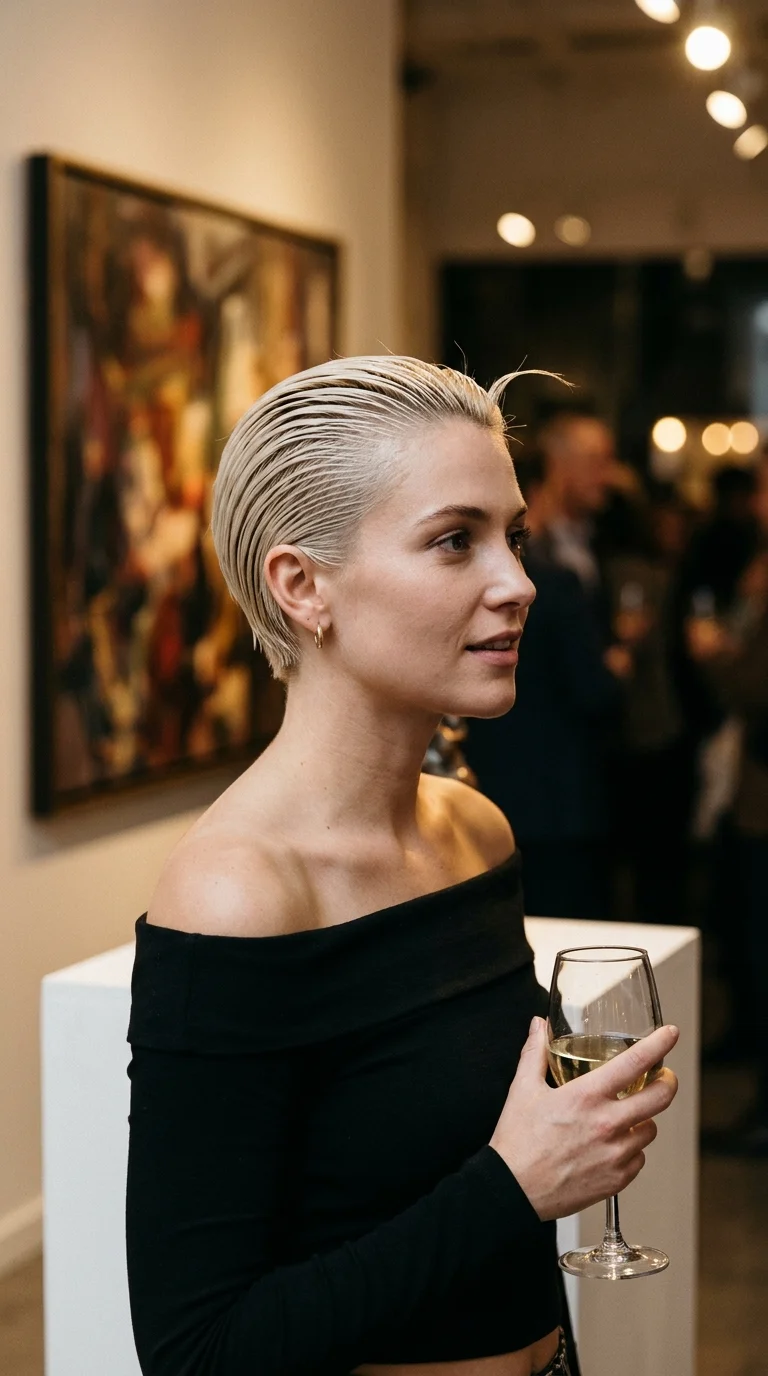
One rule for the wet look: product goes on damp hair, never soaking wet hair.
Towel dry until your pixie stops dripping. Rub a nickel sized amount of clear gel between your palms, then rake it straight back from the hairline with your fingers. Use a wide tooth comb only on top, so you see neat lines instead of clumps.
Let the sides lie flat behind your ears and keep the nape sleek.
It takes three minutes and looks like you planned an outfit around it. Wear it with gold hoops and a bare neckline. The comb lines show best when nothing else competes.
6. Claw Clip Half Up Twist on a Lob
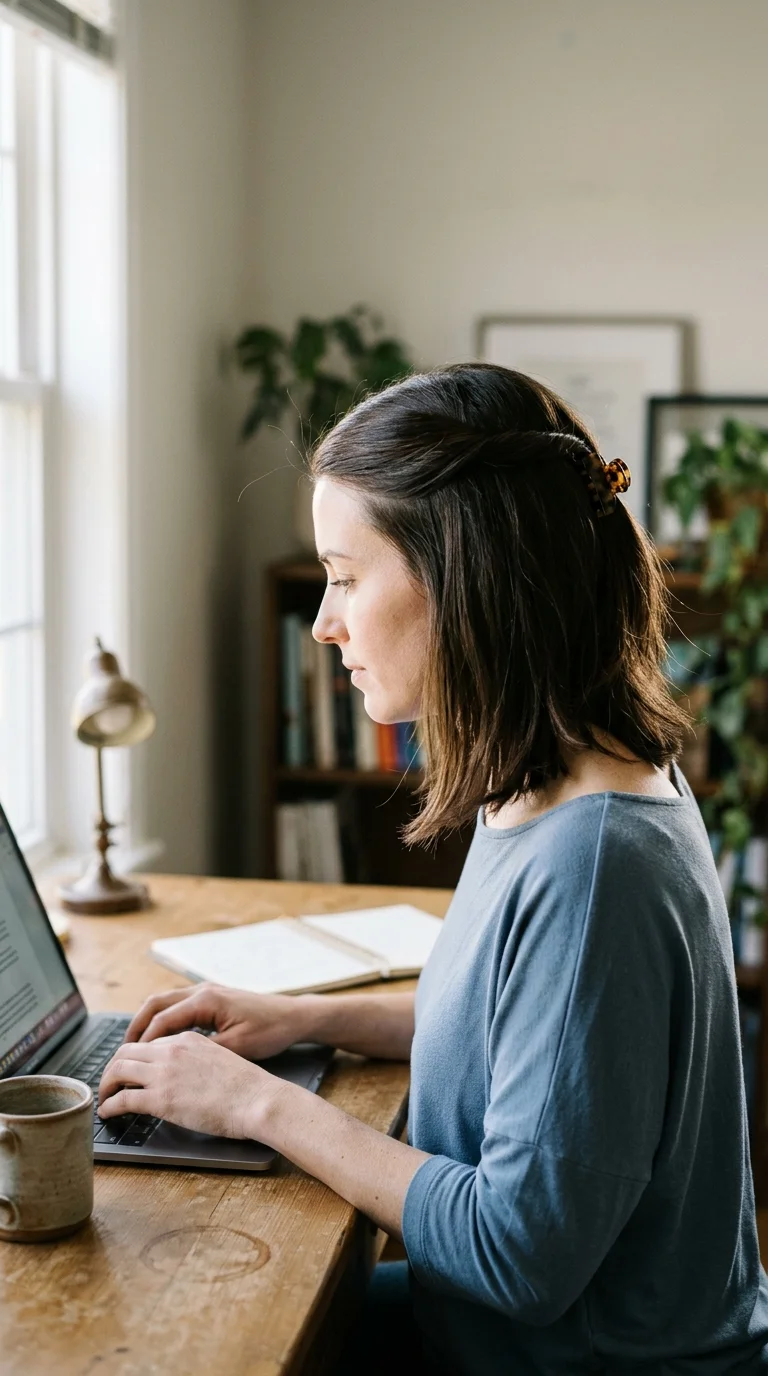
It is 8:57 and your video call starts at nine. Your lob is doing that half flat, half frizzy thing.
Grab the top section of hair between your temples. Twist it once toward the back of your head, fold the end up, and clip it with a small claw clip, about two to three inches wide. A big clip will slide right out of short hair.
That is it. The clip hides the messy crown, the loose bottom layer covers uneven ends, and the front looks neat on camera.
Tortoiseshell clips blend into brown hair. Matte cream or sage ones stand out.
7. Stubby Low Ponytail With Face Framing Pieces

Plenty of people think a ponytail needs at least shoulder length hair. It doesn’t. A short, stubby tail at the nape looks sweet and keeps hair off your neck on hot days.
- Brush everything back toward the nape and gather it low.
- Wrap a small elastic around it twice, not three times, so the tail stays soft.
- Pull out two pieces at the temples and one in front of each ear.
- Pin up any short bits at the back that slip out.
The tail might only be an inch or two long. That is fine. It looks cute because it is small.
8. Padded Velvet Headband With Crown Lift

A padded headband hides flat roots and second day oil in about ten seconds. On short hair it also adds height, which makes a bob look fuller.
Tease the crown lightly with a fine comb, just three or four strokes at the roots. Smooth the top layer back over it. Slide the headband on from behind your ears, then nudge it forward until it sits about an inch behind your hairline.
Velvet grips better than satin, which tends to slip down short hair by mid morning.
A thin strand pulled loose at each temple keeps it from looking stiff.
9. Silk Scarf Tied in a Side Knot
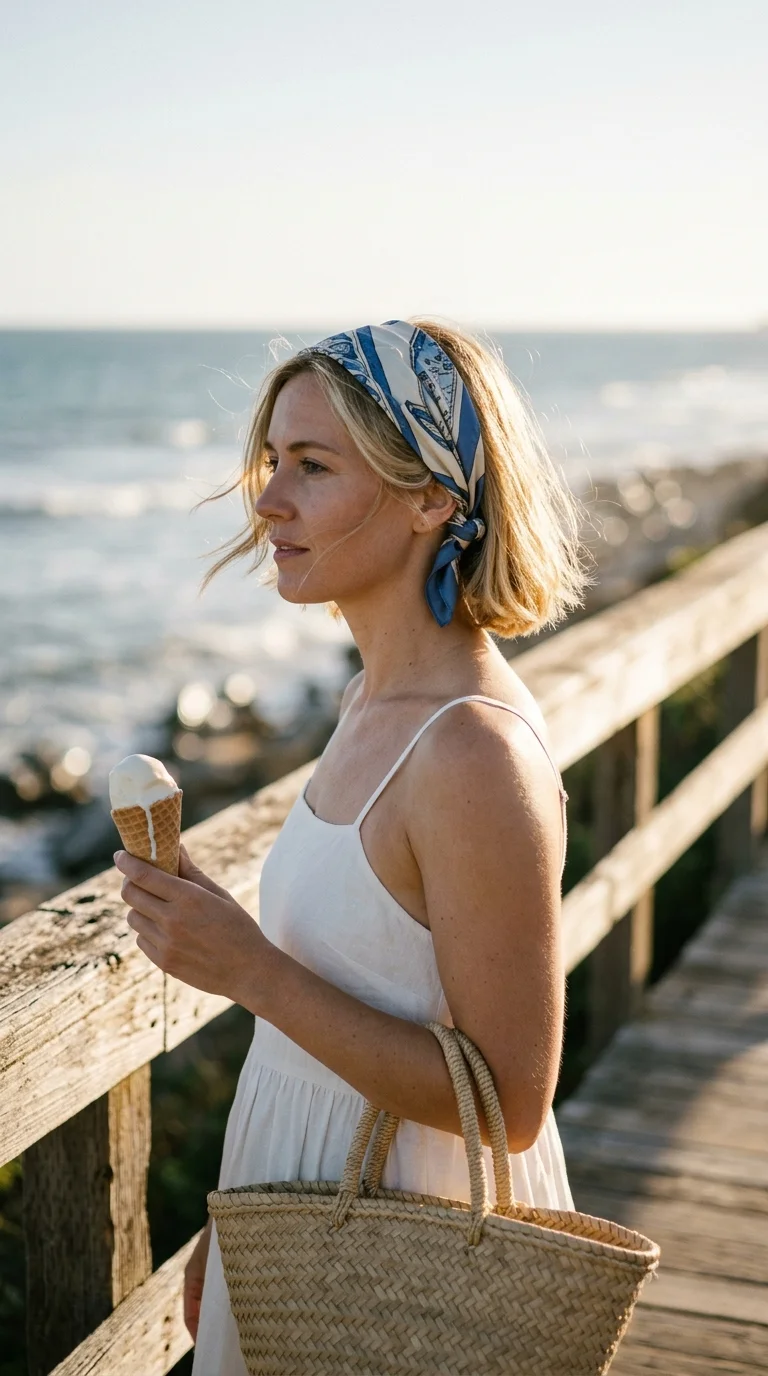
Scarves change how a bob looks more than almost anything else in your drawer. The same chin length cut seems sporty with a cotton bandana and very French with a silk square.
Fold a square scarf into a long strip about two inches wide. Lay the middle at your nape, bring the ends up over your ears, and tie a small knot just above one ear. Tuck the tails under or let them hang.
Good to know: Patterned silk hides creases better than solid colors. Thrift shops often have a whole basket of old scarves, and they cost very little.
10. Mini Dutch Braid Along the Part
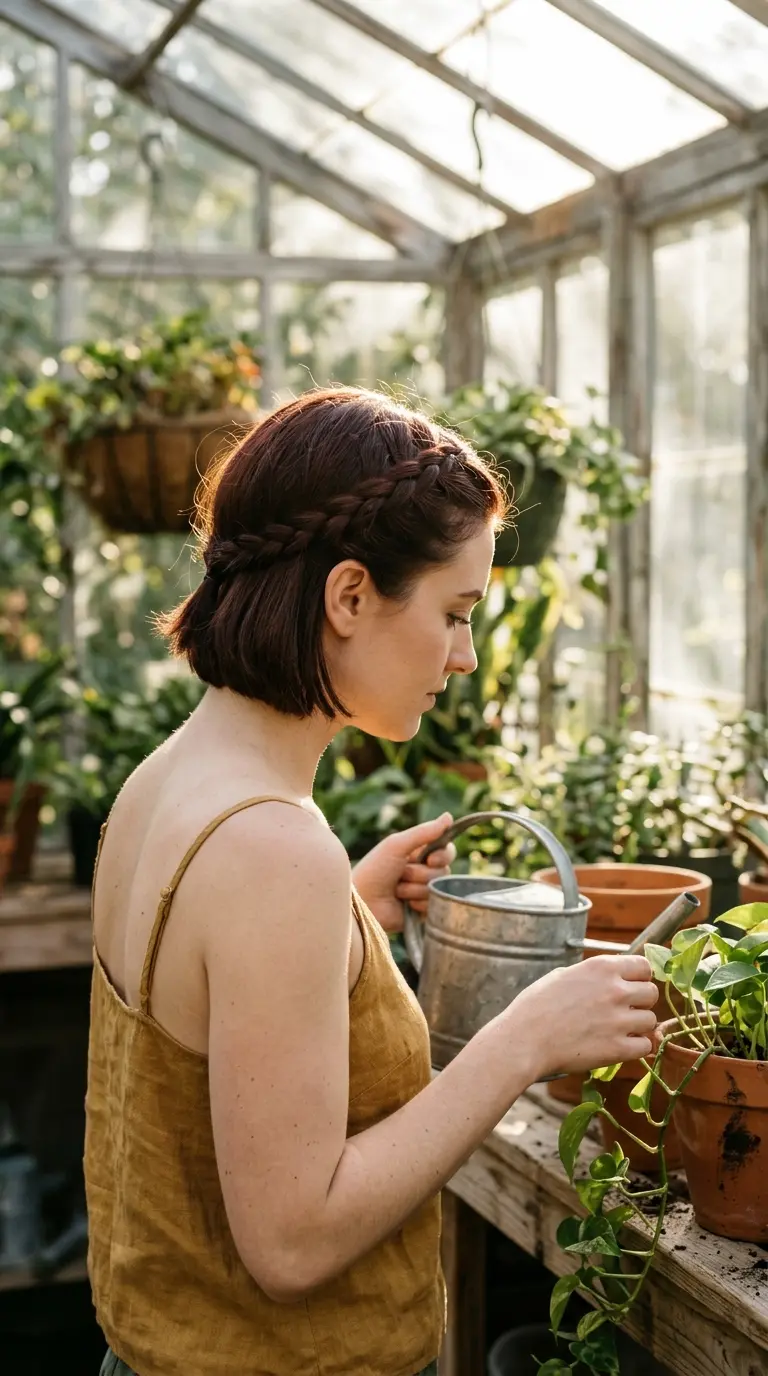
The most common mistake with a braid on short hair is starting too far back. By the time it gets going, you have run out of hair.
Start right at the part. Take three tiny pieces, each about the width of a pencil, and cross them under instead of over. Add a few strands from the hairline with each cross. Keep the braid close to your face and angle it down toward your ear.
When you reach the ear, pin the end flat behind it with two bobby pins.
Gently pull the edges of the braid with your fingertips. It looks thicker and hides the pins.
11. Tucked Under Faux Bob for a Lob
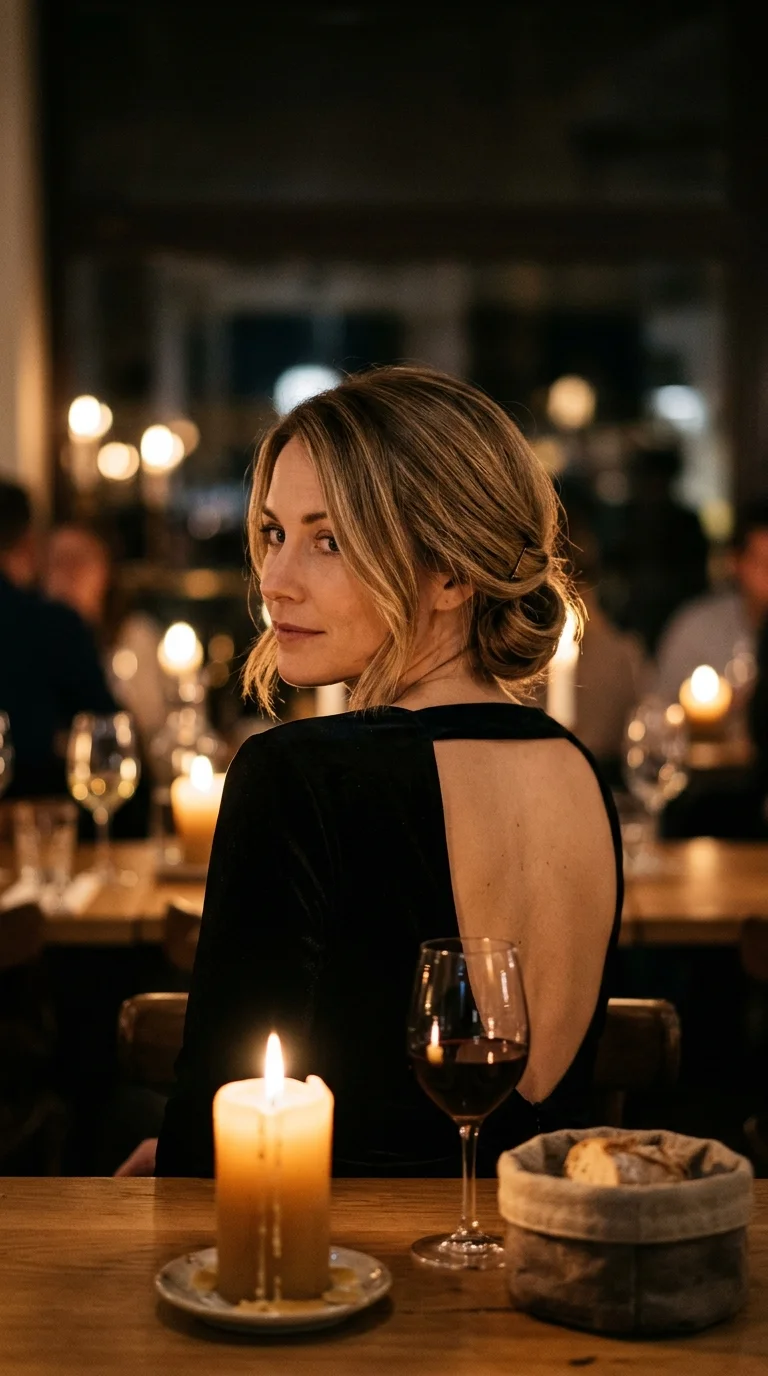
Want a bob for one night without cutting your lob? Fold it.
- Gather your hair into a low, loose ponytail at the nape.
- Roll the ponytail under and up toward your head until the length disappears.
- Pin the roll flat with four or five bobby pins across the base.
- Loosen the sides so they fall just above your jaw.
From the front, it reads as a short bob. The back shows a soft folded roll, which looks pretty in its own way.
Skip the trick if your hair is very heavy. The roll gets bulky and starts to pull.
Slide bobby pins in with the wavy side facing your scalp.
Cross two pins into an X when one keeps sliding.
Add dry shampoo to clean hair so pins have something to grip.
Large claw clips. Short hair cannot fill them, so they slip.
Thick elastics wrapped three times. They kink short tails.
Pins pushed straight in. Slide them along the scalp instead.
12. Messy Low Bun With Pinned Short Layers

You are making pasta, the steam is rising, and the shorter layers keep falling into your face. A messy low bun is the fix for shoulder length hair.
Pull everything into a low ponytail and wrap a small elastic around it. On the last loop, leave the hair halfway through so you get a little bun with the ends sticking out. Pin the bun at the top and bottom.
The short layers around your ears will slip out. Twist each one back and pin it flat.
A spritz of dry shampoo at the roots gives this bun grip. Clean hair slides out within an hour.
13. Bubble Half Up on a Bob

Two soft little bubbles run down the back of the head, sitting on top of a smooth bob. It looks fiddly. It isn’t.
- Pull the top section back into a half up ponytail at the crown.
- Add a clear elastic about an inch below the first one.
- Gently pull the hair between the two elastics outward so it puffs into a rounded bubble.
- Repeat once more if your hair is long enough.
On a chin length bob, you may only get one bubble. One still counts.
Clear elastics hide best. Bright colored ones make it look like a style for a little kid.
14. Gold Barrette Stack Above One Ear
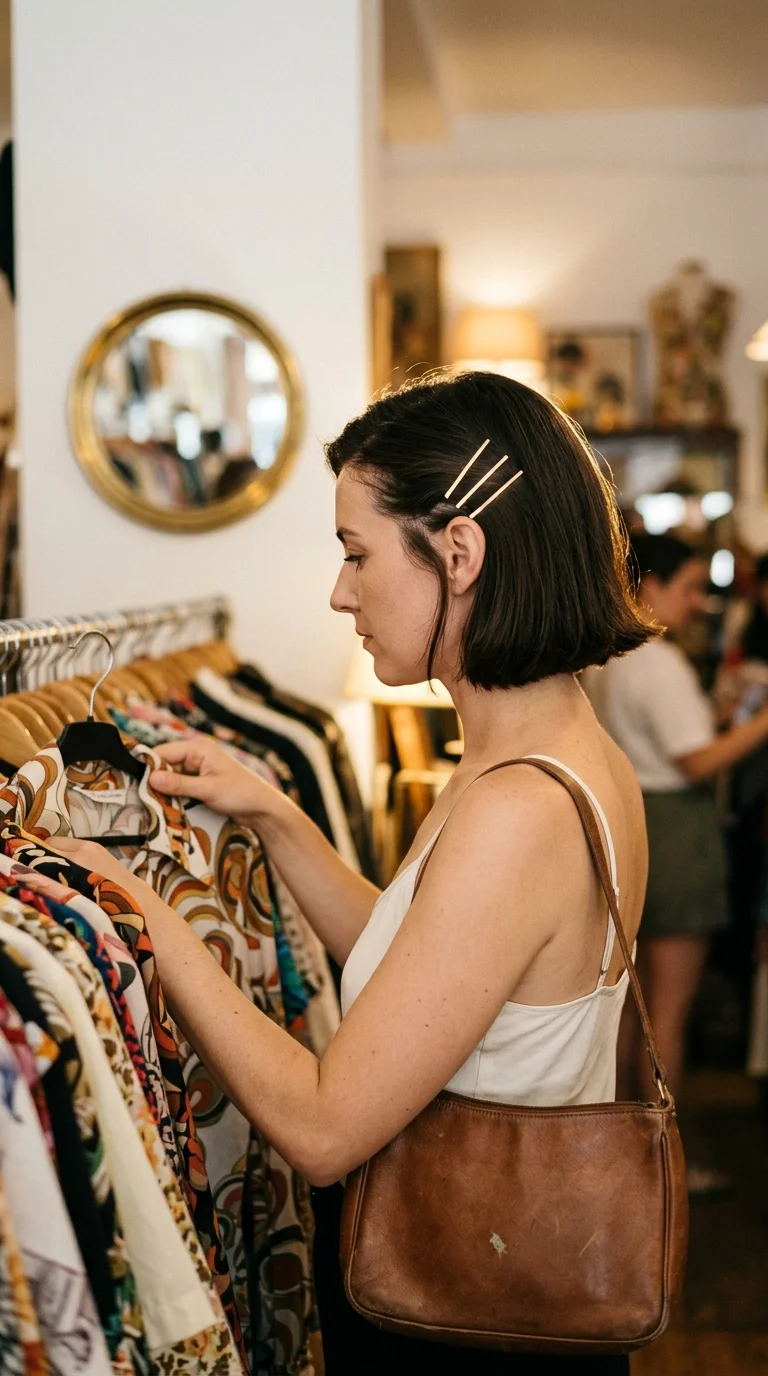
Barrettes aren’t only for little kids. Three stacked together above one ear look grown up, especially in gold, pearl, or tortoiseshell.
Sweep the heavier side of your hair back behind the ear. Clip the first barrette at the temple, angled slightly up. Add the next two right below, each about half an inch apart, all at the same angle.
That is the whole routine.
Quick tip: Mix shapes but not colors. A gold bar, a gold oval, and a gold pearl clip look planned. Three different colors look random.
15. Textured Pixie Faux Hawk
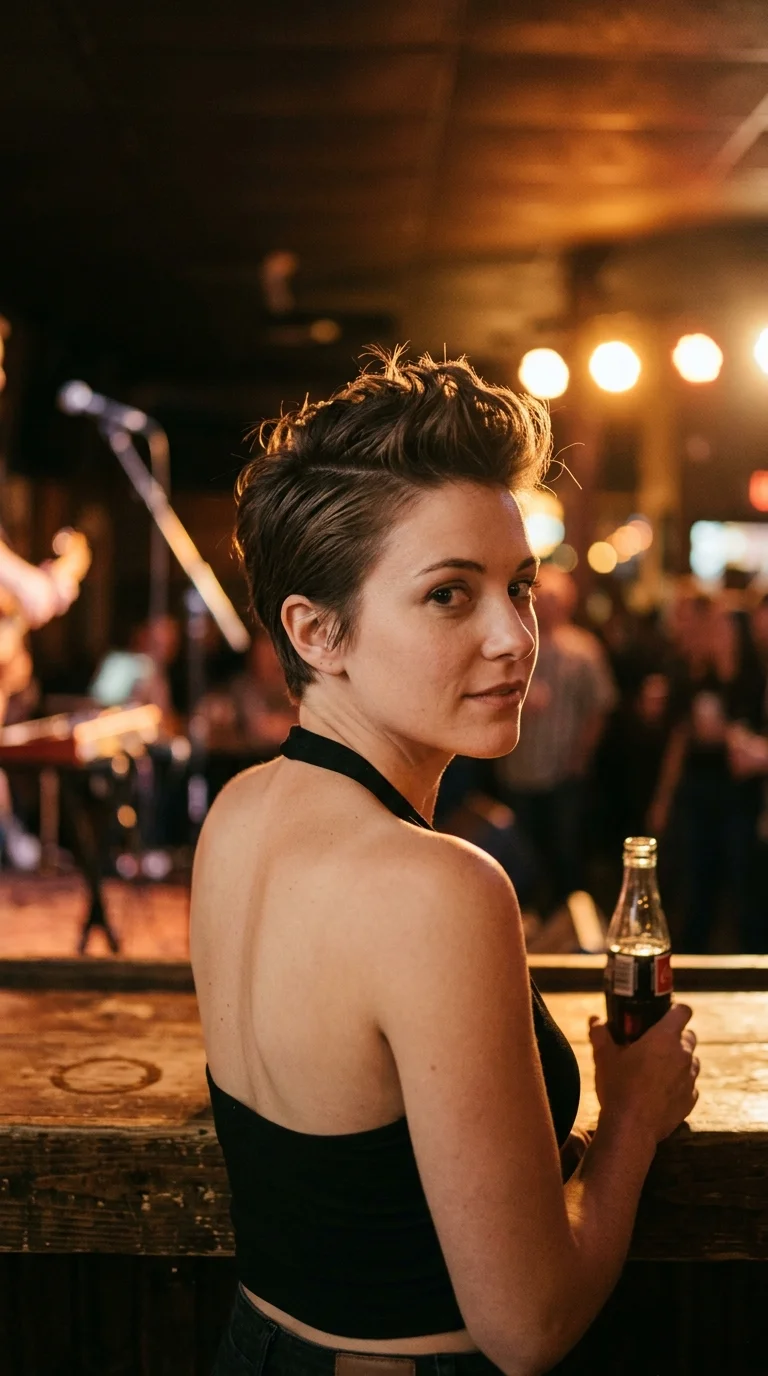
A faux hawk gives a pixie a little edge for a night out, and it washes out the next morning with no fuss.
- Warm a pea sized amount of matte paste between your fingers.
- Push the sides back and slightly up toward the center of your head.
- Pinch the top hair into small, uneven peaks along the middle.
- Leave the nape flat and close to the neck.
Keep the peaks soft. Stiff spikes look dated fast.
Matte paste holds better than gel here, and you can still run your hands through it later without crunch.
16. Teased Crown Bump With Pearl Pins
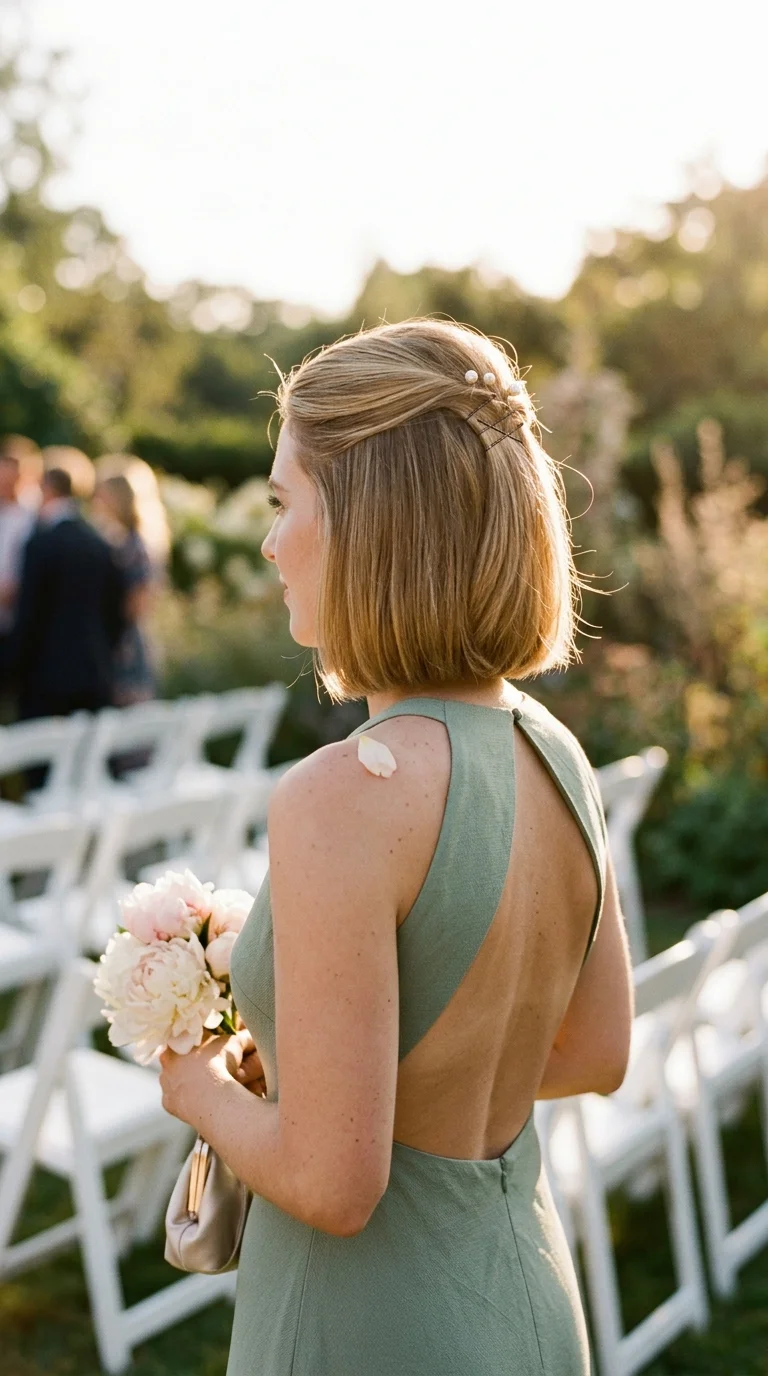
Old tricks stick around for a reason. A small bump at the crown still makes a short cut look dressed up, and it works especially well on fine hair that lies flat by noon.
Take the section between your hairline and the crown. Tease the roots underneath with a fine comb. Smooth the top layer over and push it forward a little so it lifts. Pin it at the crown with two crossed pins, then let the sides fall naturally.
A pair of pearl pins over the bobby pins hides them and makes the look wedding guest ready.
Spray before teasing, not after. The bump lasts much longer.
17. Scrunched Waves With Sea Salt Spray

Most people spray sea salt on dry hair and wonder why it feels crunchy. Spray it on damp hair instead.
The five minute version:
- Mist damp hair with sea salt spray, mostly from the middle down.
- Flip your head forward and scrunch fistfuls of hair up toward the roots.
- Dry it with a diffuser or the low setting on your dryer for three minutes.
- Let it finish air drying on the way out.
Short hair dries fast, so the waves set quickly. Keep your hands off it until it is fully dry, or the waves fall flat and fuzzy.
18. Knotted Half Up for Day Two Hair

Take a one inch section from each side, just above your ears. Bring both behind your head and tie them in a single knot, the way you would start tying a shoe. Pin the knot flat with one bobby pin through the center and one below it.
The tails hang down into the rest of your hair and blend in. No elastic needed.
- On a lob, tie a second knot below the first.
- On a chin length bob, one knot is the limit.
It holds best on day two or three. Freshly washed hair keeps sliding loose.
Day two lob. Flat at the crown, a little oily near the part, and the ends flipping in different directions.
The knot pulls the oily front pieces back, adds a little shape at the crown, and lets the uneven ends read as texture.
19. Side Swept Pixie With Pearl Accents
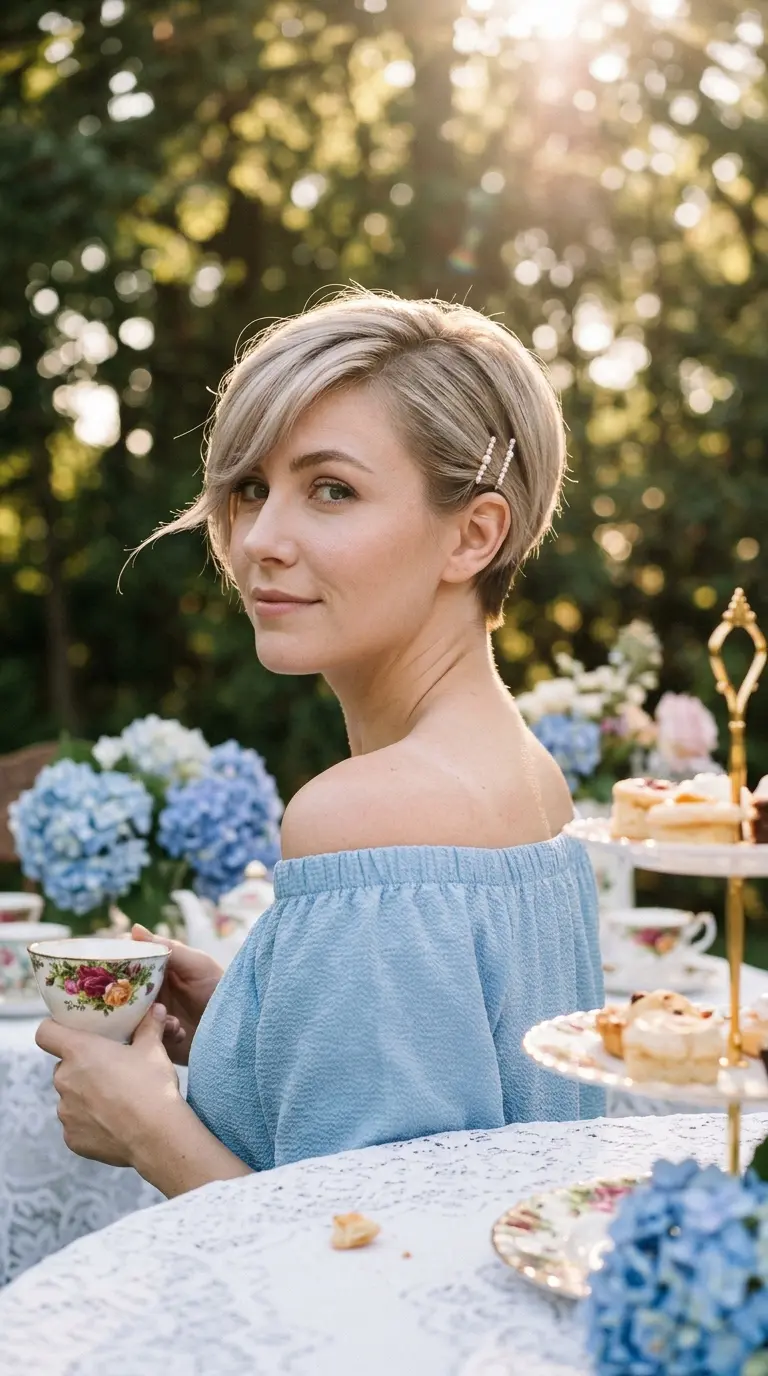
Three small pearl pins tucked above one ear catch the light every time you turn your head. On a pixie, they also keep a long side swept fringe right where you want it.
Blow dry the fringe across your forehead with a flat brush. Then push the shorter side back behind your ear and slide the pearl pins in at a slight angle, spaced about a finger apart.
Pearls look softest on blonde and light brown hair. On dark hair, gold pins show up better.
Growing out a pixie? This hides the awkward bit above the ear for a few extra weeks.
20. Sleek Tucked Bob With Shine Serum
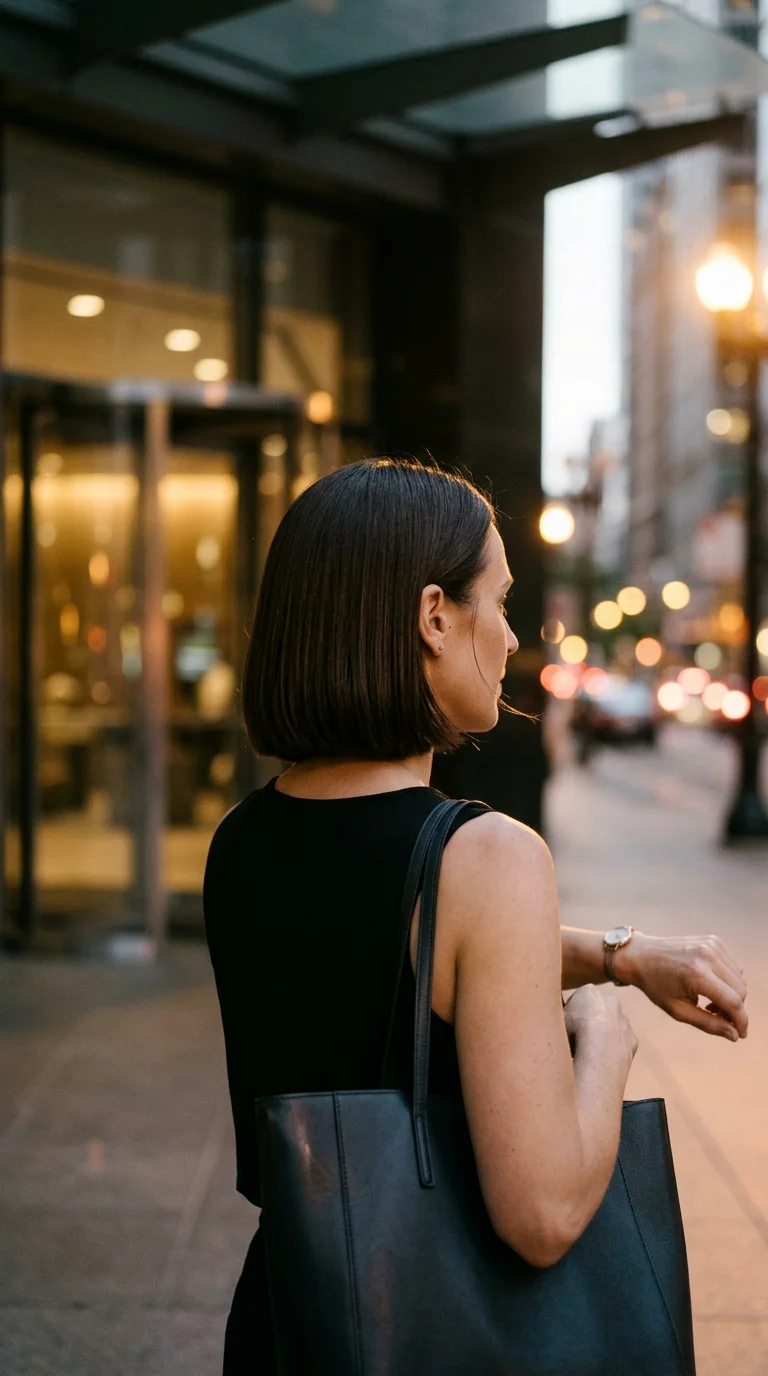
The rule here is less serum than you think. One pump, split between both palms.
Flat iron the bob straight, keeping the ends pointed slightly in. Rub the serum through the lengths only, never the roots. Tuck both sides firmly behind your ears and press them down for a few seconds so they stay.
Clean, glossy, and very grown up.
It suits blunt bobs best, because the straight line at the bottom becomes the main detail. Layered cuts can look a little flat with this one. Small gold studs finish it.
21. Half Up Velvet Ribbon Bow
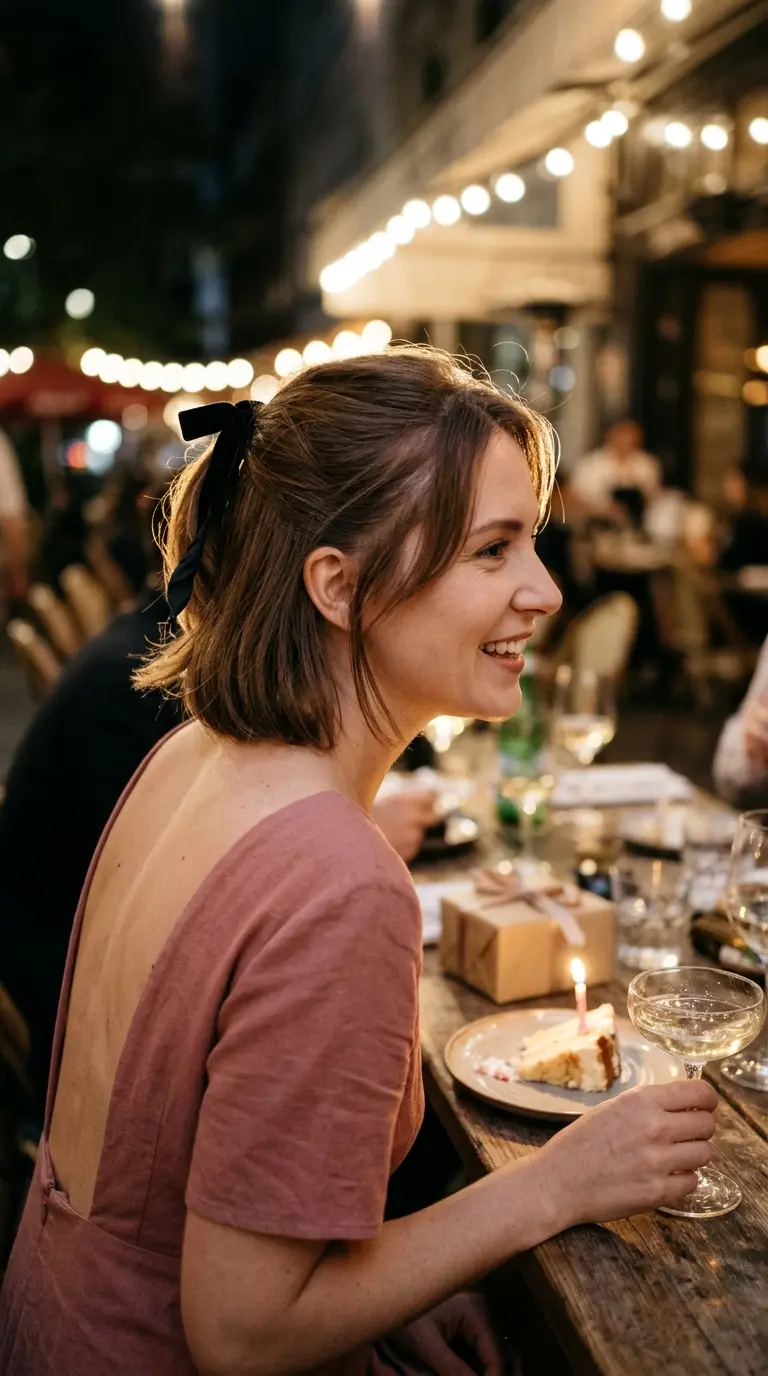
Your friend’s birthday dinner starts in twenty minutes and your bob is flat. Grab a ribbon.
Pull the top section back into a small half up ponytail at the crown and wrap a clear elastic around it. Tie a velvet ribbon, about half an inch wide, over the elastic and finish with a neat bow. Trim the tails on a slant so they hang a little past the bow and don’t fray.
Black velvet looks dressy. Cream satin feels softer and works well for daytime.
A ribbon saved from a gift box is fine, as long as it has no wire inside.
Short hair gives you more room to play than most people think. A few pins, a small clip, a ribbon, and one good product can carry you through a whole week without a single bad hair morning.
Pick three of these and practice them on a slow Sunday. Once your hands know the moves, each one really does fit into five minutes.
Keep a small dish of bobby pins, two clear elastics, and one small claw clip near your mirror. That little kit covers most of this list.
Whenever your bob or pixie starts to feel boring, come back to these easy hairstyles for short hair and choose something new.
Save this list to your hair board so your next five minute style is ready when you need it.