
Most event updos fail in the same way. They look great in the mirror at 5 p.m. and start slumping by the time the first toast happens. If you have ever spent an hour on your hair only to feel it loosening during dinner, you know the frustration.
Braided crown hairstyles solve a lot of that. The braid acts like built in structure. It wraps your hair into a secure circle, keeps flyaways down, and still looks soft and romantic in photos. The style also works on short layers, long thick hair, fine hair, and natural curls with a few small changes.
Below you will find 15 ideas made for weddings, galas, dinners, and birthday parties. Each one has a clear idea, a practical tip, and a note about who it suits best. Some are quick enough for a busy morning. Others take patience and a friend with steady hands. Pick the one that matches your dress, your hair type, and the time you actually have.
1. Classic Braided Crown With Baby’s Breath Tucked In
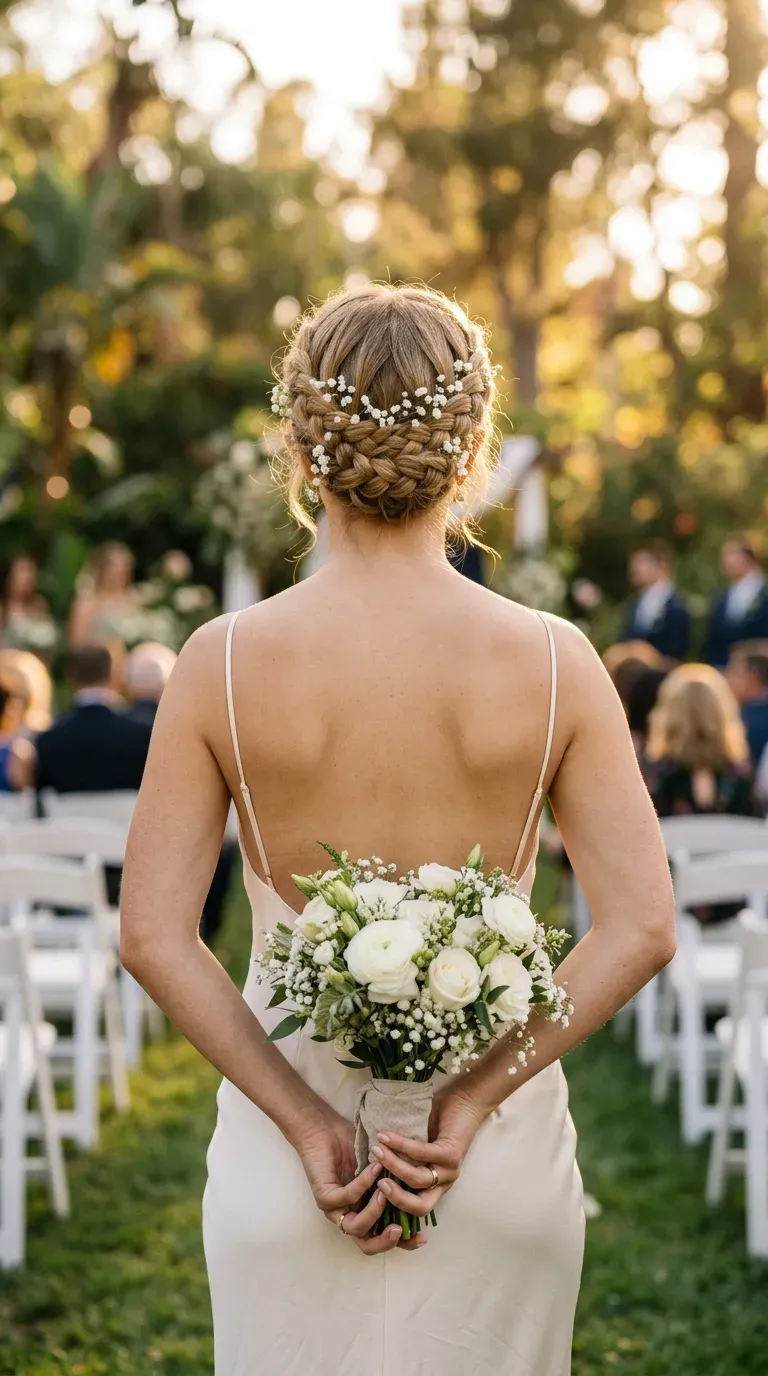
The simplest version is also the one people photograph most. Make a center part, braid two low Dutch braids behind the ears, then wrap each one over the top of the head. Pin the ends under the opposite braid.
Tuck in tiny sprigs of baby’s breath only after the braids are pinned. That way the flowers sit on top of the pins instead of fighting them.
- Use pins that match your hair color
- Gently pull the edges of each braid for a fuller look
- Skip the flowers if the dress already has plenty of detail
Best for: garden weddings and daytime events.
2. Double Dutch Braid Crown Pinned Low At The Nape
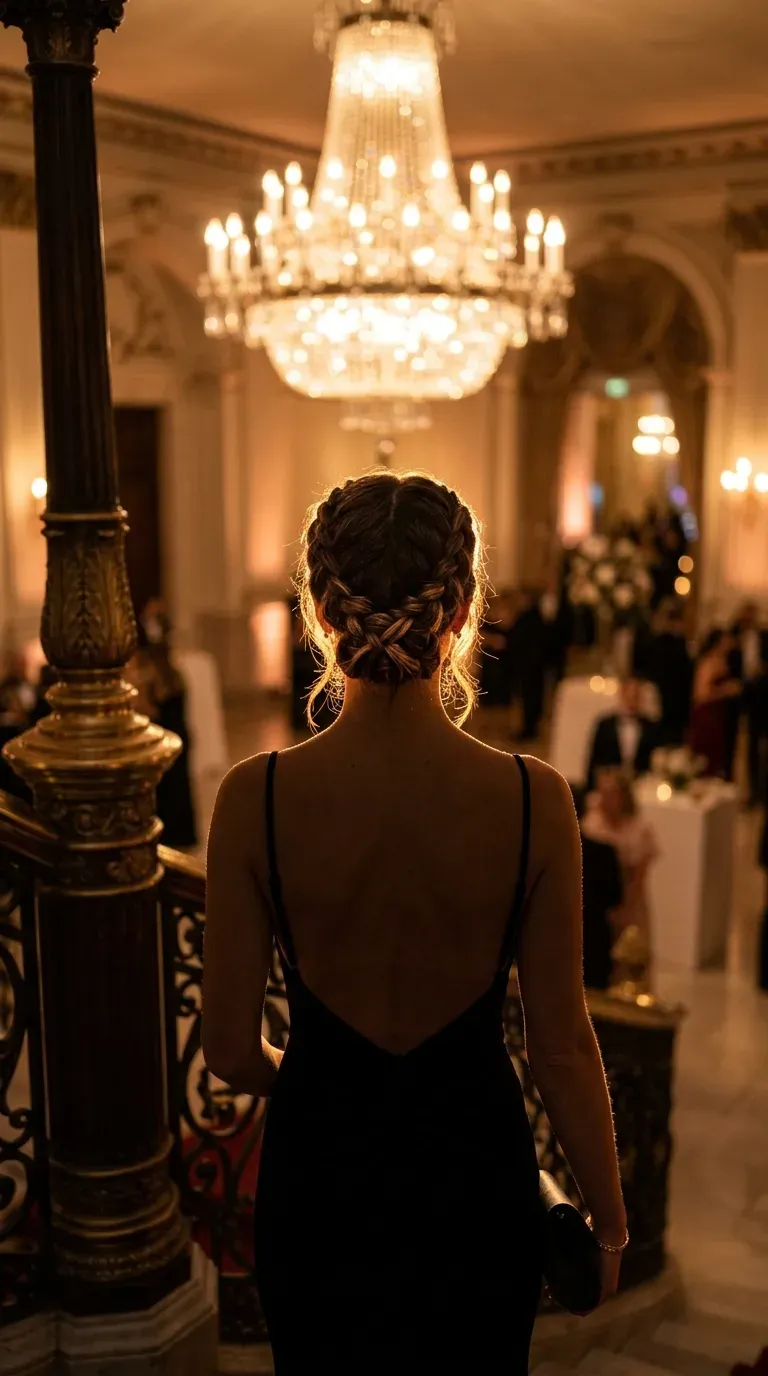
A low crown sits better under a veil, a hair comb, or a high neckline, and it never reads as a headband.
- Part the hair down the middle and clip one side out of the way.
- Dutch braid from the temple down behind the ear, then continue to the ends.
- Repeat on the other side and secure both ends with clear elastics.
- Cross the braids at the nape and pin them flat in a loose X.
Quick tip: Spray texture spray on dry hair first. Clean, slippery hair makes braids slide out of place.
3. Milkmaid Braids Crossed Flat Across The Top

Myth: milkmaid braids only suit picnics and costume parties.
The look turns formal in the details. Keep both braids tight and even, tug the edges slightly to flatten them, and cross the ends at the top so no tail sticks out. A pair of small gold pins finishes it and the style reads as polished instead of rustic.
- Part the hair cleanly down the center
- Wrap the braids close to the hairline
- Hide each end under the opposite braid
Watch for bulky elastics. They poke through and ruin the smooth line.
4. Fishtail Crown With Two Loose Face Framing Wisps

Fishtail braids can look busy when they sit on a flat crown. The fix is to keep the braid thin and let it act as a detail, not the whole look.
Make one narrow fishtail on each side, wrap them over the top, and pin them with the tails tucked away. Then pull two thin wisps loose in front of each ear.
Those wisps soften the braid and make the style look relaxed, which suits candlelit dinners and rooftop parties.
Small warning: do not pull out too many wisps, or humid weather will turn them into frizz.
5. Waterfall Braid Crown That Lets Curls Fall Through
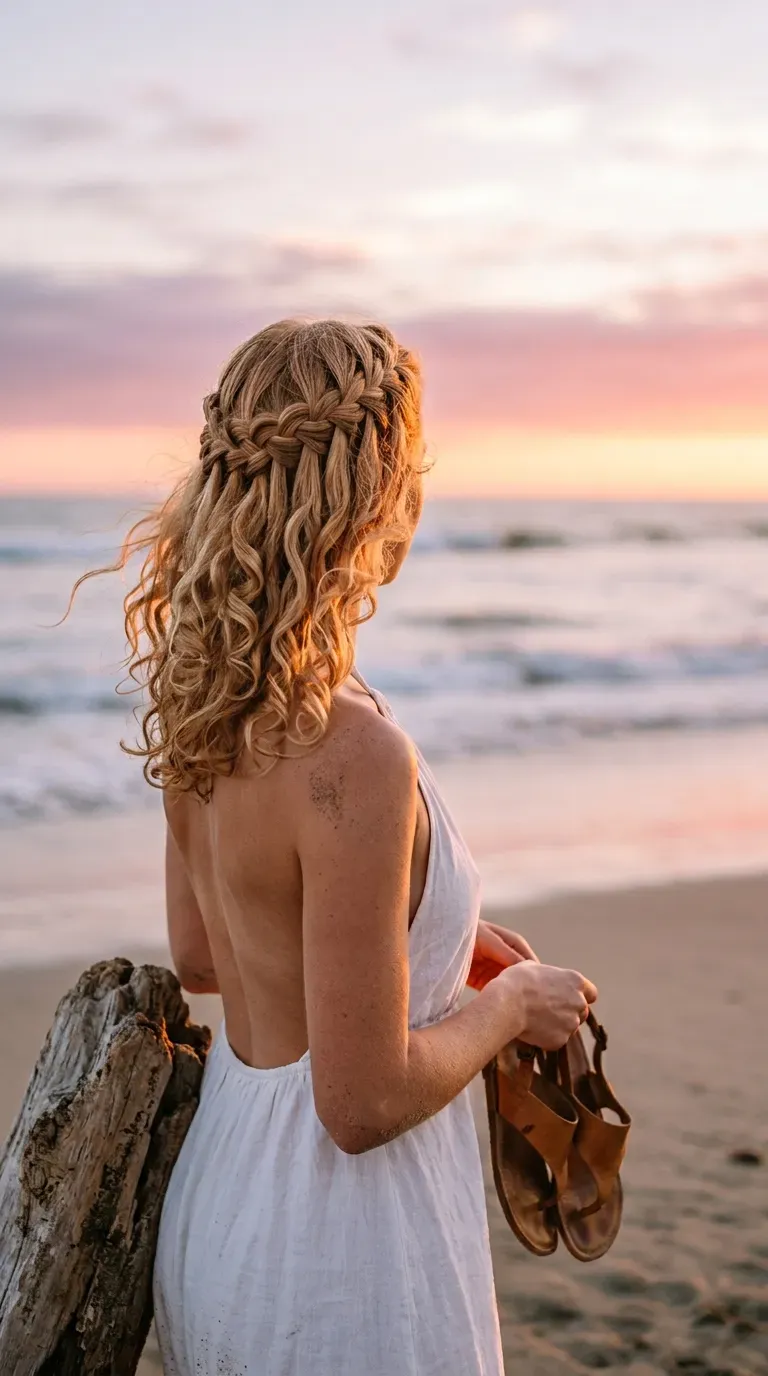
Free flowing curls with a braid that stays put is the whole appeal here. A waterfall braid starts at one temple, travels across the back of the head, and drops strands as it goes, so curls spill below it.
Hold the braid angled slightly upward so it frames the head like a crown.
- Curl the hair first, then braid
- Let the dropped strands hang loose
- Pin the end under the hair on the opposite side
Best for: cocktail parties and beach weddings where you want movement.
Drop thin strands so the curls look airy.
Mist a light hold spray after curling.
Dropping thick chunks that leave gaps.
Braiding on freshly washed, slippery hair.
6. Rope Twist Crown For Fine, Silky Hair
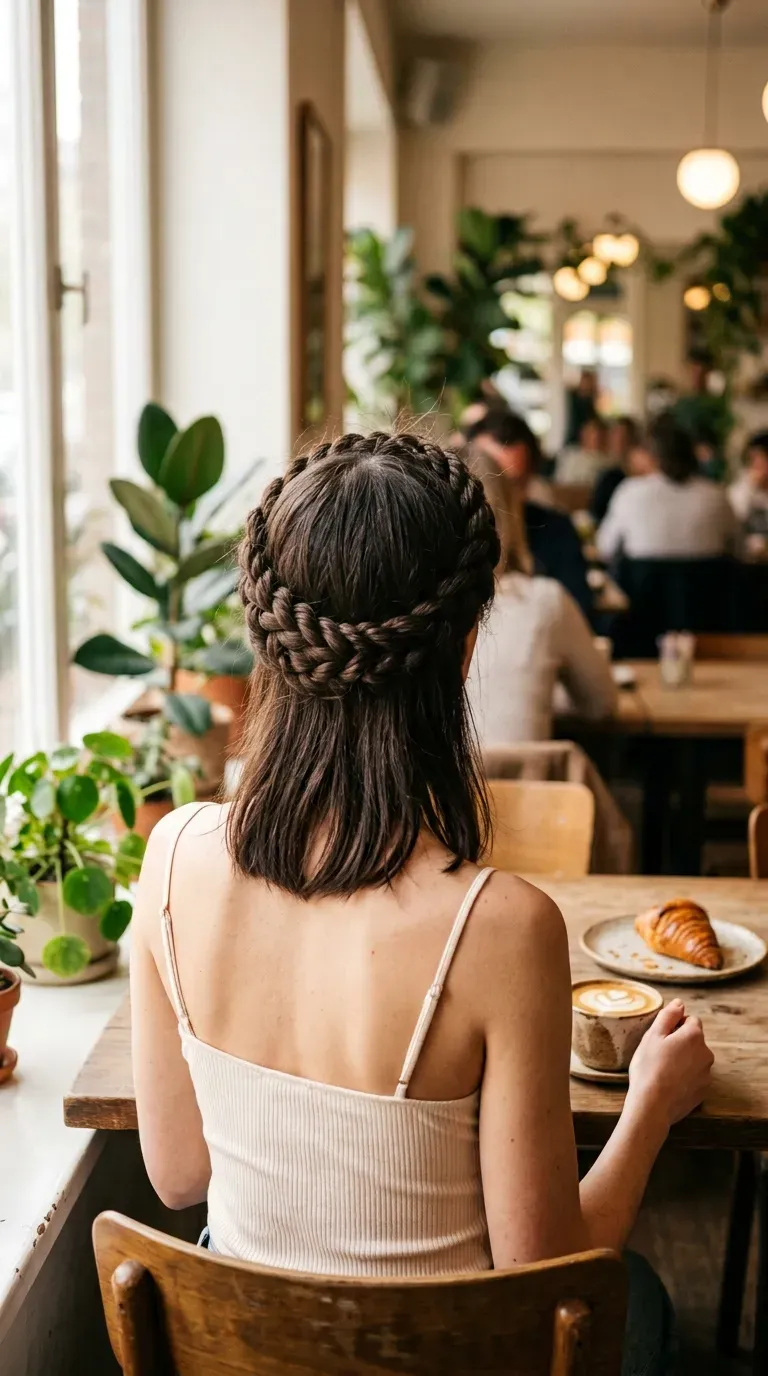
Tiny rule for fine hair: use fewer, looser sections.
A rope twist crown uses just two strands, so it never gets bulky. Twist each strand to the right, then wrap them around each other to the left. That opposite direction locks the twist. Wrap it around the head and pin it.
A bit of volume powder at the roots before twisting gives fine hair the grip it needs. Gently tug the twist wider with your fingertips once it is pinned.
Works best for: shoulder length hair and anyone short on patience.
7. Braided Crown Flowing Into A Low Chignon
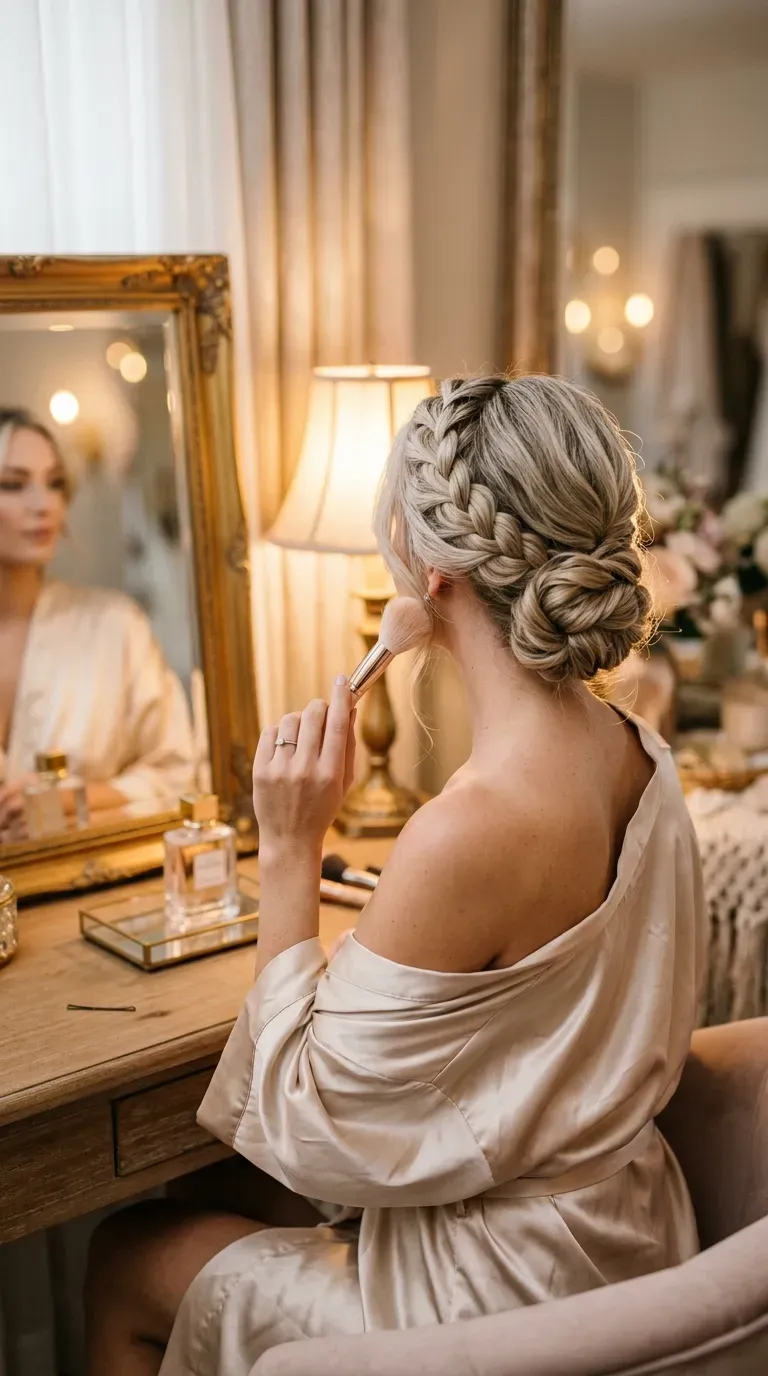
Somewhere around the second hour of a reception, a loose bun gives up. A crown braid that ends in a chignon does not.
Braid a Dutch crown from ear to ear across the back of the head, then gather the remaining length into a low twisted bun. Pin the braid ends inside the bun so no tails show.
Quick tip: Push U shaped pins in from opposite directions to anchor the chignon. They grip better than straight bobby pins.
A plain low bun that slumps by dessert and leaves flyaways around the neck.
A braid anchors the bun, so the shape stays tidy until the last dance.
8. Braided Crown With A Sleek Ponytail Behind It
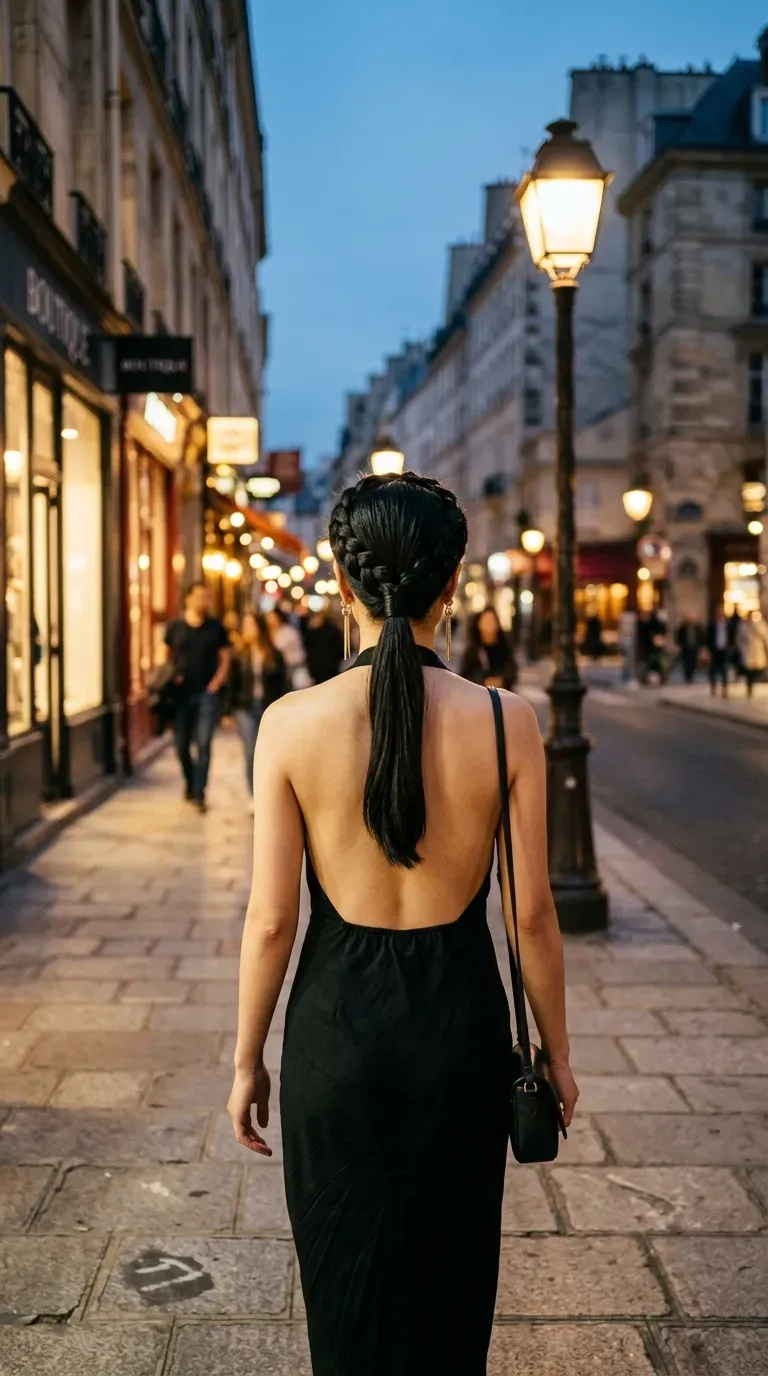
A braided crown with a ponytail looks sharper than a full updo, and it is easier to sit and dance in.
Compare the two finishes:
- Sleek tail: modern, clean, and good with bold earrings
- Wavy tail: softer, and better with floral or lace dresses
Braid a Dutch crown across the top, then gather the rest into a low ponytail at the nape. Wrap a small section around the elastic to hide it.
Best for: events with lots of hugging, dancing, and sitting.
9. Pearl Threaded Braid Crown For Evening Events
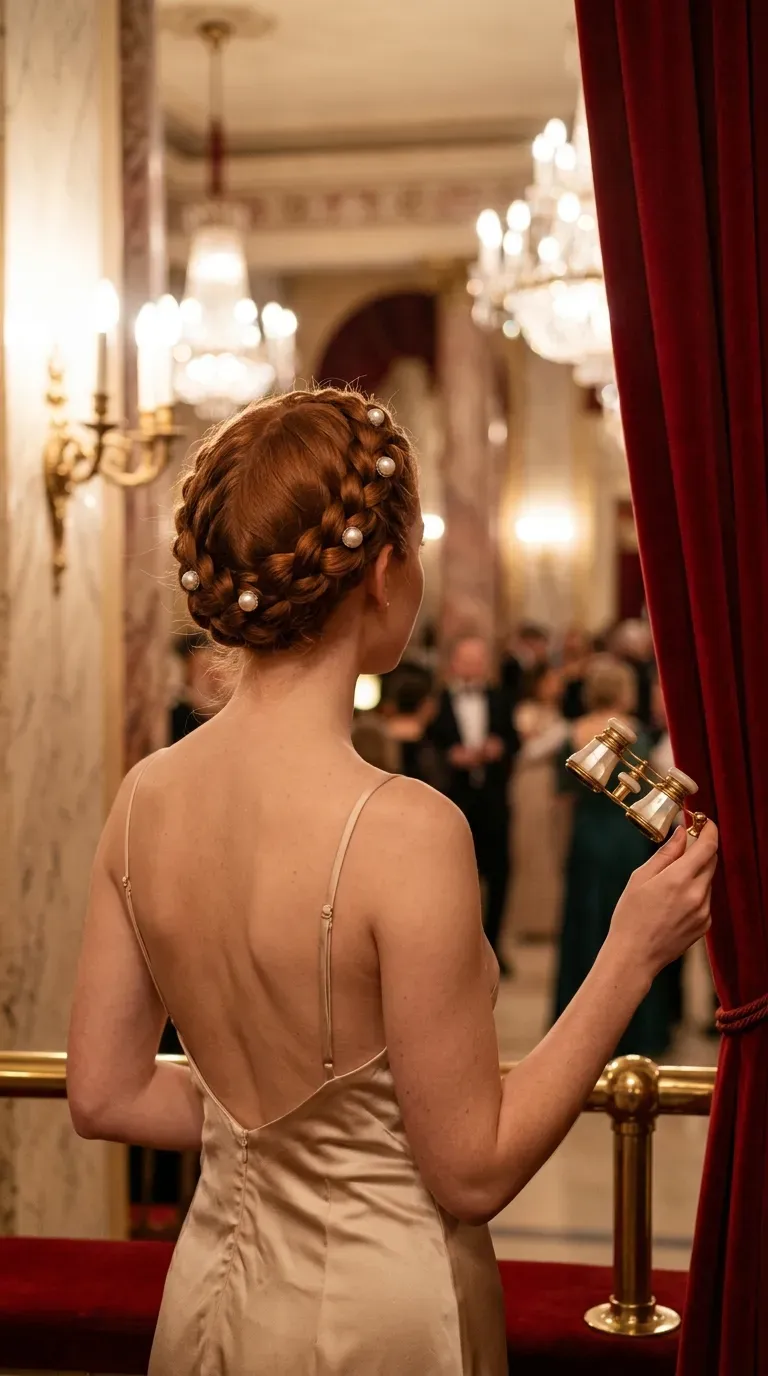
The most common mistake with pearl accents is pushing pins straight onto the top of the braid, where they just look scattered.
Place the pearls in the small gaps between braid loops, and angle each pin so the pearl faces forward. Use an odd number, like three or five, and space them unevenly so the style looks natural.
- Choose pins with a sturdy two prong base
- Match the pearl color to your jewelry
- Add them after hairspray, not before
Style note: ivory pearls show best in dark hair, champagne ones in blonde.
10. Four Strand Braid Crown For Thick Hair

Thick hair can overwhelm a standard three strand crown. A four strand braid spreads the weight into a flatter, wider ribbon that wraps the head more comfortably. I have found it holds better too, because the sections lock against each other.
Divide the hair into four sections and work slowly, keeping the tension even. If your hair is very dense, wrap and pin the braid a little below ear level.
Quick tip: Use smaller pins and more of them when the braid feels heavy.
11. Side Swept Braid Crown With Long Loose Curls
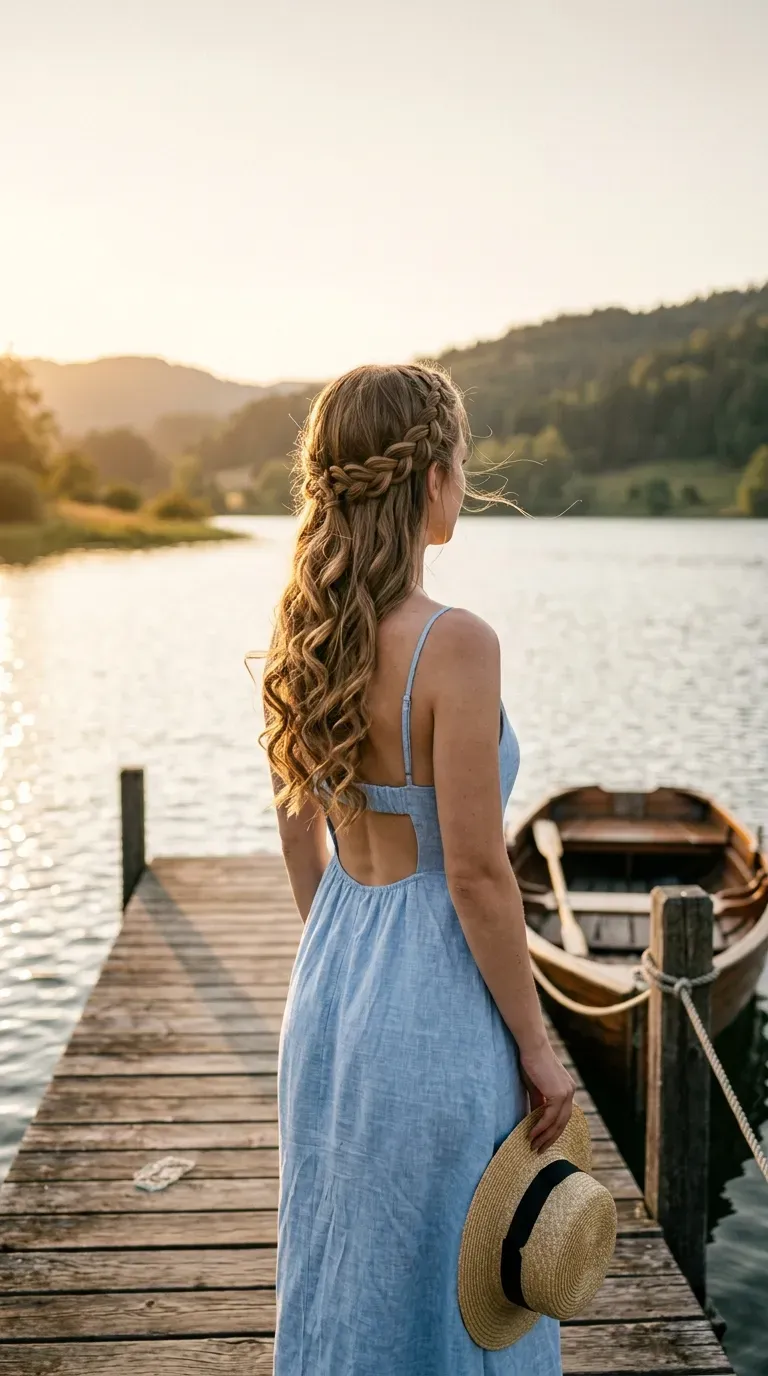
A thin braid starts behind one ear, climbs across the top of the head, and ends tucked behind the other ear, while long curls fall over one shoulder. It looks soft from every angle.
Curl the lengths with a large barrel iron and let each curl cool before touching it. That keeps the shape bouncy instead of frizzy.
- Sweep the curls to the side opposite the braid’s end
- Finish with a light shine spray
- Keep one earring simple so the hair stays the focus
Best for: long hair and strapless dresses.
12. High Braided Crown Bun For Backless And Strapless Dresses
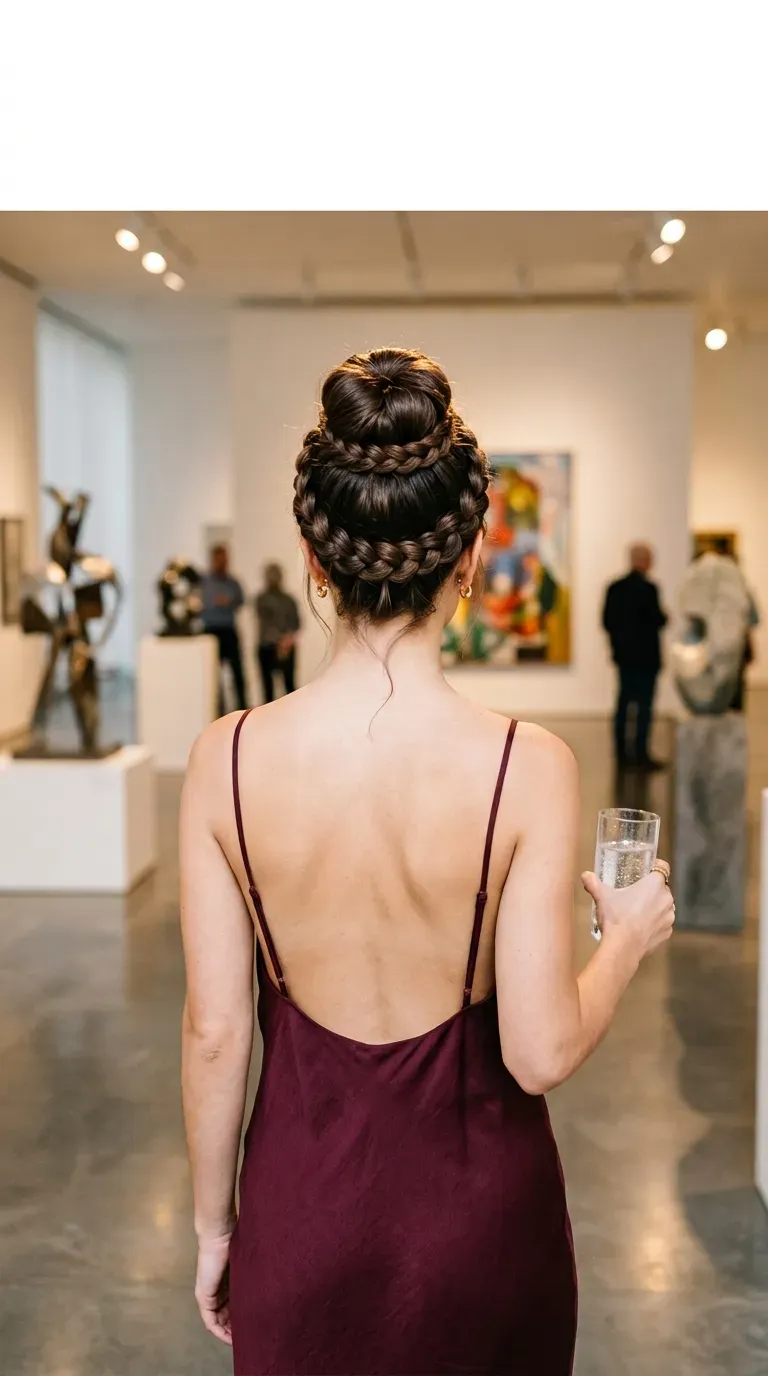
Formal necklines call for a high, clean finish. A braided crown bun shows off the neck and shoulders and keeps the hair clear of a statement necklace.
Brush the hair into a high ponytail first. That ponytail becomes the base of the bun.
Quick tip: Mist the ponytail with a little hairspray and smooth it with a soft brush for a tidy base.
Twist the high ponytail into a coil and pin it into a bun on top of the head.
Leave out a thin section at one temple and Dutch braid it around the back of the head.
Wrap the braid around the base of the bun and pin the end underneath.
13. Ribbon Woven Crown Braid In Your Dress Color
Plain braids can get lost against a bold or patterned dress. A ribbon woven through the crown carries the color of the outfit into the hair.
Cut a length of narrow satin ribbon about twice the braid length, fold it in half, and braid it into the middle strand as you go. Tie the ends in a small bow at the back and tuck the loops into the braid.
- Choose a ribbon slightly darker than the dress
- Seal cut ends with a quick pass of a lighter flame, kept well away from the hair
Quick tip: Satin slips. Add a bobby pin behind the bow to keep it in place.
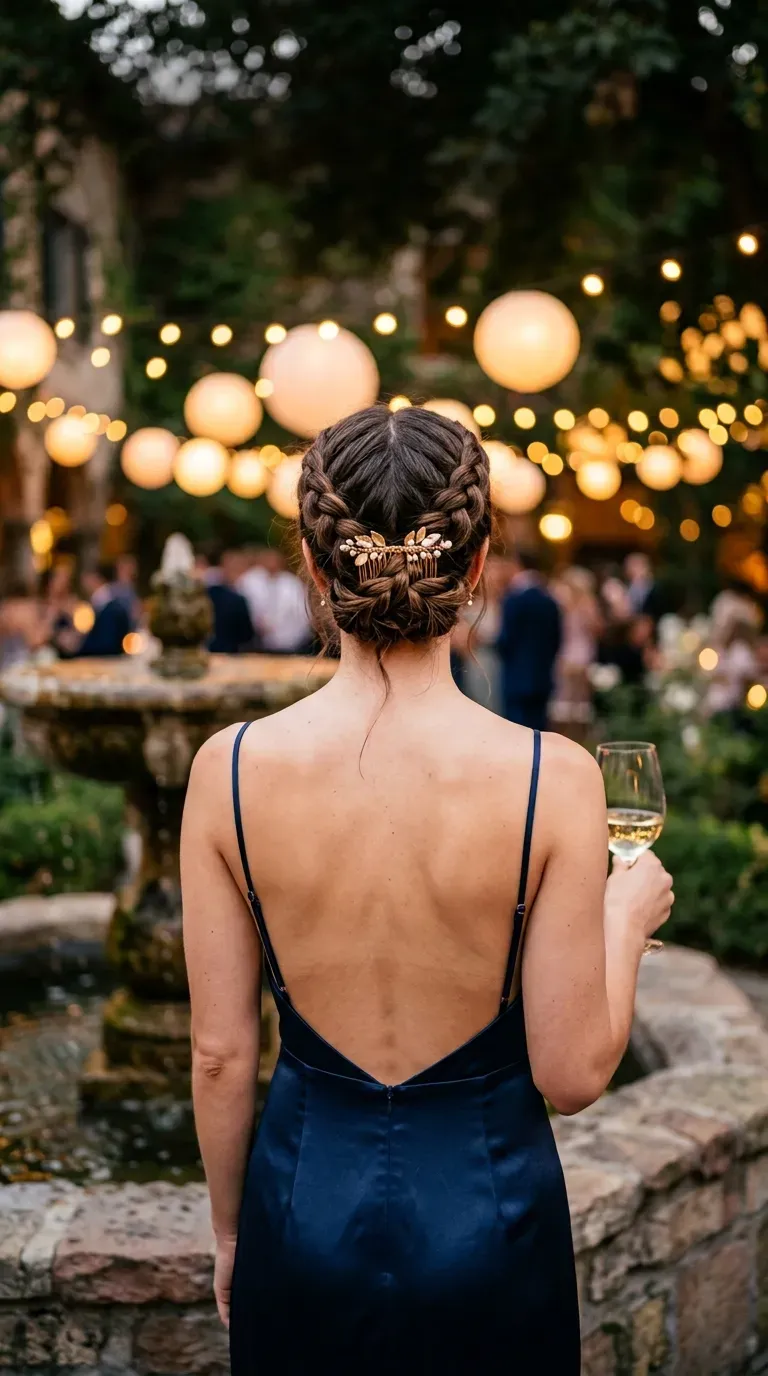
14. Twin Crown Braids That Meet In The Back

Symmetry is the whole game here. Two braids that meet in the back only look balanced if both start from the same point on each side.
Part from the center, mark both starting points just above each ear, and use the same tension on both braids. Overlap the ends, pin them in an X, and slide in a small decorative comb.
The braid that gets tight first usually ends up higher, so check the mirror before pinning.
Pin every braid in place first. Combs, flowers, and ribbons go on last.
15. Flat Twist Crown For Natural Curls And Coils

Natural curls and coils already have the texture braided styles need. A flat twist crown makes the most of that by twisting small sections along the hairline from each side until they meet at the back.
Work on damp hair with a leave in cream so each twist stays smooth, then leave the length free in a soft puff or twist out.
- Twist small sections for a neat line
- Pin the ends flat with a few bobby pins
- Finish with a light gel for hold without crunch
Overnight tip: tie a satin scarf around the style to keep it fresh for the next day.
Wrapping Up
A braided crown does not need a professional stylist. Start with the one that fits your hair length and your dress, practice it once before the big day, and keep a few extra pins in your bag. Small details like a ribbon, a pearl, or a loose curl make the style feel personal. Whatever event is next on your calendar, one of these braided crown hairstyles can carry you through it without a mirror check every ten minutes. Every braid gets faster the second time you do it.
Save this list to your hair board so it is ready the next time an invitation lands in your inbox.