
It is 7:42, the bus comes at 7:55, and somebody just announced that ponytails are boring. If you do hair in the morning, you know this moment. You have one brush, a few elastics from the bottom of your bag, and a kid who would rather be anywhere than sitting still in front of you.
You don’t need fancier skills to fix this. You need more styles to rotate through. Once you know a few quick styles that hold through recess and gym class, mornings stop feeling like a negotiation.
This list of kids hairstyles has quick two minute styles for rushed days and a few braids worth saving for a slow Sunday. Some work on short bobs, some need shoulder length hair, and a few are made for curls and waves. Each one includes the small details that make it stay put, because a cute style that falls out by lunch doesn’t help anyone.
Grab the spray bottle and the elastics. Here are 25 to choose from.
1. Bubble Ponytail With Tiny Clear Elastics
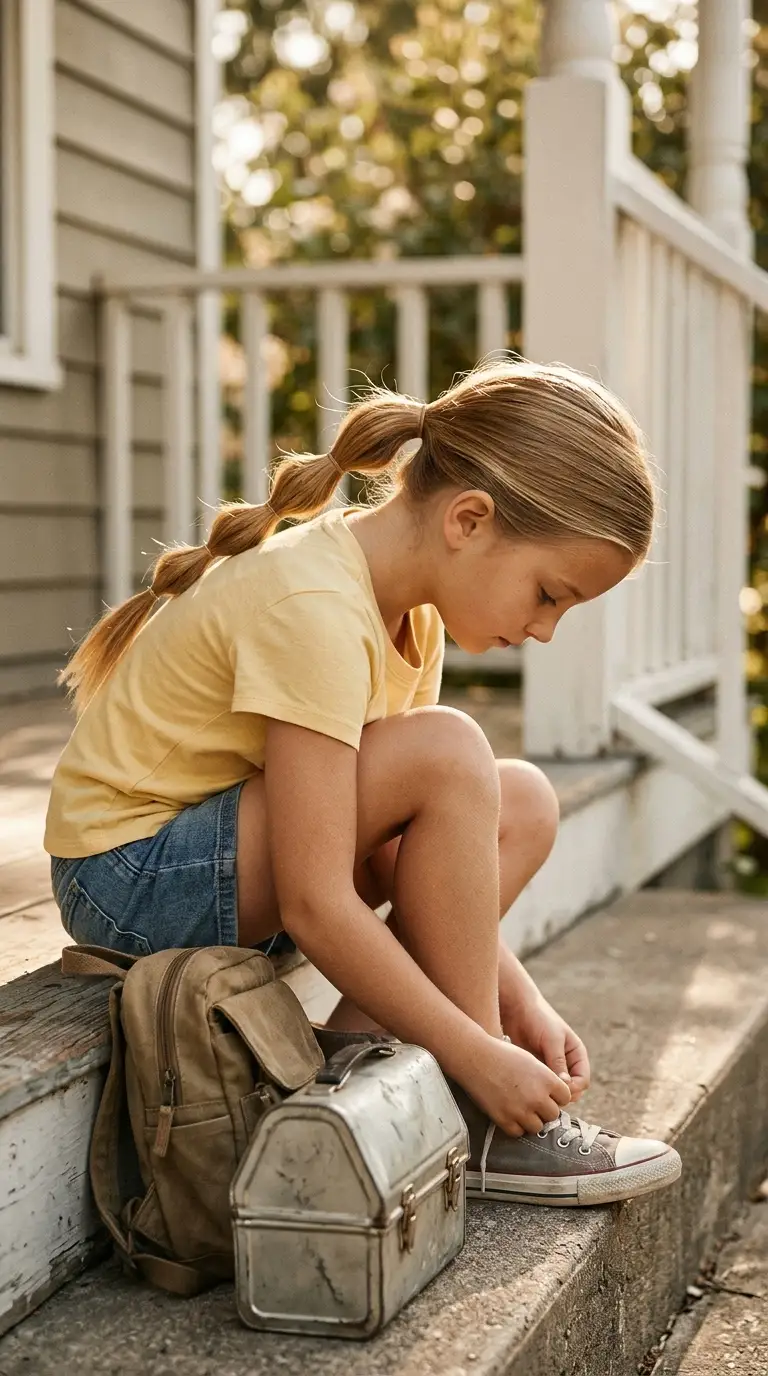
A bubble ponytail looks fancy and takes about three minutes. Clear elastics do most of the work.
- Brush the hair into a mid height ponytail and secure it.
- Add a clear elastic every two inches down the length.
- Gently pull the hair between each elastic outward to puff each bubble.
- Make the top bubble a little wider than the rest.
Fine, thin hair benefits most, because puffing each section makes the ponytail look about twice as full.
Quick tip: buy tiny silicone elastics in a big pack. They disappear into the hair and cost almost nothing.
2. Two Dutch Braids for Playground Days
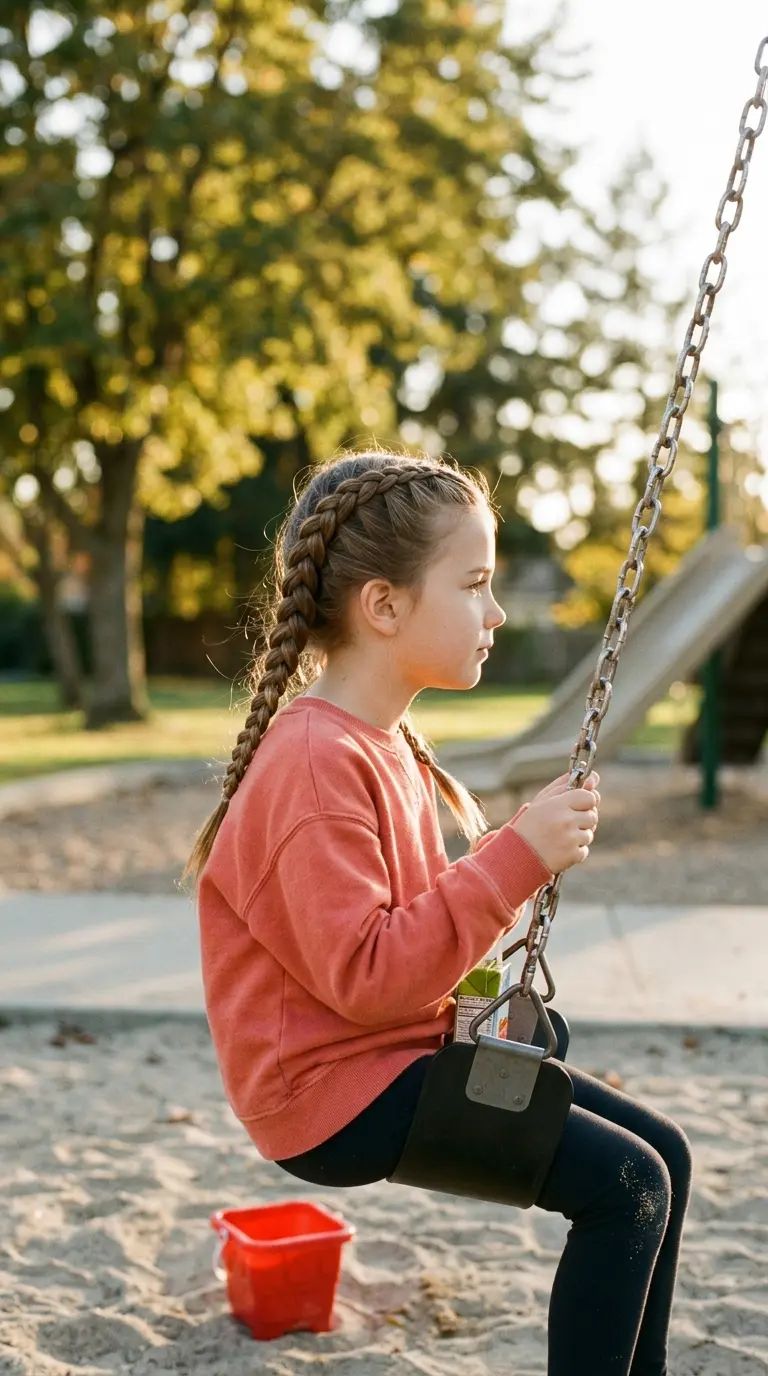
Regular pigtails fall apart the second a kid hangs upside down on the monkey bars. Dutch braids last longer because they grip the scalp the whole way down.
The trick is crossing the strands under instead of over. The braid then sits on top of the head like a raised rope, which kids tend to think looks cool.
- Part straight down the middle with the tail of a comb.
- Braid each side snug at the hairline and looser near the ends.
- Finish with elastics that match her hair color.
Done well, these last two days. She can sleep in them, and you just spray and smooth them the next morning.
3. Half Up Topknot for Hair That Gets in Her Eyes
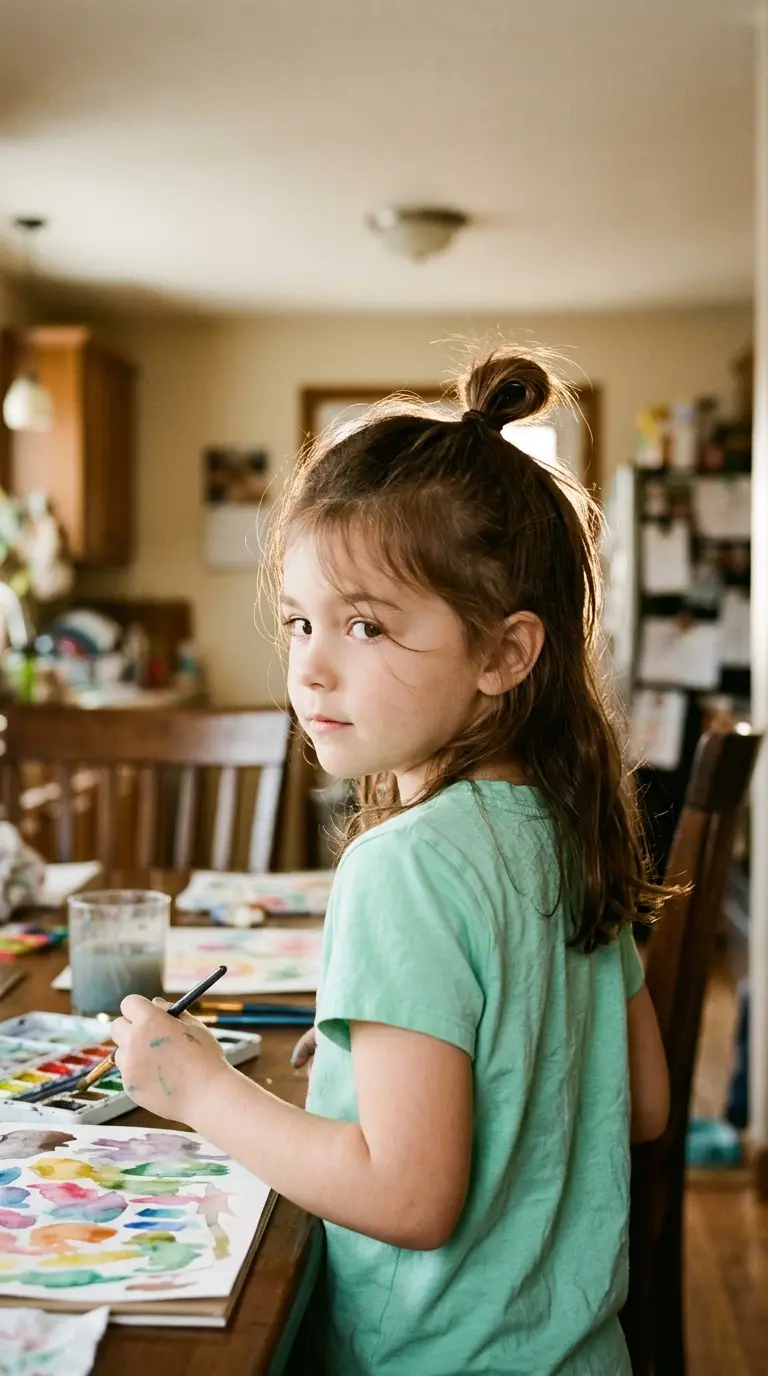
Her face stays clear and her hair still hangs down, so nobody at the table is unhappy.
Gather the top third of the hair, from temple to temple, and twist it into a small bun right at the crown. Wrap a scrunchie around it twice. Leave the rest loose.
This style helps most with growing out bangs. Those awkward in between pieces tuck straight into the knot instead of poking her eyelashes all day.
Small detail: a tight, slick topknot can look severe on a small head. Pull a few wisps loose at the front.
4. Space Buns With Twisted Bases
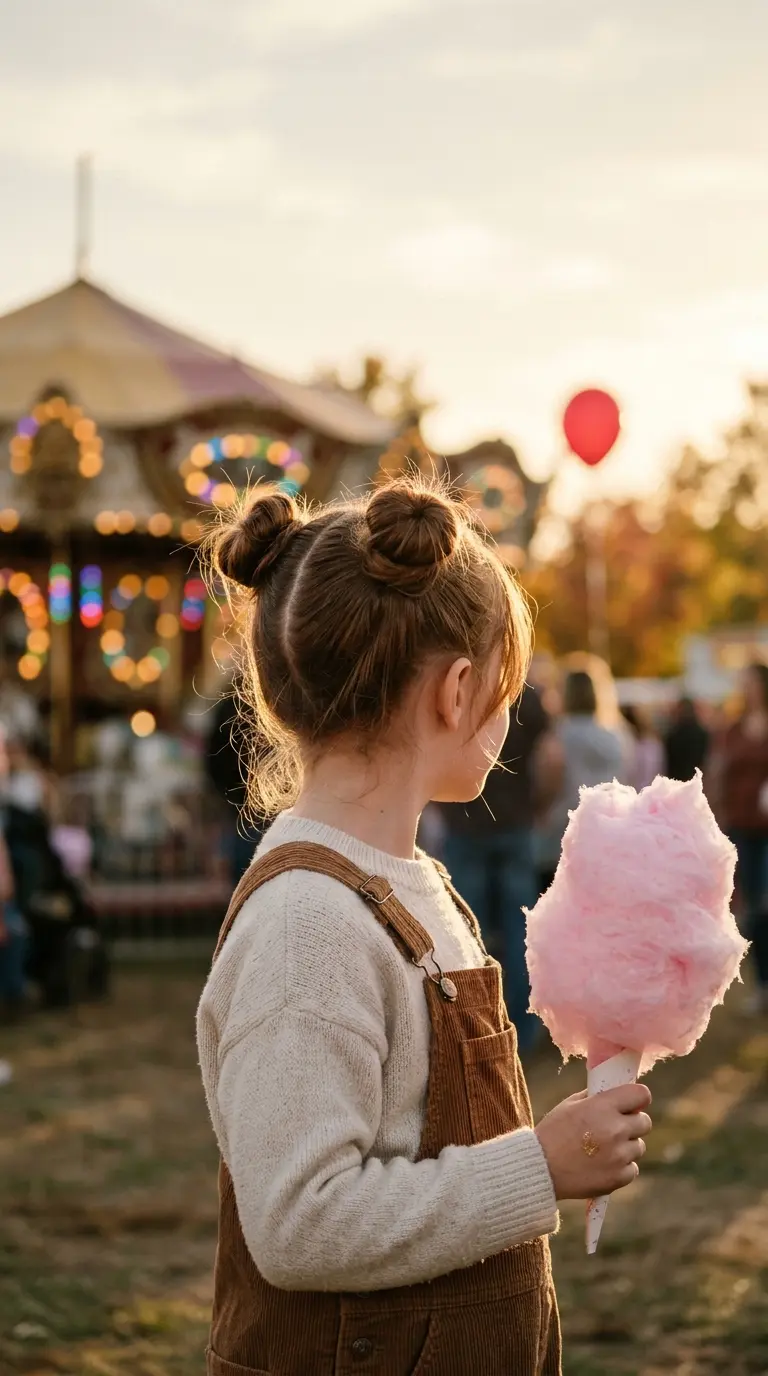
Two round buns high on the head, a clean middle part, and a few soft pieces at the temples. That’s the whole look.
What separates buns that hold from buns that sag is the base. Twist each pigtail tightly before wrapping it, and the twist coils into itself like a snail shell.
Steps that work:
- Make two high pigtails, slightly in front of the ears.
- Twist each one until it starts to curl back on itself.
- Wrap it around the elastic and pin it with two bobby pins in an X.
Shoulder length hair makes small, neat buns. Longer hair makes big, puffy ones.
5. Lace Braid Headband Across the Front
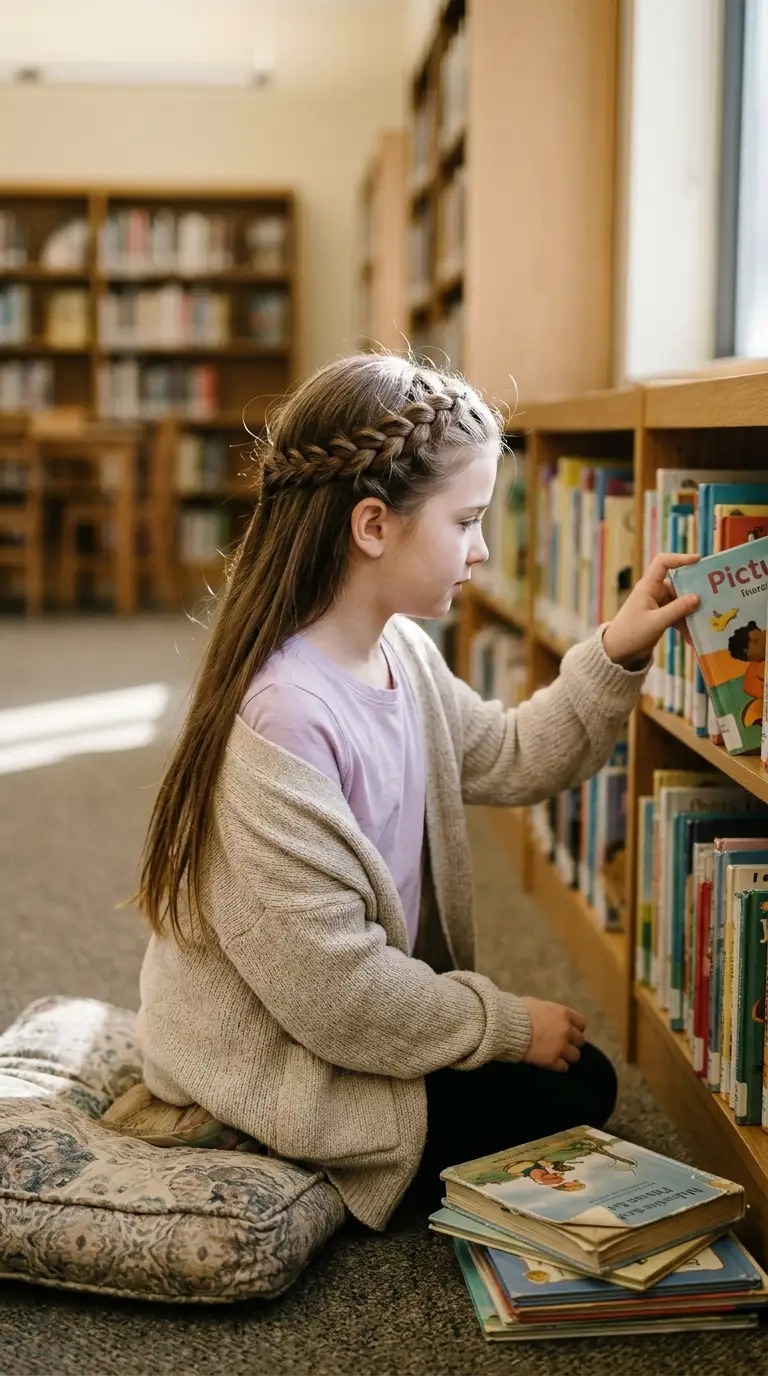
Braid only from the front. That’s the rule that makes this style work.
A lace braid is a French braid that picks up hair from one side only, the hairline side. Start behind one ear, braid across the top of the forehead, and add new hair from the front edge as you go. Finish behind the other ear and pin the end under the loose hair.
It works like a headband that never slides down. It’s handy for layered cuts, because the short front layers get caught in the braid.
Good fit for: picture day, recitals, and any day she wants her hair down but off her face.
6. Rope Twists Pinned at the Back
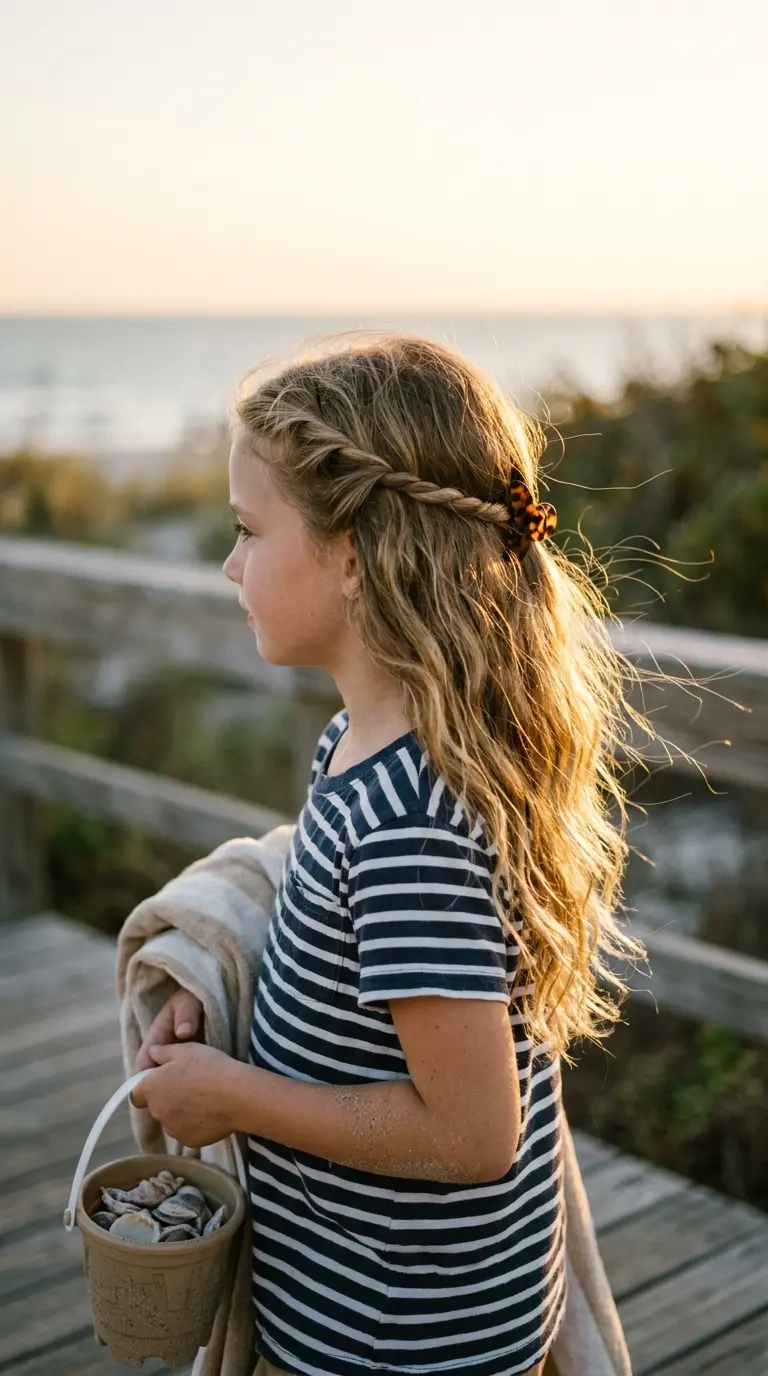
The most common mistake with twisted half up styles is twisting both strands the same way. They unravel within an hour.
Here’s the fix. Take a one inch section at each temple and split it in two. Twist each strand to the right, then wrap the two around each other to the left. The opposite directions lock the rope in place.
Bring both ropes to the back of the head and join them with a small clear elastic or a cute clip.
Why it holds: wavy hair grips itself, so the twists stay tight even on a windy beach.
7. Pull Through Braid Ponytail
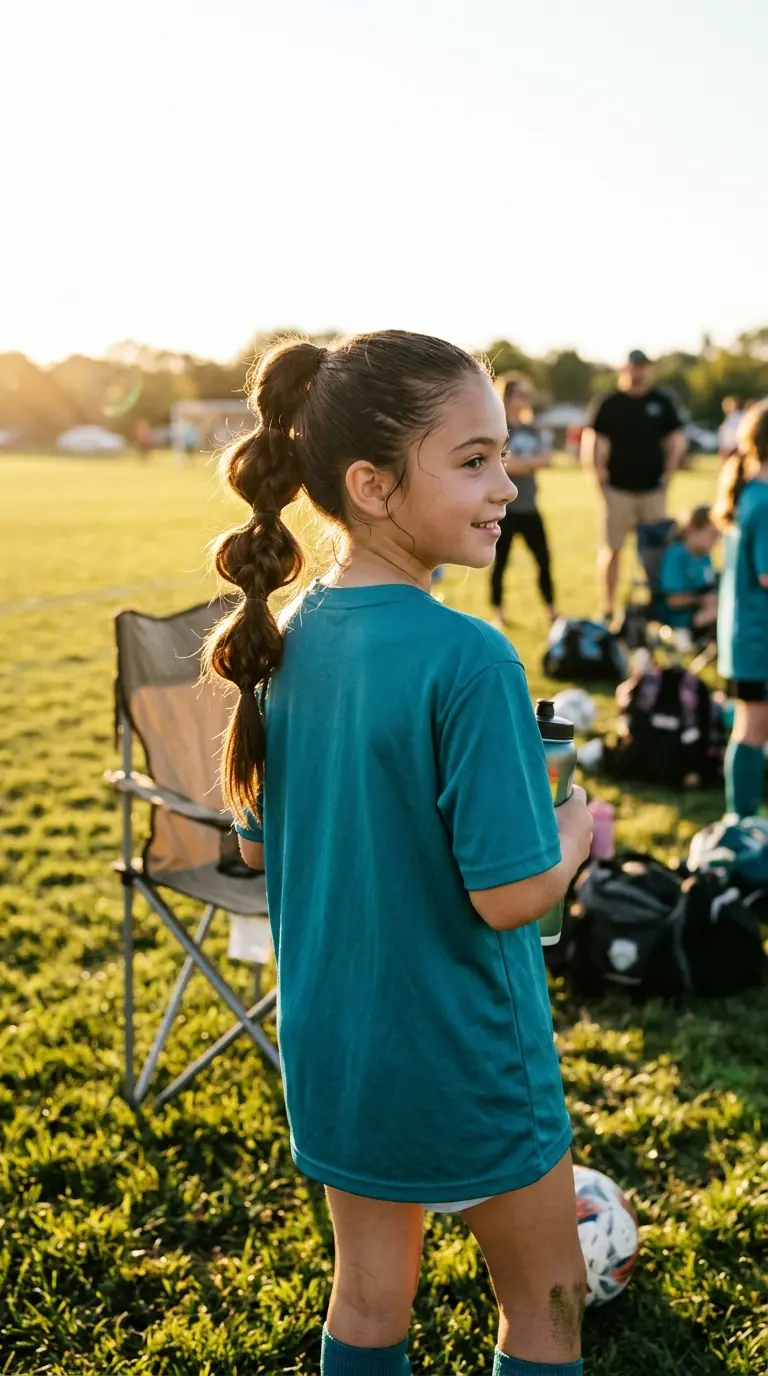
It looks like a thick, complicated braid. It’s really just ponytails and elastics, which makes it much easier than a real braid if you never learned to plait.
Make a high ponytail. Split it into a top half and a bottom half. Pull the bottom half up through the top, add an elastic, then split again and repeat down the length. Gently tug the edges of each section to widen it.
Compared with a French braid, it takes about the same time but forgives sloppy hands.
The bonus: missed sections just disappear into the puff.
<div style="display:flex; flex-wrap:wrap; gap:14px; margin:26px 0; width:100%; box-sizing:border-box;"> <div style="flex:1 1 220px; background:#FCEEF2; border-radius:12px; padding:18px 20px; box-sizing:border-box;"> <div style="font-weight:800; color:#7E2E4A; font-size:15px; margin-bottom:10px;">✅ Do this</div> <p style="margin:0 0 6px; color:#333333; font-size:15px; line-height:1.55;">Pick elastics close to her hair color so each section blends in.</p> <p style="margin:0; color:#333333; font-size:15px; line-height:1.55;">Widen each section right after its elastic goes on, while it is easy to reach.</p> </div> <div style="flex:1 1 220px; background:#f6efee; border-radius:12px; padding:18px 20px; box-sizing:border-box;"> <div style="font-weight:800; color:#9a4a3f; font-size:15px; margin-bottom:10px;">🚫 Skip this</div> <p style="margin:0 0 6px; color:#333333; font-size:15px; line-height:1.55;">Pulling the sections tight as you build, which flattens the puff.</p> <p style="margin:0; color:#333333; font-size:15px; line-height:1.55;">Starting without a firm base ponytail, since every section hangs from it.</p> </div> </div>8. Waterfall Braid for Long, Straight Hair
[[IMAGE: h2=”8. Waterfall Braid for Long, Straight Hair” filename=”waterfall-braid-long-straight-hair” alt=”Three quarter back view of a long waterfall braid on a girl in an orchard” prompt=”A vertical 2:3 Pinterest style photo of a girl of about nine in a three quarter back view in an apple orchard, her body turned away and her head turned left enough that her temple, the start of the braid at the front hairline, and soft face framing pieces show while the waterfall braid wraps around the back of her long straight golden blonde hair with dropped strands falling down her back, wearing a rust colored crew neck t-shirt, reaching up to pick a red apple with a woven basket on her arm and a wooden ladder blurred nearby, warm golden hour sun from the side rim lighting the falling strands, shot on a Canon EOS R5 with a 135mm lens at f/2.0, ISO 200, eye level with the hairstyle in the upper center showing the front start and the full back and cropped at the waist with open space at the top, cheerful candid editorial aesthetic with warm tones and soft bokeh, a leaf caught in her sleeve, a few flyaways, subtle film grain, photorealistic, ultra-detailed, editorial quality, 4K resolution”]]
Family photos, a cousin’s birthday, the first day back. Some days call for a little extra, and a waterfall braid gives you that without the stress.
It looks best on smooth, long hair, because the dropped strands fall cleanly. Start a regular braid at one temple. Each time the top strand crosses over, let it drop and pick up a new strand from above instead. The dropped pieces hang down like water through the braid.
- Braid around the back of the head to the opposite ear.
- Pin it with a small claw clip or a pretty pin.
- Mist the hair with water first so the strands behave.
Expect to practice twice. The third try is usually the keeper.
9. Fishtail Side Braid Over One Shoulder
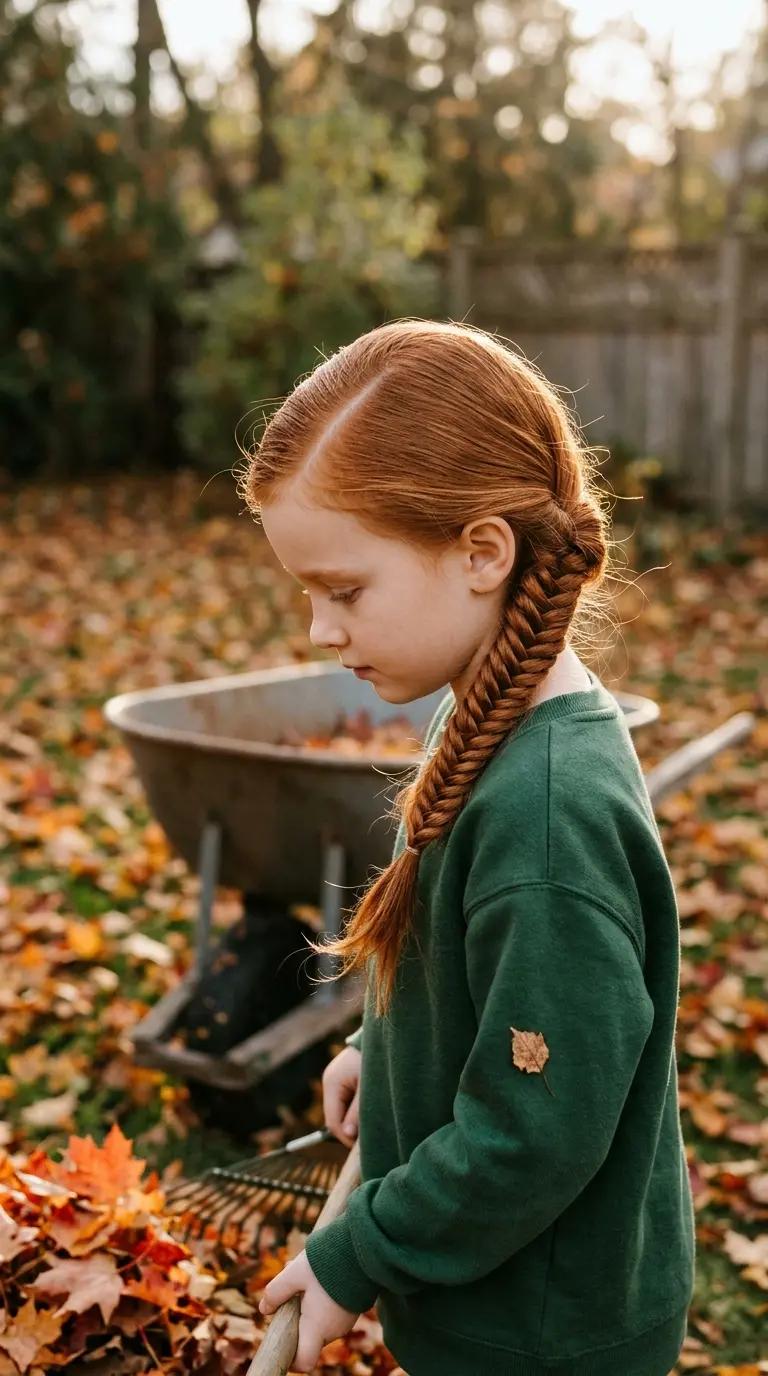
Fishtails have a reputation for being hard. They only use two strands, which makes them one strand easier than a normal braid.
Sweep all the hair over one shoulder and split it in half. Take a thin piece from the outside of the left half and cross it over to the right half, then do the same from the right. Keep repeating with skinny pieces.
Thinner pieces make a finer, prettier pattern. Thick chunks turn it into a regular looking braid.
Patience note: let her watch a show while you work. A fishtail takes more patience than skill.
10. Heart Braid for Valentine’s Day and Beyond
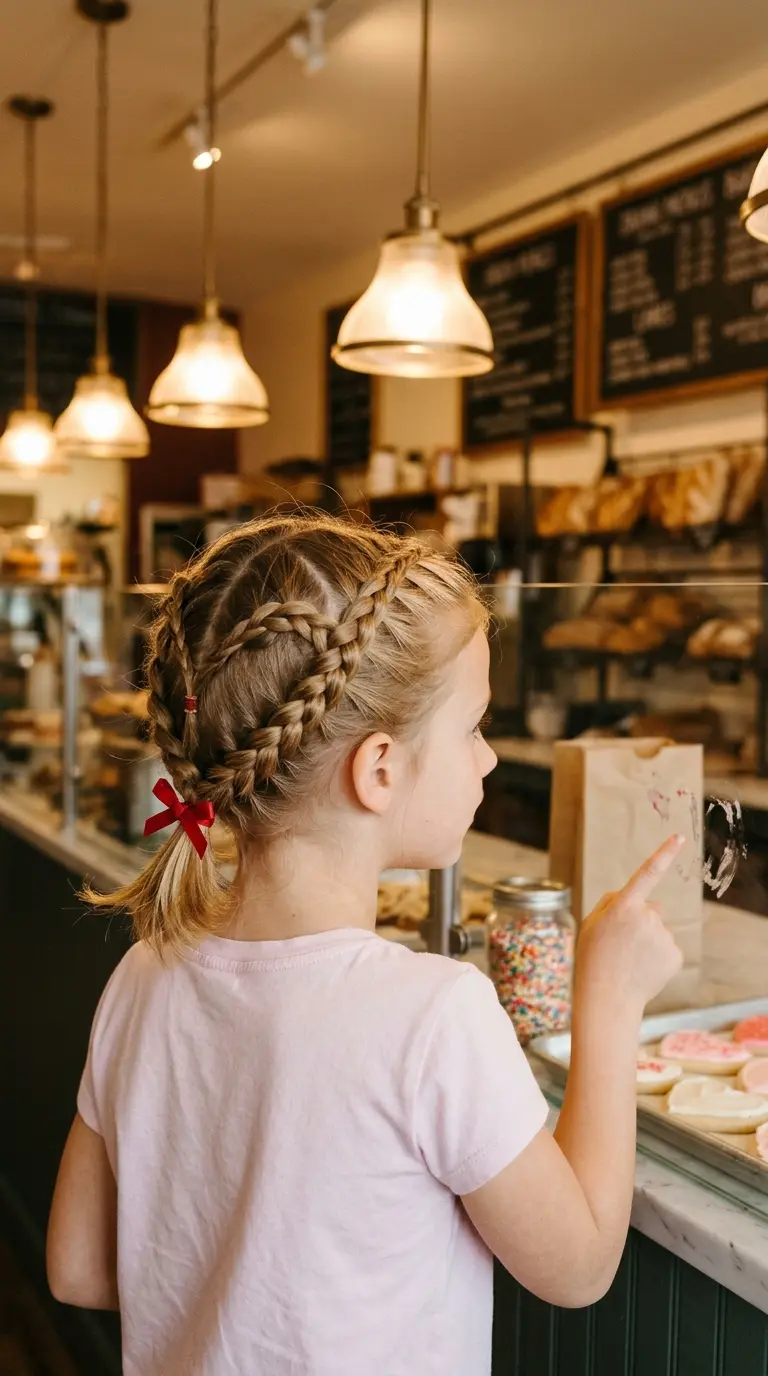
Once kids see this on a classmate, they ask for it by name. It’s two Dutch braids that curve into a heart on the back of the head, and the curve is easier than it looks.
Draw the heart with the comb first. Part a V shape at the crown, then curve each side out and down toward the nape.
- Braid the left side, following the curved part.
- Repeat on the right.
- Join both braids into one ponytail at the bottom point.
Keep the parts clean. A wobbly part makes a wobbly heart, so redo it before you start braiding.
11. Criss Cross Elastics for Short or Thick Hair
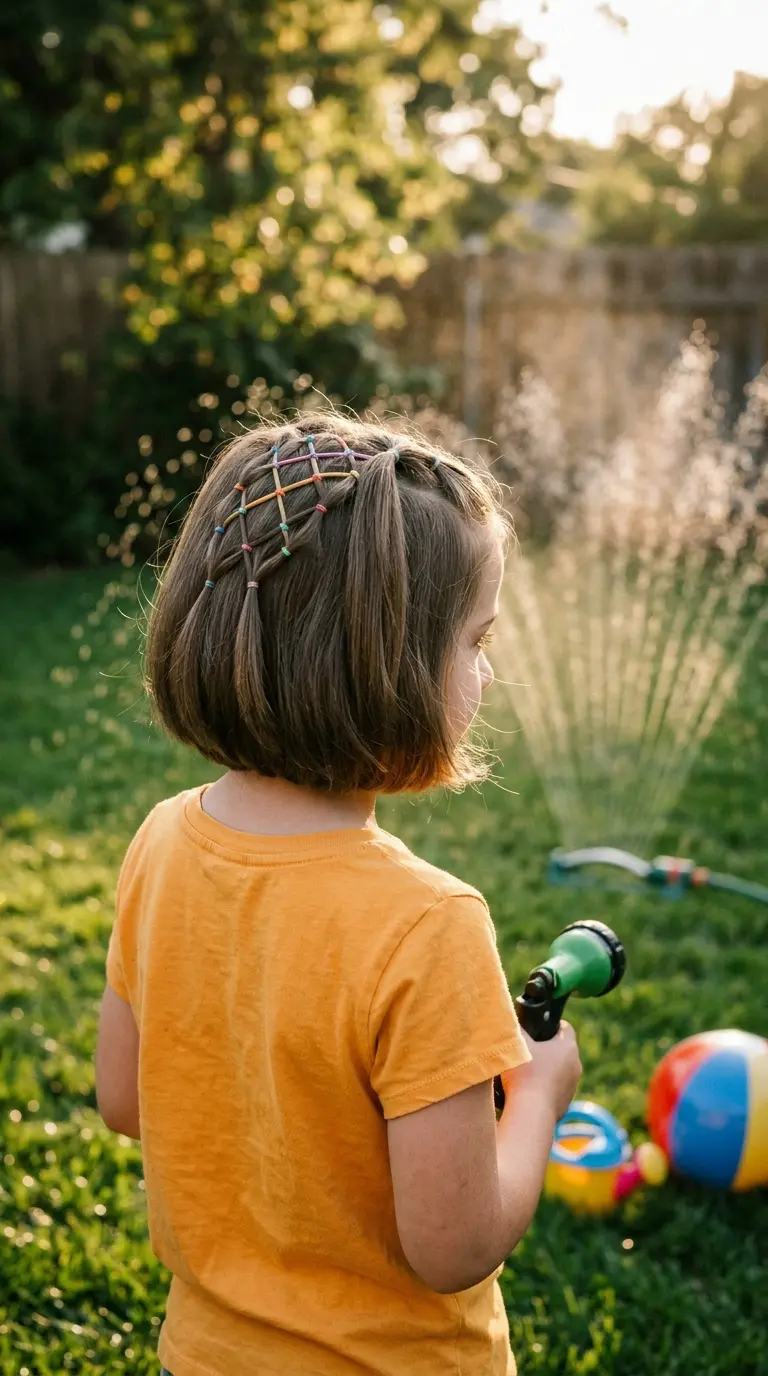
Short hair can’t make a ponytail, and thick hair turns every ponytail into a heavy, aching lump by noon. Criss cross elastics fix both problems.
Make three small ponytails across the front hairline. Split each one in half and join the neighboring halves with new elastics a couple of inches back, so they form a diamond pattern. Repeat for another row, then leave the rest down or gather it.
The weight spreads across the scalp instead of pulling on one spot, so many kids find it more comfortable than a single tight pony.
Elastic note: use soft, snag free elastics. Cheap rubber bands break hair when you take them out.
Short front pieces fall into her eyes, clips slide out before second period, and the back sticks up from sleeping on it.
The front is locked into a tidy diamond grid, the back sits smooth, and it all holds through recess and the bus ride home.
12. Messy Low Bun With a Big Scrunchie
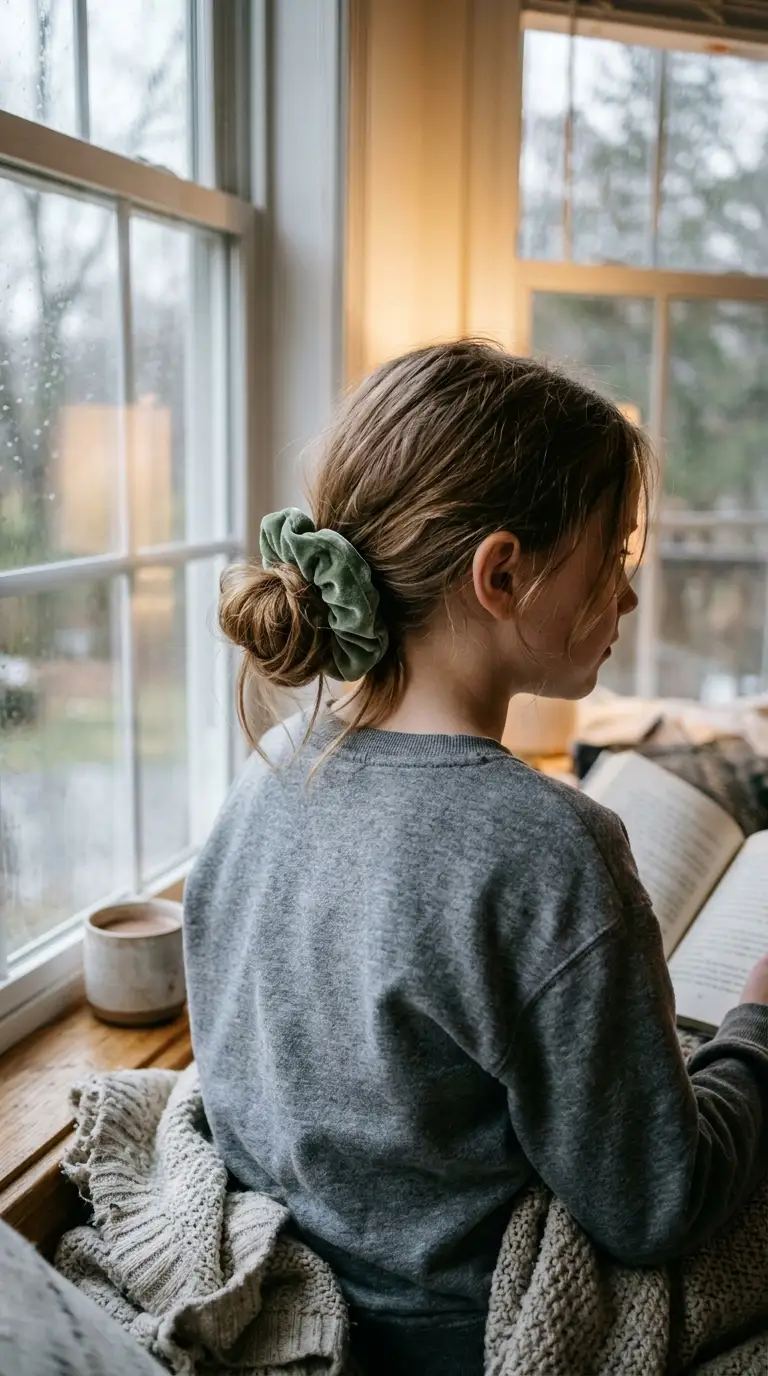
Never brush it smooth first. Messy buns on kids look best on second day hair with a little texture.
Gather the hair loosely at the nape with your fingers. Twist it, wrap it around itself, and loop a big scrunchie over it twice. Then pull a few pieces loose at the temples and the back.
- Fine hair: add a pinch of dry shampoo before twisting for grip.
- Thick hair: use two scrunchies, one under the other.
- Curly hair: skip the twist and just loop it, which keeps the curls defined.
This is your rainy day style, your sick day style, and your running late style all at once.
13. Low Pigtails With Ribbon Bows
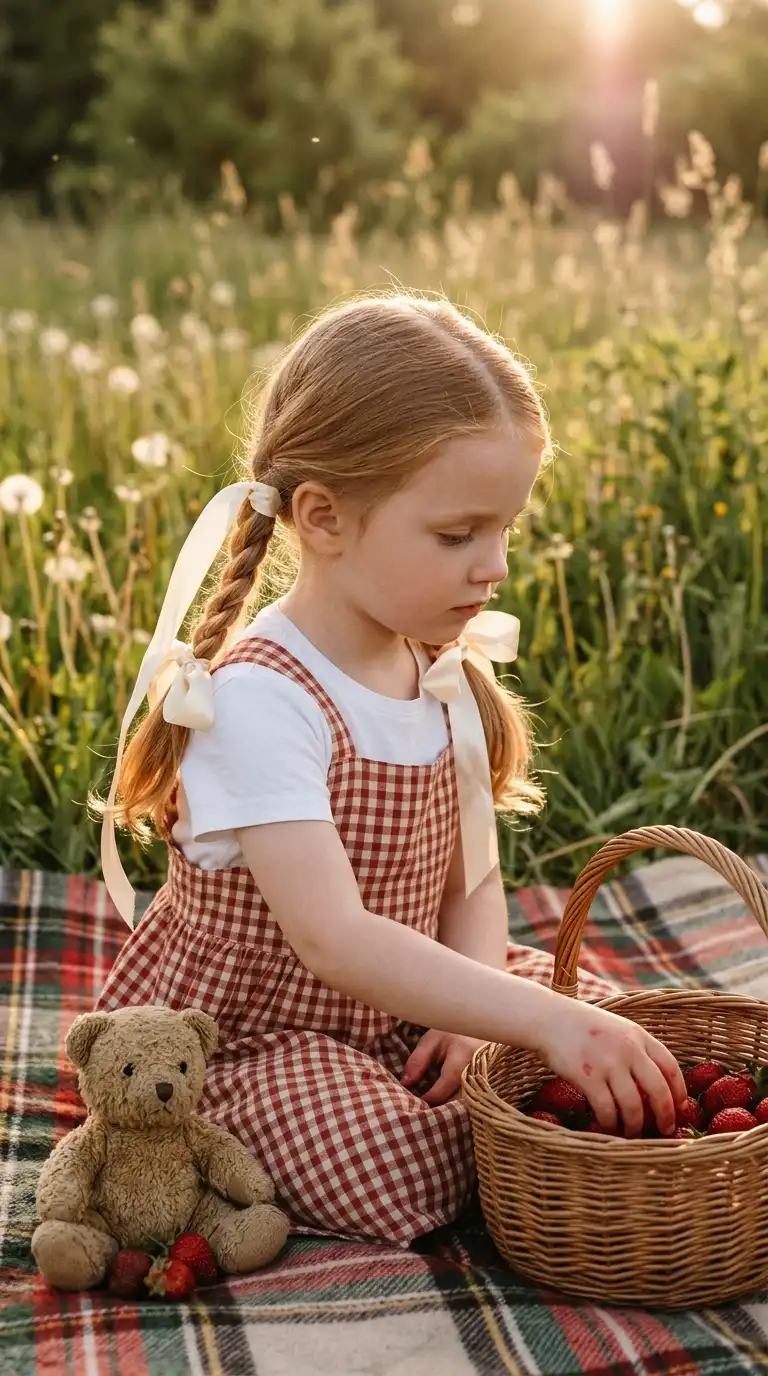
Two soft, low pigtails tied with long satin ribbons that flutter when she runs. It’s the simplest style on this list, and somehow it’s the one grandparents always comment on.
Tie the pigtails just behind the ears, low on the neck. Thread a ribbon under each elastic and tie a bow with long tails, about four inches each.
Low pigtails are also kinder to little ones. High pigtails pull on young scalps, while low ones stay comfortable during car seat naps.
Ribbon tip: satin slides, so tie it over the elastic, never instead of it. Grosgrain grips better on kids who play hard.
14. Hair Wrapped Ponytail That Hides the Elastic
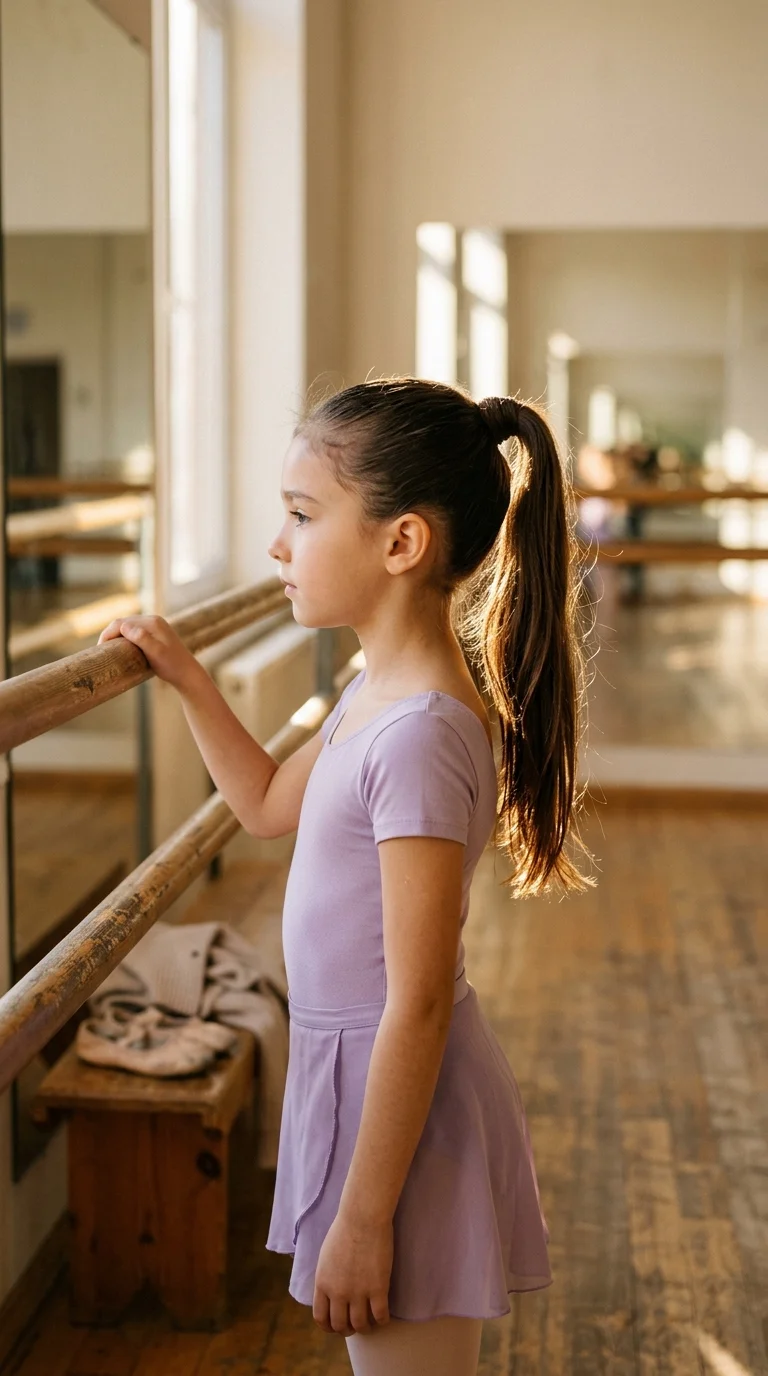
The usual mistake is wrapping a thick chunk of hair around the base. It looks bulky and slides down within the hour.
Take a thin piece, about the width of a pencil, from the underside of the ponytail. Wrap it around the elastic two or three times. Then tuck the end under the elastic, or secure it with a bobby pin slid upward into the base.
That one small detail makes a basic pony look finished, which comes in handy for recitals, church, and school photos.
Quick tip: smooth a drop of leave in conditioner over the wrapped piece so no frizz pops up.
15. Topsy Tail Low Ponytail

A flipped ponytail gives you a twisted, braided look with zero braiding. It suits kids who can’t sit still for long.
The twist at the base also hides a messy part, which helps on mornings when the brush runs into a tangle.
Flip two or three times down the length and it starts to look like a chain. One flip looks polished. More flips look playful.
Watch the tension: if the elastic is too tight, the hole won’t open. If it’s too loose, the flip slides out.
<div style="margin:24px 0; width:100%; box-sizing:border-box;"> <div style="display:flex; align-items:flex-start; gap:12px; margin:0 0 14px;"> <span style="flex:0 0 auto; width:30px; height:30px; background:#B4486A; color:#ffffff; border-radius:50%; display:flex; align-items:center; justify-content:center; font-weight:700; font-size:15px;">1</span> <p style="margin:0; color:#333333; font-size:16px; line-height:1.6;">Tie a loose, low ponytail at the nape and slide the elastic down about an inch.</p> </div> <div style="display:flex; align-items:flex-start; gap:12px; margin:0 0 14px;"> <span style="flex:0 0 auto; width:30px; height:30px; background:#B4486A; color:#ffffff; border-radius:50%; display:flex; align-items:center; justify-content:center; font-weight:700; font-size:15px;">2</span> <p style="margin:0; color:#333333; font-size:16px; line-height:1.6;">Open a small gap in the hair just above the elastic with two fingers.</p> </div> <div style="display:flex; align-items:flex-start; gap:12px;"> <span style="flex:0 0 auto; width:30px; height:30px; background:#B4486A; color:#ffffff; border-radius:50%; display:flex; align-items:center; justify-content:center; font-weight:700; font-size:15px;">3</span> <p style="margin:0; color:#333333; font-size:16px; line-height:1.6;">Flip the tail up and through the gap, then split it in two and pull apart to tighten.</p> </div> </div>16. French Braid Into a High Ponytail
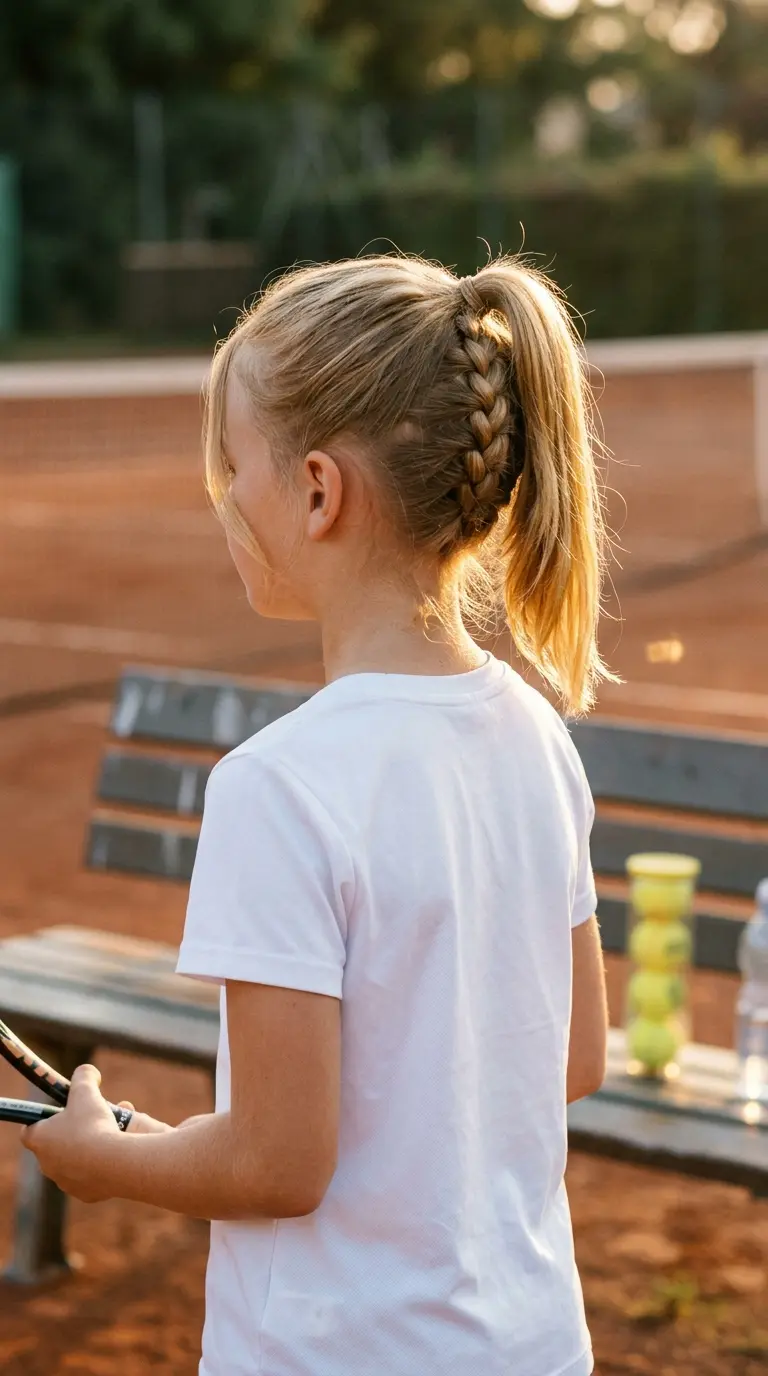
Have her tilt her head gently forward for this one. Gravity does half the work.
- Start a French braid at the nape of the neck and braid upward toward the crown.
- Stop at the crown and hold the braid with one hand.
- Gather the rest of the hair and the braid end into one high ponytail.
- Wrap it with an elastic and smooth out any bumps.
Sporty kids get the most out of this style. Nothing hangs at the neck, so she stays cooler and tidier through a whole tennis lesson.
Braiding upside down feels strange at first. Talk yourself through each step and it clicks fast.
17. Mini Twist Crown for Curly Hair

Braids can frizz curly hair at the edges, while twists keep each curl’s pattern intact. That makes twists the friendlier choice for curls.
Working on damp hair, take small sections around the hairline and two strand twist each one back toward the crown. Pin them in a ring like a crown, and leave the curls at the back loose and full.
- Use a wide tooth comb or your fingers, never a fine brush.
- A dab of curl cream on each section keeps the twists smooth.
- Spin the ends around a finger so they dry in neat coils.
The back stays big and bouncy, and the front stays off her face.
18. Half Up Bubble Braid
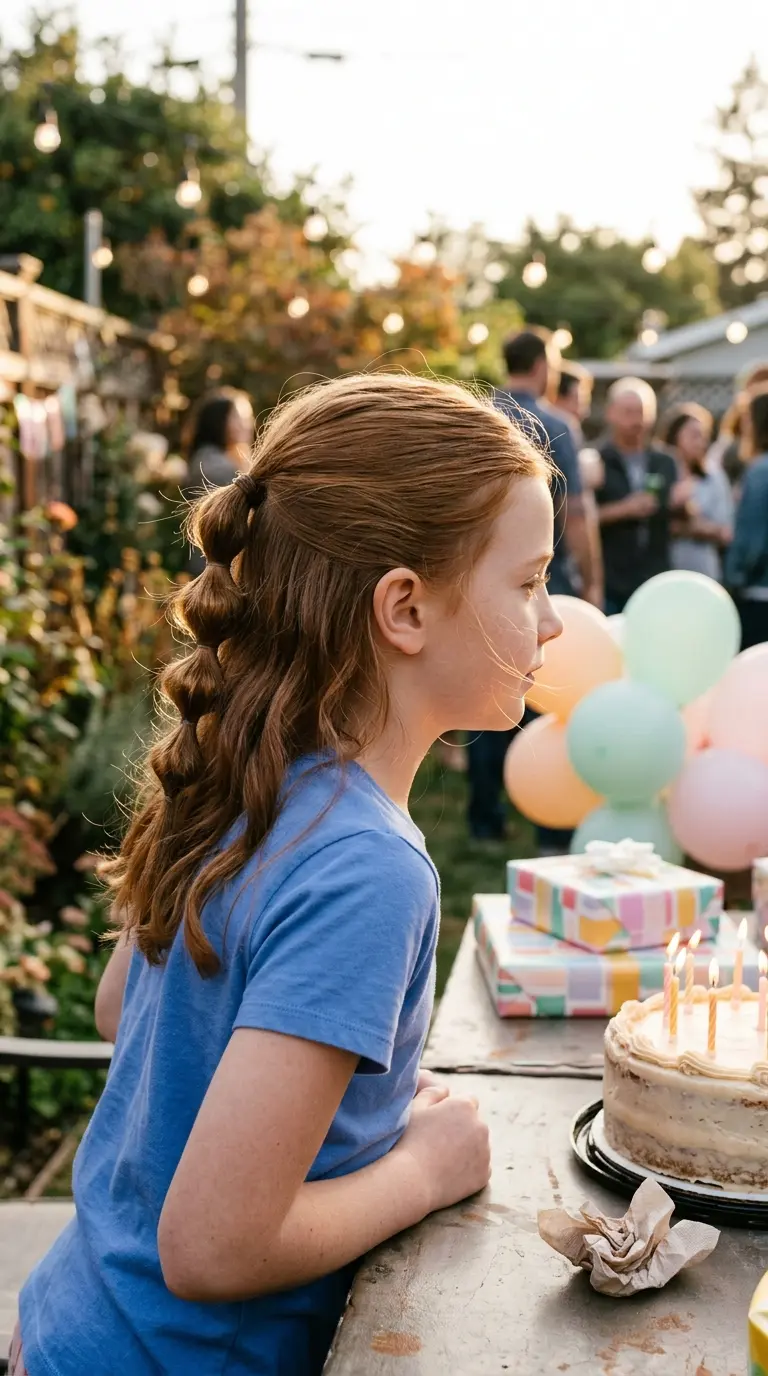
A full bubble ponytail can feel too formal when she wants to keep her long hair down. This version uses only the top half.
Pull the hair from the temples and crown back into a small ponytail. Add a clear elastic every inch and a half down its length, then puff out each bubble. The rest of the hair stays loose underneath, so the bubbles sit on top like a little stack of pearls.
Spacing guide: shorter spacing looks neat and doll like. Longer spacing looks more relaxed.
Birthday parties are where people notice this one. It photographs well from behind while she blows out the candles.
19. Clipped Back Bangs With Snap Clips
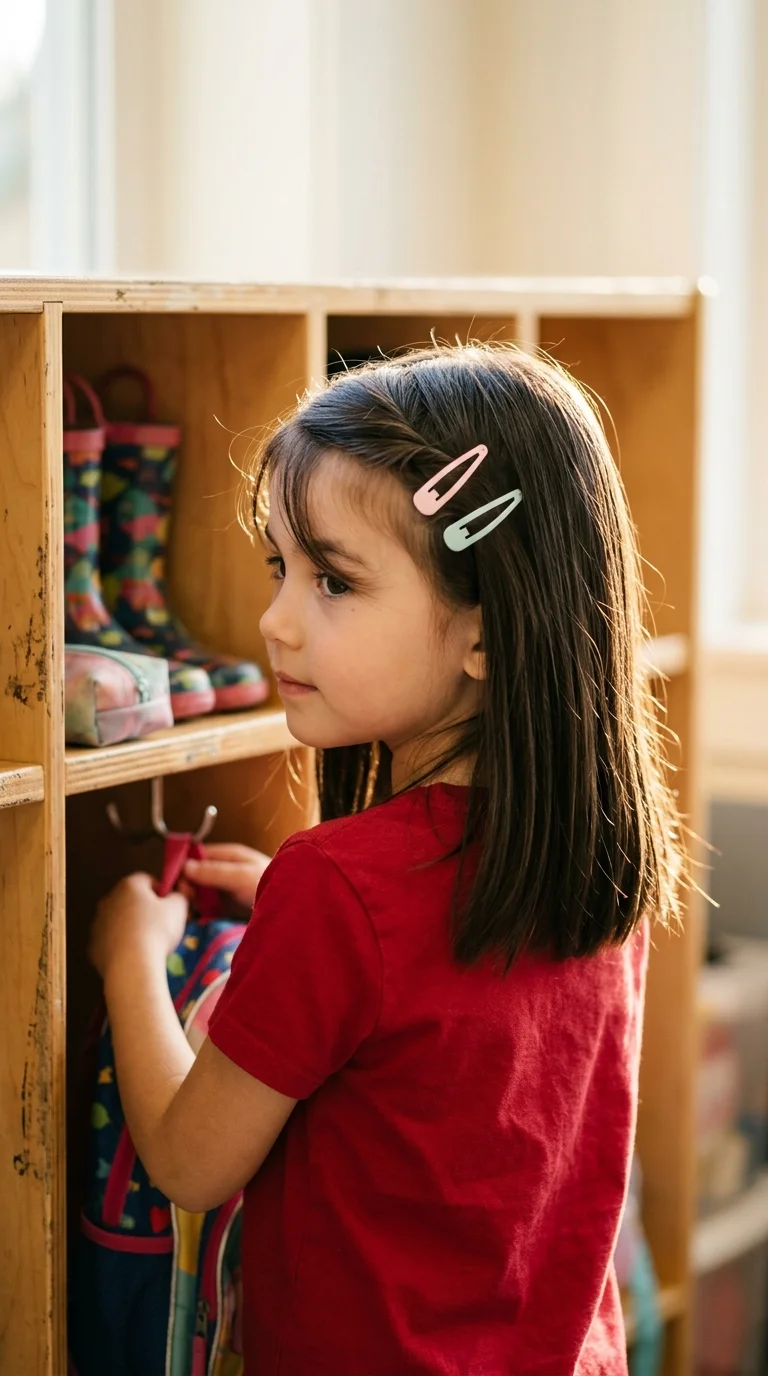
Bangs don’t have to mean a daily battle. Clipped back the right way, they become a style instead of a problem.
Twist the bangs once away from the face, then press a snap clip in at an angle just above the temple. Add a second clip a little behind the first, angled the opposite way. The crossed clips hold much better than one flat clip.
Leave the back down, or pair it with a low pony on gym days.
Clip tip: snap clips with a grippy coating stay in fine hair. Plain metal ones slide right out.
<div style="display:flex; flex-wrap:wrap; gap:14px; margin:26px 0; width:100%; box-sizing:border-box;"> <div style="flex:1 1 150px; background:#FCEEF2; border:1px solid #B4486A; border-radius:12px; padding:18px; text-align:center; box-sizing:border-box;"> <div style="font-size:30px;">📎</div> <div style="font-size:clamp(18px,3vw,22px); font-weight:800; color:#7E2E4A; margin:6px 0 2px;">Snap Clips</div> <div style="font-size:14px; color:#333333;">bangs and fine hair</div> </div> <div style="flex:1 1 150px; background:#FCEEF2; border:1px solid #B4486A; border-radius:12px; padding:18px; text-align:center; box-sizing:border-box;"> <div style="font-size:30px;">🦀</div> <div style="font-size:clamp(18px,3vw,22px); font-weight:800; color:#7E2E4A; margin:6px 0 2px;">Claw Clip</div> <div style="font-size:14px; color:#333333;">thick half up styles</div> </div> <div style="flex:1 1 150px; background:#FCEEF2; border:1px solid #B4486A; border-radius:12px; padding:18px; text-align:center; box-sizing:border-box;"> <div style="font-size:30px;">📌</div> <div style="font-size:clamp(18px,3vw,22px); font-weight:800; color:#7E2E4A; margin:6px 0 2px;">Bobby Pins</div> <div style="font-size:14px; color:#333333;">hidden hold for buns</div> </div> <div style="flex:1 1 150px; background:#FCEEF2; border:1px solid #B4486A; border-radius:12px; padding:18px; text-align:center; box-sizing:border-box;"> <div style="font-size:30px;">🎀</div> <div style="font-size:clamp(18px,3vw,22px); font-weight:800; color:#7E2E4A; margin:6px 0 2px;">Bow Barrette</div> <div style="font-size:14px; color:#333333;">dressy days and photos</div> </div> </div>20. Milkmaid Braids Pinned Over the Top
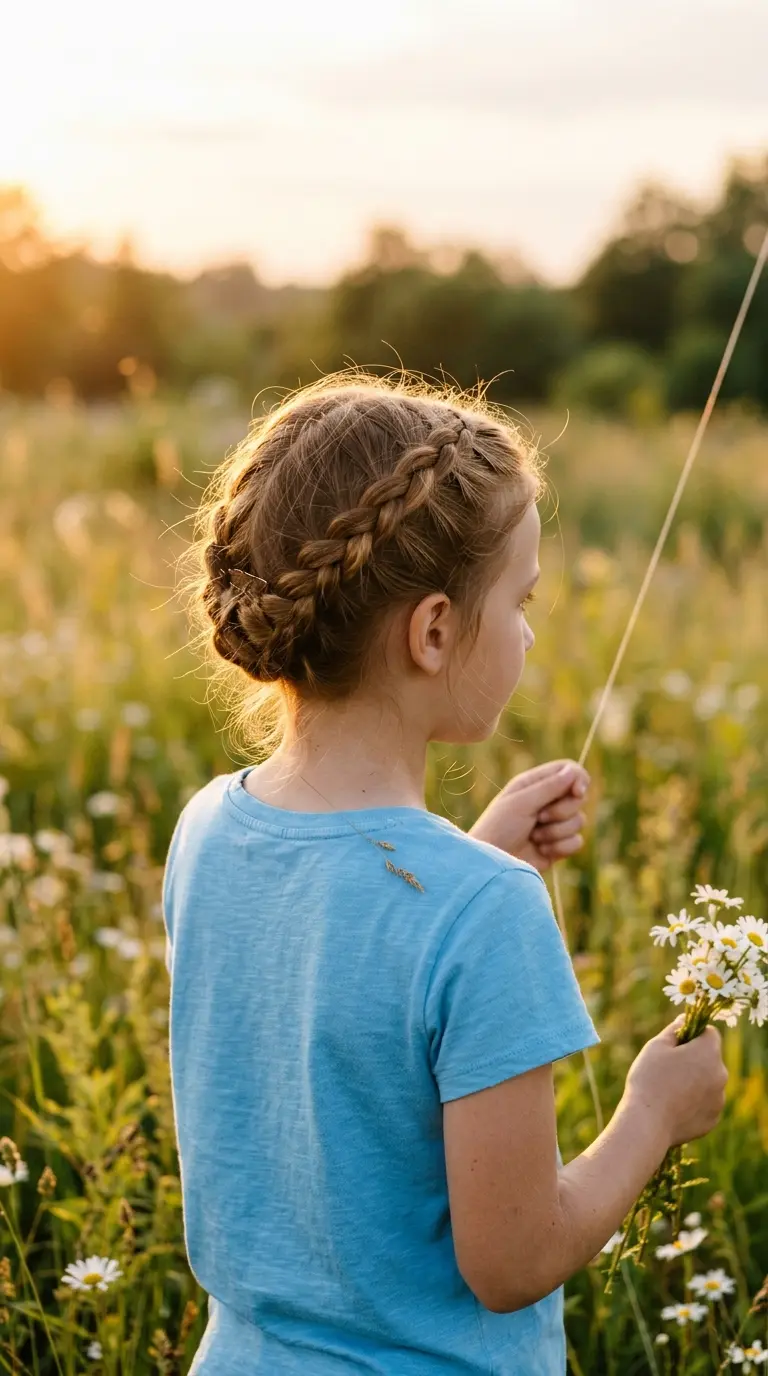
Two braids, lifted up and over the head and pinned at the top like a soft crown. Very long hair usually gets in the way, and this gives it somewhere to go.
Make two regular braids, one behind each ear. Lift the left braid over the top of the head and pin it as you go. Bring the right braid across just behind it and tuck the end under.
Pin tip: U shaped pins hold better than bobby pins here. Use six to eight, sliding them in against the direction of the braid.
Best for: hair that reaches at least the middle of the back.
21. Deep Side Part With a Bow Barrette for Short Bobs
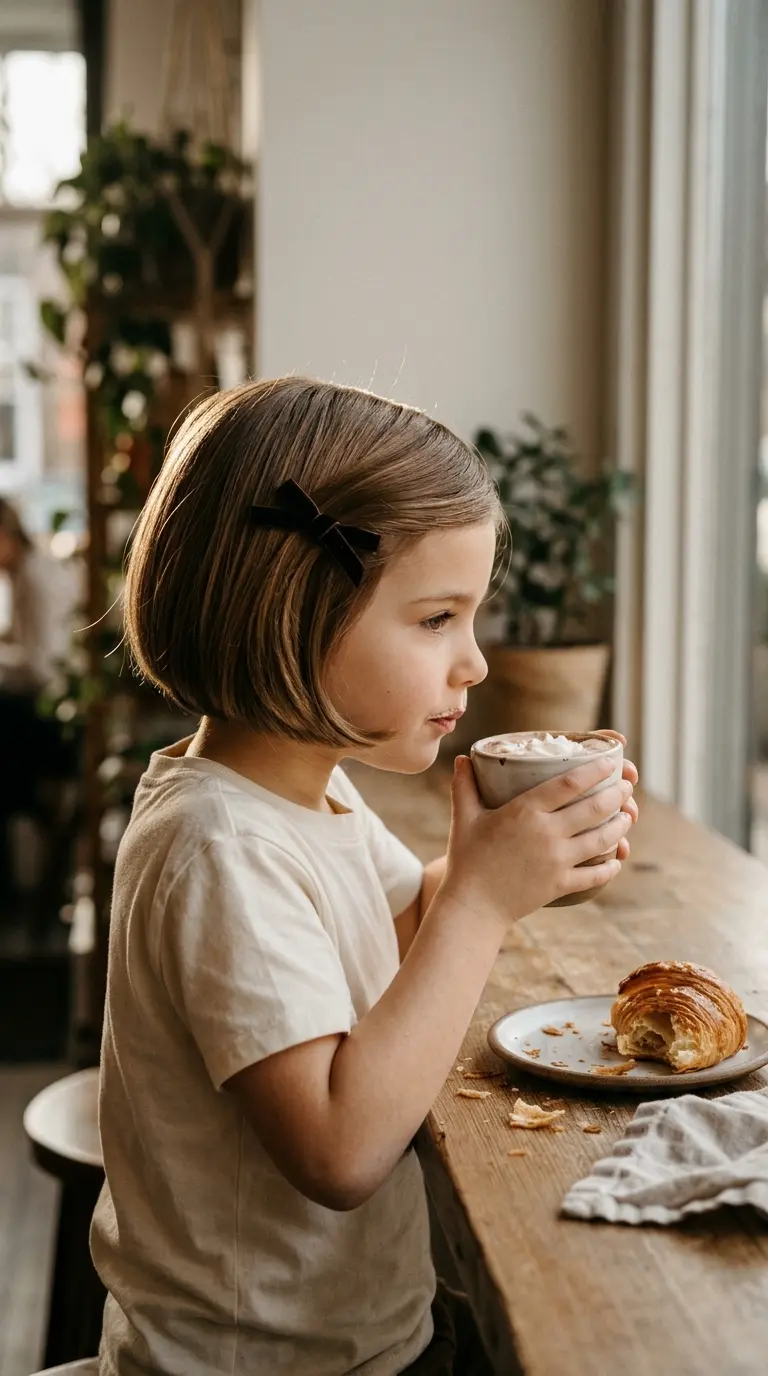
Parents of kids with bobs often feel left out of hairstyle lists. Short hair has fewer options, but a deep side part changes the whole shape of a bob in seconds.
Comb the part over so it starts above the outer edge of one eyebrow. Sweep the heavier side back behind the ear and hold it with a bow barrette at the temple.
The heavy side gains volume, the light side stays sleek, and the bob suddenly looks styled instead of just cut.
Quick tip: wet the part line before combing. Dry hair snaps back to its usual spot.
22. Tiny Pigtail Puffs for Toddlers
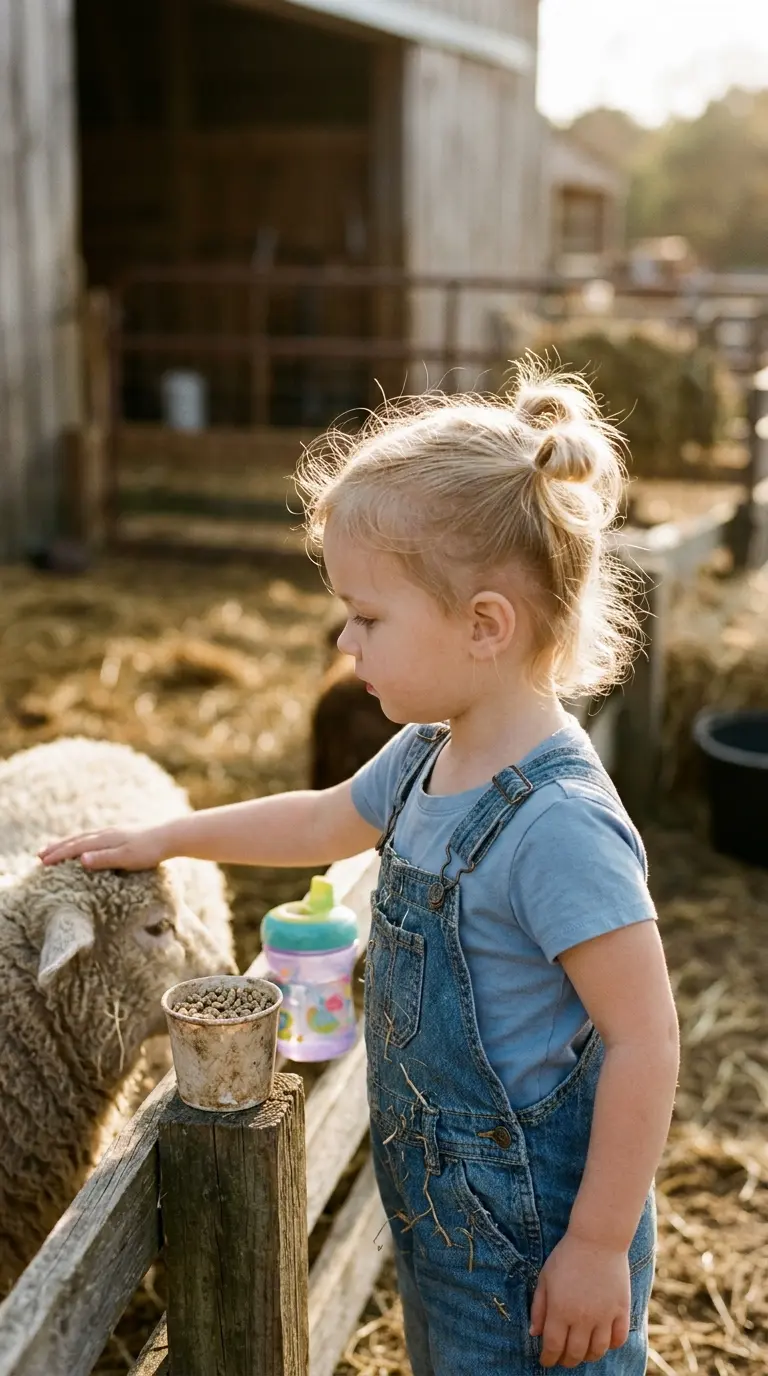
Twenty seconds. That’s roughly how long a toddler will sit still, so the style has to be done before she notices.
Pull up two small sections high on the head and secure each with a tiny elastic, leaving the rest loose. Fine baby hair forms little puffs or sprouts that look sweet with no extra work.
- Use the smallest elastics you can find, made for baby hair.
- Skip tight pulling at the hairline. Gentle is better at this age.
- Put a snack or a board book in her hands while you work.
Loose wisps are part of the charm here, so don’t chase them.
23. Zigzag Part Pigtail Braids
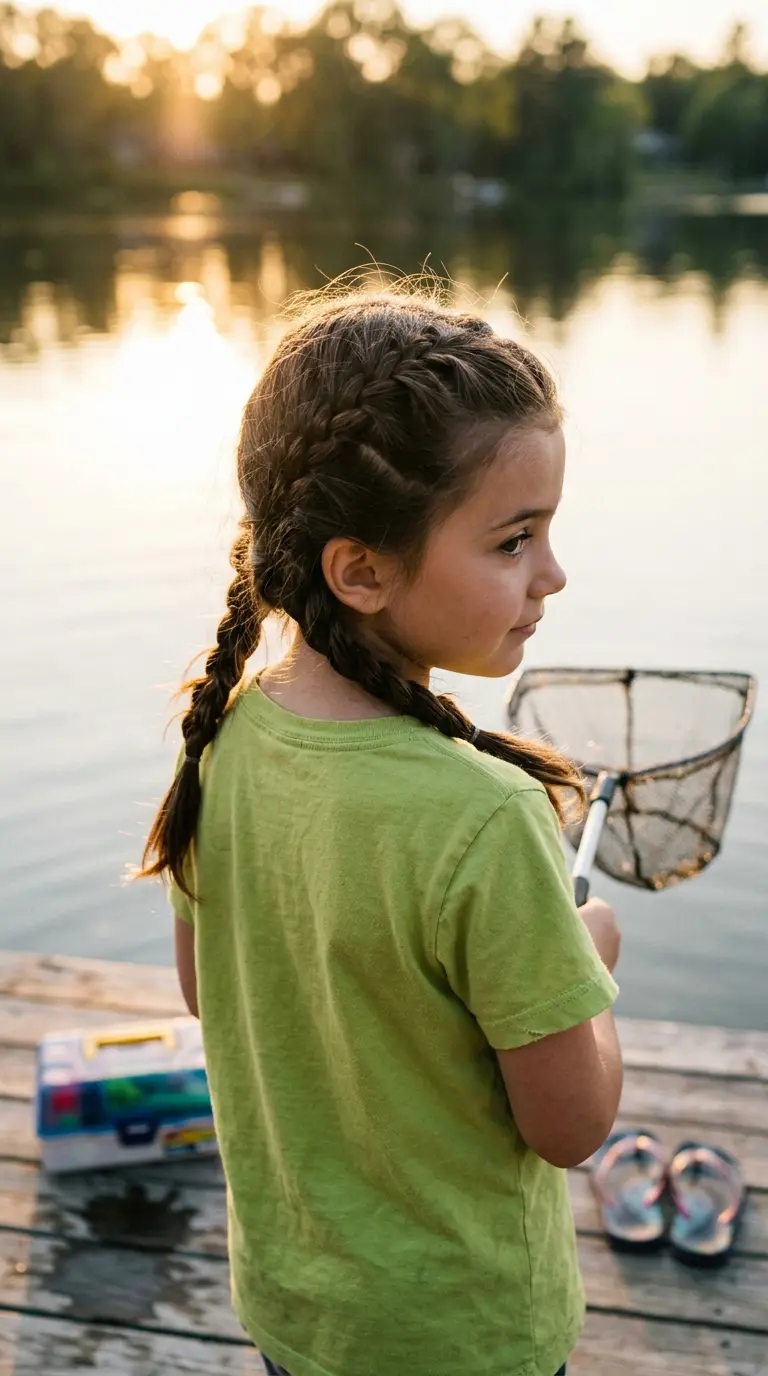
Hold the comb at an angle and move it in short steps. That’s all a zigzag part needs.
Start at the forehead and draw the comb tail back to the nape in small left and right jumps, flipping the hair to each side as you go. Then braid two simple pigtail braids.
It’s a good pick for kids who are bored of their usual style. The change is small, but everyone notices it.
Color note: the zigzag shows best on darker hair, where the part line stands out. Light blonde hair can make it nearly invisible, so make the zigs bigger.
<div style="background:#B4486A; border-radius:12px; padding:22px 24px; margin:26px 0; box-sizing:border-box; width:100%;"> <div style="font-size:13px; letter-spacing:1px; color:#ffffff; opacity:0.85; font-weight:700; margin-bottom:6px;">THE ONE THING TO REMEMBER</div> <p style="margin:0; color:#ffffff; font-size:clamp(16px,2.6vw,19px); line-height:1.55; font-weight:600;">When she is tired of the same braids, change the part before you change the style. A new part makes an old favorite feel brand new with no extra skill.</p> </div>24. Scarf Tied Ponytail for Bad Hair Days
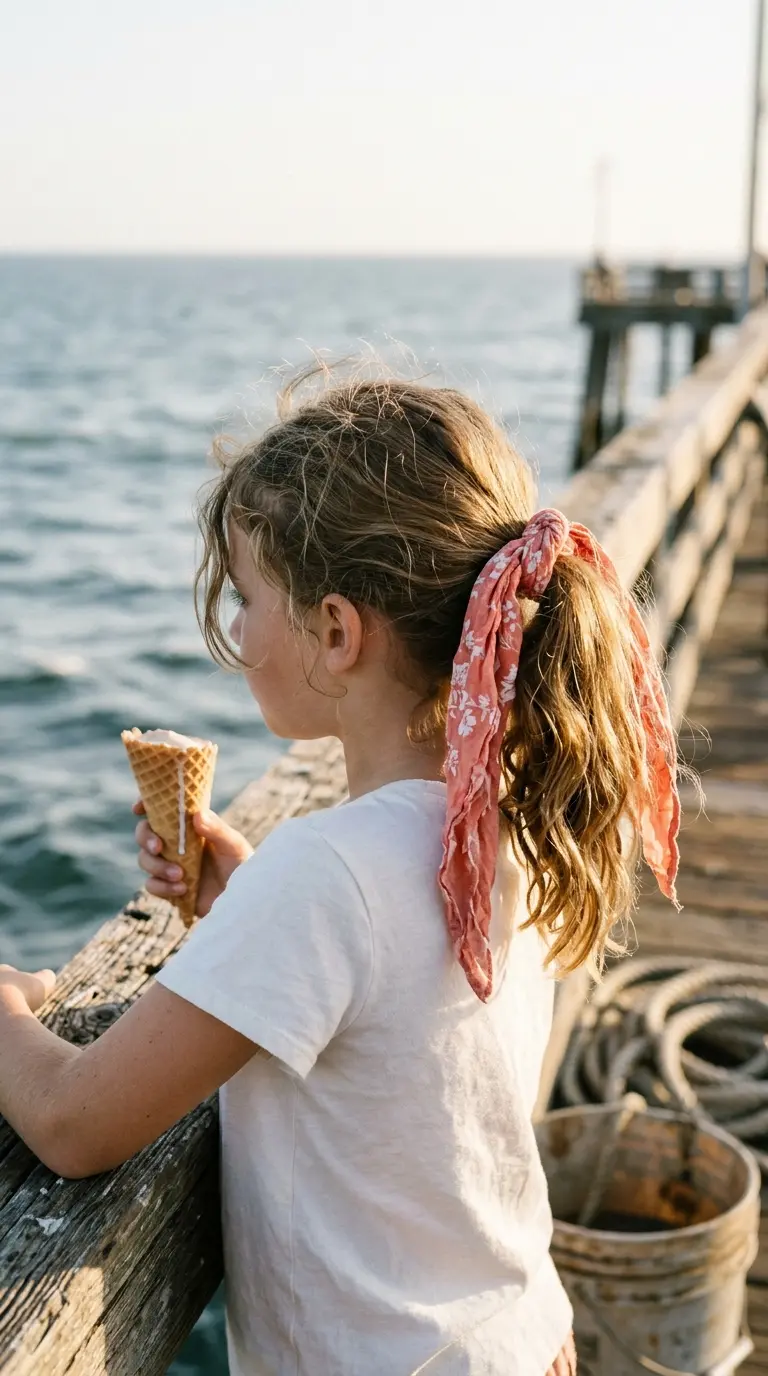
A bright scarf covers frizz, a messy part, and yesterday’s crimps all at once. It also makes a plain ponytail look planned.
Tie a mid height ponytail. Fold a small cotton bandana into a long strip and knot it around the elastic, letting the ends hang down with the hair. You can also wrap it around the head like a headband and knot it under the ponytail.
Fabric tip: cotton holds a knot. Silky scarves look pretty but slide off within minutes on a moving kid.
Keep a couple of bandanas in the car for mornings that start with a surprise tangle.
25. Overnight Braids for No Heat Waves
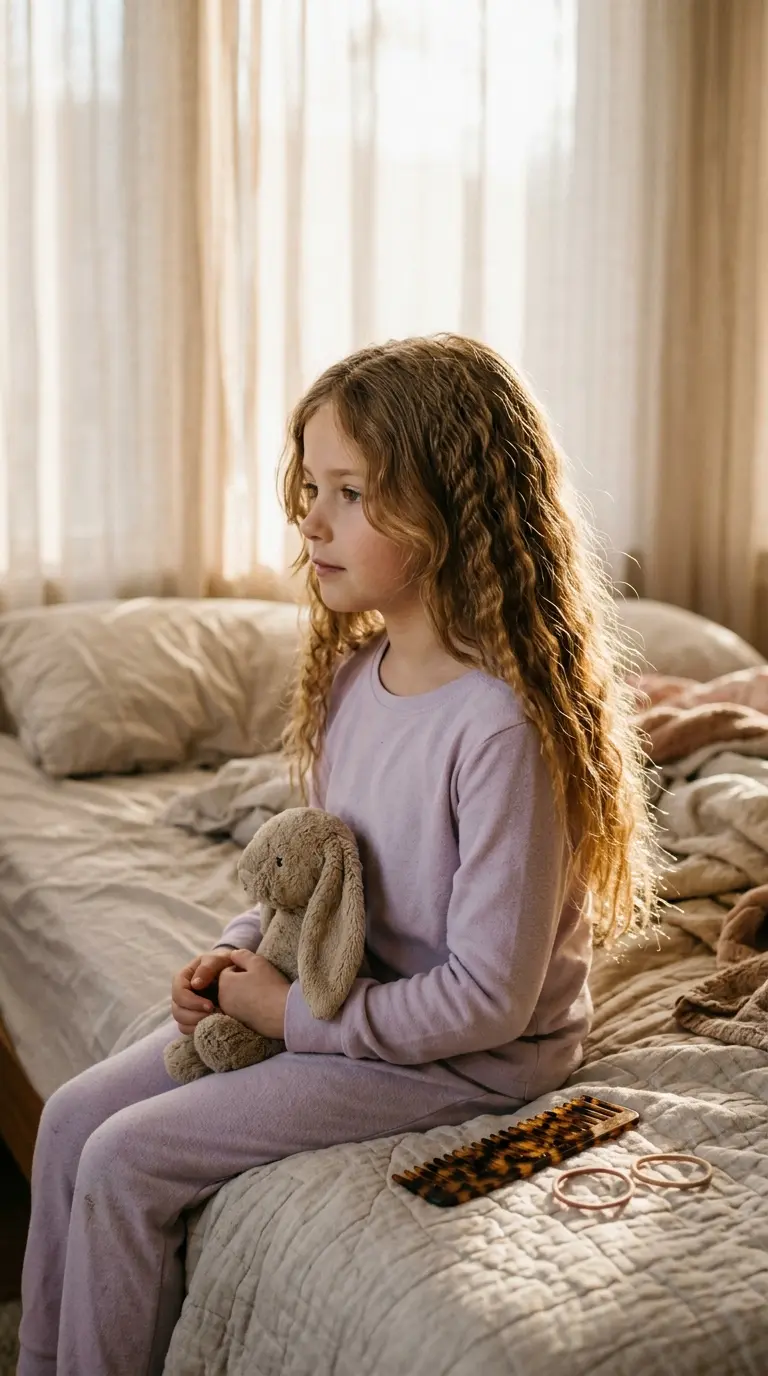
Bath night, a slightly damp head, and two loose braids before bed. By breakfast, she has soft waves with zero heat and no extra time in the morning.
Braid while the hair is damp, not soaking. Very wet hair can stay damp all night and come out frizzy.
- Two braids give big, loose waves.
- Four smaller braids give tighter, crinkly waves.
- A silk pillowcase keeps the ends from fuzzing.
In the morning, undo the braids and separate the waves with your fingers, never a brush. A brush turns waves into a cloud.
The waves pair well with almost any half up style on this list.
Wrapping Up
Most mornings don’t need a new skill. They need two or three go to styles, plus one fun one saved for the day she asks for something different. Pick a quick favorite, like the topknot or the scarf pony, and one weekend project, like the heart braid or the waterfall. Practice the bigger one when nobody is racing the bus.
Kids notice when their hair feels like theirs. Letting her choose from these kids hairstyles turns the brush fight into a small daily ritual, and that matters more than a flawless part.
Save this list so the next “ponytails are boring” complaint has 25 answers waiting.