
Wearing your hair down sounds easy until it starts falling into your face by ten in the morning. A full updo feels like too much for a normal day, and loose hair on its own can look flat and unfinished.
Braided half up half down hairstyles solve both problems. The braid holds the front and crown away from your face, while the rest of your hair stays soft and loose. It looks planned without looking stiff.
The trick is matching the braid to your hair type and your day. A fishtail behaves differently on fine hair than a Dutch braid does on thick curls, and a work morning should not need twenty pins.
Below are 20 ideas. Some take five minutes. Others suit a slower weekend morning. Each one has a clear move to follow, a small tip, and a note on who it works best for. Start with the level that fits you, then save the rest for later.
1. Half Up Dutch Braid With Loose Waves
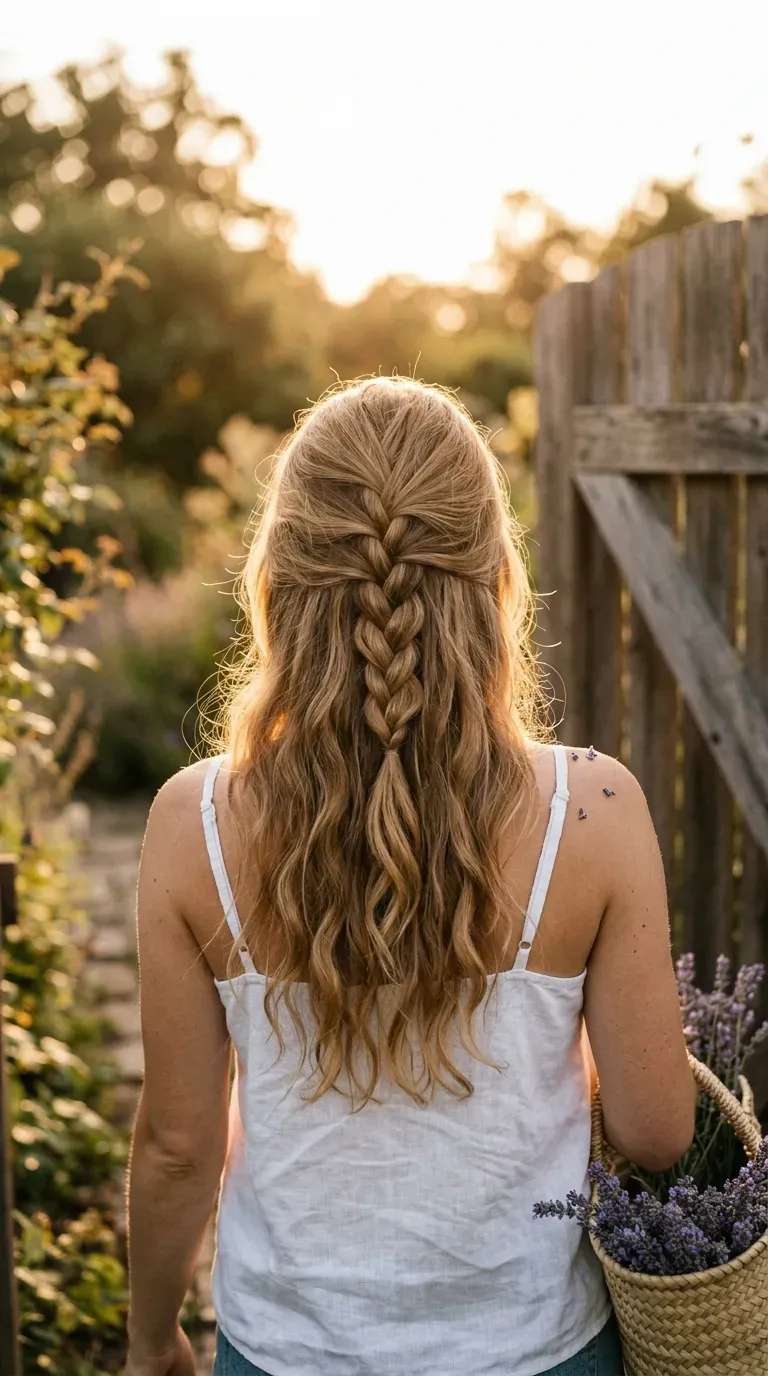
A single raised braid down the center of the top half gives waves a clear focal point.
- Part off the top half of your hair, from ear to ear.
- Start a Dutch braid at the front hairline, adding hair from both sides.
- Stop at the crown, braid the ends and tie them off.
Curl the lower hair away from your face with a large barrel. A slightly messy braid looks better here than a tight one.
Quick tip: Pull the edges of each loop outward with your fingertips for a fuller look.
2. Side Braid Swept Behind One Ear
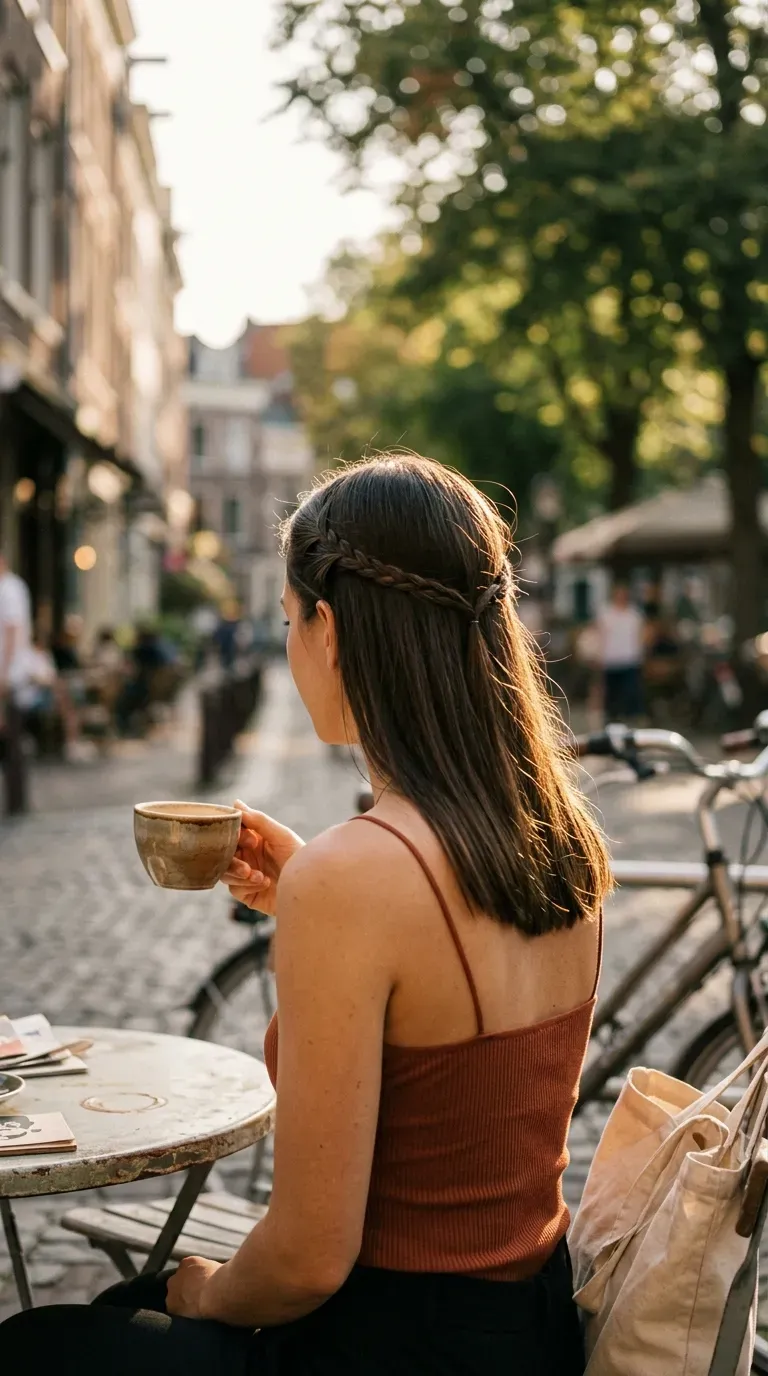
Hair that swings forward every time you lean over needs one small fix, not a whole new style.
- Take a thin section above one ear
- Braid it with a regular three strand braid to the ends
- Sweep it back and pin it near the crown with a bobby pin that matches your hair color
The rest of your hair stays down and fully loose. Once you have done it twice, it takes about three minutes. Straight and wavy hair show off the braid best, since it stands out against smooth strands.
<div style="display:flex; flex-wrap:wrap; gap:14px; margin:26px 0;">
<div style="flex:1 1 150px; background:#F7EDF1; border:1px solid #8C5A6F; border-radius:12px; padding:18px; text-align:center; box-sizing:border-box;">
<div style="font-size:30px;">🧷</div>
<div style="font-size:clamp(18px,3vw,22px); font-weight:800; color:#5C3447; margin:6px 0 2px;">Pins</div>
<div style="font-size:14px; color:#333333;">two, matched to your hair color</div>
</div>
<div style="flex:1 1 150px; background:#F7EDF1; border:1px solid #8C5A6F; border-radius:12px; padding:18px; text-align:center; box-sizing:border-box;">
<div style="font-size:30px;">💇♀️</div>
<div style="font-size:clamp(18px,3vw,22px); font-weight:800; color:#5C3447; margin:6px 0 2px;">Best on</div>
<div style="font-size:14px; color:#333333;">straight or wavy hair</div>
</div>
<div style="flex:1 1 150px; background:#F7EDF1; border:1px solid #8C5A6F; border-radius:12px; padding:18px; text-align:center; box-sizing:border-box;">
<div style="font-size:30px;">✨</div>
<div style="font-size:clamp(18px,3vw,22px); font-weight:800; color:#5C3447; margin:6px 0 2px;">Finish</div>
<div style="font-size:14px; color:#333333;">light, flexible hairspray</div>
</div>
</div>3. Twin Fishtail Braids Joined at the Back
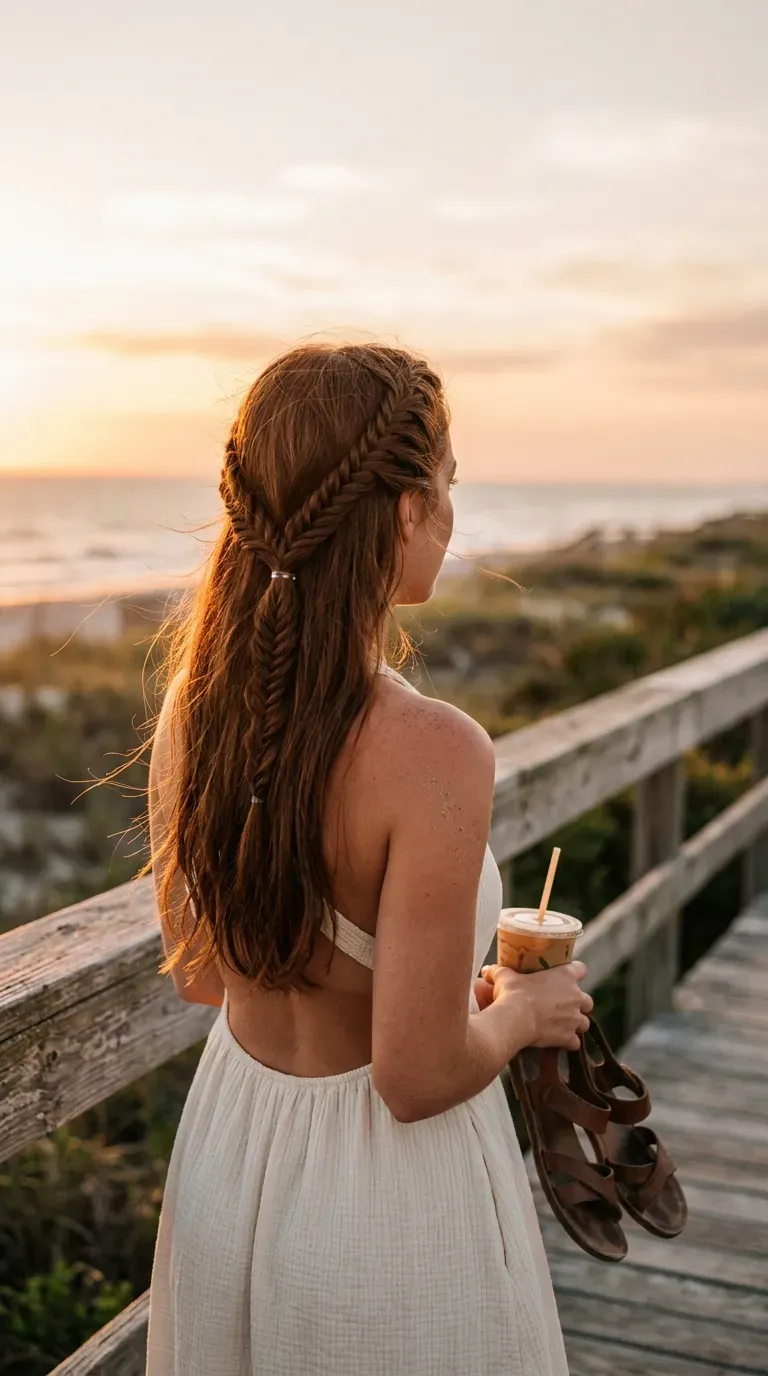
Two small fishtails look more detailed than regular braids, but the motion is just as simple.
Start one at each temple and braid down toward the back of the head. Join both tails at the center with a clear elastic, then wrap a thin strand around it to hide it.
Fishtails grip better on hair with a little grit, so a light mist of dry shampoo at the roots helps if your hair is freshly washed.
Best for: fine hair that needs a little extra body in the back.
4. Tiny Accent Braids Tucked Into Sleek Hair

One rule keeps this style neat: every braid stays thin, thinner than a pencil.
- Make two or three tiny braids at the front, spaced a finger width apart
- Pull them back and clip them together at the crown
- Leave everything else straight and smooth
The contrast between sleek hair and tiny braids is the whole point. Skip heavy serum on the braided sections, because slippery hair unravels.
Watch out: Braiding damp hair makes lumpy braids. Dry hair holds a crisp, even shape.
5. Half Up Bubble Braid With Clear Elastics
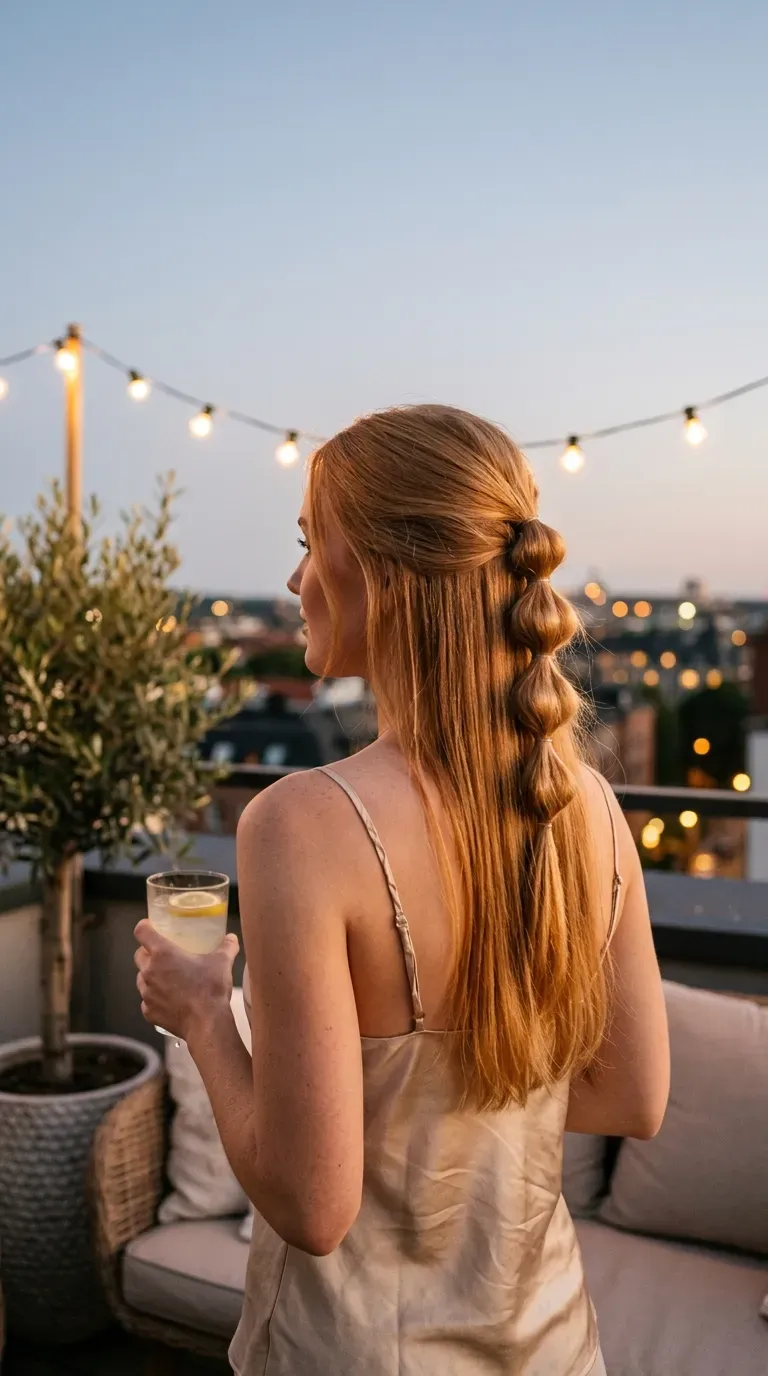
A plain half ponytail often looks flat by noon. Bubble braiding gives the same hold with a lot more shape.
- Tie the top half of your hair with an elastic.
- Add another elastic a few inches down.
- Gently pull the hair between them outward until it puffs.
- Repeat down the length of the section.
Clear elastics disappear into the hair, and slow tugging keeps the strands from tangling. Fine hair puffs best with a little texture spray first.
<div style="display:flex; flex-wrap:wrap; gap:14px; margin:26px 0;">
  <div style="flex:1 1 220px; background:#f3f1ee; border-radius:12px; padding:18px 20px; box-sizing:border-box;">
    <div style="font-weight:800; color:#8a8a8a; font-size:13px; letter-spacing:1px; margin-bottom:8px;">BEFORE</div>
    <p style="margin:0; color:#333333; font-size:15px; line-height:1.6;">A half ponytail that droops flat by noon with one lonely elastic showing at the back.</p>
  </div>
  <div style="flex:1 1 220px; background:#F7EDF1; border:2px solid #8C5A6F; border-radius:12px; padding:18px 20px; box-sizing:border-box;">
    <div style="font-weight:800; color:#5C3447; font-size:13px; letter-spacing:1px; margin-bottom:8px;">AFTER ✨</div>
    <p style="margin:0; color:#333333; font-size:15px; line-height:1.6;">Rounded sections stacked down the length, with the elastics hidden inside the puffs.</p>
  </div>
</div>
6. Boho Braid Headband Along the Hairline

Think of it as a headband made from your own hair.
Start behind one ear and braid a thin section along the hairline toward the opposite ear. Pin the end under the loose hair so it disappears.
Boho styling works best on wavy hair with a few loose strands left out near the face. Pull them out on purpose.
Mistake to avoid: Pulling the braid tight at the temples. It looks sharp for an hour and gives you a headache by afternoon.
7. Waterfall Braid That Drips Into Curls

Brunch starts in an hour and the curls need help. The waterfall braid covers it without much work.
Start a regular three strand braid at one temple. Each time you cross the top strand over, drop it and pick up a fresh piece from above. The dropped strands fall like water.
Carry the braid across to the back and pin it under your hair on the other side.
Quick tip: Work on dry, slightly textured hair. Silky wet hair slides out of the braid.
8. Half Up Braid With a Satin Ribbon Woven In
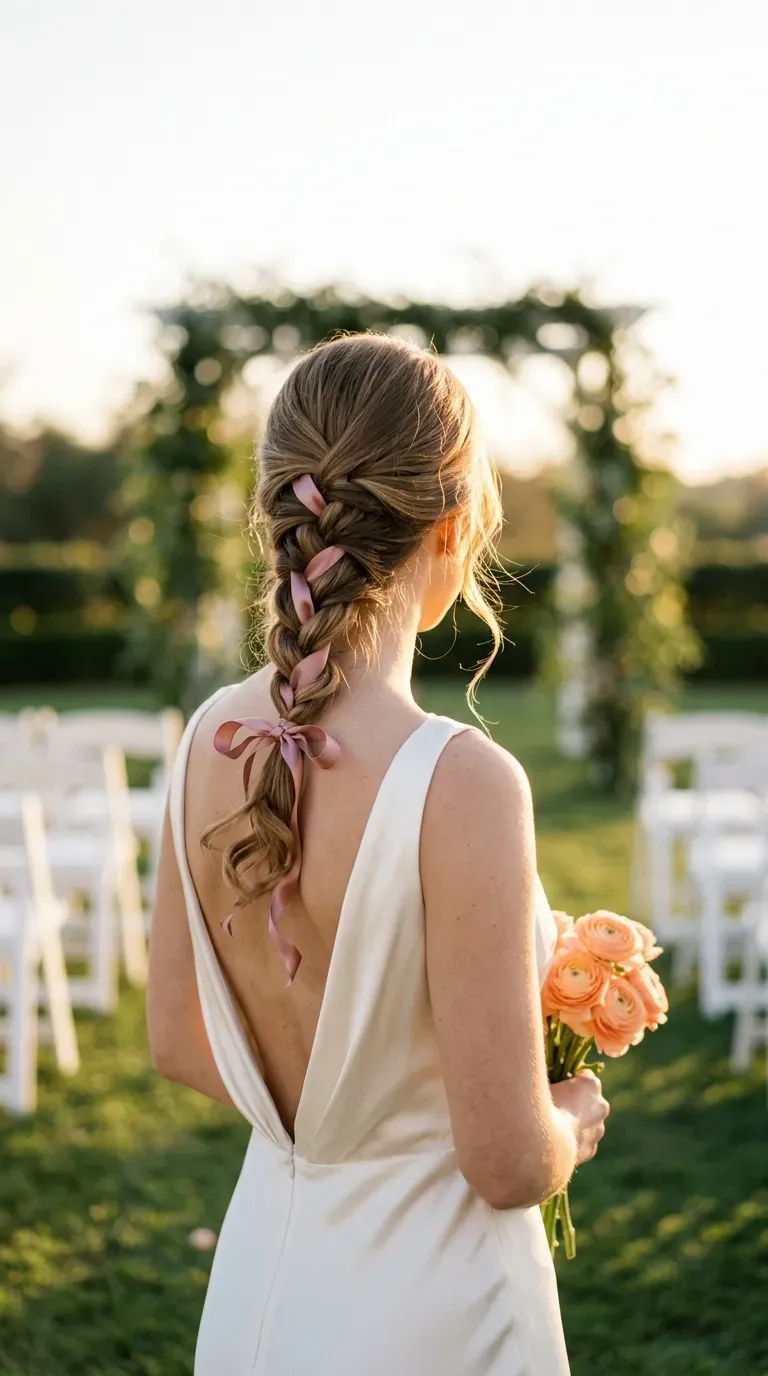
A ribbon turns a basic braid into something that looks styled for an occasion.
Cut a ribbon about three times as long as your braid and tie it to the middle section at the crown. Braid as usual, treating the ribbon as part of that strand, and finish with a small bow.
Satin looks soft but slips. Velvet grips better on slippery hair.
Good for: weddings, birthdays, and photo days.
9. Pull Through Braid in a Half Up Style
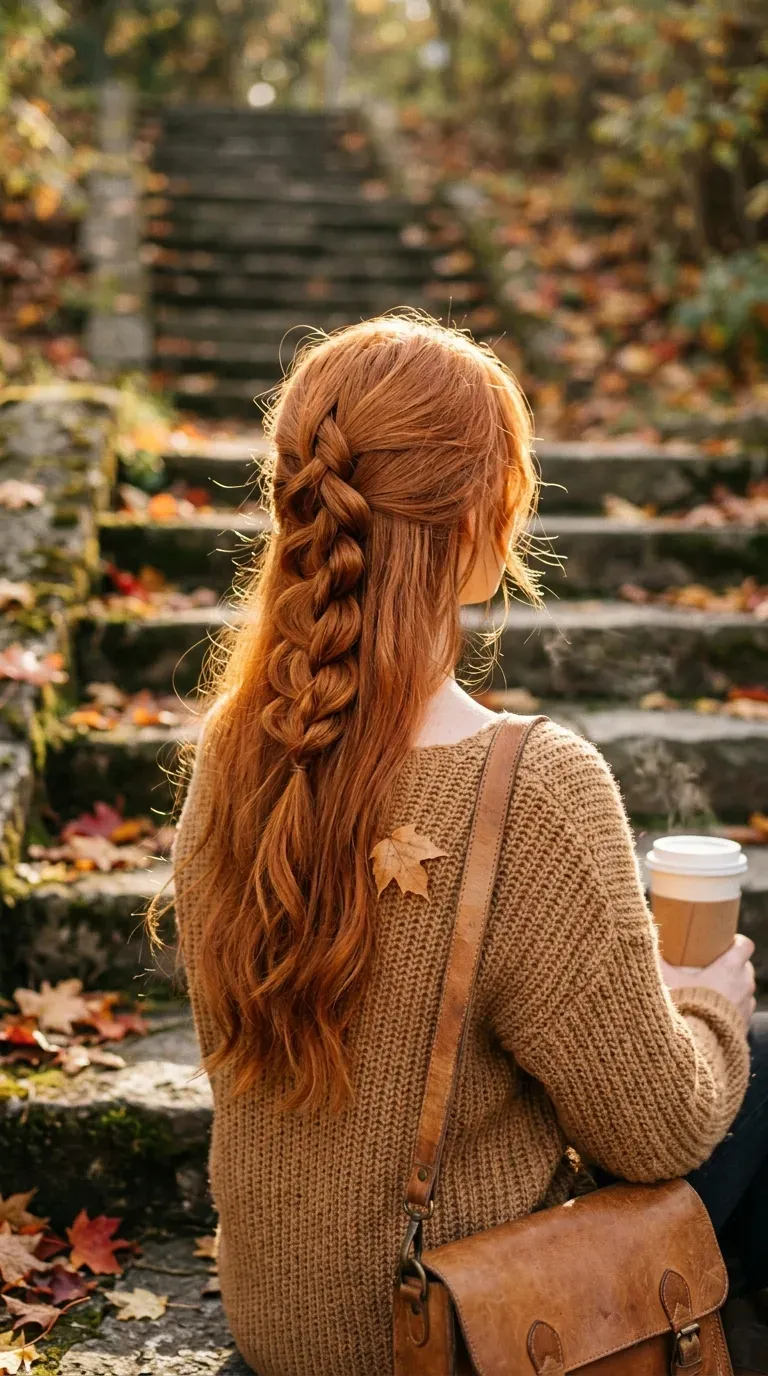
The pull through braid looks tricky, but it is mostly elastics and patience.
- Tie the top half of your hair into a ponytail.
- Make a second ponytail just below it, taking a little hair from each side.
- Split the top ponytail in two and pull the lower one up through the gap.
Repeat down the length, then gently widen each link. In photos it reads as a real braid, and it holds better in fine, slippery hair.
<div style="display:flex; flex-wrap:wrap; gap:0; margin:26px 0; border:1px solid #8C5A6F; border-radius:12px; overflow:hidden;">
  <div style="flex:1 1 120px; padding:16px; text-align:center; box-sizing:border-box; border-right:1px solid #F7EDF1;">
    <div style="font-size:22px;">🕰️</div>
    <div style="font-weight:700; color:#5C3447; font-size:15px; margin-top:4px;">Time</div>
    <div style="color:#333333; font-size:14px;">medium</div>
  </div>
  <div style="flex:1 1 120px; padding:16px; text-align:center; box-sizing:border-box; border-right:1px solid #F7EDF1;">
    <div style="font-size:22px;">🪙</div>
    <div style="font-weight:700; color:#5C3447; font-size:15px; margin-top:4px;">Cost</div>
    <div style="color:#333333; font-size:14px;">low, just elastics</div>
  </div>
  <div style="flex:1 1 120px; padding:16px; text-align:center; box-sizing:border-box;">
    <div style="font-size:22px;">🎯</div>
    <div style="font-weight:700; color:#5C3447; font-size:15px; margin-top:4px;">Skill</div>
    <div style="color:#333333; font-size:14px;">intermediate</div>
  </div>
</div>
10. Half Up Fishtail on Natural Curls
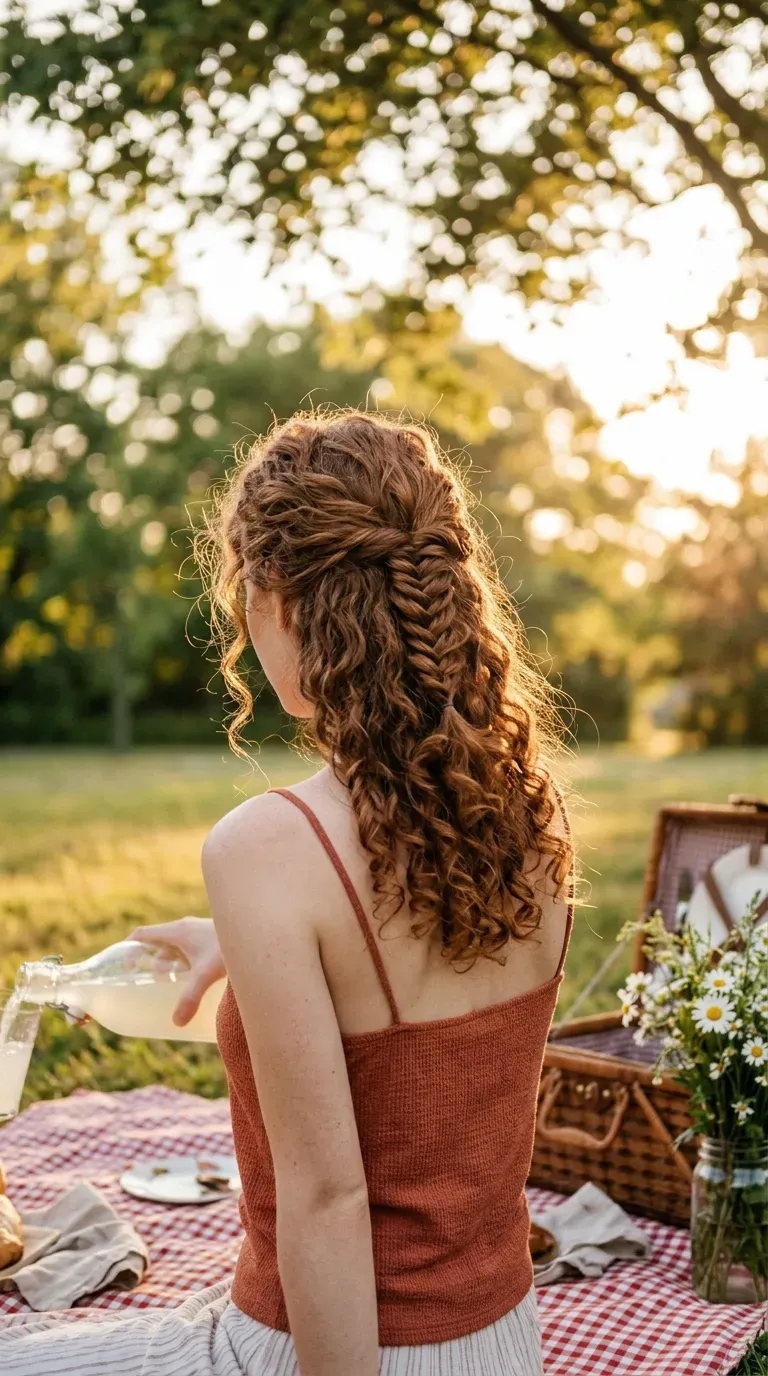
Many people think curls swallow braids. They do not. The braid just needs some grip and a loose hand.
Define your curls with your usual cream first. Take a section from the top of your head and fishtail it loosely. Tie the end with a small elastic and fluff the edges. The curls below frame the braid and make it stand out.
Quick tip: Curly hair shrinks as it dries, so braid a little looser than you think you need.
11. Two French Braids Meeting at the Back

French braids sit flat against the head, while Dutch braids rise above it. For a clean half up look that stays low and smooth, French wins.
Braid a thin French braid from the front hairline on each side, ending at the back of the head. Join them with a small elastic and leave the lower hair loose.
This works well under hats and with glasses, since it keeps hair off the temples.
Watch for: uneven braid sizes. Count your pulls on each side so they match.
12. Braided Half Up With a Claw Clip Finish

Claw clips slip out when they grip only smooth hair. A braid solves that.
Braid the top half in a simple three strand braid, twist it once into a loose coil at the crown, and snap the clip over the coil. The bumps in the braid give the teeth something to grab.
Match the clip to your hair thickness, small for fine hair and large for thick hair.
Good for: hot days, errands, and long train rides.
<div style="display:flex; flex-wrap:wrap; gap:14px; margin:26px 0;">
  <div style="flex:1 1 220px; background:#F7EDF1; border-radius:12px; padding:18px 20px; box-sizing:border-box;">
    <div style="font-weight:800; color:#5C3447; font-size:15px; margin-bottom:10px;">✅ Do this</div>
    <p style="margin:0 0 6px; color:#333333; font-size:15px; line-height:1.55;">Clip across the thickest part of the coil.</p>
    <p style="margin:0; color:#333333; font-size:15px; line-height:1.55;">Leave a few loose pieces near your ears.</p>
  </div>
  <div style="flex:1 1 220px; background:#f6efee; border-radius:12px; padding:18px 20px; box-sizing:border-box;">
    <div style="font-weight:800; color:#9a4a3f; font-size:15px; margin-bottom:10px;">🚫 Skip this</div>
    <p style="margin:0 0 6px; color:#333333; font-size:15px; line-height:1.55;">Clipping only the thin tail end of the braid.</p>
    <p style="margin:0; color:#333333; font-size:15px; line-height:1.55;">Pulling the braid tight at the hairline.</p>
  </div>
</div>
13. Halo Braid With Loose Hair Below
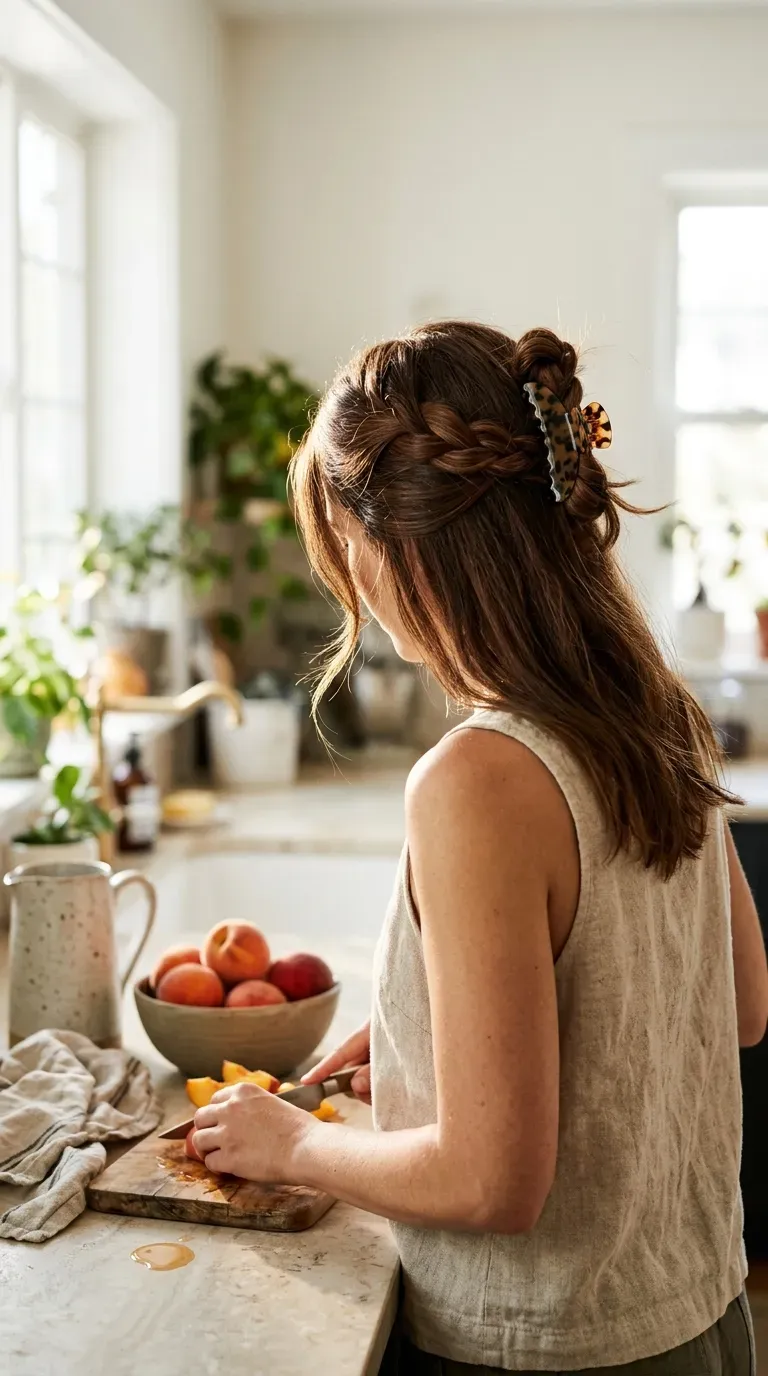
A halo braid circles the head like a ring. In the half up version, the ring sits at the back of the crown and the lower hair stays free.
Start a small French braid at one ear, carry it across the back of the head at crown height, and stop at the other ear. Tuck the tail under the braid and pin it.
Thick or layered hair covers the pins best. If your hair is thin, mist some texture spray before braiding.
Quick tip: Stretch each loop slightly to make the ring look bigger.
14. Sleek Flat Braid Half Up for Work
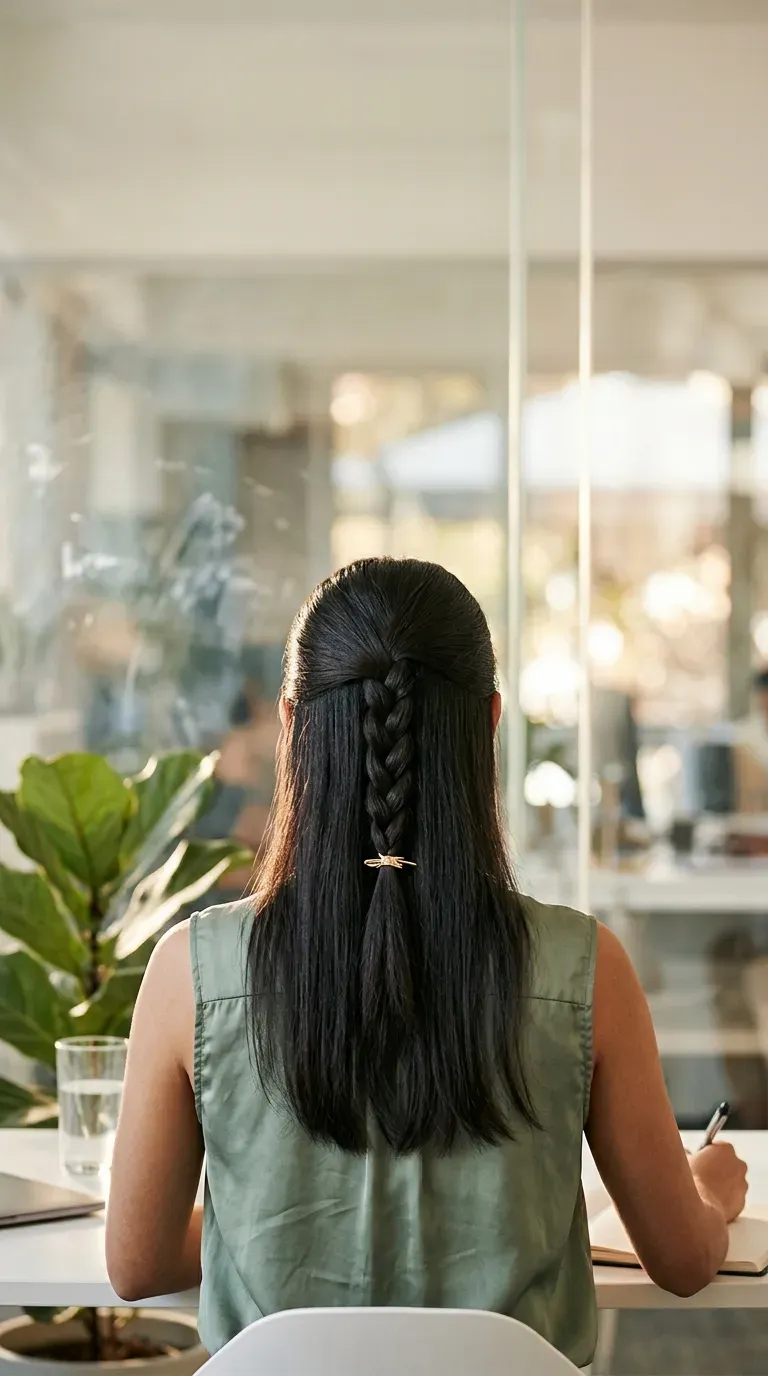
Office days call for a neat braid that stays put through meetings.
Smooth the top half with a little styling cream, then make a snug French braid down the center back. Tie the end with a small elastic and tuck it under the lower hair.
- Brush before braiding so there are no bumps
- Use a fine tooth comb for a clean line along the braid
- Blow out the lower hair straight
Dress it up: Add a small gold clip at the base.
15. Braided Mini Bun Half Up
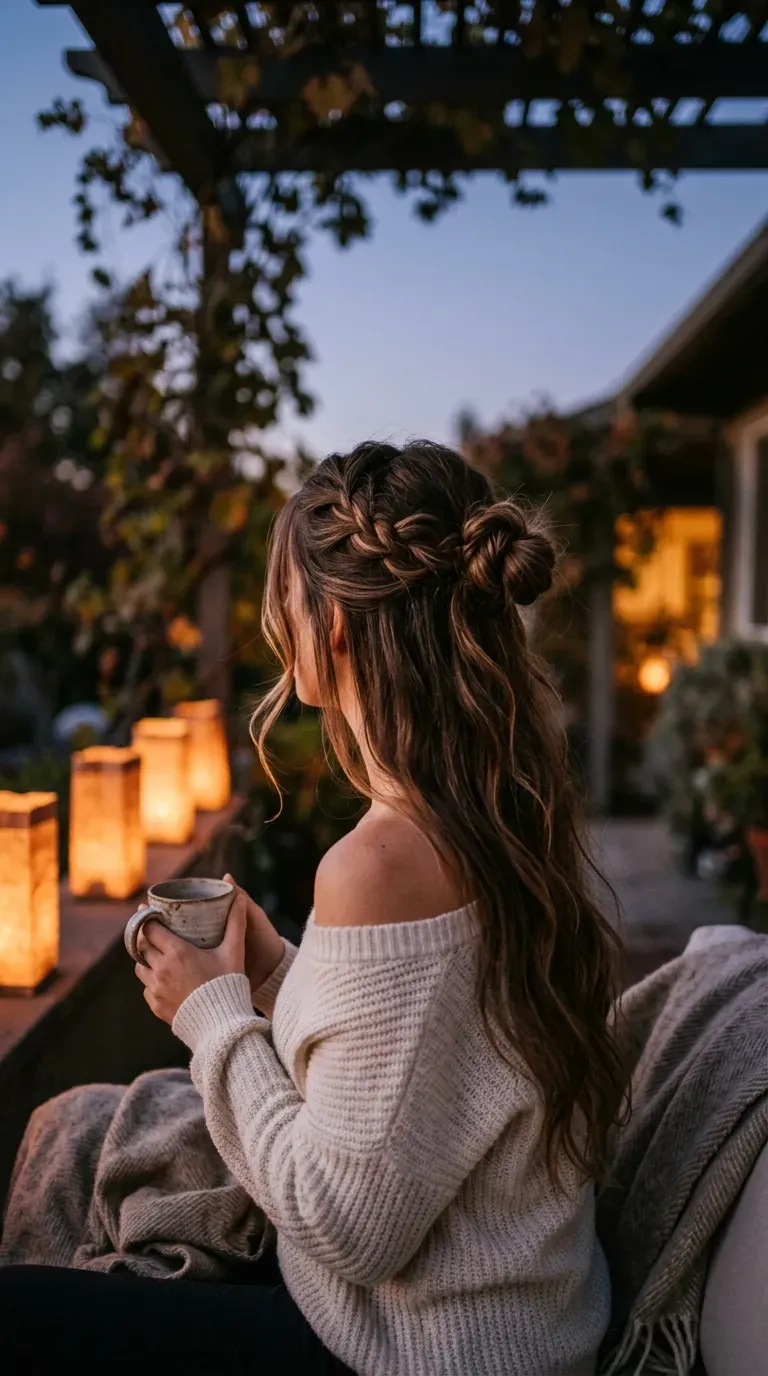
Half up buns can look flat from behind, so give the bun some detail.
Braid the top half in one loose three strand braid, wind it into a small bun at the crown, and pin it in place. Pull a few face framing strands loose.
A braided bun sits higher than a plain ponytail, so it lifts your whole look without a lot of work.
Quick tip: Spray a little volumizing mist at the roots to keep the crown from looking flat.
Works best on medium to long hair.
16. Side Swept Dutch Braid Into Half Up

Side parts give a Dutch braid more drama. Start the braid at the deep part, follow the hairline toward the back, and keep the loops pulled wide as you go. Pin the tail under the half up section at the crown.
Brush the lower hair to the opposite side so the shape feels balanced. A dab of light pomade smooths the flyaways along the part.
Best for: hair with a natural side part and a little weight at the ends.
<div style="background:#8C5A6F; border-radius:12px; padding:22px 24px; margin:26px 0; box-sizing:border-box;">
  <div style="font-size:13px; letter-spacing:1px; color:#ffffff; opacity:0.85; font-weight:700; margin-bottom:6px;">START WITH YOUR NATURAL PART</div>
  <p style="margin:0; color:#ffffff; font-size:clamp(16px,2.6vw,19px); line-height:1.55; font-weight:600;">Let the braid follow the part your hair already falls into. A forced part makes the braid sit crooked by midday.</p>
</div>
17. Face Framing Braids With the Rest Down
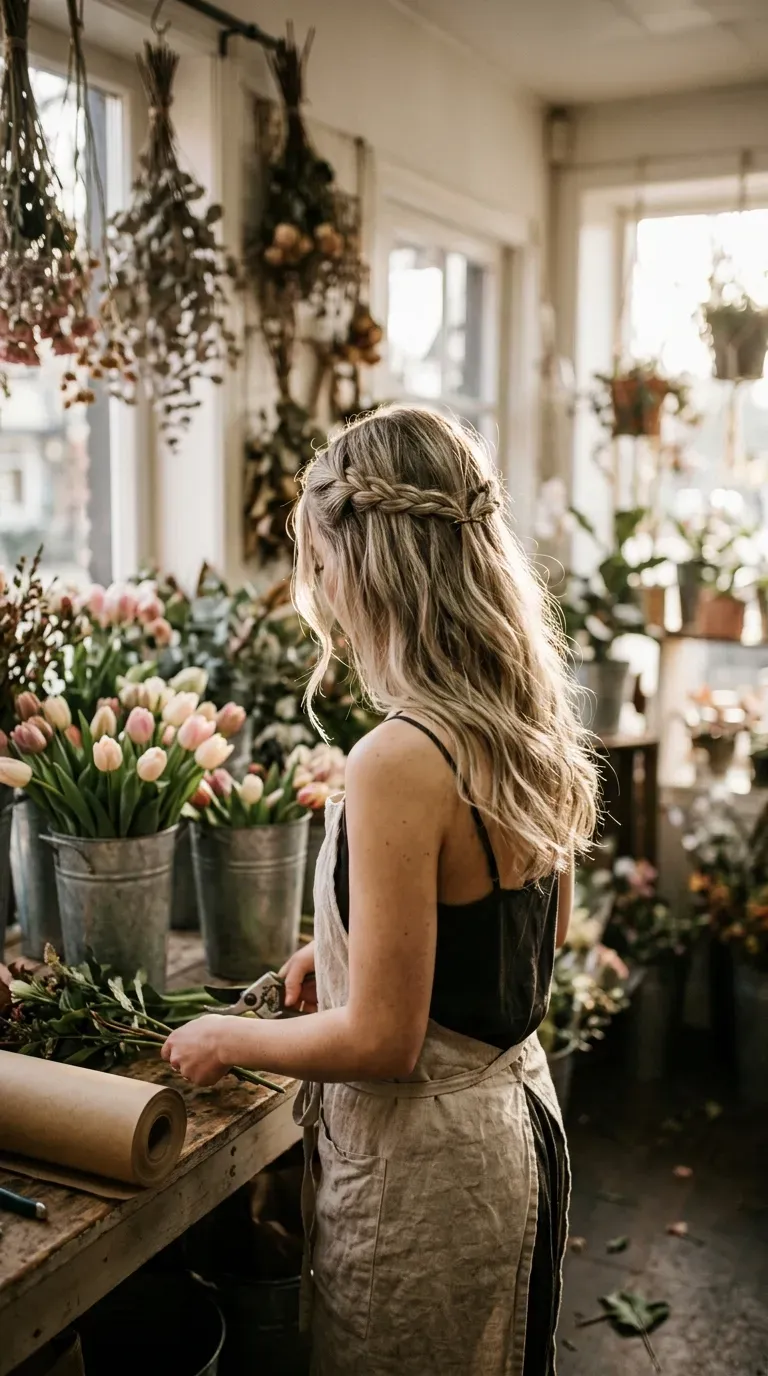
Two skinny braids at the front soften the face and keep hair out of your eyes.
Braid the thin pieces that fall beside your face, tie each with a tiny clear elastic, and pin them back at the crown. The rest of your hair stays loose.
This one leaves the rest of your hair alone, so it is good on second day hair that you do not want to restyle.
Quick tip: Braid a little longer than feels necessary, since the ends tuck back and shorten the look.
18. Criss Cross Braids Pinned at the Back
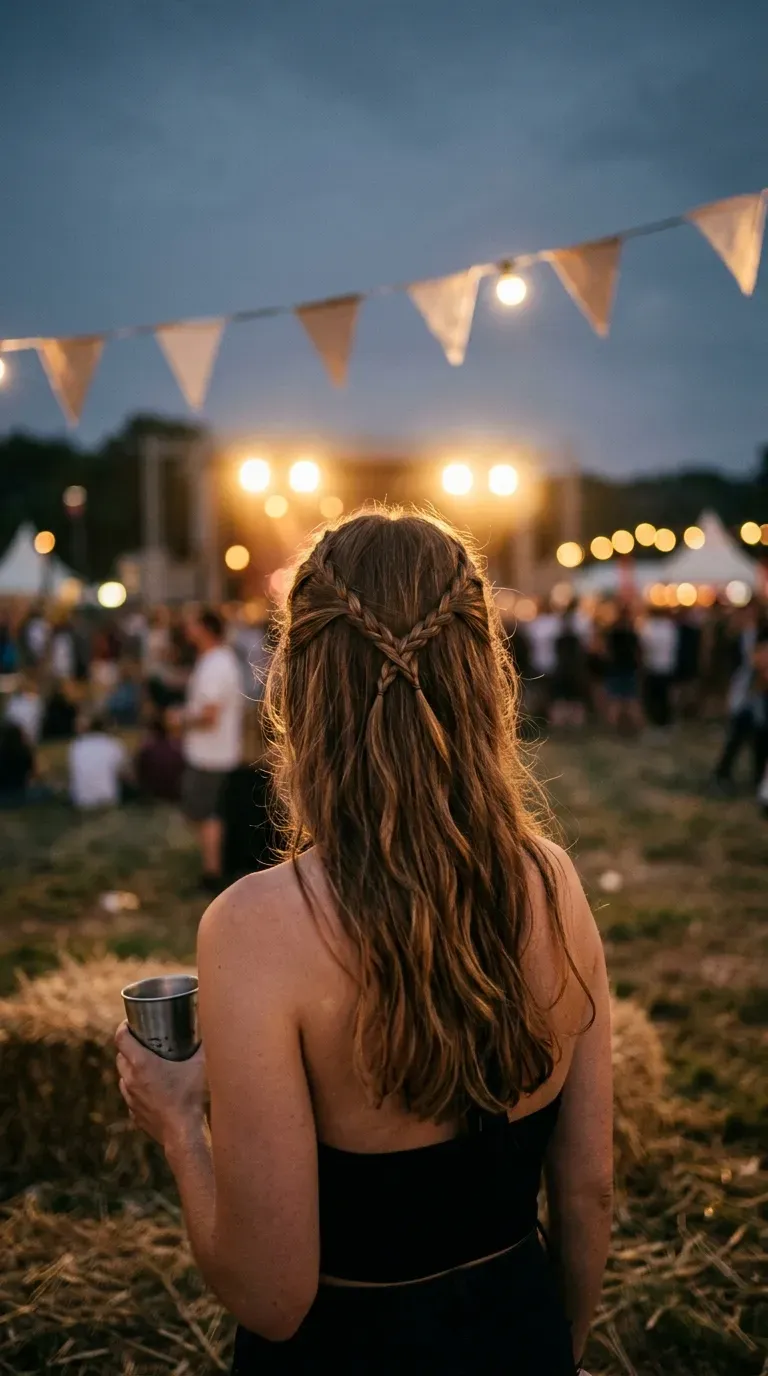
Two braids can do more than sit side by side. Cross them.
Braid a thin section on each side of the head. Bring the left braid to the right and the right braid to the left so they cross at the back. Secure each end with bobby pins set in an X shape.
The crossing hides the pins and gives a woven look from behind.
Quick tip: Pin each braid close to the scalp, then slide a second pin through the first for extra grip.
19. Micro Braids Pinned With Pearl Clips
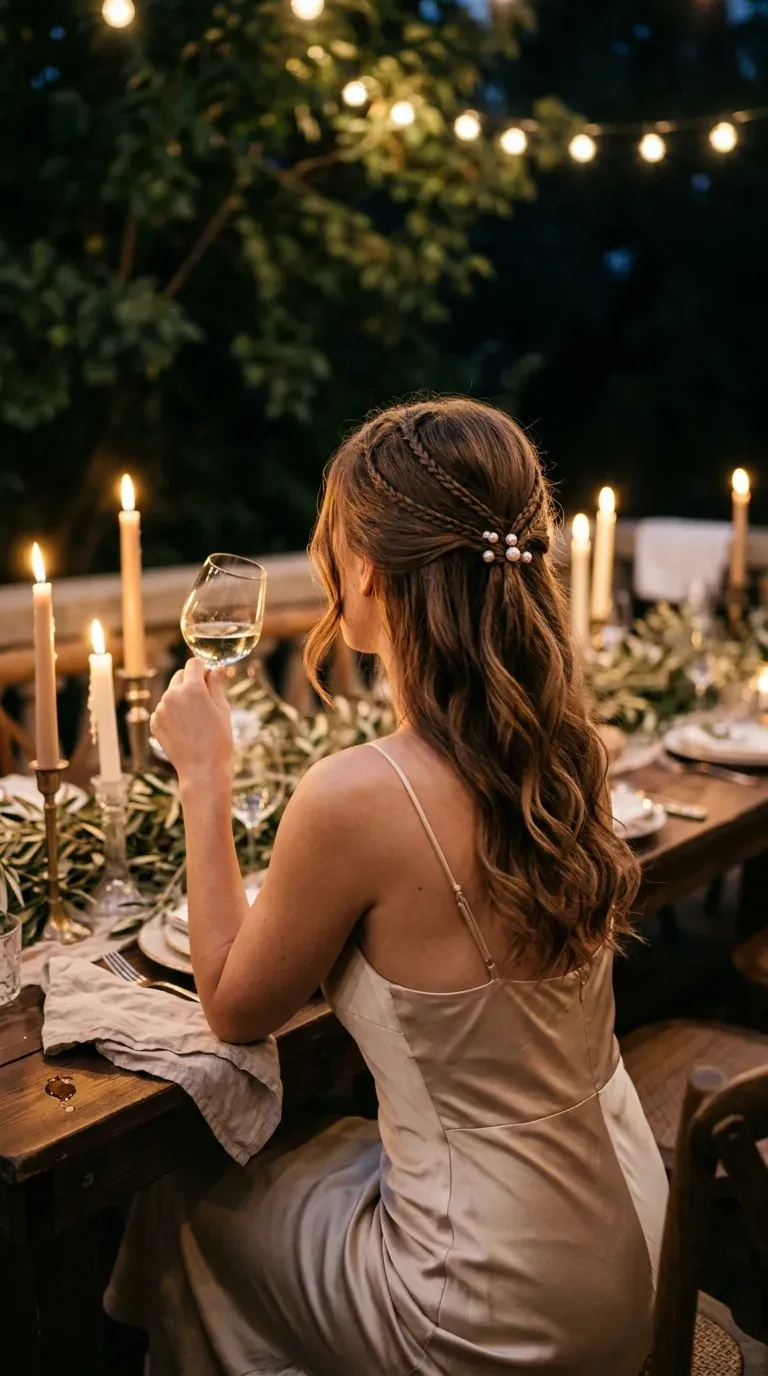
Micro braids catch the light like jewelry, especially with a few small pearl clips.
Make four or five very thin braids along the front of the top half, tie each end with a clear elastic, and gather them at the back. Slide a pearl clip over each elastic to hide it.
Space the clips at slightly different heights so the line looks relaxed. Loose waves in the lower hair keep it soft rather than fussy.
Good for: evening dinners and small parties.
<div style="margin:24px 0;">
  <div style="font-weight:700; color:#5C3447; font-size:16px; margin:0 0 12px;">Taking it down without frizz</div>
  <div style="display:flex; align-items:flex-start; gap:12px; margin:0 0 14px;">
    <span style="flex:0 0 auto; width:30px; height:30px; background:#8C5A6F; color:#ffffff; border-radius:50%; display:flex; align-items:center; justify-content:center; font-weight:700; font-size:15px;">1</span>
    <p style="margin:0; color:#333333; font-size:16px; line-height:1.6;">Remove the pearl clips and pins first so nothing snags.</p>
  </div>
  <div style="display:flex; align-items:flex-start; gap:12px; margin:0 0 14px;">
    <span style="flex:0 0 auto; width:30px; height:30px; background:#8C5A6F; color:#ffffff; border-radius:50%; display:flex; align-items:center; justify-content:center; font-weight:700; font-size:15px;">2</span>
    <p style="margin:0; color:#333333; font-size:16px; line-height:1.6;">Undo each braid from the ends up toward the scalp.</p>
  </div>
  <div style="display:flex; align-items:flex-start; gap:12px;">
    <span style="flex:0 0 auto; width:30px; height:30px; background:#8C5A6F; color:#ffffff; border-radius:50%; display:flex; align-items:center; justify-content:center; font-weight:700; font-size:15px;">3</span>
    <p style="margin:0; color:#333333; font-size:16px; line-height:1.6;">Finger comb the waves, and brush only after they loosen.</p>
  </div>
</div>
20. Braided Half Up Half Down Pony With Curled Ends
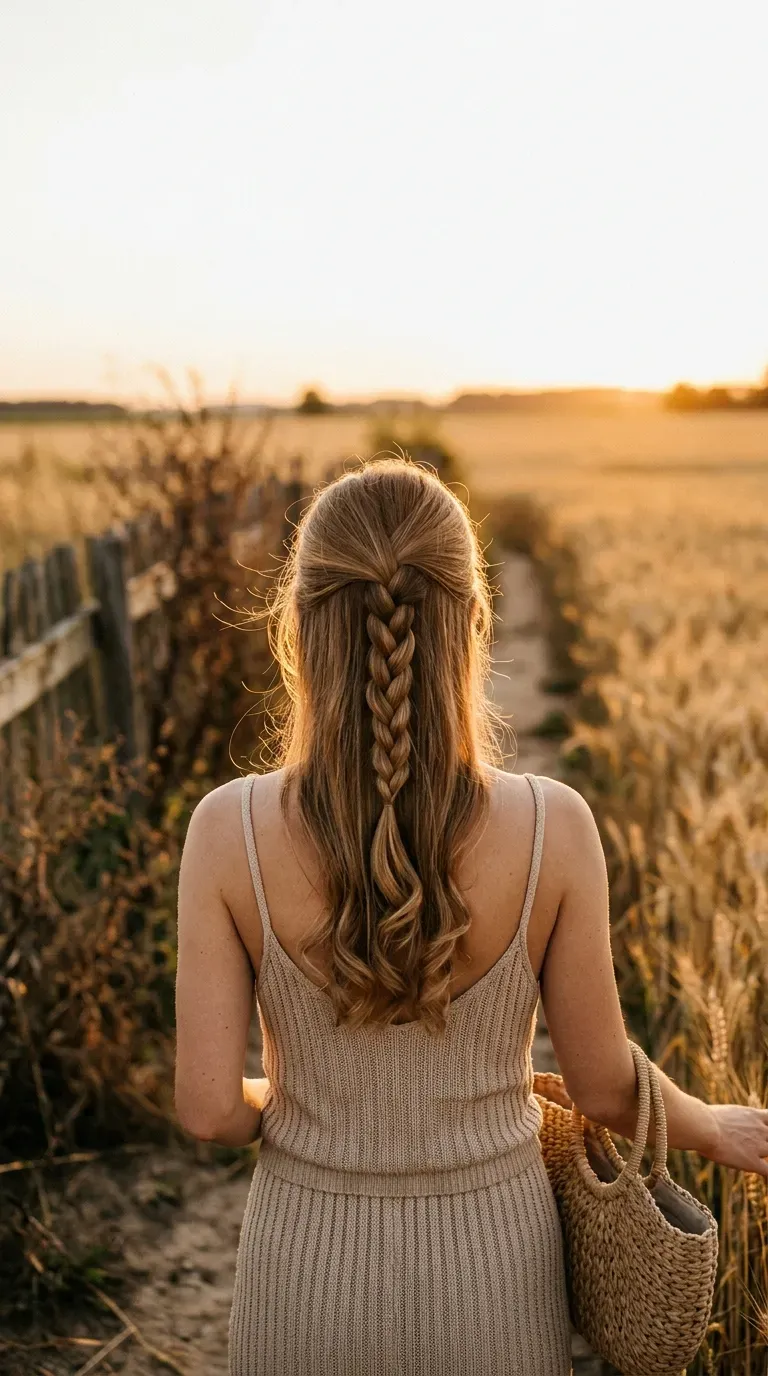
Braid just the tail of a half ponytail and the whole look changes.
Tie the top half at the crown, braid the ponytail down to its ends, and secure it. Then curl the loose lower hair away from your face so both lengths end with some movement.
The braid gives you structure, and the curls keep it from feeling too tidy. Layered hair works best, because the loose pieces hide the elastic.
Quick tip: Wrap a thin strand around the elastic and pin it underneath.
Conclusion
A good braid does not have to be fancy. It only has to keep your hair where you want it and give the style a clear shape. These braided half up half down hairstyles give you options for work days, weddings, errands, and everything in between. Start with a simple one, like the side braid or the two French braids, then move to the pull through or the bubble braid once your hands get used to the motion.
Practice on a day when nothing is waiting on you. Most of these look better on the second try anyway, and a little looseness is part of the charm.
Save this list to your hair board so the next braid idea is ready when you are.