
You blow dry it, you head out the door, and by lunch your hair is lying flat against your head again. Mid length fine hair has a real talent for this. It is too long to hold the lift a short cut gets for free, and too short to swing and move like long hair. So it just hangs there.
Most advice says to add more product. That usually makes it worse. Fine strands get weighed down fast, and a heavy cream or too much hairspray turns soft hair into limp, piecey hair by two in the afternoon.
What actually helps is shape. A blunt edge makes the ends look thicker. A bend through the middle gives the hair somewhere to go. A part in a new spot lifts roots that have been lying flat for years.
These medium hairstyles for fine hair are built on those small tricks. Some are cuts to ask your stylist for by name. Others take ten minutes and a clip. Each one comes with the exact steps and the one detail that keeps it from falling flat again.
1. Blunt Collarbone Lob With a Soft Bend

A blunt line is the quickest way to make fine hair look thicker. When every strand ends at the same spot, the bottom edge reads as solid instead of see through.
Ask your stylist for:
- A length that lands right at the collarbone
- A straight, blunt perimeter with no thinning shears
- Very light internal layers, or none at all
Style it with a flat iron. Clamp at mid length, turn your wrist half a turn, and glide out. That one soft bend keeps the cut from looking like a helmet.
Quick tip: book a trim every eight to ten weeks. Fine ends split fast, and the blunt edge is the whole point of this cut.
2. Shoulder Length Cut With Invisible Layers

Layers are not off limits for fine hair. The wrong kind are.
Short, choppy layers take away the weight your hair needs at the bottom, and the ends turn wispy. Invisible layers are cut long and hidden underneath, so they push the top sections up without thinning out the edge.
Here is what to tell your stylist:
- Keep the outer line blunt at the shoulders.
- Cut a few long layers only in the under sections.
- Leave the top layer at full length.
The result moves when you turn your head, but it still looks full from the back. Best for anyone who has been burned by a choppy cut before and still wants a little swing.
3. Curtain Bangs That Lift From the Root

Look at anyone with great curtain bangs and you will notice they never lie flat. They rise off the forehead first, then fall to each side like an open door.
Fine hair can do this too, and the bangs add body right where everyone looks first.
- Keep them long, around cheekbone length, so they blend into the sides
- Blow dry them straight forward first, then split them with a small round brush rolled back
- Finish with a pea size dab of light mousse at the root, nothing heavier
Small warning: skip oil anywhere near your bangs. Your forehead adds plenty of its own by midday.
4. Deep Side Part Flip

Move your part at least two inches from where it usually sits.
That is the whole rule. Hair that has been parted in the same spot for years lies flat at the root because it has been trained to. Flip it to the other side, and the roots stand up all day because they are pushing against their own habit.
To make it last:
- Part it while your hair is still damp.
- Blow dry the roots against the new direction first.
- Flip them back over and hold them with a flat clip for five minutes.
Nobody will be able to say what changed. They will just see more lift.
Set the new part on damp hair, when the roots are easiest to retrain.
Dry the roots in the opposite direction, then flip them over once they are fully dry.
Use a flat duckbill clip at the root while it cools so it does not leave a dent.
Moving the part on dry, flat roots and hoping it stays.
Spraying hairspray right on the part line, which clumps strands and shows more scalp.
Brushing the roots flat again after you flip them.
5. Round Brush Blowout With Bounce at the Ends

Section first. Blowing out fine hair in one big chunk just makes it frizzy and flat.
- Rough dry with your fingers lifting at the roots until it is mostly dry.
- Clip the top half up and work in sections about two inches wide.
- Use a medium round brush, not a huge one. Fine hair grips a smaller barrel better.
- Roll each section under at the ends and hit it with the cool shot button before you let go.
Let the hair cool completely before you touch it. Warm hair still bends, and cool hair holds the bend.
That last step is the one most people skip, and it is why the bounce is usually gone by the time you find your car keys.
6. Flat Iron Bent Waves Kept Loose
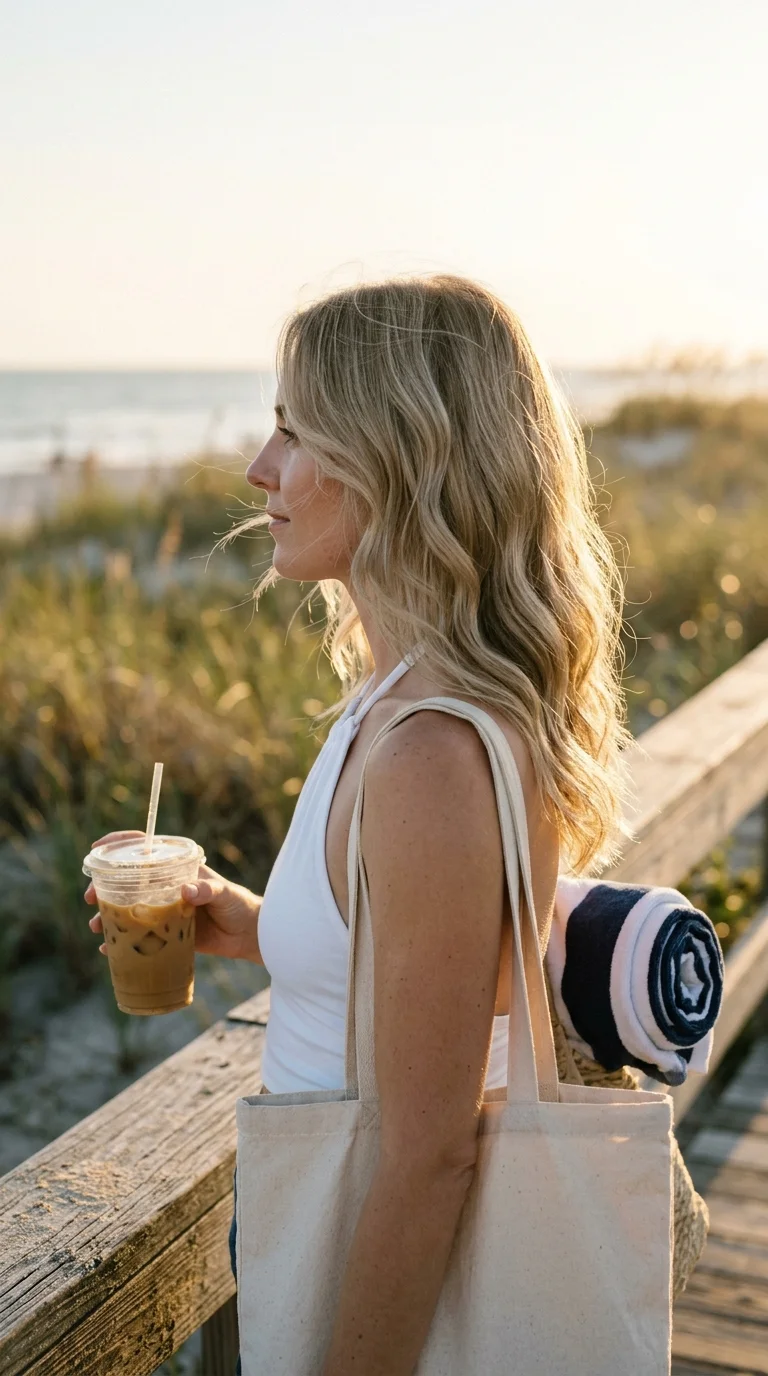
Tight curls look full for about an hour. Then fine hair drops them, and they turn stringy. Bent waves go the other way. They start relaxed, so there is less shape to lose.
Here is the difference in practice:
- Curling iron: round coils, lots of product, gone by evening
- Flat iron bends: flat S waves, light, often still there the next morning
Grab one inch sections. Clamp, turn the iron down, move an inch lower, turn it up. Keep going and leave the last inch straight.
Shake the waves out with your fingers once they cool. A brush pulls them right back to flat.
7. Velcro Roller Set for Crown Height

Most mornings there are about ten minutes between getting dressed and finding your keys. That is exactly enough time for velcro rollers.
Roll three or four large ones along the top of your head while your hair is dry or still warm from the dryer. Point them back, away from your face. Then go do your makeup, pour coffee, answer a text.
Before you take them out:
- Give each roller a quick blast of warm air
- Let them cool for two more minutes
- Unroll gently and rake through with your fingers
You get crown height that looks like a salon blowout, with almost no heat on your ends.
8. Stacked Double Ponytail
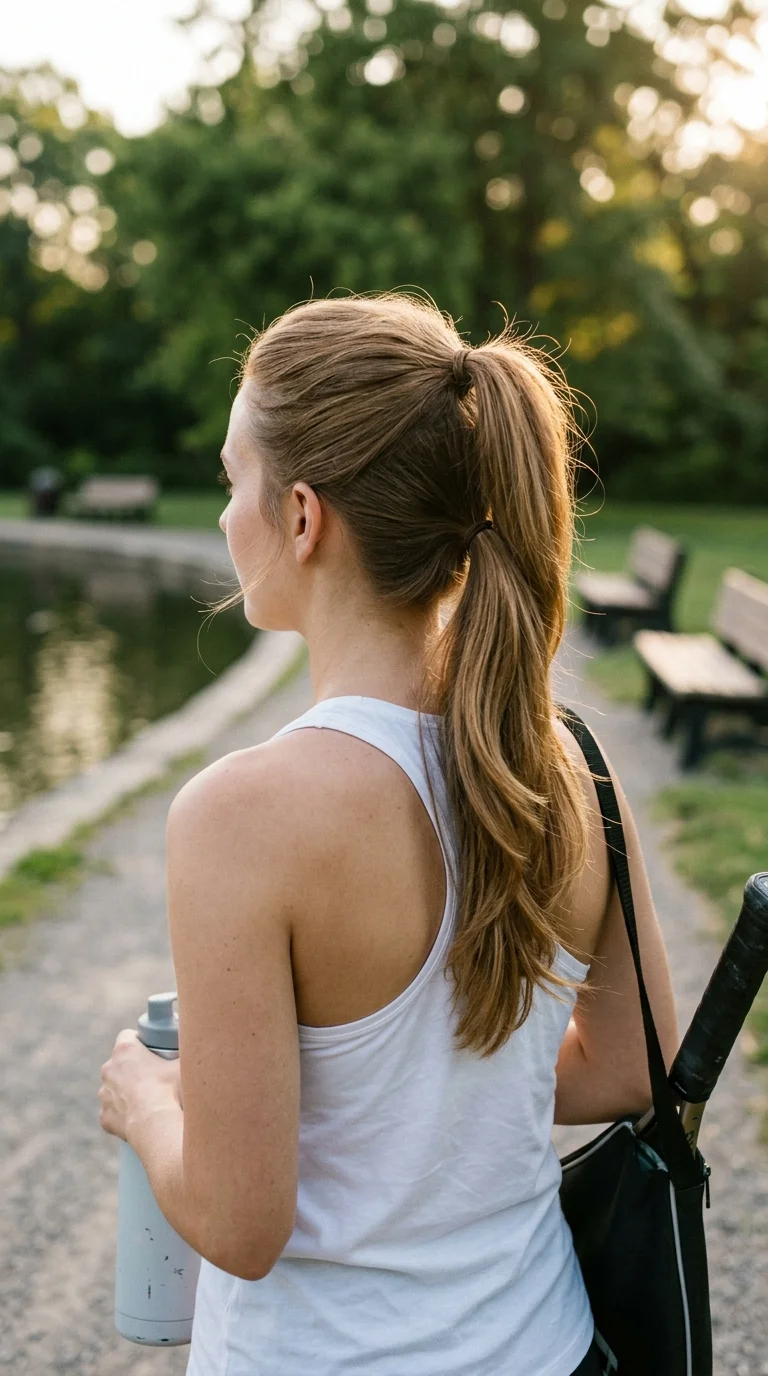
A single ponytail on fine medium hair usually ends up the width of a paintbrush. One elastic squeezes all your hair into one tiny bundle, and there is nowhere for it to hide.
Two ponytails fix it.
- Split your hair at ear level into a top half and a bottom half.
- Tie the top half at the crown.
- Tie the bottom half directly below it, close enough that the top tail covers the second elastic.
From behind, it reads as one long, thick ponytail. Gently pull the crown up with your fingertips for extra height.
Clear elastics hide better than black ones on light hair.
9. Half Up Twist With a Pinched Crown

Half up styles on fine hair tend to look a little sad when the top is slicked down tight. The crown needs air.
Here is what works better. Take the top section from temple to temple, twist it back once, and pin it with a small clip. Then, before anything else, use two fingers to pinch and lift little pieces at the crown. Just a tiny tug each time.
It feels like nothing. In the mirror, it looks like you have twice the hair up top.
Finish with a light mist of texture spray over the twist.
Quick tip: leave two thin pieces out near your face. They soften the look and hide the spot where the twist starts.
10. Pancaked French Braid Pulled Wide

Braid it tight, then pull it wide. A fresh French braid on fine hair sits thin and close to the scalp. Pancaking flattens each loop outward so the braid looks two or three times as wide.
How to pancake it:
- Braid loosely and tie off with a small clear elastic.
- Start at the bottom and work up.
- Pinch the outer edge of each loop and tug it sideways, a little at a time.
Hold the end of the braid while you pull, or the whole thing slides.
Fine hair can look a bit fuzzy after pancaking. A little hairspray on your fingertips smooths the loops without flattening them.
A tight, narrow braid hugging the scalp. You can see the part lines between sections, and the tail at the nape looks skinny.
Wide, flat loops that cover the scalp and sit softly against the head. The braid looks thick, and the small tail barely matters.
11. Claw Clip Twist Up With Loose Ends

Small clip, loose twist. That is the rule for fine hair.
A huge claw clip swallows thin hair and slides down by noon. A medium one, around three inches wide, actually bites.
- Gather your hair at the back of your head, no brush, just hands
- Twist it up once, loosely, so the ends spill out over the top
- Clip it with the teeth facing down into the twist
The loose ends at the top fan out and make the twist look bigger than it is. Pull a few pieces free at the temples.
Matte clips grip fine hair better than shiny ones, which tend to slip.
12. Low Messy Bun Built on Texture Spray

Freshly washed fine hair is slippery. Twist it into a bun, and it slides out of the pins before you leave the house.
So rough it up first. Spray texture spray all through your lengths, then scrunch with your hands for about thirty seconds. Now it has grip.
Twist the hair at the nape, wrap it around itself, and hold it with three U shaped pins instead of an elastic. U pins keep the bun loose, so it looks bigger.
Good to know: second day hair works even better. The bun you make on the morning you skip washing might be your best one all week.
13. Sleek Tuck Behind One Ear

Sleek styles are supposed to be the enemy of fine hair. This one is the exception.
The trick is keeping only one side sleek. Tuck your hair behind one ear and smooth it with a single drop of serum. Leave the other side loose and slightly bent, with a deep part over it.
What that does:
- The tucked side shows off your jawline and an earring
- The loose side holds all the volume
- The contrast makes the loose side look even fuller
A gold hoop or a small ear cuff on the tucked side finishes it. Good for dinners, weddings, or a work event where you want polish without flat hair.
14. Soft Shag With Layers Only at the Crown

Look closely at a good shag and you will see short, lifted pieces near the crown. They make the whole cut look taller and messier in the good way.
Fine hair can wear a shag if the stylist keeps those short layers up top and leaves the bottom heavy.
Ask for:
- Short crown layers, around chin to cheekbone length
- A thick, blunt bottom edge at the shoulders
- Curtain style pieces in front, not a wispy fringe
Air dry with a light mousse, then scrunch. The crown does most of the work.
Fair warning: this one needs a stylist who has cut fine hair before. Ask to see photos of their shags.
15. Heatless Robe Belt Curls
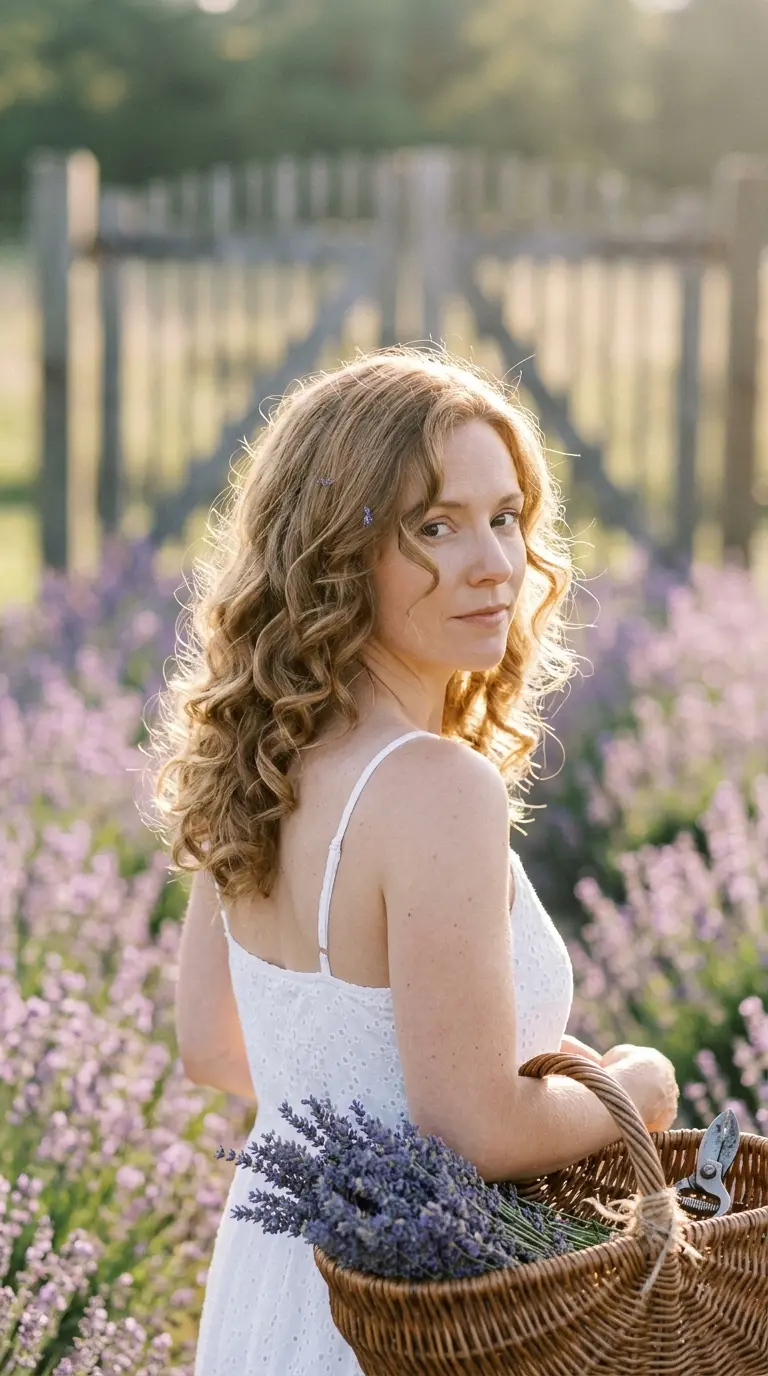
Sleeping on a robe belt sounds silly. It works anyway, and it spares your fine ends any heat.
- Start with hair that is almost dry. Soaking wet fine hair takes forever and can come out frizzy.
- Lay the middle of a soft robe belt across the top of your head like a headband.
- Wrap each side around the belt, adding hair as you go, the way you start a French braid.
- Tie the ends with scrunchies and sleep.
In the morning, unwrap and finger comb. The waves come out soft and round, sitting below the ears, which is right where medium fine hair usually looks flattest.
16. Twin Side Braids Pinned Across the Crown
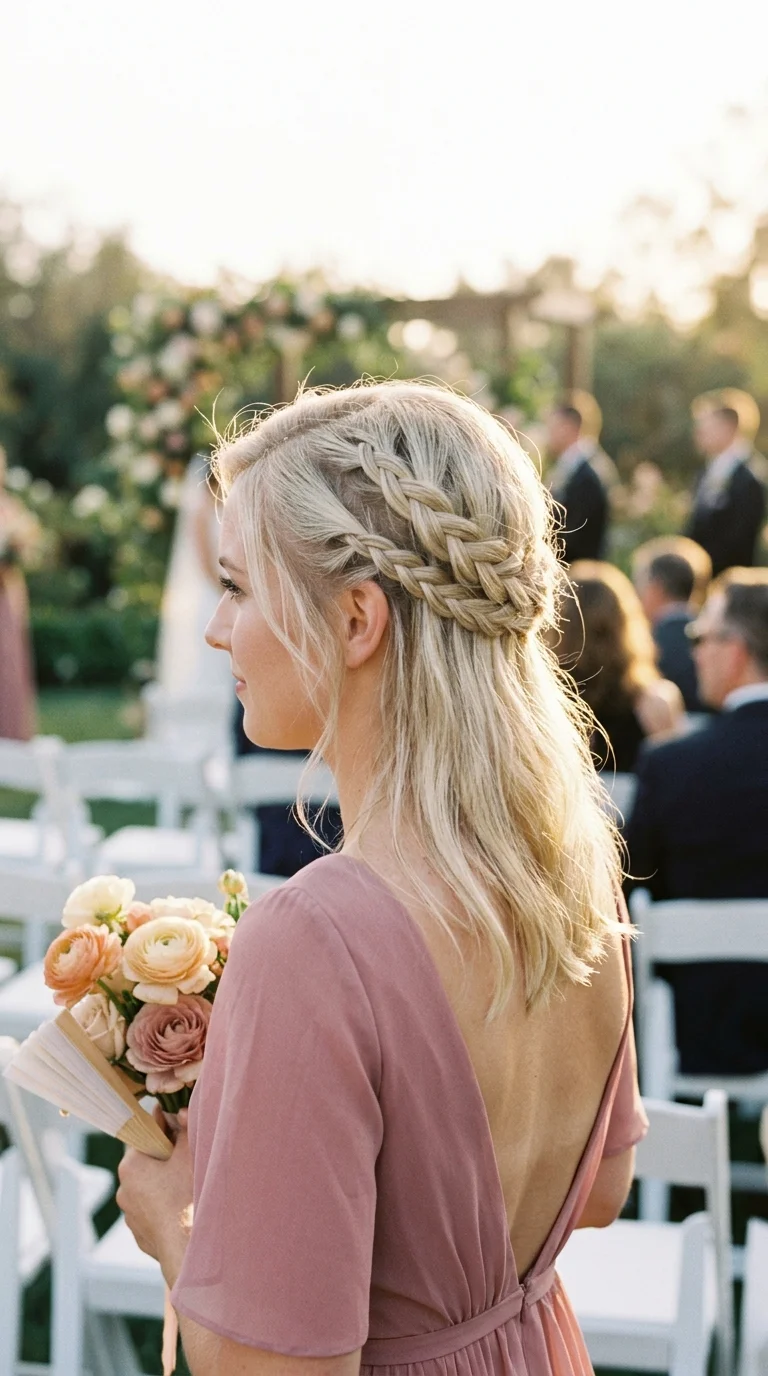
A full crown braid is hard on medium fine hair. There usually is not enough length to wrap all the way around. Two small side braids pinned across the top solve that.
- Make a deep side part.
- Braid a thin three strand braid on each side, starting just behind the ear.
- Pancake both braids a little.
- Cross them over the top of your head and pin each end under the other braid.
The rest of your hair stays down and loose underneath. From the side, it looks like a braided headband resting on soft volume.
It holds through a long day, even a dance floor.
17. Messy Half Up Topknot

Pulling the top section too tight is the usual slip. It flattens the sides and turns the knot into a small, hard bump.
Do this instead:
- Grab only the top third of your hair, from the crown forward
- Loosen it at the roots with your fingers before you tie it
- Wrap it into a loose knot and hold it with a small scrunchie, not a tight elastic
- Tug a few pieces out of the knot so it looks bigger
The knot sits right on the crown, so it adds height with no teasing at all. Best for days when your hair is a little greasy and you have zero patience.
18. Zigzag Part With Volume Powder

Your part is the one spot where people can see straight down to your scalp. On fine hair, that line can look wider than it really is.
A zigzag part blurs it. Use the tail of a comb to draw a loose zigzag from your forehead back to the crown. Small, uneven zigs look more natural than neat ones.
Then add volume powder:
- Shake a tiny bit right along the zigzag.
- Rub it in with your fingertips for ten seconds.
- Flip your hair back over.
The roots stand up and the scalp mostly disappears. Pick a tinted powder if your hair is dark, or it can leave a gray cast.
19. Low Bubble Ponytail With Puffed Sections

Bubbles make a short, thin ponytail look a lot longer and fuller.
Tie a low ponytail at the nape. Add a small clear elastic every two inches or so down the tail. Then gently pull the hair between each pair of elastics outward with your fingertips until it puffs into a round bubble.
Medium hair usually fits three bubbles. That is plenty.
Quick tip: spray a little dry shampoo into each section before you pull it. It gives the hair grip, so the bubbles stay round instead of collapsing by dinner.
20. Scrunched Air Dry Waves With Light Mousse

A lot of fine hair has a little wave hiding in it. It just never shows, because heavy conditioner and a brush keep pulling it straight.
Give it a chance:
- Use a lightweight conditioner on the ends only.
- Squeeze out the water with a cotton T shirt, not a towel.
- Rake in a golf ball size amount of light mousse.
- Scrunch upward, then leave it alone until it is fully dry.
Once it is dry, scrunch again to break up any crunch.
The waves may be loose, but they add real width at the sides. It is also the gentlest style on this list, with zero heat.
A Little Shape Goes a Long Way
Fine hair at medium length is not the lost cause it can feel like on a flat morning. It just needs structure. A blunt edge, a moved part, a bend through the middle, or a braid pulled wide can make the same amount of hair look fuller the very same day.
Start with one cut and one style. The blunt lob and the stacked ponytail are easy wins, and both show you right away that shape matters more than product.
Keep a few of these medium hairstyles for fine hair ready for the days your hair goes flat before you even leave the house.
Save this list to your hair board so it is there the next time your hair needs a lift.