
Thick hair sounds like a gift until you are the one living with it. It takes an hour to air dry. It snaps cheap elastics. By the end of the day your scalp aches from a ponytail that was only ever half secure, and the back still feels damp at dinner. Hair ties stretch out, claw clips slide down, and the bobby pin jar never seems to have enough pins in it.
The usual advice is to “thin it out.” That often goes wrong. Thinning shears used all over can leave short, frizzy bits that poke up through the top, so your hair ends up looking puffier than before.
Take weight out in smart places, like the middle lengths and the nape. Split heavy hair into two sections so no single elastic or pin carries all of it. And pick styles that use your density on purpose instead of fighting it.
These hairstyles for thick hair cover all three. There are cuts to ask for by name, blowouts that keep their shape, and ponytails, braids, and updos built for hair that refuses to stay small. Each one includes the small detail that makes heavy hair feel lighter on your head.
1. Long Layers With Weight Taken Out of the Middle

Most thick hair feels heavy in one spot: the middle. That is where the bulk sits, right between your ears and your shoulders.
Long layers fix that without shortening your length. Ask your stylist for layers that start around the chin and run to the ends, with some interior layers cut underneath the top section. The top stays smooth. The weight underneath disappears.
What you will notice first:
- Your hair dries faster
- The ends move when you walk
- Your ponytail stops feeling like a rope
Go back every 10 to 12 weeks. Thick hair grows into a triangle shape fast once the layers grow out.
Interior layers cut under the top section, so the surface stays smooth.
Point cutting or slide cutting on the ends to soften a blunt, heavy edge.
A dry check at the end, since thick hair can sit very differently once it is dry.
Thinning shears all over the top layer, which leaves short bits that frizz upward.
Short layers at the crown if you want a sleek look, since they puff out first.
Saying just “thin it out” with no detail about where the weight bothers you.
2. Hidden Nape Undercut Beneath Long Hair

A small shaved patch at the nape can remove more bulk than any layering. Nobody sees it when your hair is down. You feel it right away.
How to ask for it:
- Have your stylist section off the hair from ear to ear at the bottom of your head.
- Pick a size. A strip about two fingers tall is a good first try.
- Choose a clipper guard. A number 2 or 3 grows out softer than a 1.
The payoff shows up on hot days. Your neck stays cooler, buns sit flatter, and high ponytails finally feel balanced. Keep it trimmed every 3 to 4 weeks, or it starts to push the hair above it outward.
3. Soft V Cut Layers Across the Back

A straight blunt line across the back of thick hair can look like a heavy curtain. A V shape changes that.
The sides are cut a little shorter and angle down to a longer point in the center of your back. So the hair looks long from behind, while the sides stay light and move away from your face.
Quick tip: Ask for a soft V, not a sharp one. A very pointed V can make the ends look thin and stringy, which is the last thing thick hair needs.
It works best on hair that is at least a few inches past the shoulders.
4. Butterfly Cut With Face Framing Layers

Short layers up front, long layers in the back. That split is the whole trick.
The short pieces around your face carry the volume, so the back can stay long and lighter. On thick hair, the cut looks full without looking wide, because the bulk gets moved forward instead of piling up at the sides.
Styling it takes one round brush. Blow dry the front layers away from your face, then flip the back ends under or out. Even a quick rough dry looks shaped, since the layers do most of the work.
Book a trim every 8 weeks. The short face layers lose their swing first.
5. Shoulder Length Shag With Choppy Ends

Lots of people with thick hair are told they cannot wear a shag. That advice is outdated.
A shag actually needs density. On thin hair the choppy layers can look see through. On thick hair, every layer has enough body to hold its own shape, so the cut looks full and textured instead of flat.
What to ask for:
- Shoulder length, with the most layers at the crown
- Curtain bangs that blend into the sides
- Razor or point cut ends, not blunt
Scrunch in a light sea salt spray and let it air dry. The messier it sits, the better it looks.
6. Collarbone Lob With Point Cut Ends

Cutting thick hair short feels risky. The fear is that it will puff up into a triangle.
The fix is in the ends. A lob that is point cut, where the stylist snips into the ends vertically, has a soft, uneven edge that lies flat. A blunt edge at the same length often sticks out like a shelf.
Collarbone length is the safe spot. It is long enough to tuck behind your ears and pull into a short low ponytail, but short enough that it dries in half the time.
Best for anyone who wants a big change without losing the option to tie it back.
7. Graduated Bob With a Stacked Back
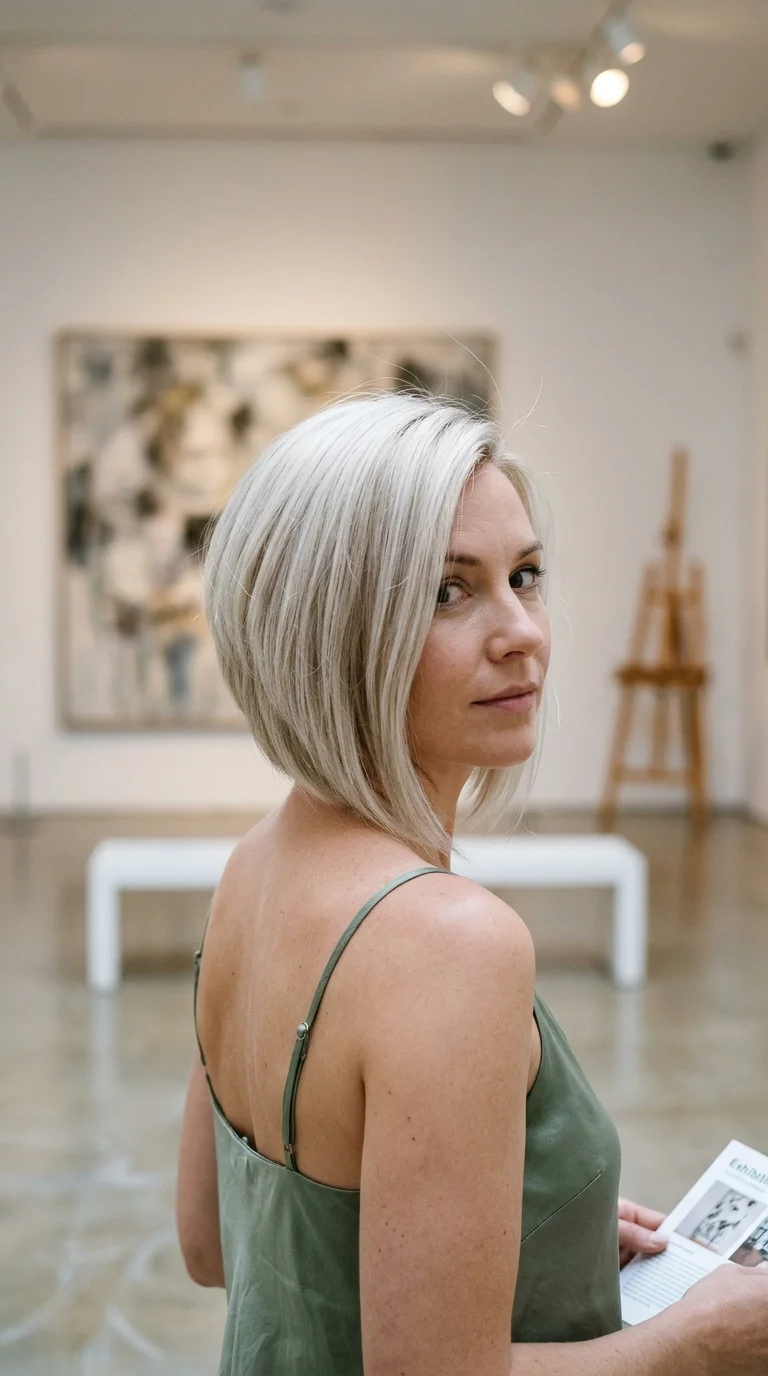
Here is a short cut that loves thick hair. The back is cut short and stacked in tight layers, and the front angles down longer toward your chin.
Why does it work? The stacked layers use your density to build a rounded shape at the back of your head. Fine hair cannot hold that shape. Yours can.
Styling is fast:
- Rough dry until about 80 percent dry.
- Use a small round brush on the back to curve it under.
- Smooth the front pieces straight with a flat brush.
Plan on a trim every 5 to 6 weeks. The stacked back loses its curve quickly.
8. Curtain Bangs Cut Into Thick Hair

Bangs on thick hair can turn into a solid helmet if they are cut straight across. Curtain bangs avoid that.
They are parted in the middle and cut longer at the outer edges, so they swing apart and blend into your face framing layers. Your stylist should also take a thinner section for the bangs than they would on fine hair. A thick section of thick hair makes bangs that will not lie down.
Morning fix: wet just the bangs at the sink, then blow dry them with a round brush, rolling each side away from your face. Two minutes, and they stay put until evening.
9. Soft Wolf Cut That Is Not Too Spiky

A wolf cut sits between a shag and a mullet. Short, choppy layers on top, longer layers in the back.
Thick hair is the best match for this cut. Fine hair often looks thin at the bottom, but yours stays full all the way down.
The word to use at the salon is soft. Ask for:
- Crown layers no shorter than chin length
- Wispy bangs, not a heavy fringe
- Longer back layers that blend into the sides
That keeps it wearable on a normal Tuesday, not only on a music festival weekend. If you have a natural wave, this cut will bring it out more than any other.
10. Round Brush Blowout With 90s Bounce

Thick hair holds a blowout far longer than fine hair does. That is the upside of all that density.
The steps:
- Rough dry until your hair is mostly dry. Thick hair takes forever if you round brush from soaking wet.
- Clip the hair into four big sections.
- Use a large round brush, about 2 inches, and dry each section with the nozzle pointing down the hair.
- Wrap each warm section into a big velcro roller and let it cool for ten minutes.
The cooling step is where the bounce lives. Skip it and the curl drops by noon.
11. Middle Part Sleek Straight Blowout
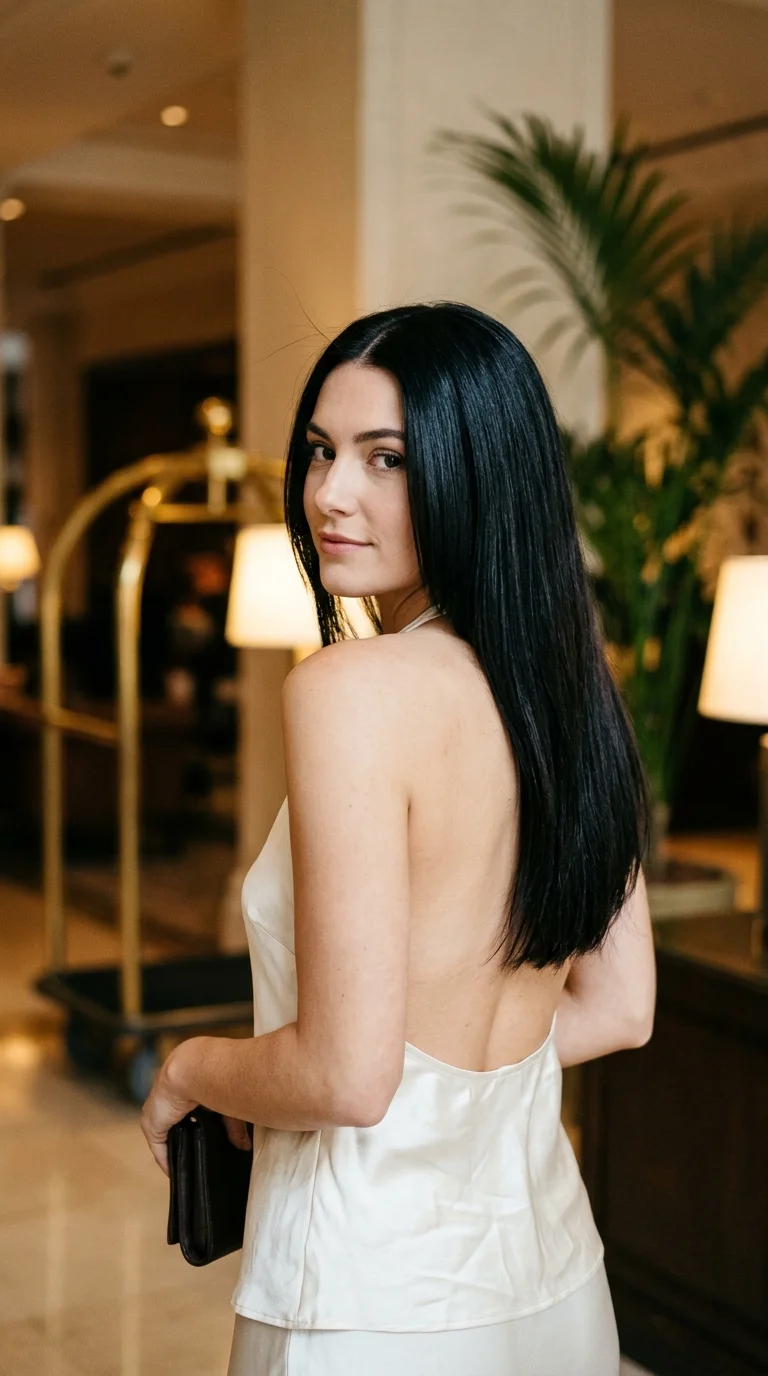
Sleek hair feels lighter than it looks. When every strand lies flat, the volume shrinks and the hair stops sitting wide around your shoulders.
The secret is small sections. Thick hair needs flat iron sections no wider than an inch, or the middle of each section stays wavy while the outside looks straight.
Watch out: always use a heat protectant, and keep the iron moving. Holding it in one spot to tame a stubborn section is how ends get crispy.
Finish with one drop of hair oil rubbed between your palms and pressed over the top. Just one. Thick hair does not need a pool of it.
12. Flat Iron Beach Waves

Curling irons and thick hair are slow friends. A flat iron is faster.
Take a one inch section, twist it away from your face, and slide the flat iron slowly down the twist. Leave the last two inches straight. Do that around your whole head, then rake through with your fingers.
The straight ends are what make it look like beach hair and not prom curls. They also stop the waves from making thick hair look even bigger.
Spritz with a dry texture spray at the end. Thick waves can feel heavy and drop, and the spray adds grip without stiffness.
13. Overnight Two Braid Heatless Waves

Sleeping on two braids is the lowest effort wave you can get. On thick hair there is one catch: it has to be almost dry first.
Damp thick hair in tight braids will still be wet in the middle at 7 a.m., and the waves fall out by lunch.
Here is the order that works:
- Wash in the evening and air dry until about 90 percent dry.
- Mist lightly with water if the ends dried completely.
- Split into two braids from the nape, not from the crown.
- Sleep on a satin pillowcase.
In the morning, unravel and break the waves apart with your fingers. No brush.
14. Stacked Ponytail That Splits the Weight

One high ponytail on thick hair means one elastic holding a lot of weight. That is the headache.
A stacked ponytail splits the load. Section your hair from ear to ear. Tie the top half into a ponytail at the crown, then tie the bottom half right below it. The top tail falls over the second elastic and hides it.
The result looks like one huge ponytail. It feels like two small ones.
Each elastic holds half the hair, so neither one pulls on your scalp, and the style holds through a whole workday without sliding down.
A single elastic wrapped three times strains to hold everything. The tail droops by midday, the crown feels tight, and you end up retying it at your desk.
Two elastics share the load. The top tail covers the lower tie, the ponytail looks longer and fuller, and the pull on your scalp drops to half.
15. Wrapped Low Ponytail

Low ponytails are kinder to thick hair than high ones. The weight sits at the nape, close to your neck, so it does not drag on the crown.
Wrapping it makes it look finished in thirty seconds. Pull one small strand from the underside of the ponytail. Wrap it around the elastic until it is covered, then pin the end underneath with a bobby pin.
Small upgrade: use a spiral coil hair tie. They grip thick hair without the tight band that gives you a headache by 3 p.m., and they leave fewer dents when you take them out.
16. Bubble Ponytail With Light Elastics

Thick hair makes the best bubble ponytails. Each section puffs out round and full, without any teasing.
Make a regular ponytail first. Then add a clear elastic every two or three inches down the tail. Gently pull the hair between each elastic outward to round it.
A few honest notes:
- Small clear elastics are easier to hide than black ones
- Pull the sides of each bubble, not the top, so it stays even
- Stop at four or five bubbles, or the tail starts to look stiff
Cut the clear elastics out with small scissors at night. Pulling them out snaps thick strands.
17. Rope Twist Ponytail

Braids on thick hair can turn bulky. A rope twist stays slimmer, and it is faster.
- Make a ponytail at any height.
- Split the tail into two equal sections.
- Twist each section to the right, tightly.
- Cross the two sections over each other to the left.
- Tie the end with a small elastic.
The trick is that you twist one way and cross the other. That is what locks the rope in place.
Thick hair holds a rope twist better than most hair types. Expect it to stay tight all day, even through a windy afternoon.
18. Flipped Low Ponytail
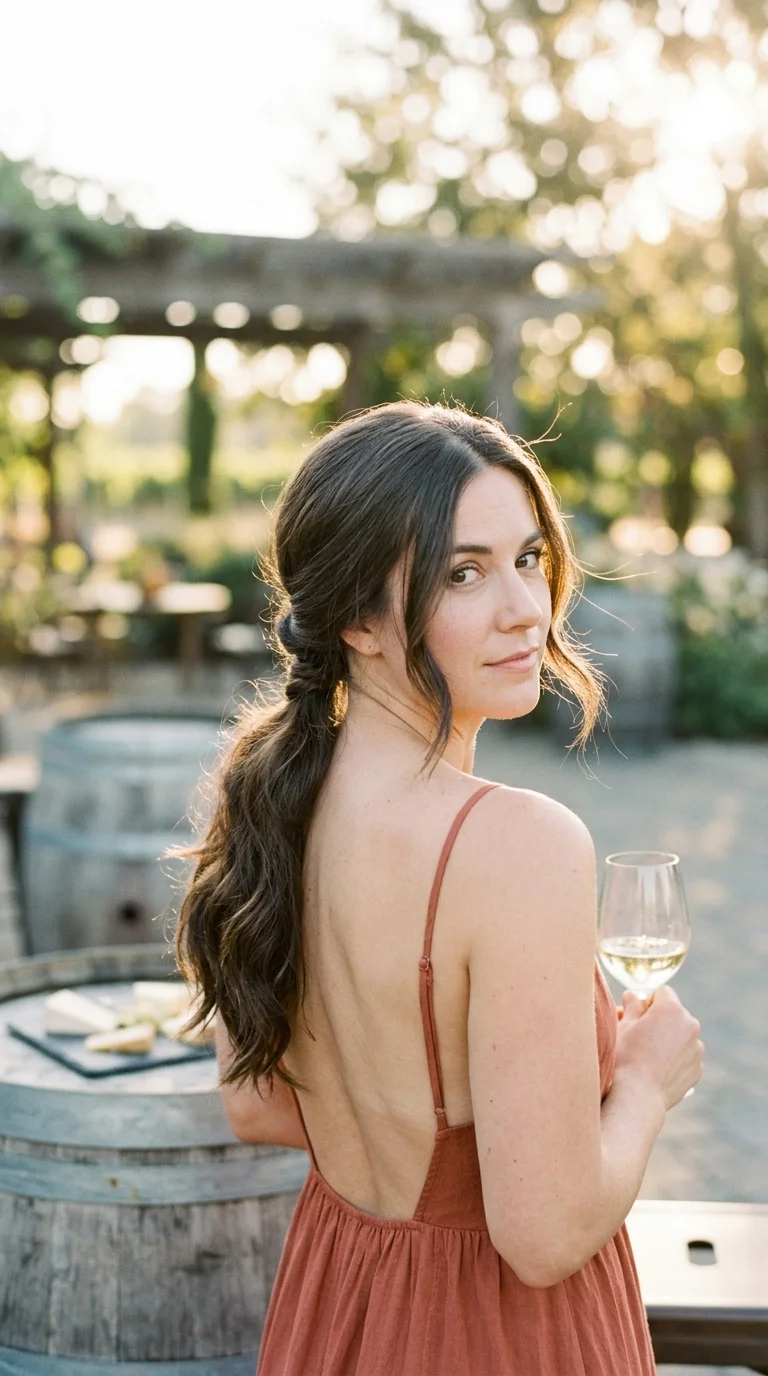
Tie a loose low ponytail. Push a small hole in the hair just above the elastic. Flip the tail up and through that hole.
That is it. The hair rolls in on itself at the sides and looks twisted, but there is no actual twisting involved.
On thick hair, the flip hides the elastic completely and makes the ponytail look neat even when your hair is a little unwashed. Pull the elastic down slightly before flipping. Too tight, and the tail will not fit through the gap.
Good for the days when you have five minutes and an important meeting.
19. Two Dutch Braids Into a Low Bun

A single bun with all of your thick hair can feel like carrying a grapefruit on your head. Two braids fix that.
Part your hair down the middle. Dutch braid each side, crossing the strands under instead of over, until you reach the nape. Then twist the two leftover tails together into one small bun and pin it.
The braids take up most of the length, so the bun stays compact.
Best use: swimming, hiking, and hot days. It holds up through water, wind, and sweat, and when you take it out the next day you get loose waves as a bonus.
20. Side Fishtail Braid

Fishtail braids look intricate. They are just two strands, crossed over and over with tiny pieces.
That is good news for thick hair, because the tiny crossovers keep the braid flat and slim. A normal three strand braid on very thick hair can come out as wide as a wrist.
Sweep everything over one shoulder, split it into two halves, and pass a small piece from the outside of one half to the inside of the other. Repeat all the way down.
Once it is tied, gently tug the edges loose. It looks fuller and softer, and the small mistakes disappear.
21. Pull Through Braid Without Braiding Skills
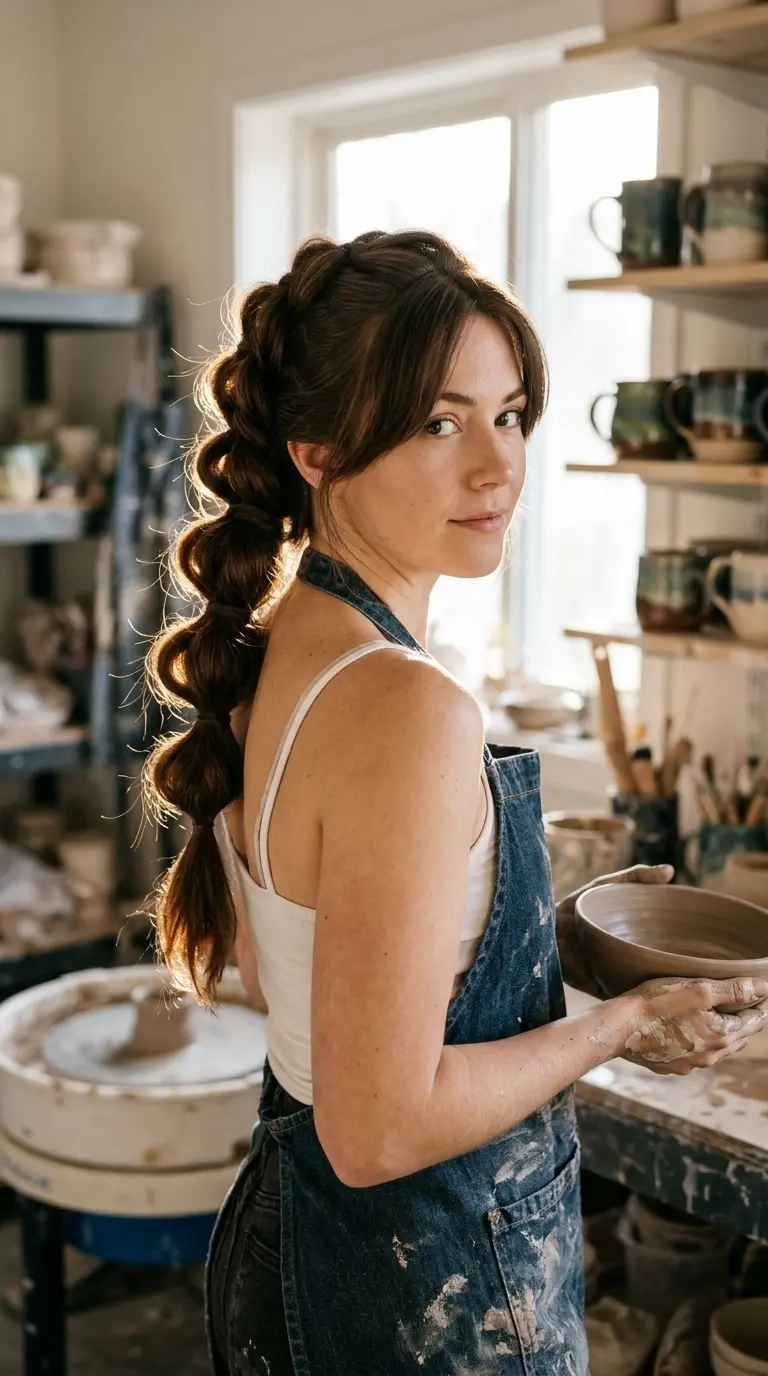
Can’t braid? You don’t need to. This style looks like a fat, fancy braid and only uses small elastics.
How it goes:
- Make a small ponytail at the crown.
- Make a second ponytail right under it.
- Split the first tail in two and bring the halves down around the second ponytail.
- Tie them together under it, then repeat down the length.
- Pull each loop wide.
Thick hair fills out every loop, so it looks full even if you skip the pulling.
Small detail from experience: use elastics the same color as your hair. Clear ones show up on dark brown.
22. Halo Crown Braid
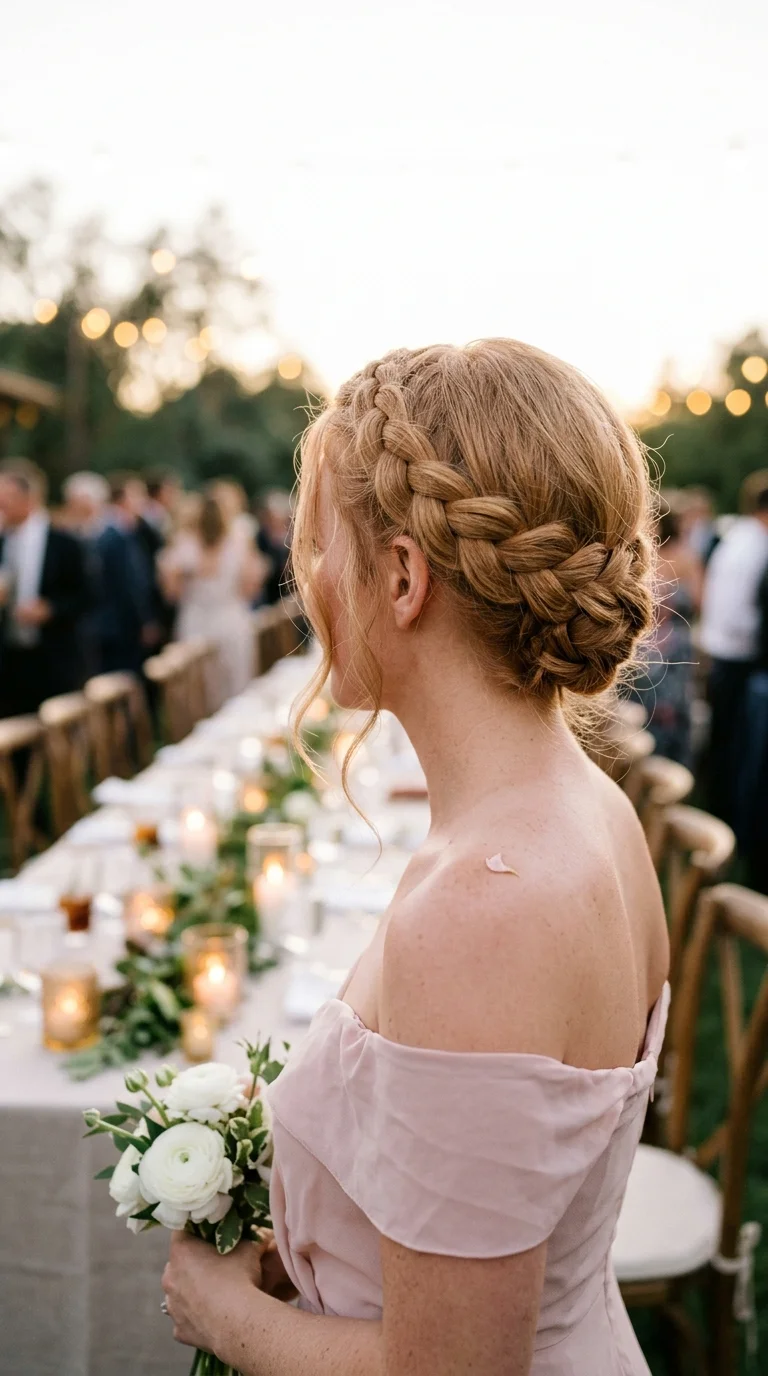
Crown braids need a lot of hair to look full. Thin hair barely makes it around the head. Thick hair goes all the way around with a few inches to spare.
Start one Dutch braid behind your left ear. Braid along your hairline over the top of your head, across to the right ear, and keep going around the back. Tuck the tail under where the braid started and pin it with U pins.
It keeps all of your hair off your neck and spreads the weight evenly around your head. No pressure point, no headache.
Weddings, graduations, and anything where you will be standing for hours.
23. Loose Milkmaid Braids
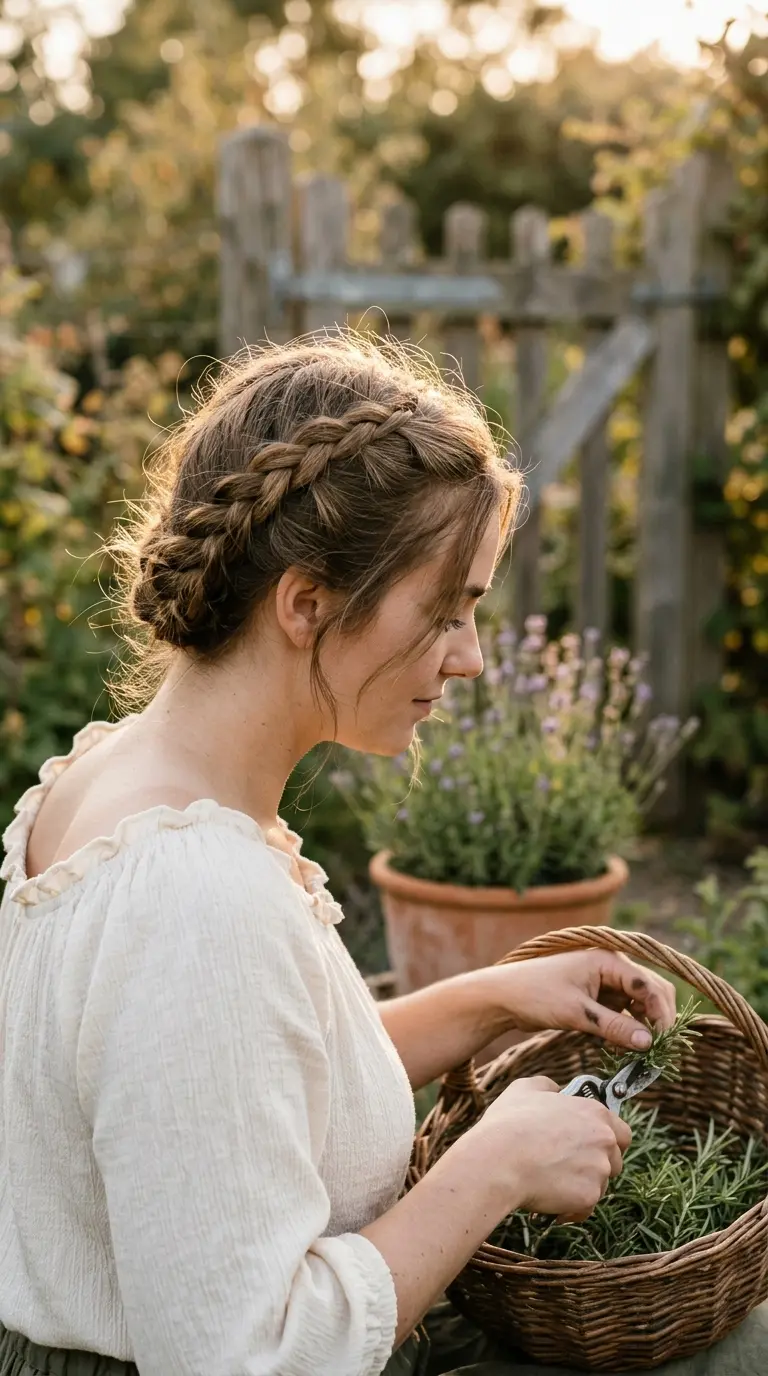
Milkmaid braids look like a crown braid but use two braids instead of one, so they are easier to do on yourself.
- Part down the middle
- Make one loose braid on each side, starting low behind the ear
- Lift the left braid over the top of your head and pin it on the right
- Lift the right braid over and pin it just behind the first
Common mistake: braiding too tight. Tight braids on thick hair become thick, stiff ropes that will not bend over your head. Loose braids bend easily and lie flat.
This is a great second day style, since a little grit helps the pins grip.
24. Sectioned Two Claw Clip Twist

One claw clip and thick hair have a common ending. The clip slides down the back of your head, and then it pops open.
Two clips fix it. Split your hair into a top half and a bottom half. Twist the bottom half up and clip it at the nape. Twist the top half up and clip it at the crown, letting the ends cover the lower clip.
Each clip holds half, so neither one slips.
Clip size matters more than people think. Small clips snap. Look for big, wide clips with deep, long teeth and a strong spring.
25. Half Up Top Knot
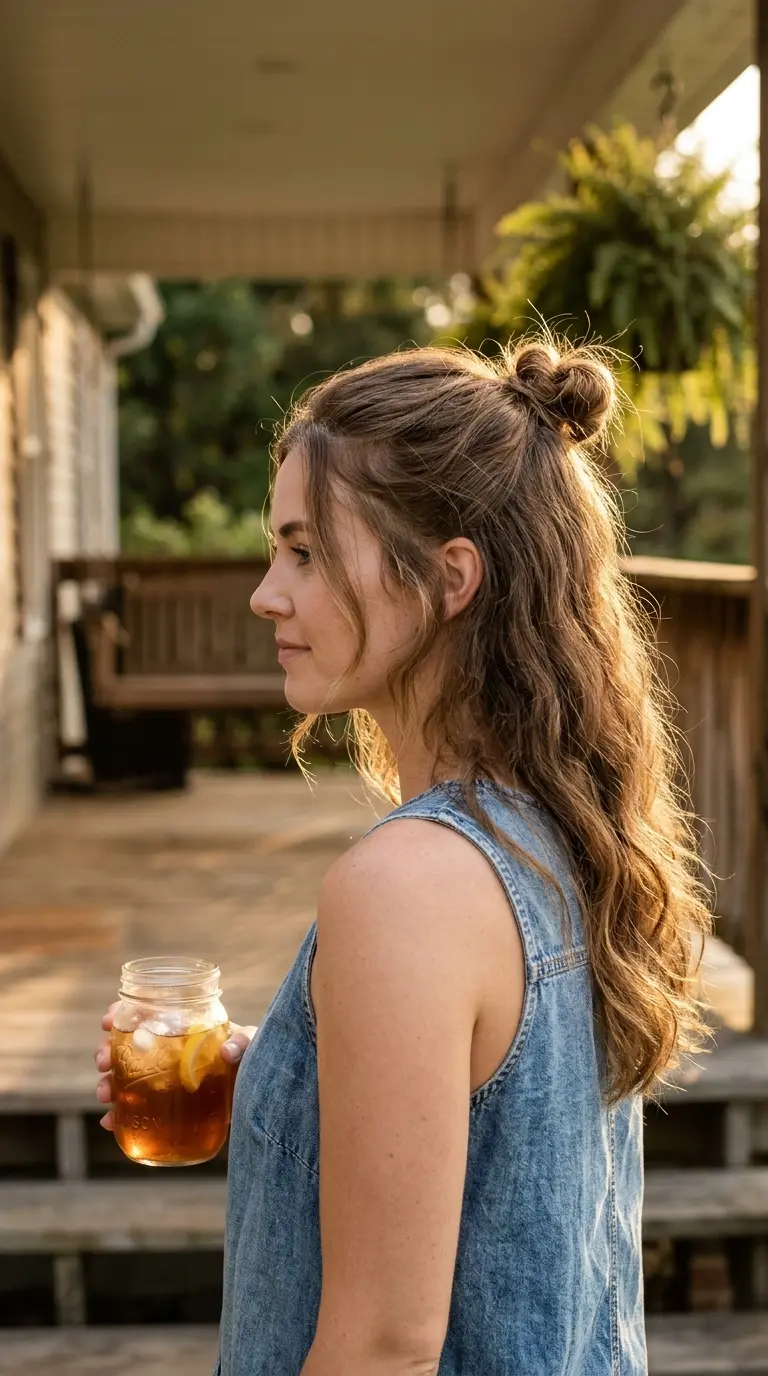
Pulling only the top section up takes the weight off your face, but your neck and shoulders still get the length.
Gather the hair from your temples back to the crown. Twist it into a small bun right at the top of your head and wrap an elastic around it. Leave the rest down.
Keep the knot small. With thick hair, the top section alone can make a big bun, and a big bun on top of all that loose hair gets very tall very fast. Take a slimmer section than you think you need.
It looks good on hair that is a day or two past wash day, which is when thick hair is easiest to work with anyway.
26. Half Up Space Buns

Full space buns with thick hair can be big. Very big. Half up space buns keep the fun and halve the size.
Steps:
- Part the top section down the middle.
- Gather each side into a high pigtail.
- Twist each pigtail and wrap it around its base.
- Pin each bun with two bobby pins in an X.
The rest of your hair stays down and covers your neck.
A zigzag part makes the split look softer and hides any scalp showing through. Concerts, festivals, and long car rides where you want your hair off your face but not tied back tight.
27. French Twist Held With U Pins
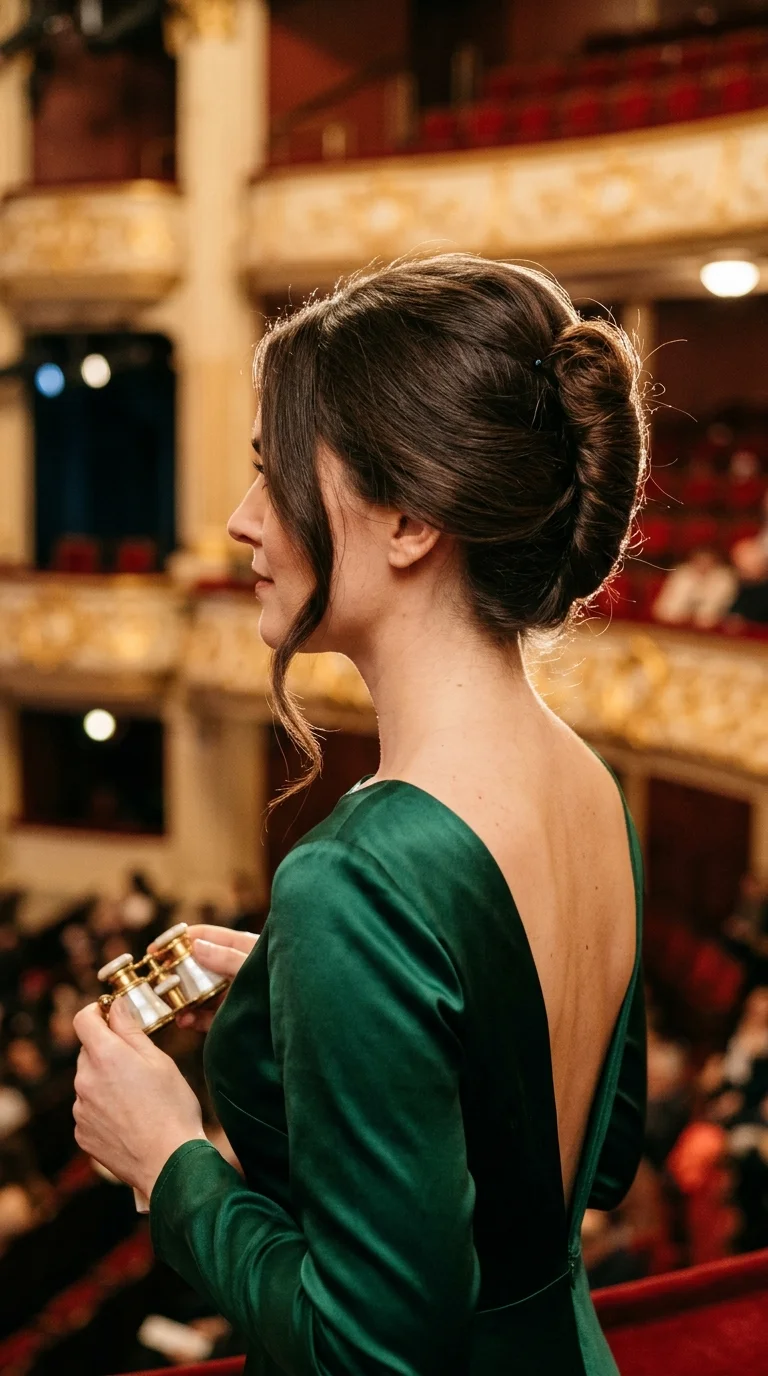
Bobby pins slide straight out of thick hair. U pins do not.
U pins are shaped like a long, open U. You push them in, then turn them to hook into the twist. They grip the roll from the inside instead of pinching the outside.
To make the twist, gather all your hair at the nape, twist it upward along the back of your head, and tuck the ends into the roll. Then slide the U pins in along the seam every inch or so.
Thick hair makes this style look smooth and full with zero padding.
It stays put for a whole evening and comes out with just a few tugs.
28. Low Double Chignon

Same idea as the stacked ponytail, but as an updo. Two smaller buns weigh less on your head than one huge one.
Make a low center part all the way to the nape. Twist each half and wrap it into a small bun just behind each ear, low and close together. Pin each with three or four pins.
From the front, it looks like a sleek, simple low bun. From the back, it looks like a neat little detail.
Pro move: tuck a single pearl pin or small flower between the two buns for a wedding guest look that took ten minutes.
29. Silk Scarf Headband With Loose Waves

Some days your hair just needs to be down. A silk scarf makes that possible.
Fold a square silk scarf into a long band. Lay it at the nape, under your hair, bring the ends up over the top of your head, and knot it behind your ear or back at the nape.
It holds the front pieces off your face without a hard headband pressing behind your ears, and that pressure is a common source of headaches for thick hair.
Silk also grips less than cotton, so it does not cause frizz along the top. Keep one in your bag for the day your hair gets too big by lunchtime.
Thick hair is not a problem to fix. It is a lot of hair that needs a plan. Take weight out of the middle and the nape, split heavy styles into two parts, and use clips, pins, and elastics built to grip.
Start with one cut idea and one daily style from this list. The long layers and the stacked ponytail are easy first steps, and you will notice how much lighter your head feels right away.
These hairstyles for thick hair are meant to work on real mornings, not just on photo days.
Save this list to your hair board so it is ready the next time your hair feels too heavy to handle.