
You bought the blue dress. You ordered the snowflake cake. The invitations say “Let it go” in glittery letters. Then, about an hour before the party, someone asks for Elsa hair, and her little sister wants to be Anna, and her cousin wants whatever the big kids are having.
Take a breath. Frozen hair is friendlier than it looks on screen. Elsa’s looks come down to swept back hair, a braid or a bun, and something that sparkles. Anna’s looks are warmer and playful: twists, little buns, braids pinned up, and a pop of green or a flower. Once you know those building blocks, you can turn almost any hair length into a Frozen character in a few minutes.
These Frozen hairstyles for kids go beyond the two famous braids. You will find bedhead buns, a crown braid, a sunflower half up for summer birthdays, snowman buns for short hair, curly and coily options, and even a Kristoff look for the boys at the party. Each one comes with the hair length it needs, how long it takes, and a tip to keep it comfortable through games, cake, and a lot of twirling.
Before you start, set out a wide tooth comb, a soft brush, a spray bottle of water, clear and colored elastics, bobby pins, and a little dish of party extras: snowflake clips, silver star pins, ribbons in icy blue and green, and a few silk flowers. Let each child pick one extra before you start. It turns the hair chair into part of the party.
1. Elsa Inspired Hair Down With Twisted Sides and Snowflake Clips
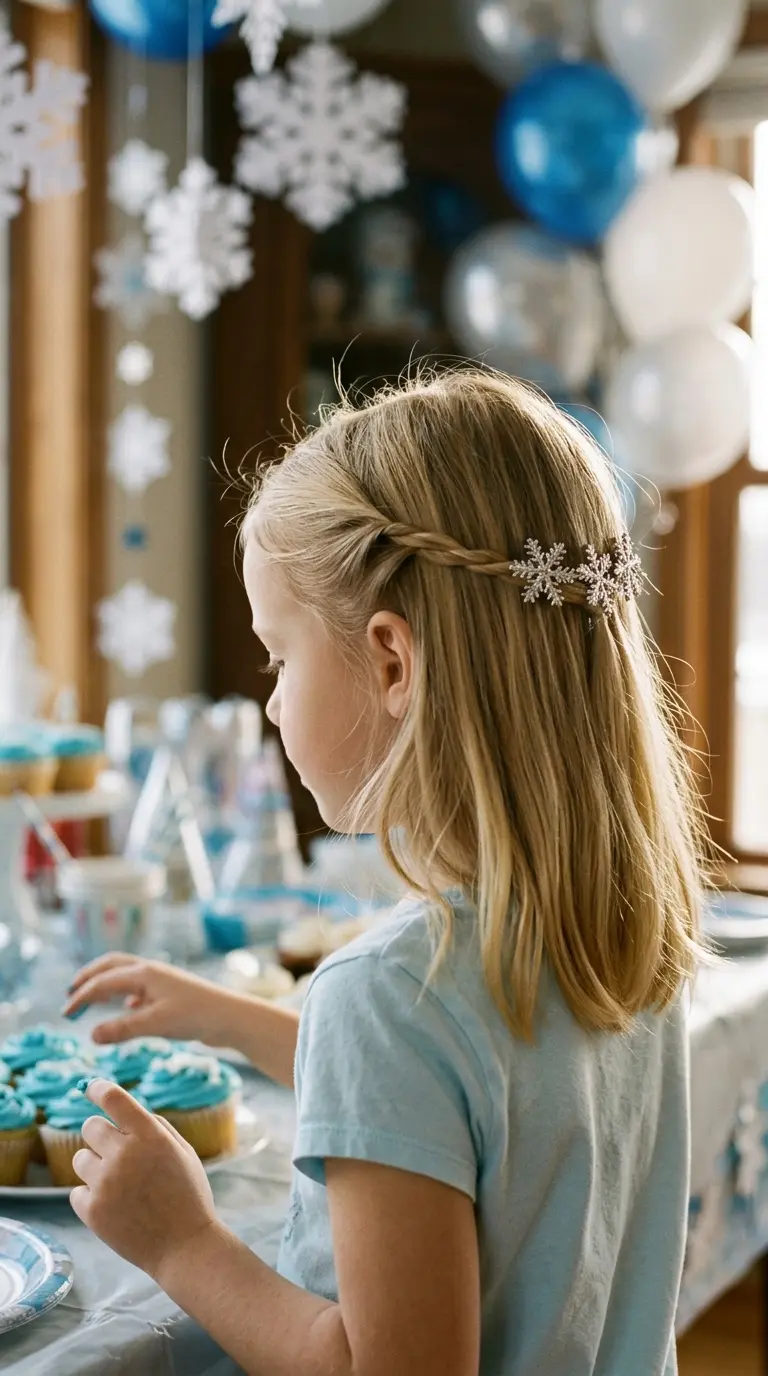
Start with the easiest one. Elsa wears her hair down and free in the big moments of the second movie, and this look captures that feeling on any hair that reaches the chin or longer.
- Brush the hair smooth and sweep the front straight back, with no part.
- Take a one inch section at the right temple and twist it back toward the ear, adding a little more hair as you go.
- Do the same on the left side.
- Bring both twists to the back of the head and join them with a clear elastic.
- Clip two or three snowflake clips over the elastic so it disappears.
It takes about three minutes, it never pulls at the scalp, and it keeps hair out of her face while she plays.
Quick tip: twist each side away from the face, toward the back of the head. Twisting the other way makes the twists unravel within the hour.
2. Young Anna Inspired Messy Bedhead Top Knot
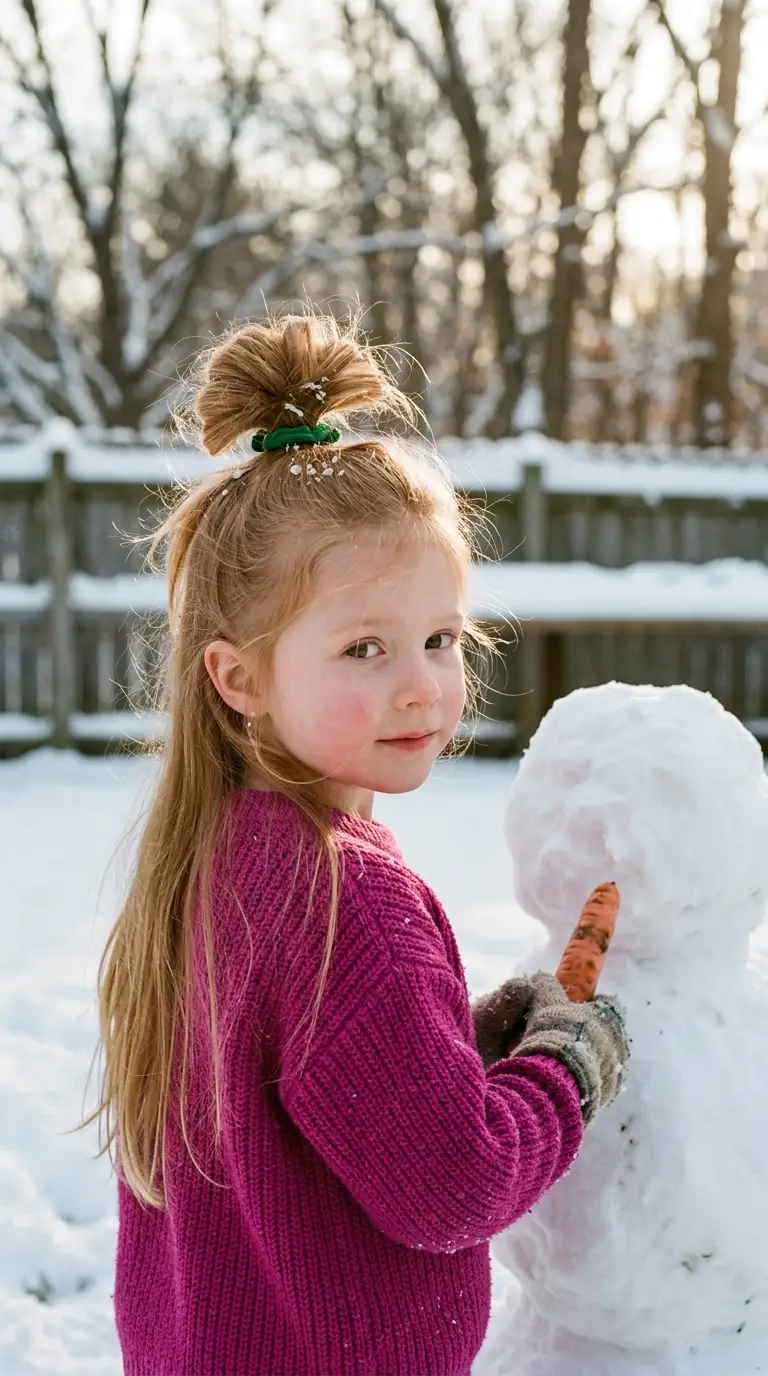
Little Anna bounces out of bed with her hair sticking straight up, ready to build a snowman. This is the version you can make on purpose, and kids love that messy is the goal.
Flip her head forward and gather all the hair loosely on top of the head with your fingers, no brush needed. Twist it once, wrap a scrunchie around it, and on the last loop pull the hair only halfway through. Spread that loop out and leave the ends sticking up. Tug a few pieces loose around the face.
It is ready in about ninety seconds, which makes it the perfect choice for the little sister who will not sit still.
Good to know: this look is a great second day style. Hair that is a little tangled or slept on actually holds the messy shape better than freshly washed hair.
3. Olaf Inspired Snowman Mini Buns for Short Hair
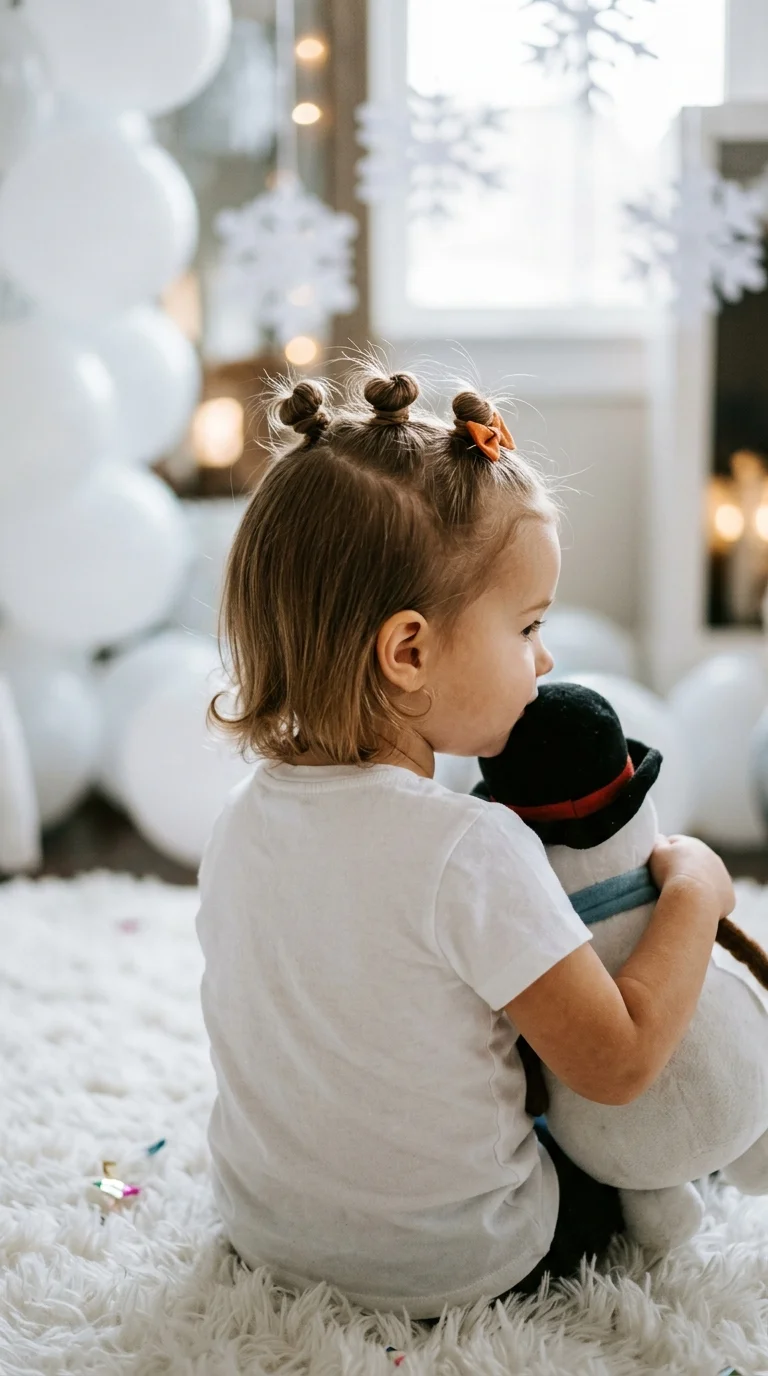
Short hair and toddler hair get to join the party too. Olaf is made of three snowballs, so this style is made of three tiny buns.
Section the top of the head into three small boxes, one behind the other, running from the forehead to the crown. Tie each box into a mini ponytail with a soft elastic. Twist each little ponytail and wrap it around itself, then hold it with a second small elastic. Make the front bun the smallest and the back bun the biggest, just like a snowman.
Finish with a tiny orange bow on the front bun for his carrot nose. The rest of the hair stays down.
Quick tip: on very short or fine hair, skip the twist. Just fold each mini ponytail in half and tie it again. You get the same round little bump with no slipping.
4. Young Elsa Inspired Low Ballet Bun With a Blue Headband
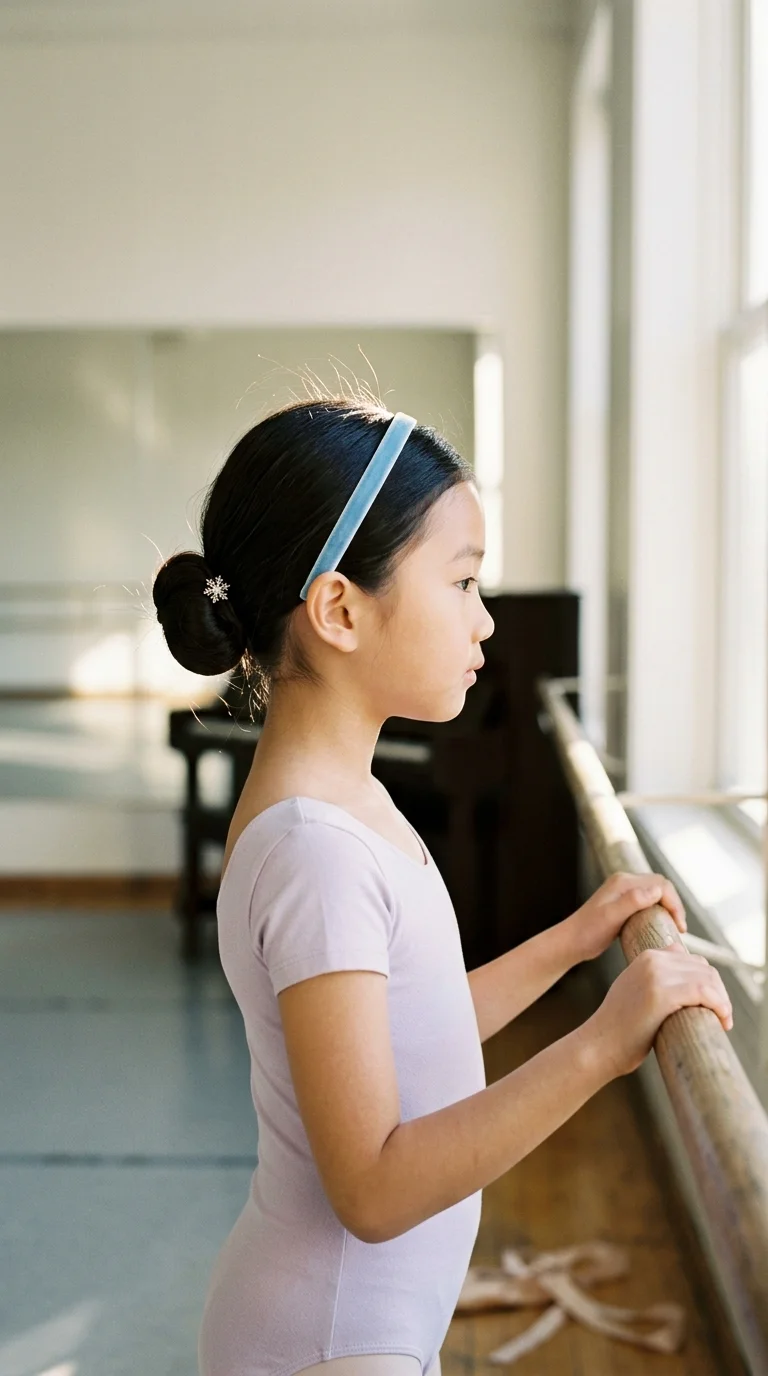
Before the gloves and the coronation, young Elsa wore her hair in a tidy bun. It is the calm, neat Frozen look, perfect for kids who do not want anything on their shoulders.
Brush all the hair back smoothly and tie a low ponytail right at the nape. Twist the ponytail until it starts to coil, then wind it around the base. Pin it with four bobby pins pushed in toward the center of the bun. Slide a slim blue headband on about an inch behind the hairline and add one snowflake pin to the side of the bun.
Because it sits low, it is comfortable against a car seat or a chair back, and it fits under a winter hat on the way to the party.
Good to know: a quick mist of water and a soft brush over the top gives a smooth finish without any hairspray. Skip gel on young kids, since it leaves white flakes as it dries.
Do a practice run a few days before the party, so the real one is quick.
Use snap clips and comb pins that close softly against the head.
Take out every pin, clip, and strand of tinsel before bed.
Temporary color sprays on kids under three, or anywhere near the eyes.
Tight elastics right at the hairline, which can pull and hurt by cake time.
Craft glitter in the hair. It ends up in eyes, mouths, and everyone’s couch.
5. Anna Inspired Twisted Half Up With a Tiny Bun
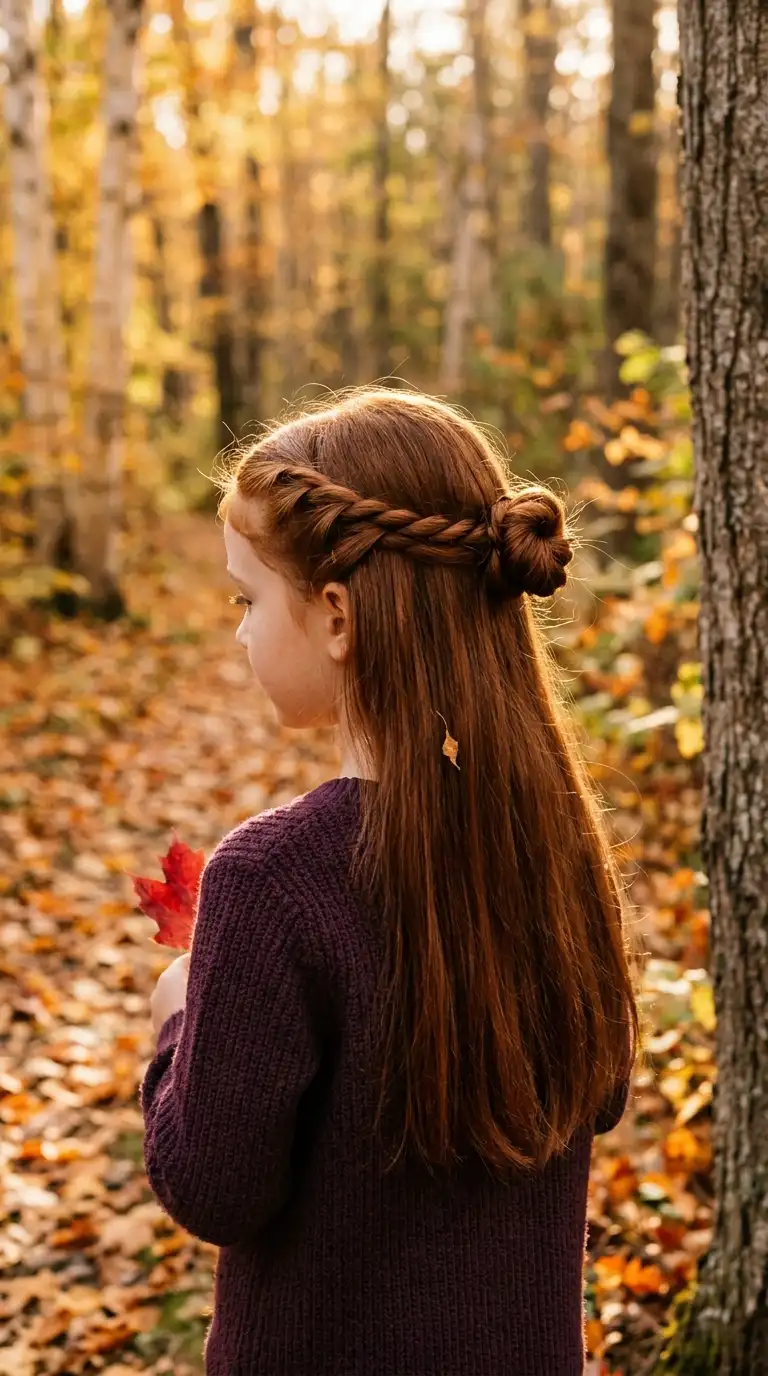
In the second movie, Anna lets her hair down with the top half pulled back. It is grown up and sweet at the same time, and it suits big kids who feel too old for pigtails.
Make a soft side part. Starting at each temple, twist a two inch section back toward the crown, adding hair as you go. Meet the two twists at the back of the head and tie them together with a small elastic. Twist that little ponytail and wind it into a tiny bun, then pin it. Let everything else hang loose.
The twists stay put better than a plain half up ponytail, so it lasts through a whole afternoon of party games.
Quick tip: if her hair is very straight and slippery, run a little dry shampoo through the sections first. It adds grip, and the twists will not slide out.
6. Elsa Inspired Low Ponytail Wrapped in a Braid
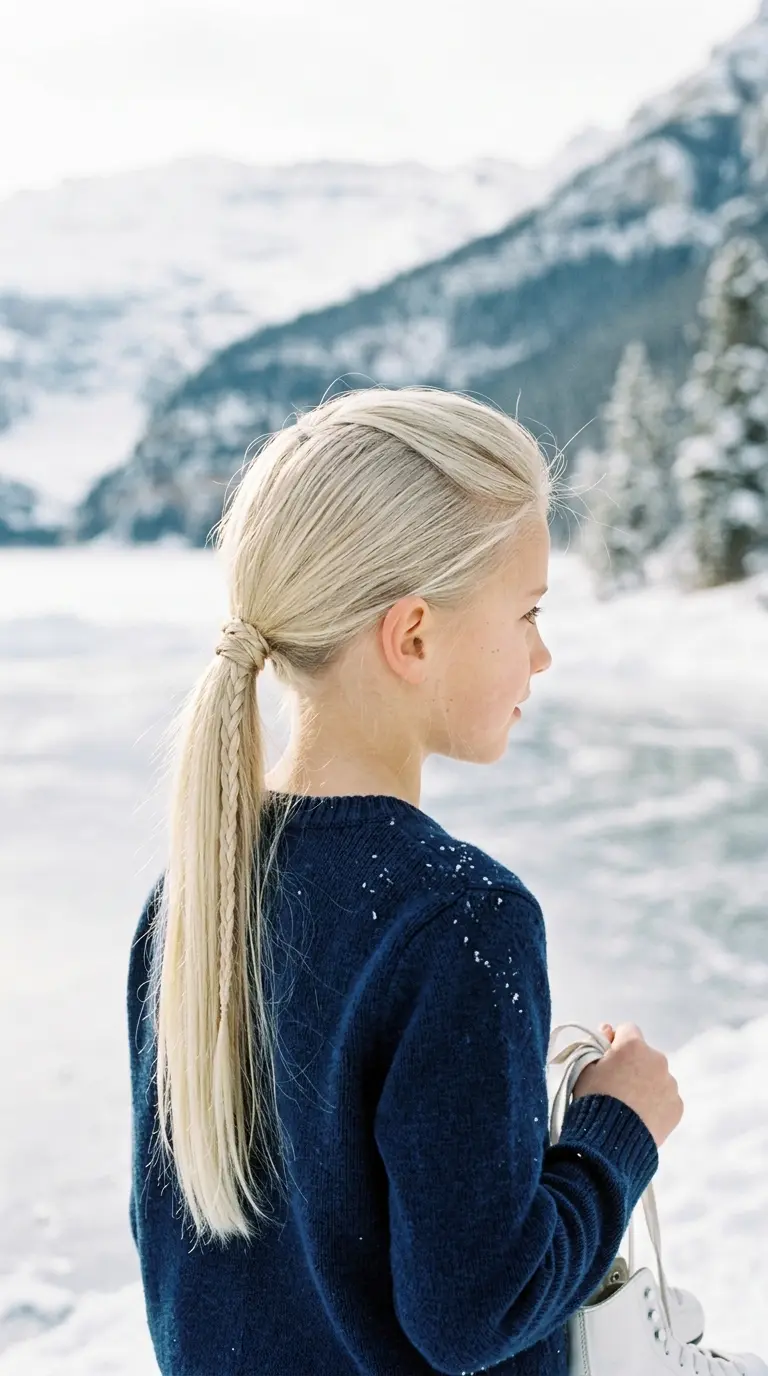
Elsa’s travel look in the second movie is a sleek low ponytail with braids woven in. Ours keeps the feel with two thin braids and a lot less fuss.
Brush the top straight back and tease the roots lightly for a little lift. Gather everything into a low ponytail at the nape, but first leave out a thin one inch section underneath. Tie the ponytail. Braid the loose section into a thin three strand braid, wrap it around the elastic, and pin the end underneath. Now take a thin piece from one side of the ponytail and braid it all the way down, tying it with a tiny clear elastic.
It looks polished from every angle and lasts all day, so it works for school concerts as well as parties.
Good to know: keep the ponytail low and loose. A tight pull on the crown is what gives kids a headache by the afternoon.
7. Anna Inspired Curly Double Puffs With Green Ribbons
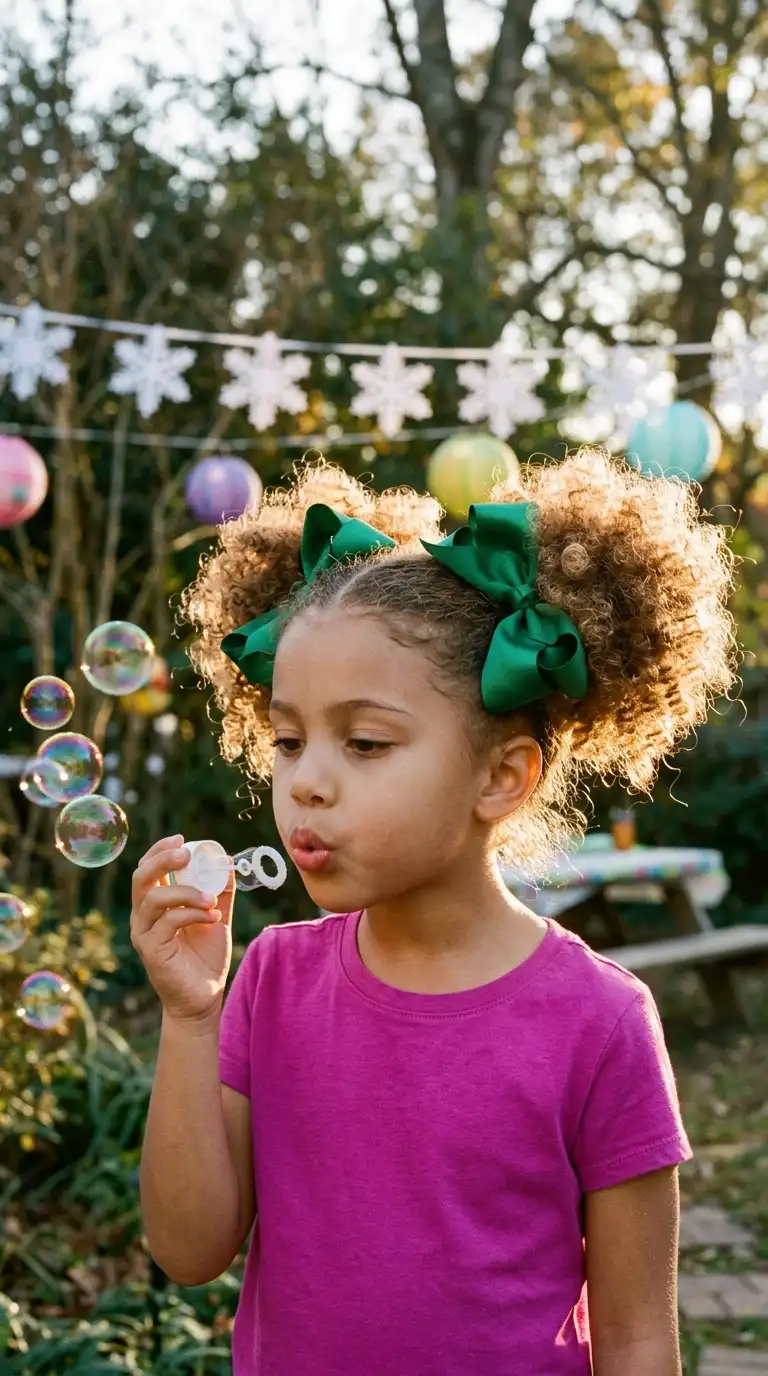
Anna’s playful energy fits curly hair perfectly. Two big puffs with green ribbons read as Anna instantly, without a single braid.
Spritz the hair with water and smooth in a leave in conditioner. Make a center part with your finger or a wide tooth comb. On each side, gently gather the curls with your hands and slip a soft fabric band around them, just above the ear. Do not pull the band tight. Fluff each puff into a round shape and tie a green ribbon over each band.
The curls do all the work, and the whole style takes about five minutes.
Quick tip: a satin scrunchie is kinder to curls than a plain elastic. It keeps the hair from snapping where the band sits.
Try the twisted sides, low ponytail, crown braid, or waterfall braid. Smooth hair shows off every braid and twist, and it holds elastics well.
Try the curly double puffs, flat twist crown, or messy top knot. These looks celebrate volume and texture, so the hair does most of the work for you.
8. Elsa Inspired Flat Twist Crown for Coily Hair
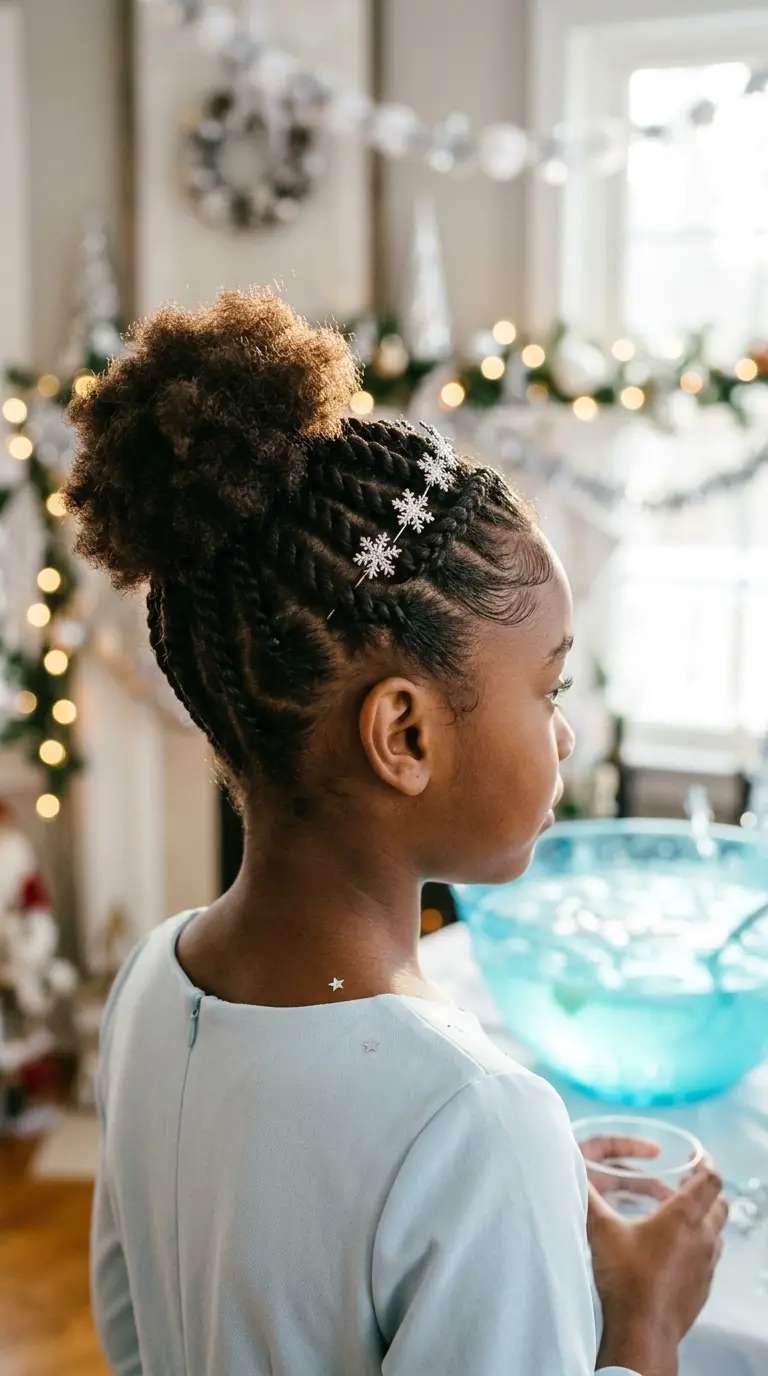
Elsa’s crown is made of ice. This one is made of flat twists, and it may be the most regal look on the whole list.
Start with stretched hair, either from a twist out or a gentle blow dry on low heat. Spritz with water and smooth in a leave in conditioner and a little styling cream. Part five or six sections running from the front hairline back toward the crown. Flat twist each section along the scalp, crossing two strands over each other and picking up hair as you move back. Gather all the loose ends at the crown and shape them into a soft puff. Add silver snowflake pins along the twists.
It takes about thirty minutes, but it holds for several days with a satin bonnet at night.
Good to know: keep the twists snug, not tight. If you see little bumps or her skin looks pulled at the edges, loosen that twist and start it again.
9. Kristoff Inspired Tousled Mountain Shag for Boys
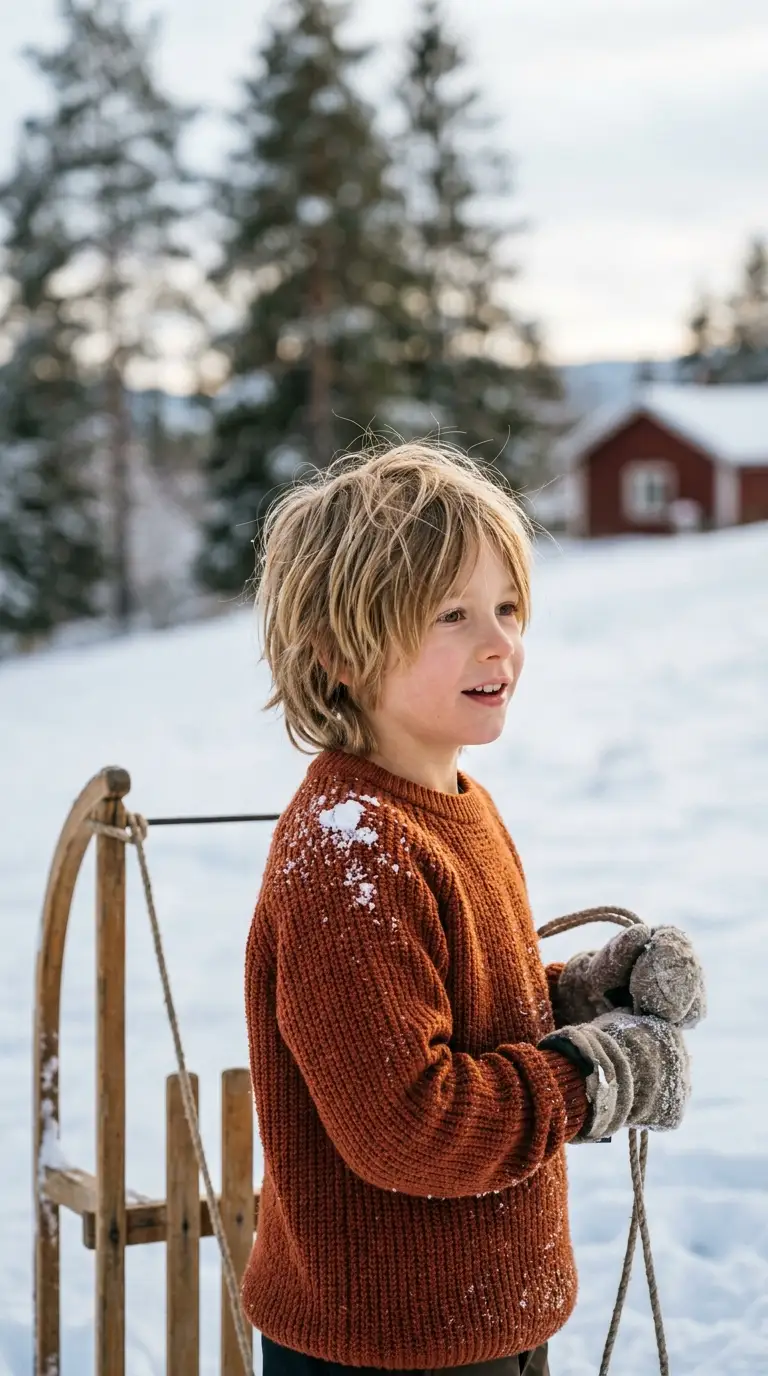
Not every Frozen fan wants a princess look. Brothers, cousins, and plenty of girls with short hair love being Kristoff, the ice harvester with the shaggy hair and the best reindeer friend.
This works on hair that covers the ears or a little longer. Dampen the hair with a spray bottle. Rub a pea sized bit of light styling cream between your palms and rake it through with your fingers, pushing the front up and back. Do not comb it. Scrunch the sides and back for a tousled, windswept shape.
Add a knit hat with ear flaps or a pair of toy reindeer antlers, and the costume is done.
Quick tip: for boys with curly or coily hair, skip the cream and just spritz with water and a curl refresher. Pat the front up with your palms, and the natural texture gives the same rugged look.
10. Frozen Fever Inspired Braided Half Up With Sunflowers
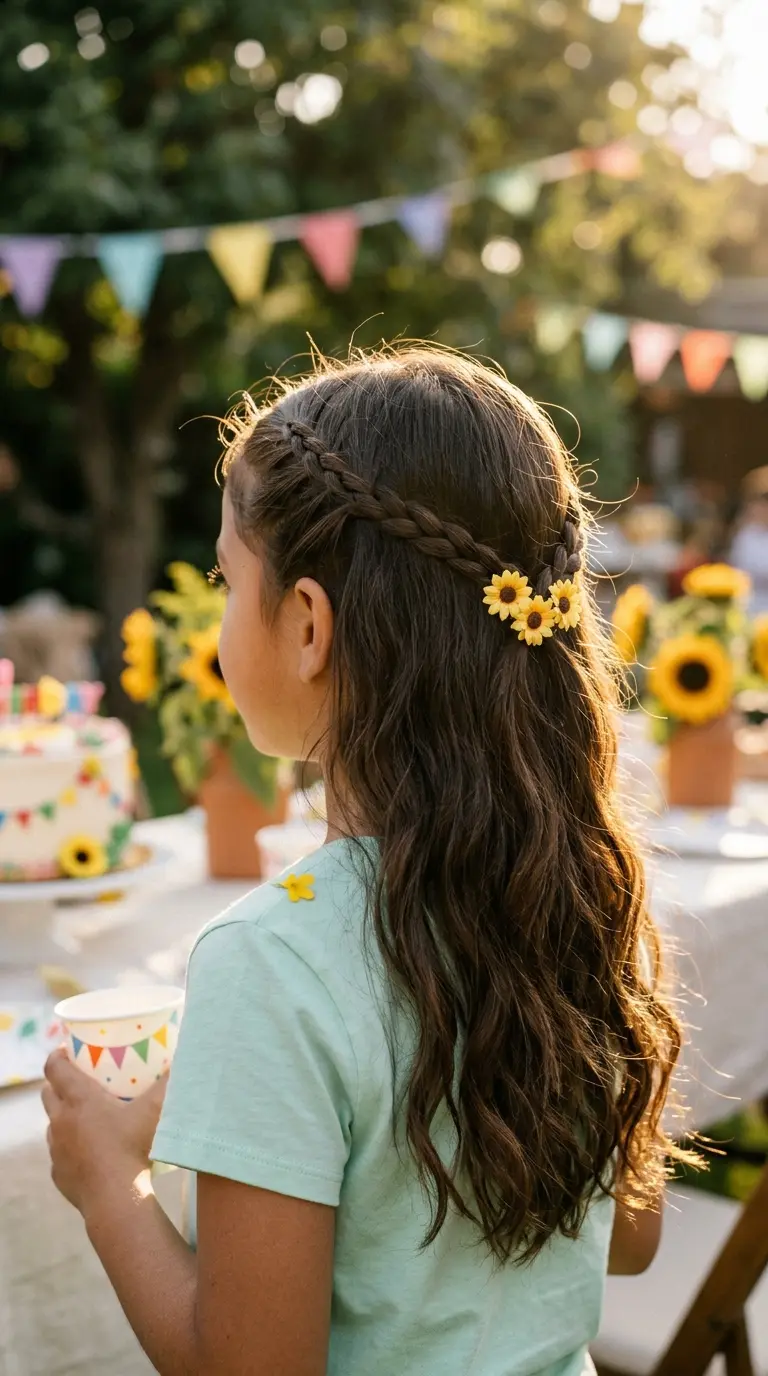
Not every Frozen party happens in winter. In the short film Frozen Fever, Anna celebrates a summer birthday with sunflowers in her hair, and it is a lovely choice for warm weather parties.
Make a soft side part. Take a thin section at each temple and braid a plain three strand braid down to the ends. Bring the left braid across the back of the head and pin it just behind the right ear. Bring the right braid across in the other direction, over the first, and pin it behind the left ear. The braids form a soft X. Clip three small sunflower clips over the spot where they cross.
The rest of the hair hangs loose, and it looks especially pretty on wavy hair.
Good to know: pin each braid end by sliding the bobby pin in against the direction of the braid. It locks in place and will not slide out during a game of tag.
Let each child pick Elsa, Anna, Olaf, or Kristoff a few days ahead, and do one practice run.
Wash and detangle the night before, so party morning starts with smooth hair.
Style the hair before the costume goes on, then add clips and sparkle last.
Pack spare elastics and pins in the party bag for quick fixes after the bounce house.
11. Elsa Inspired Snowflake Crown Braid
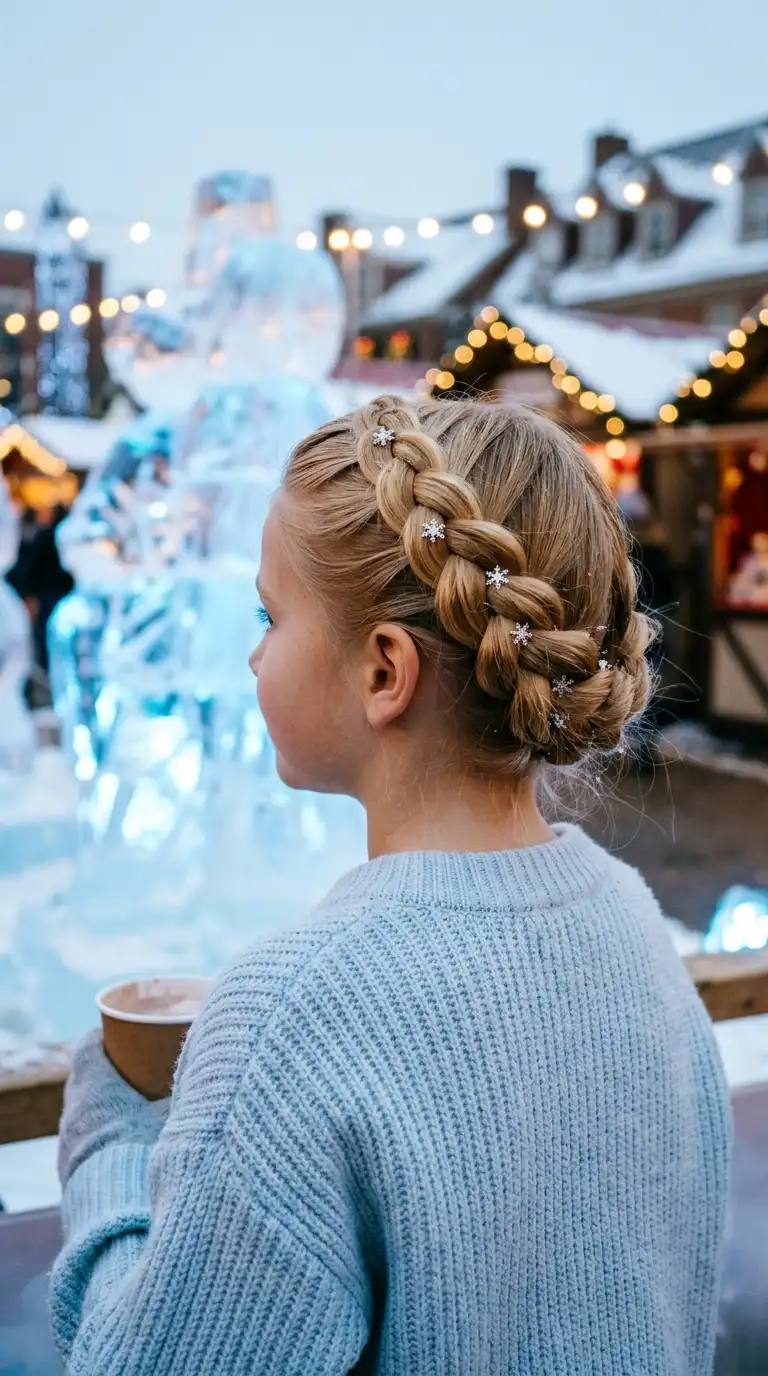
Every queen needs a crown. This one is a single braid that circles the whole head, and it makes even a jeans and sweater outfit feel royal.
Brush the hair smooth with no part. Start a Dutch braid at the nape, just behind one ear, crossing the strands under instead of over. Braid up behind the ear and along the side of the head, then across the top just behind the hairline, adding hair as you go. Keep following the curve around the other side and down to the nape. When you run out of hair to add, braid the tail plainly, tuck it under the start of the crown, and pin it.
Gently pull the outer loops wider, then add snowflake pins all the way around.
Quick tip: have her sit on the floor while you sit on the couch, and turn her slowly as you braid. Moving around the head is much easier than reaching over it.
12. Elsa Inspired Waterfall Braid With Silver Hair Tinsel
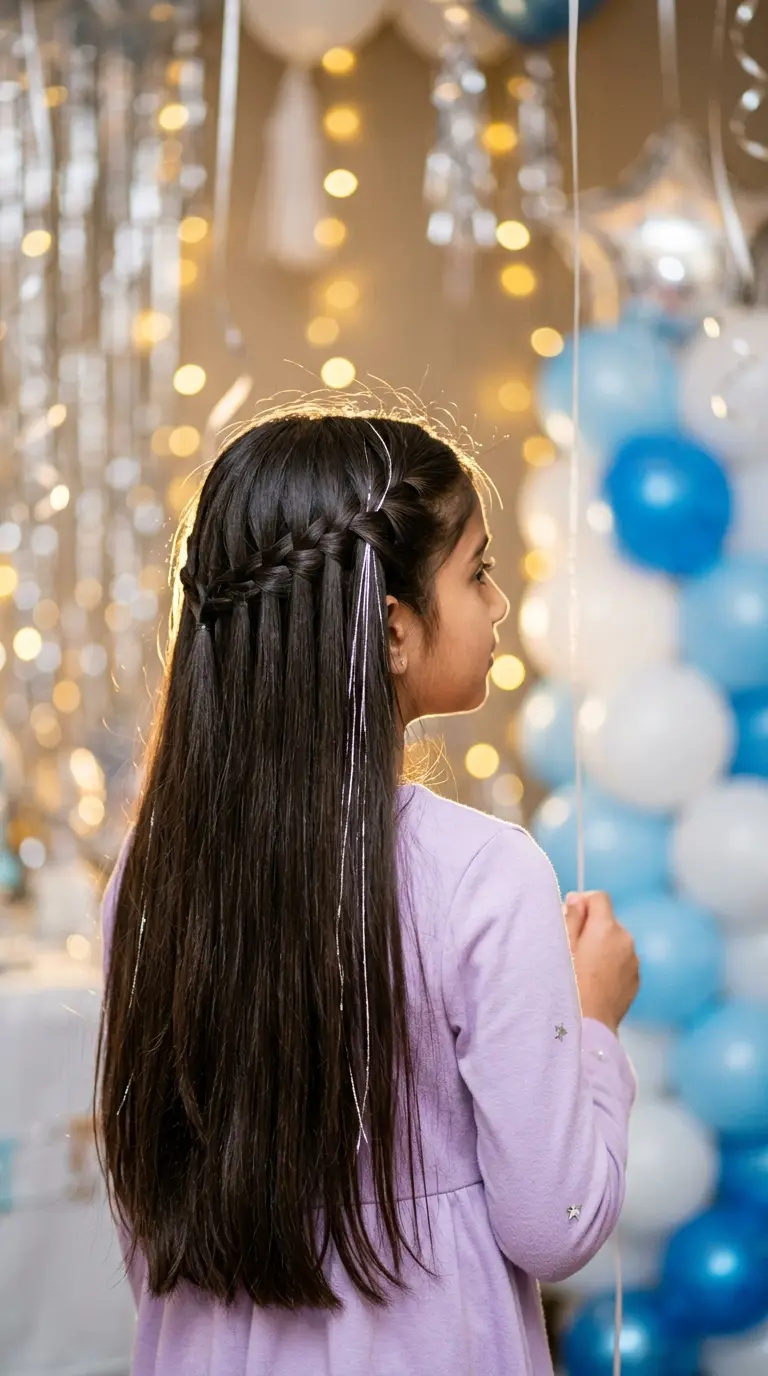
Save this one for the birthday girl. The waterfall braid looks like strands of hair melting through a braid, and a few threads of silver tinsel catch every light at the party.
Start at one temple with a small section and split it into three strands. Cross the front strand over the middle, then the back strand over the middle. Now drop the front strand so it hangs down, and pick up a new strand of loose hair to take its place. Keep going across the back of the head, dropping one strand and picking up a new one each time. When you reach the other temple, braid a few plain stitches and pin the end.
For the sparkle, tie two or three strands of hair tinsel onto small sections of hair near the braid with a simple slip knot.
Good to know: use tie in hair tinsel, not the kind that is glued or bonded. It slides out with conditioner at bath time, and nothing tugs on her scalp.
Kids recognize Frozen by one detail. A swept back top and a snowflake clip says Elsa. A twist and a green ribbon says Anna. Three little buns says Olaf. Pick one detail, keep the style comfortable, and let the costume do the rest.
Your Frozen Party, Sorted
Frozen hair does not need to be perfect to make a child feel like royalty. It needs one recognizable detail and a style that stays comfortable through cake, games, and a lot of singing.
Start with the quick ones. The twisted sides with snowflake clips, the messy bedhead top knot, and the Olaf mini buns all take five minutes or less. The low ballet bun, the twisted half up, and the curly double puffs are easy middle ground. Save the flat twist crown, the snowflake crown braid, and the waterfall braid with tinsel for the birthday child, and give them a practice run first. Do not forget the Kristoff shag for the boys, and the sunflower half up if the party falls in summer.
The best Frozen hairstyles for kids are the ones that survive the bounce house and still get a gasp in the party photos.
Save this list to your party planning board so the next Frozen request comes with a plan.