
The first cold morning of the year always catches my curls off guard. Summer frizz is gone, but now there is a wool scarf rubbing the back of my head, a heater drying out every ringlet, and a coat collar flattening the ends by noon.
Fall is a strange season for curly hair. The air gets drier, so curls lose moisture and turn crunchy or fuzzy. Wind tangles the length. Hats crush the roots. And the outfits you finally get to wear, the chunky knits and high collars, all love to grab at your coils.
Most advice says to just wear a bun until spring. That works for a week. After that you miss your curls.
So these fall hairstyles for curly hair were chosen for real autumn days: apple picking in the wind, a rainy commute, a long Thanksgiving dinner, and a Friday night with your favorite sweater. Some take two minutes and a scrunchie. Others use braids, pins, scarves, or a fresh cut. Every one of them keeps your curl pattern on show instead of hiding it.
1. Pumpkin Patch Pineapple With a Velvet Scrunchie
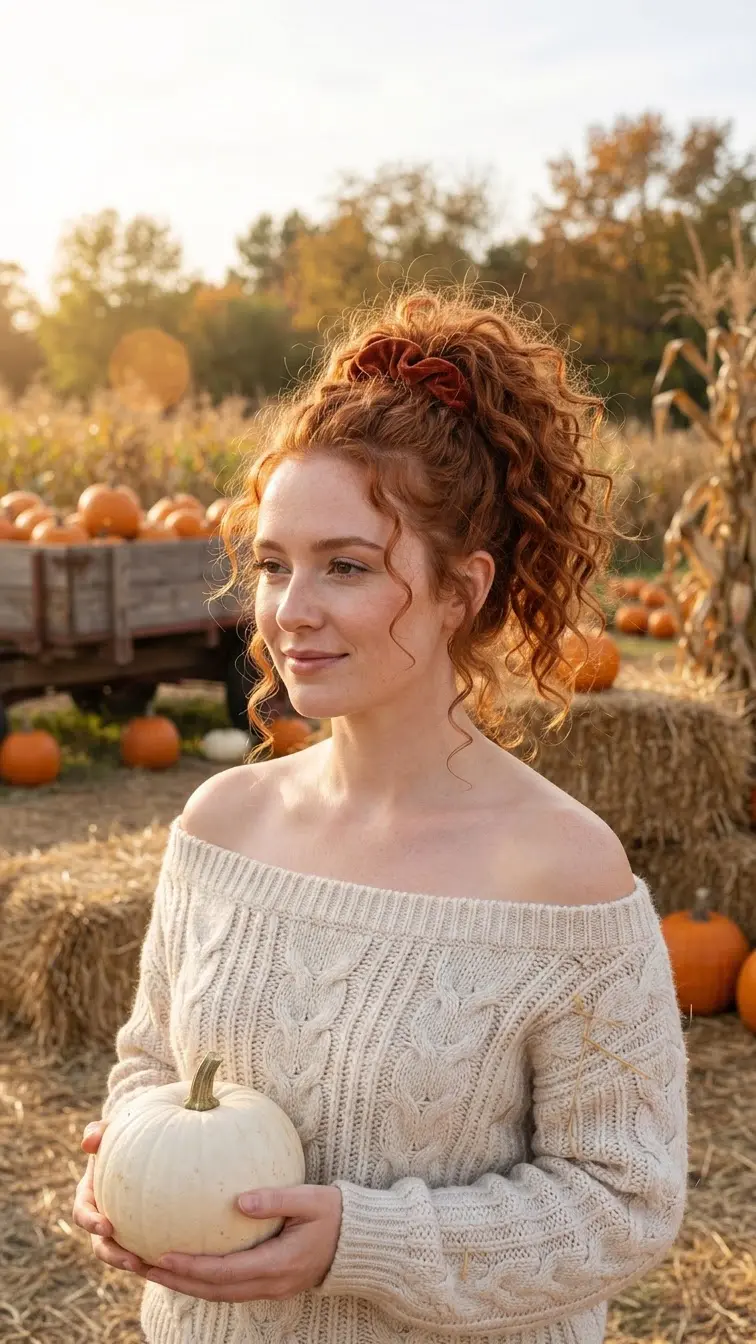
Velvet grips curls without snagging them, and it looks right the second the leaves turn.
Flip your head upside down and gather every curl at the very front of your crown, almost at your hairline. Loop the scrunchie around two times, not three. A tight third loop squashes the curls into a stiff palm tree.
Then flip back up and pull two small ringlets loose at the temples.
Quick tip: sleep in this same pineapple and your day two curls stay rounder than they would on a flat pillow. Swap the rust velvet for olive or plum as the weeks go on.
2. Wool Beret Over Loose Defined Curls
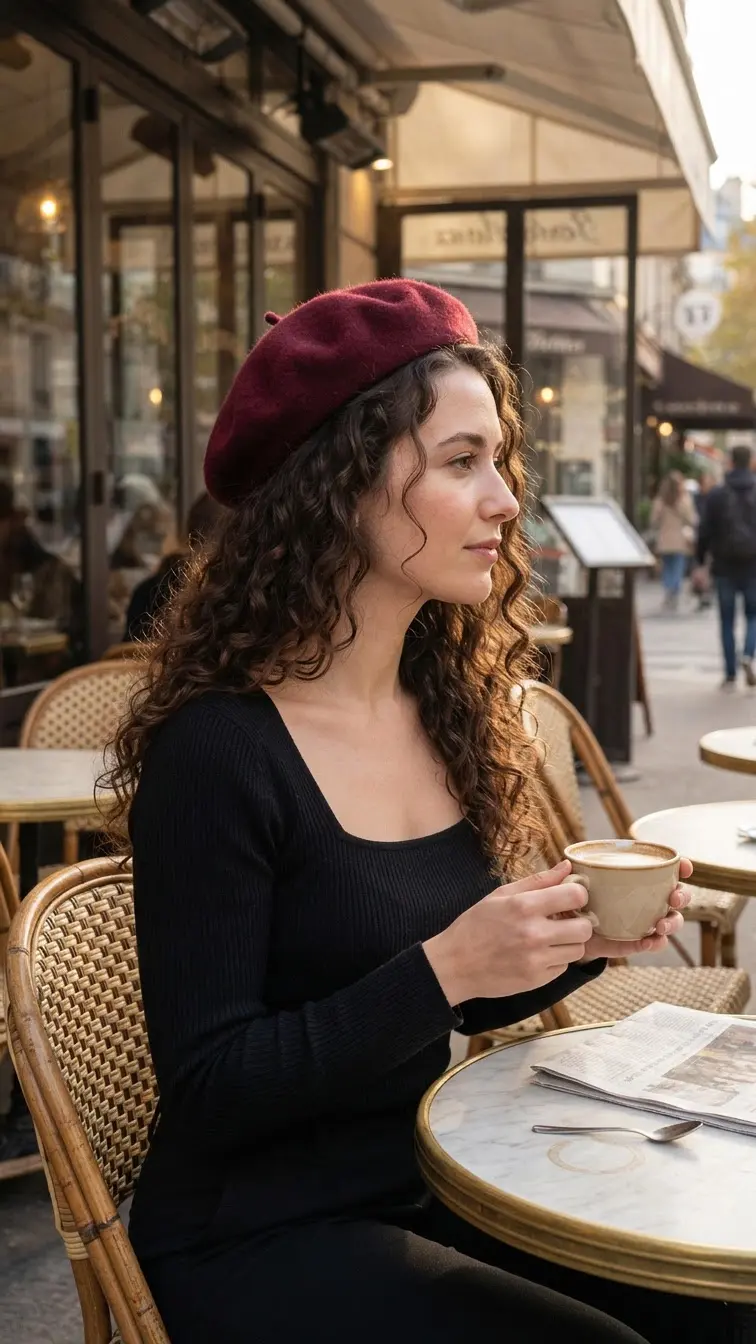
Hats get blamed for flat curls, but the problem is usually where the hat sits.
Wear a beret pushed back so it rests behind your front hairline, not on top of your roots. That way your part and front curls stay lifted, and the beret holds the crown in place against wind.
A few things that help:
- Pin it through the knit at both sides with two bobby pins
- Scrunch a pea size bit of cream into the ends before you put it on
- Keep a satin lining sewn in, so the wool does not rough up the curls
Take it off indoors and the roots bounce right back.
3. Low Curly Bun Wrapped in a Silk Scarf
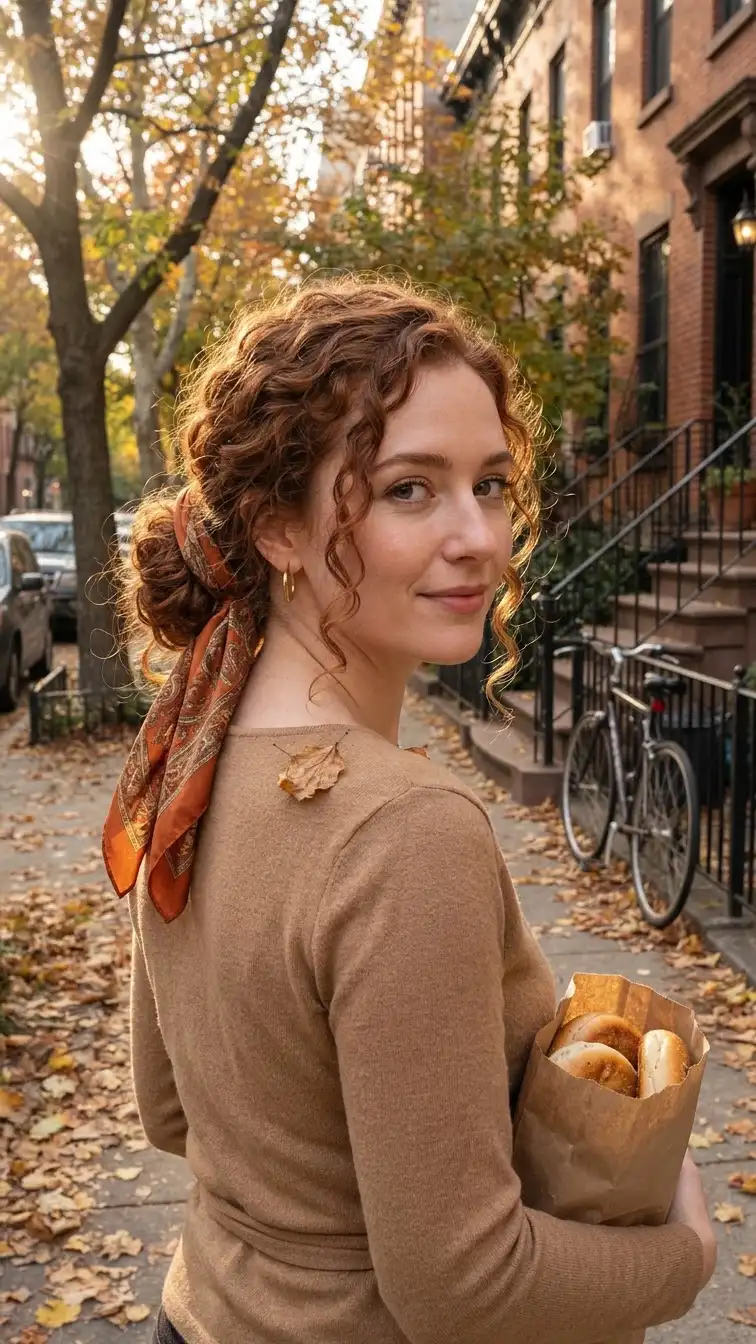
Day four curls happen. The ends get dry and the roots go flat, especially once the heat comes on indoors.
Here is the fix in three steps:
- Twist all your hair once at the nape and coil it into a soft bun. Pin it with four U pins.
- Fold a square silk scarf into a long band and wrap it around the bun twice.
- Tie the ends in a small knot underneath and let the tails hang.
The silk covers the frizziest part while your front curls stay out. It also stops a wool coat collar from rubbing the bun all day.
4. Chunky Side Dutch Braid Into Loose Curls
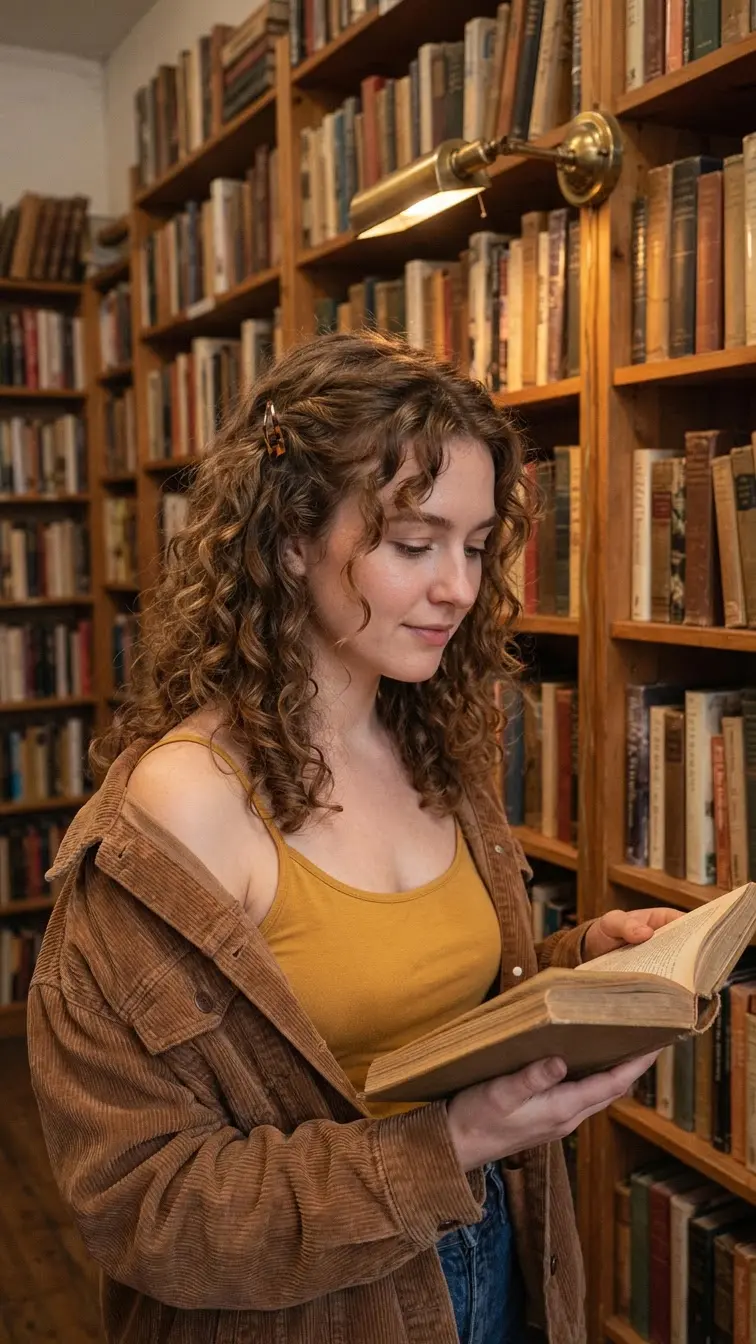
Windy fall days are the reason this braid exists.
Most of your tangles start at the side of your face, where curls blow across your mouth and get caught in a scarf. A single Dutch braid on that side locks those pieces down while the back stays big and bouncy.
Braid on damp hair, right after your leave in. The braid holds the curl shape as it dries. Stop braiding just behind your ear and secure it with a clear elastic hidden under the loose curls.
It is a good pick for long drives with the window cracked.
5. Claw Clip French Twist With Curly Ends Spilling Out
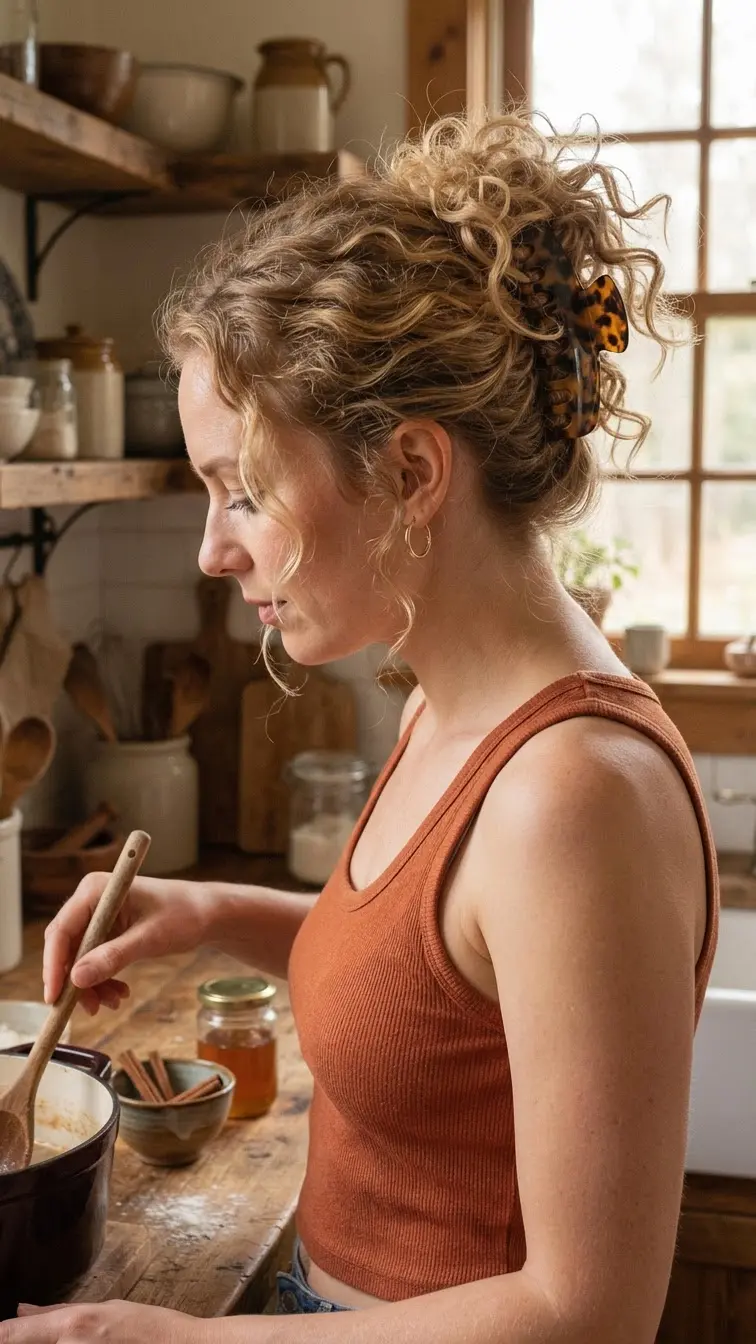
Straight hair French twists need teasing and spray. Curly ones do not, because the texture grips itself.
Gather your curls at the nape, twist them upward in one direction, and press the claw clip in flat against your head. Leave the last few inches out on top. Those curly ends are the whole point.
A large clip, about four inches, holds thick curls better than two small ones. Fine curls can go smaller.
Good to know: this one looks best on day two or three, when the curls are a little looser and easier to twist.
6. Curly Curtain Bangs Pinned Back With Tortoiseshell Clips
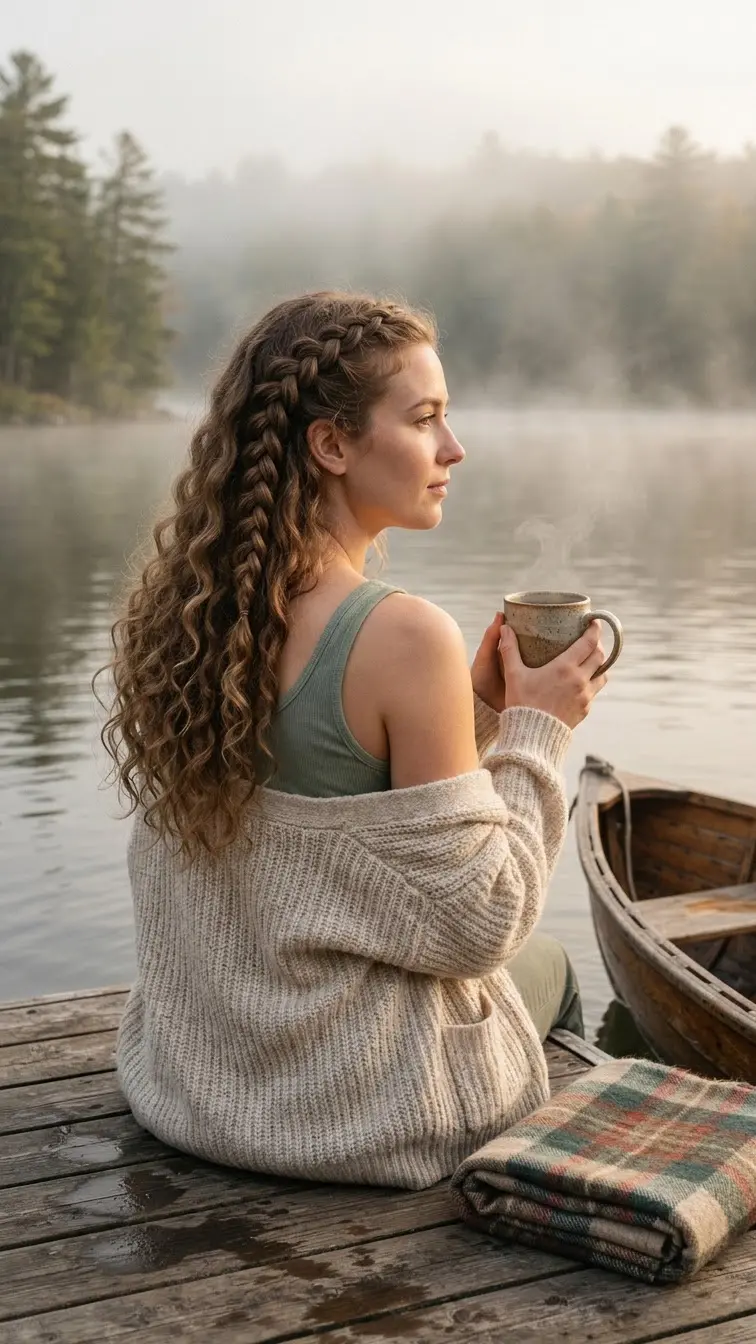
Growing out curly bangs in cold weather? This is the in between fix.
Curtain bangs on curls can spring up and sit in your eyes once the air dries out, because drier curls shrink more. Instead of fighting them every morning:
- Twist each side back away from your face, once only
- Clip it just above the temple
- Let the loose ends curl behind the clip
The twist keeps the bangs shaped and soft, not flat. Tortoiseshell blends into brown and copper tones, so the clips almost disappear.
7. Two Curly Space Buns for Apple Picking
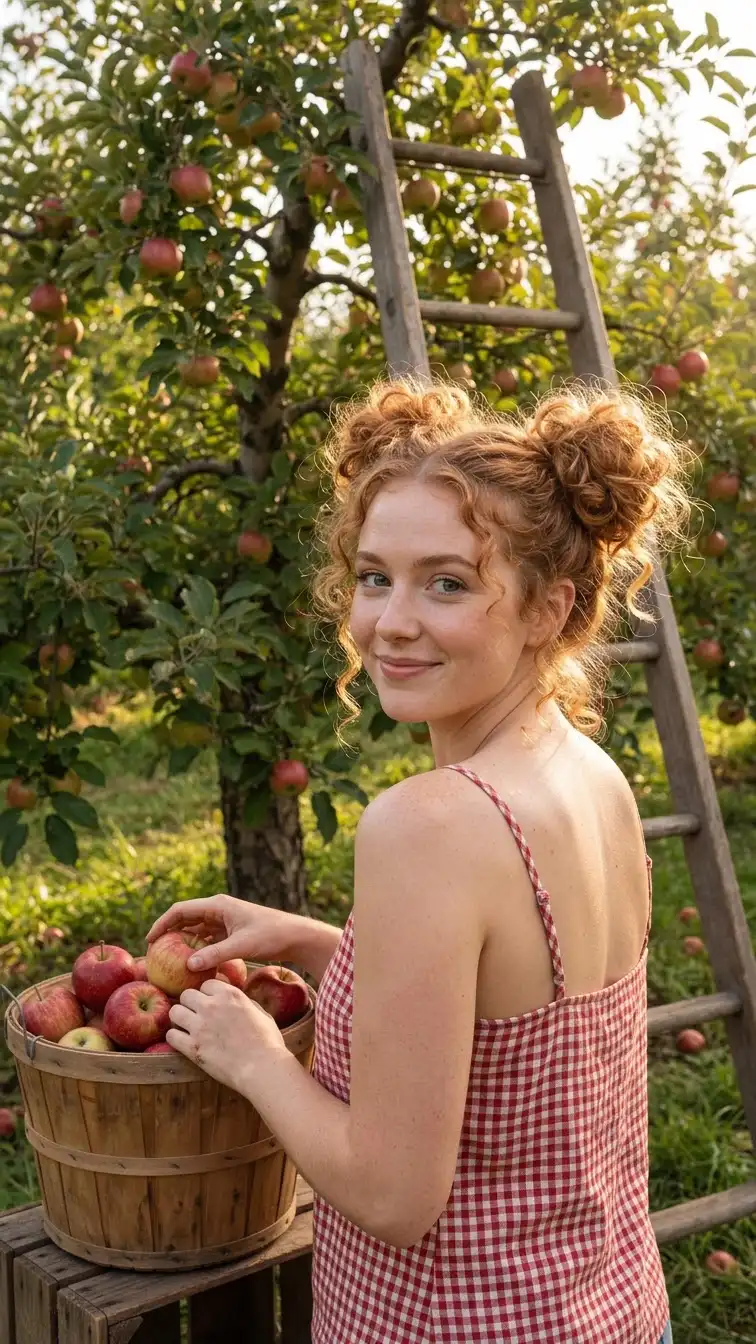
Climbing a ladder for the top apples with loose curls in your face is not fun. Two buns solve it.
Part your hair down the middle and make two high ponytails. Twist each one loosely and wrap it around its base, leaving the last two inches of curl sticking out. Pin with three bobby pins each.
These look best a little uneven. Perfectly matched buns read stiff on curly hair.
Who it suits: curls between collarbone and mid back. Shorter curls work too, just skip the twist and make two puffs.
8. Pinned Curly Faux Hawk for a Night Out
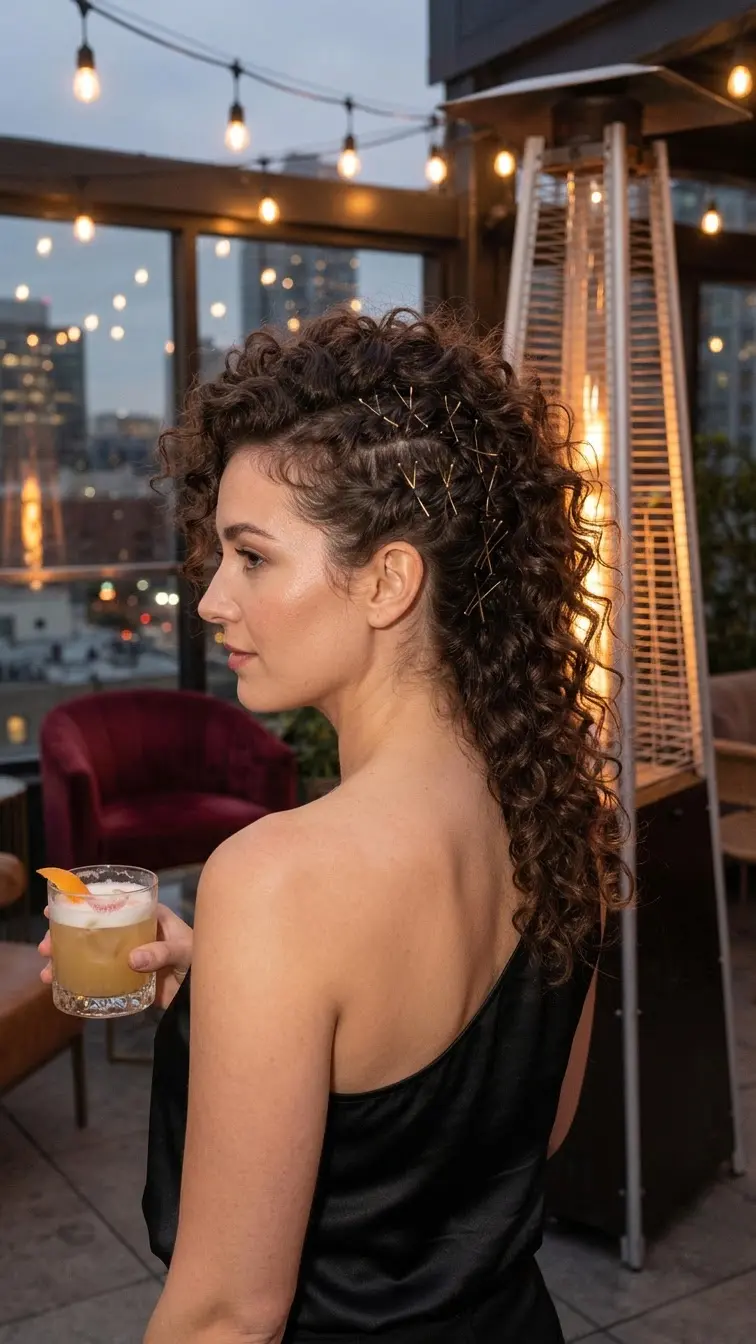
A quick mistake to avoid: twisting the sides while your curls are wet. They shrink as they dry and the pins pop loose by ten o’clock.
Start on dry, second day curls instead.
- Take a two inch section above each ear.
- Twist it back toward the center of your head.
- Pin the twist down with two gold pins in an X.
- Repeat in rows down the back on both sides.
The middle strip of curls stays big. Fluff it with your fingers, never a brush, and it looks full and bold under bar lighting.
9. Wide Knotted Headband With Full Curly Volume
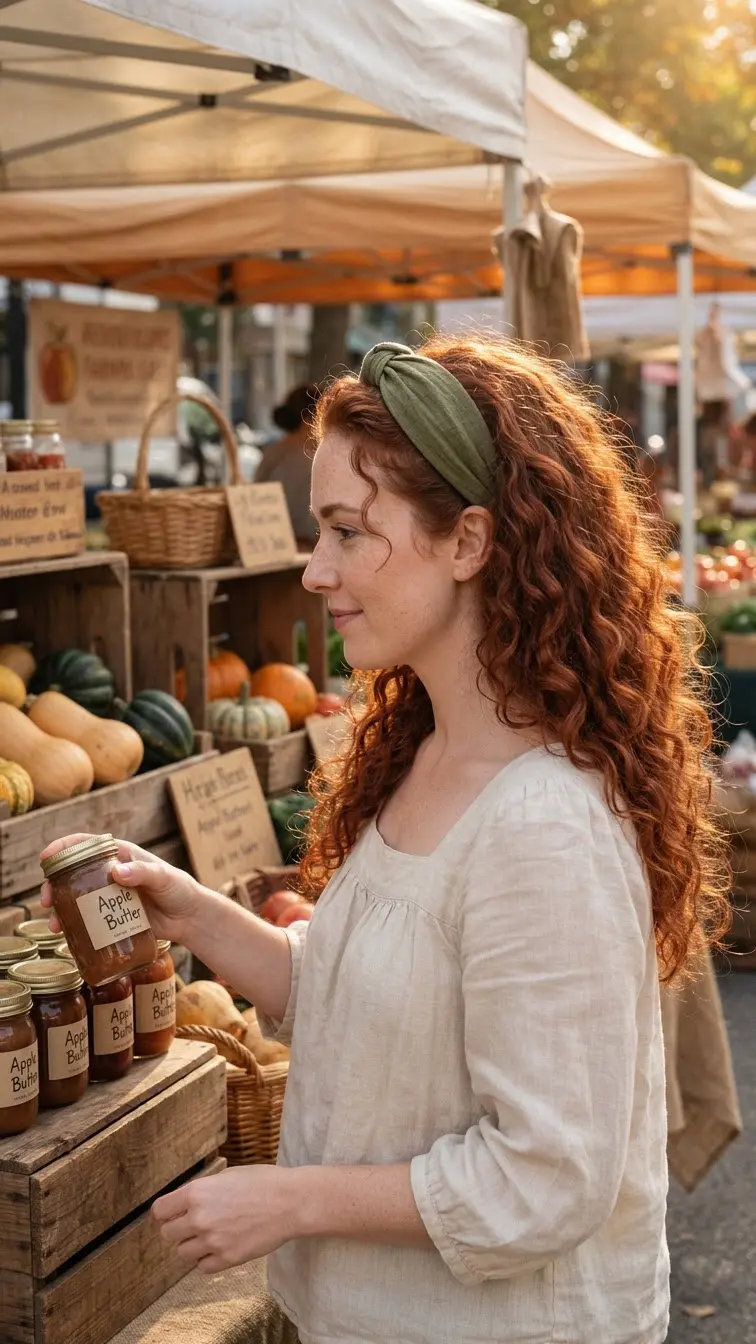
Some mornings your curls are great and your face needs them out of the way. That is headband weather.
A wide knotted band does more than a thin plastic one. It covers the frizzy front roots, holds without pinching behind the ears, and lets the back of your curls stay as full as you like.
Slide it on starting at the back of your neck and push it up toward your hairline. Pushing it back over the front drags the curls flat.
Olive, mustard, and wine colored bands all look like fall without trying hard.
10. Low Curly Ponytail With a Leather Hair Cuff
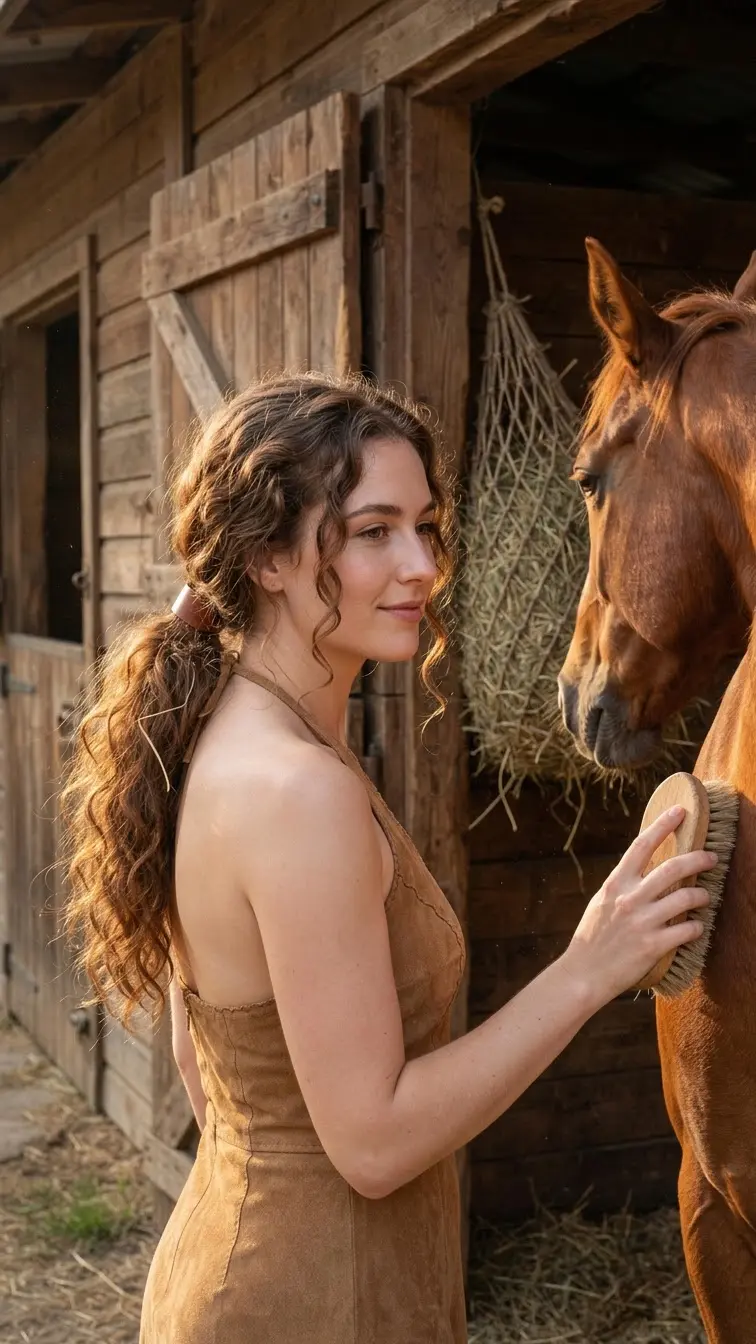
Low ponytails are the fall default for a reason. They sit under hats, behind coat collars, and stay out of a seatbelt.
The leather cuff is the small upgrade. It hides a plain elastic and makes a two second ponytail look planned.
Keep the ponytail loose at the base. Smoothing the roots tight with a brush ruins the curl pattern near your head, and that part shows most from the side.
A cuff with a pin through it holds better on thick curls than the snap style.
11. Dutch Crown Braid With Curls Falling at the Nape
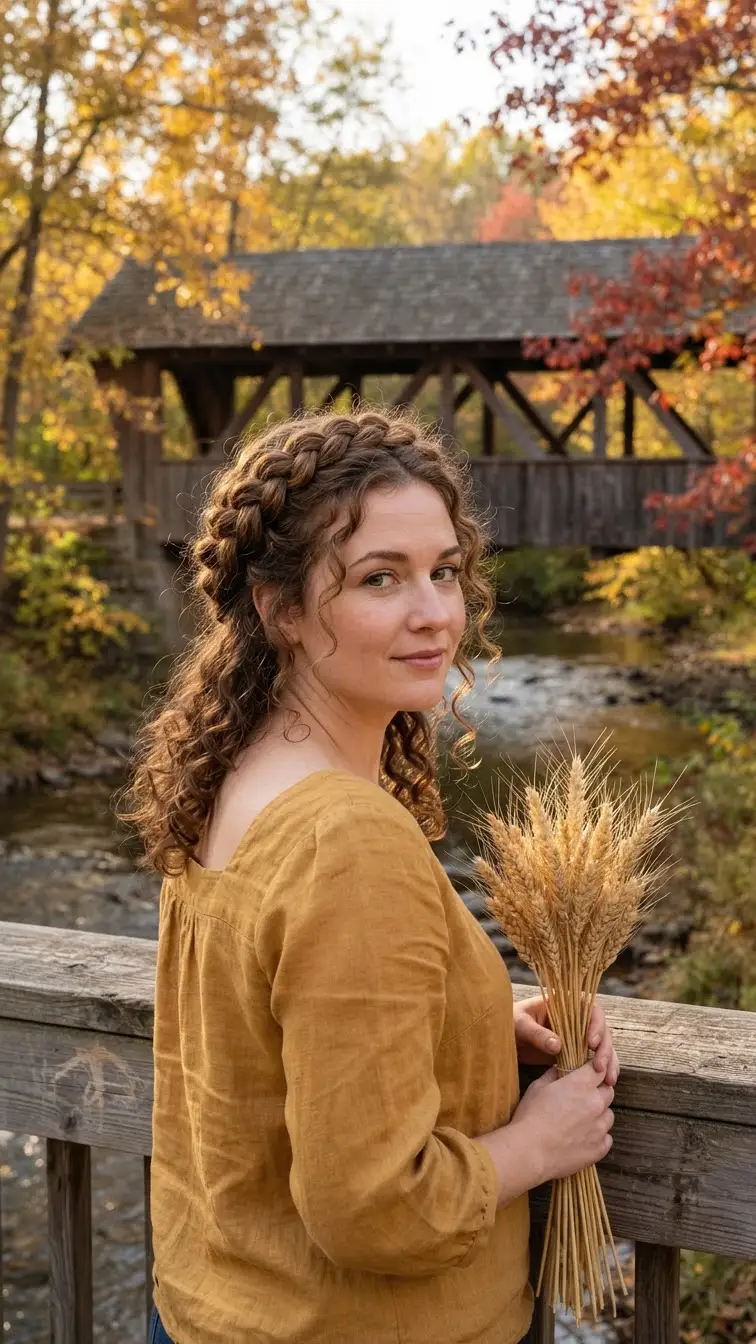
Benefit first: a crown braid keeps every curl off your scarf, and it lasts two or three days.
Start the Dutch braid above one ear, working toward the front and around the head. Keep adding curls as you go so the braid stays even. When you reach the nape, stop adding hair and let the rest hang as loose curls.
Pin the end under the start with two U pins.
Curly hair makes a fatter, fuller braid than straight hair. Do not pancake it. It already has texture.
12. Deep Side Part Twist Out
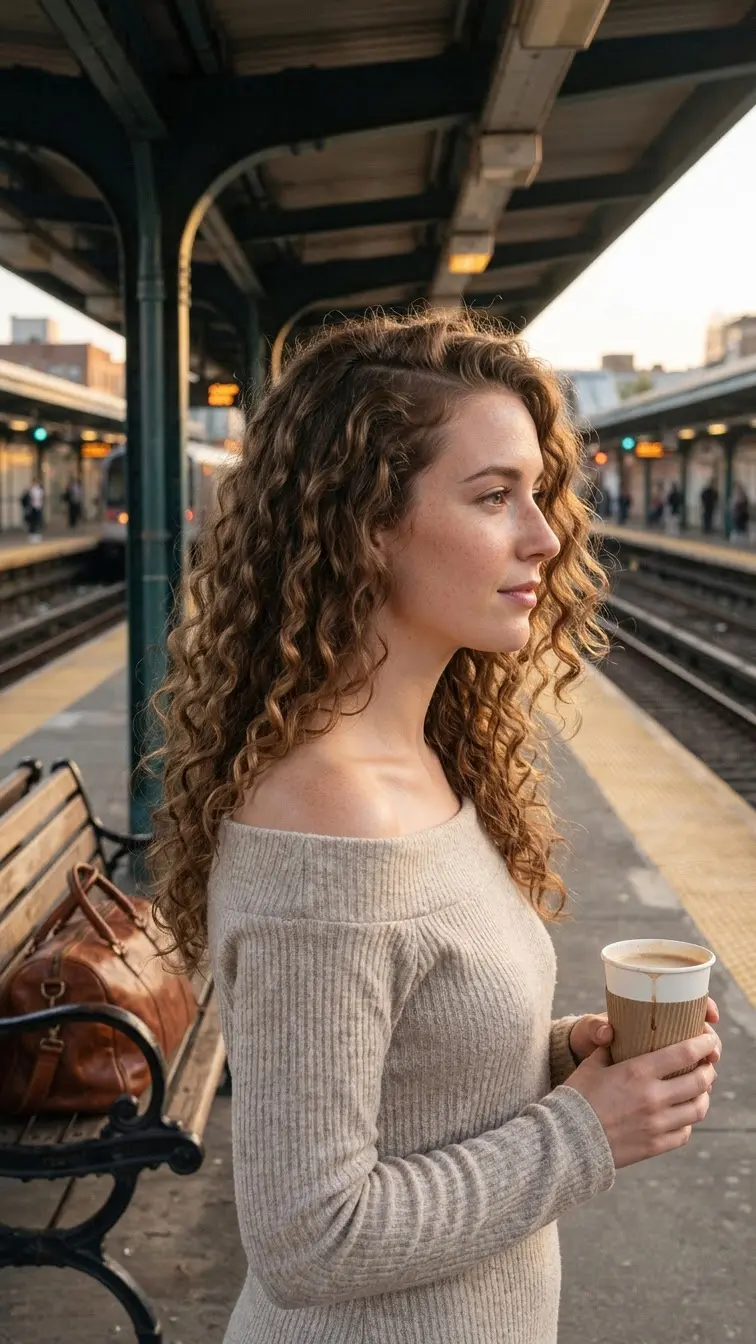
Low effort, big payoff. That is the twist out.
Before bed, split damp hair into eight to ten flat twists with a little curl cream. Sleep on satin. In the morning, untwist slowly and pull each section apart into two or three pieces.
Then switch your part to a deep side part.
The deep part adds height at the root, which is where curls go flat in dry fall air. It also makes the swoop over your forehead look like you spent longer than you did.
Good for travel days. It survives a nap against a train window.
13. Curly Bubble Ponytail
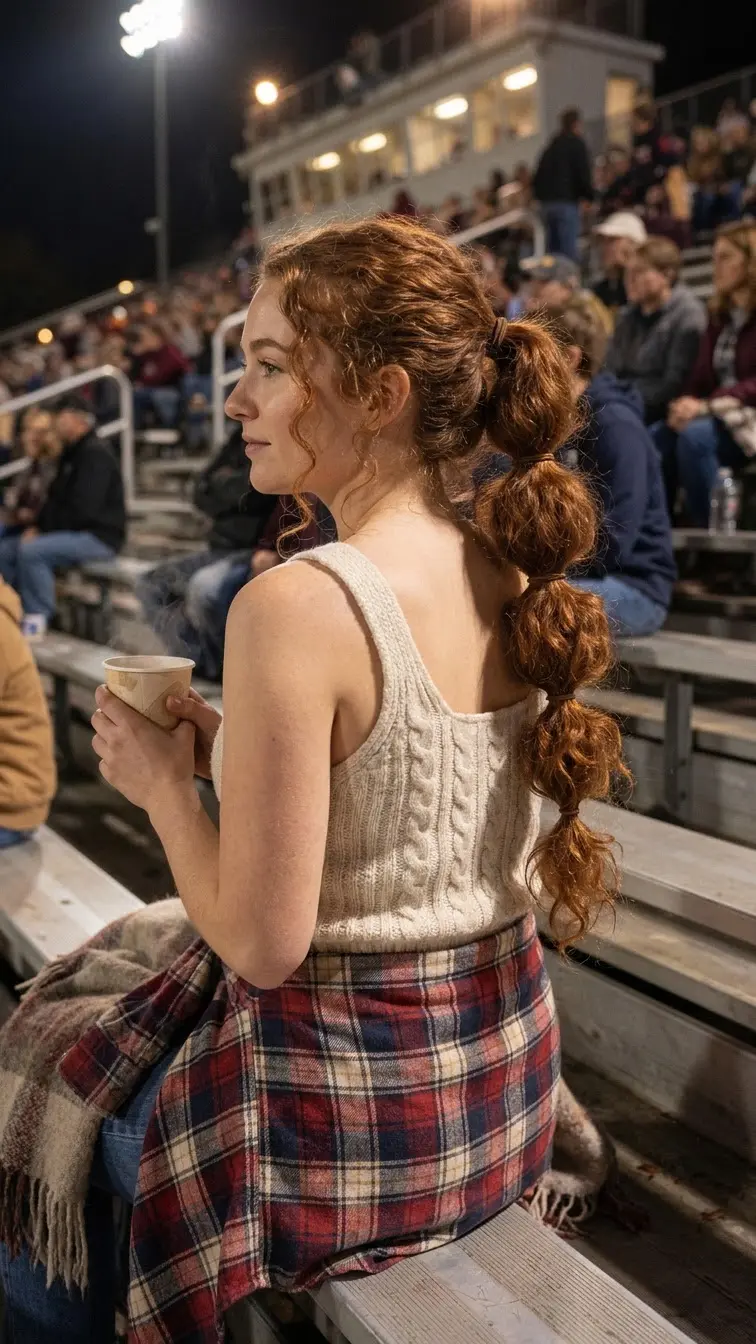
Tiny rule: pull each bubble out before you add the next elastic, not at the end.
Make a regular ponytail first. Add a clear or brown elastic every three inches down the length. After each one, gently tug the section between the elastics to round it out.
Curly hair fills each bubble without any backcombing. Straight hair needs help here. You do not.
It is one of the few long ponytails that stays tidy in wind. The elastics keep the length from whipping into knots during a cold game night.
14. Half Up Twisted Crown With Pearl Pins
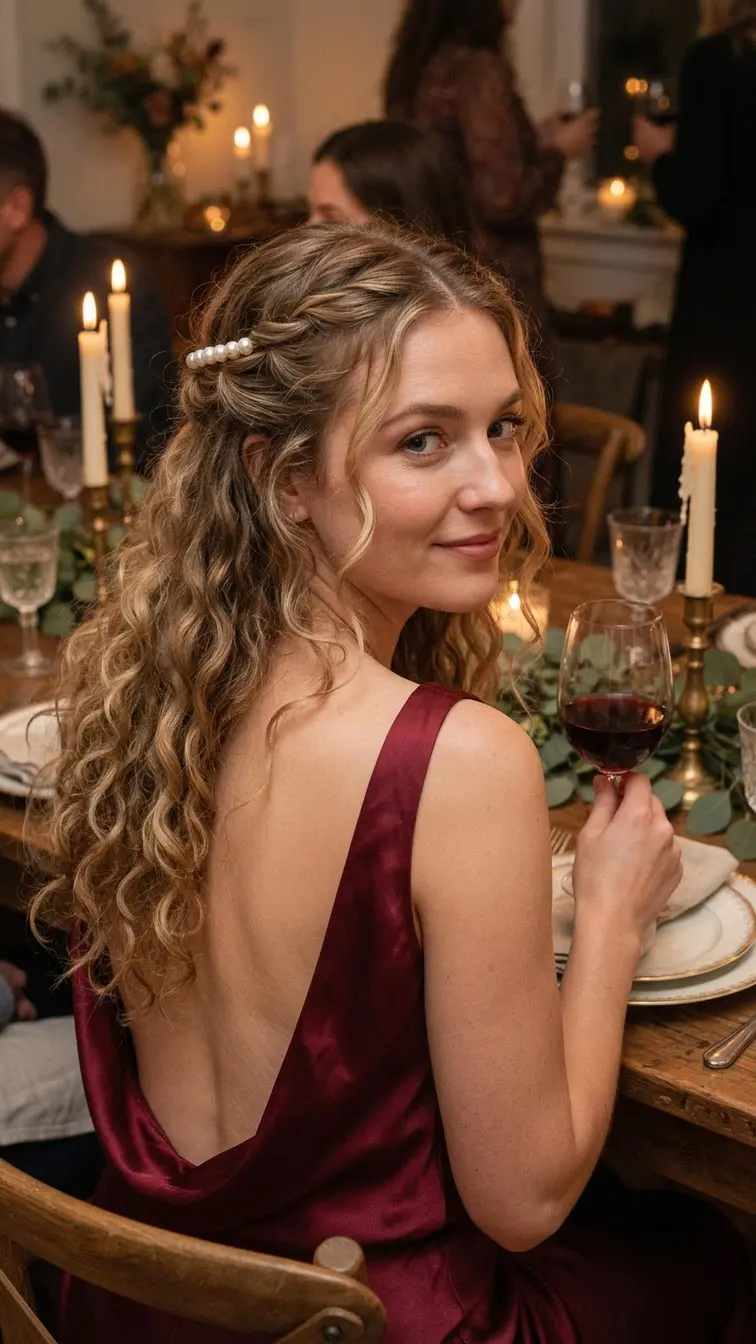
A long holiday dinner is hard on curls. Hot kitchen, steam from the food, leaning over the table. Hair ends up in the gravy.
This half up twist keeps the face area clean and the back long, so you still look dressed up.
- Take a two inch section above each ear.
- Rope twist each one toward the back.
- Join them at the crown with a clear elastic.
- Cover the elastic with a row of four or five pearl pins.
Slide each pin in against the direction of the twist so it grips the curls.
Twist sections when curls are fully dry so the style does not loosen later.
Mist a little water on the loose length to wake up flat curls after pinning.
Brushing the side sections smooth first. It turns curls into a frizz cloud.
Heavy pearl clips on fine curls. They slide down within an hour.
Twisting so tight that the pull hurts at the temples.
15. Bandana Tied Curly Updo for Hayrides
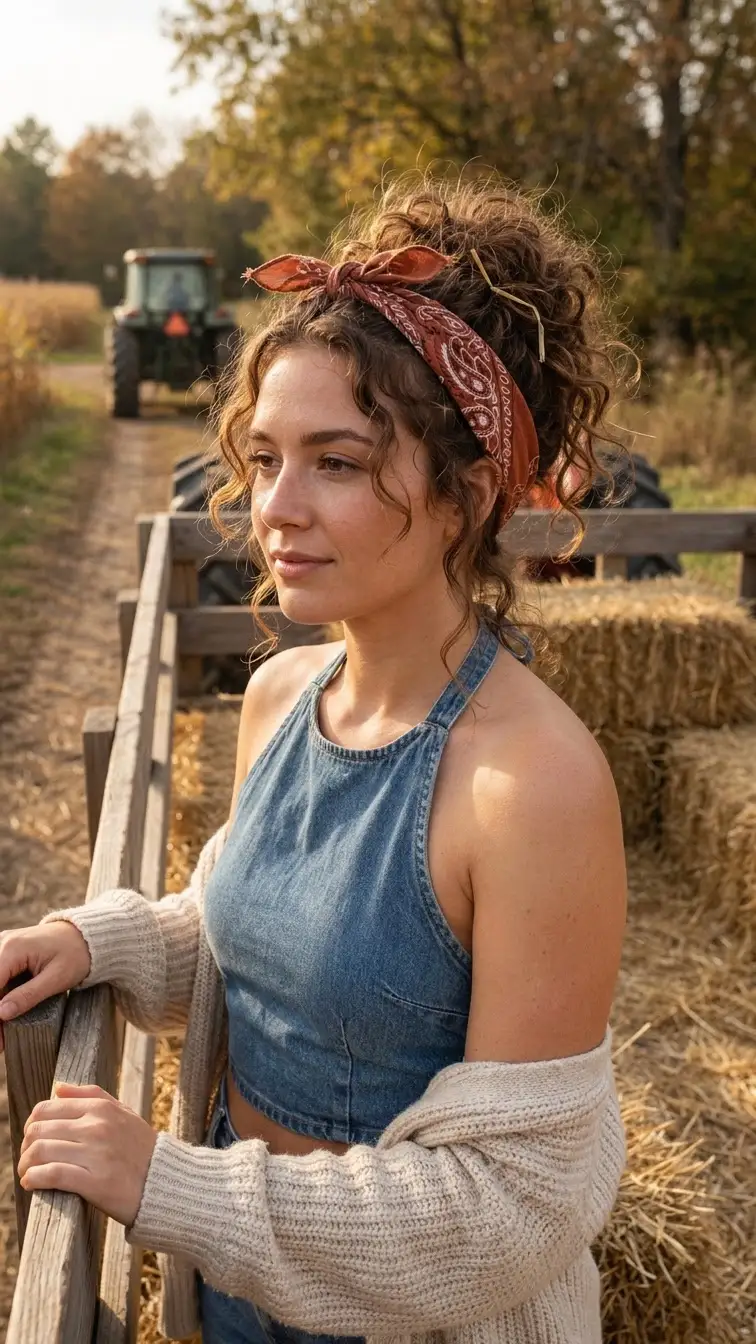
You will be sitting on hay for an hour. Pieces of it will end up in your hair no matter what.
A bandana updo keeps most of your curls tucked in and makes the straw easy to pick out later. Pile your curls on top with a big scrunchie first, then fold the bandana into a three inch band and wrap it around your head, starting at the nape, and knot it on top.
The bandana also covers the roots, so it is a smart move on a day four wash schedule.
Cotton bandanas grip better than silk for this one.
16. Rope Twisted Pigtails With Curly Ends
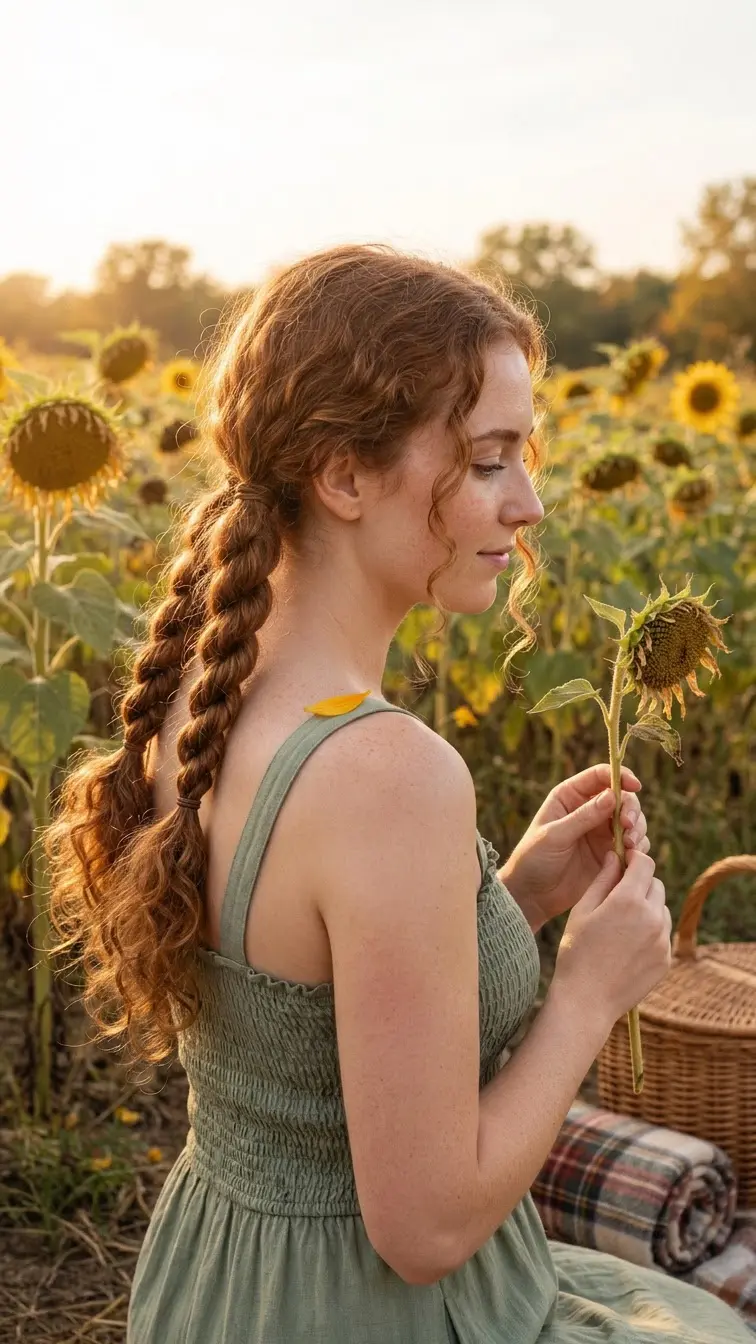
Rope twists are faster than braids. Two strands, not three.
Split each side into two sections, twist both in the same direction, then wrap them around each other the opposite way. That counter twist is what keeps them from unraveling.
Stop about four inches from the end and tie it. Leave the rest curly.
Look closely in the afternoon. The twists loosen a little and get softer, which honestly looks better than the fresh version. They also unravel into gentle waves if you sleep in them.
17. Messy Curly Chignon at the Nape

Messy chignons look harder than they are. On curls, the mess is built in.
Gather your hair low, twist it loosely, and fold it up and under itself. Then push in six to eight U pins, angled inward, wherever it feels loose. Do not aim for smooth. Pull out a couple of curls near the ears.
Make it sit just above your collar line, not on it, so a sweater neck does not push it up.
Watch out: regular bobby pins snap shut and flatten curls. U pins hold the bulk without crushing it.
18. Diffused Curly Shag With Face Framing Layers

If you want a fall change without going darker, think about the cut.
Comparison time. A one length curly cut sits heavy at the bottom and goes flat on top, a triangle shape. A curly shag stacks short layers at the crown, so the volume moves up where people actually see it.
Ask your stylist to cut it dry, curl by curl. Wet cuts on curly hair often end up shorter than planned.
At home, diffuse on low heat with your head tipped to the side. The layers will separate on their own.
19. Curly Bob Tucked Behind One Ear With a Gold Barrette
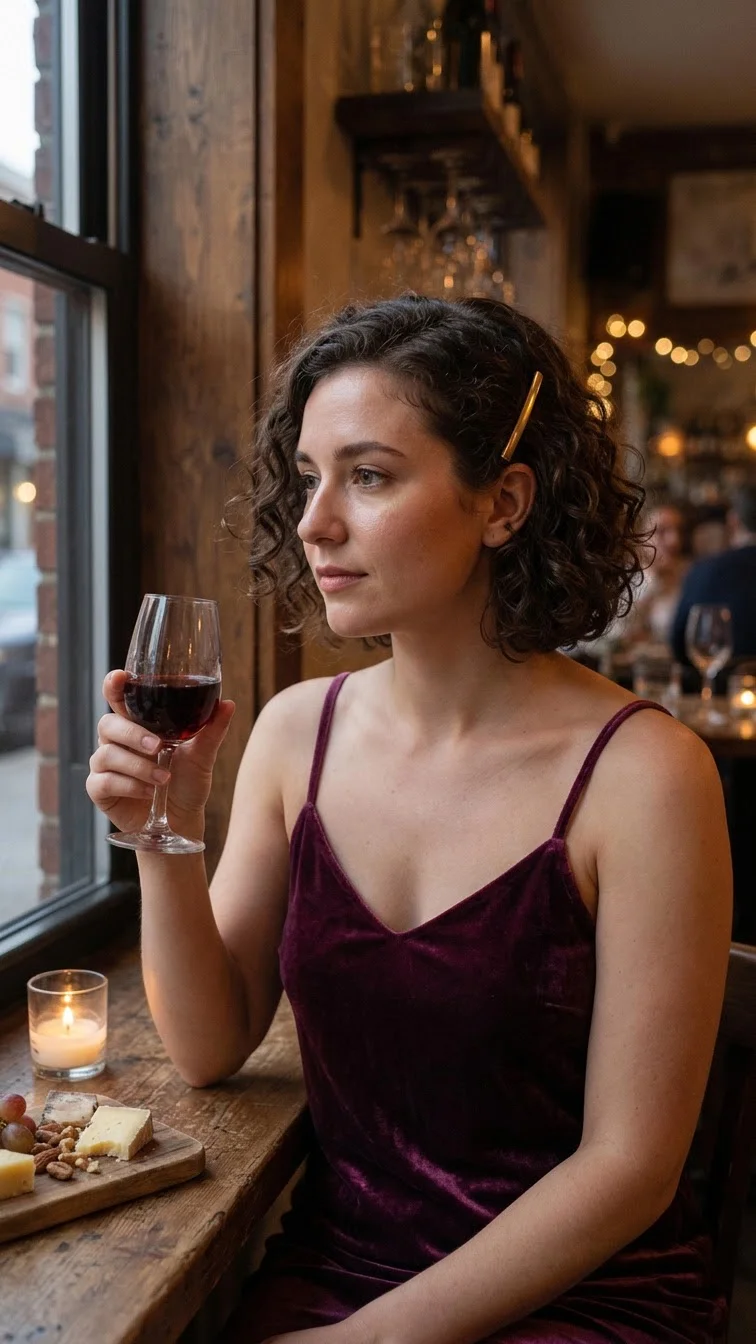
Short curls can feel like there is nothing to style. There is. Just less.
Push one side behind your ear with damp fingers and slide in a long gold barrette, flat, right above the ear. The other side stays full and curly. Now the bob has a shape: smooth on one side, round on the other.
A small detail: barrettes with a snap clasp hold short curls better than the spring kind, which tend to slide out.
It works best on bobs between the chin and the jaw.
20. Curly Pull Through Braid
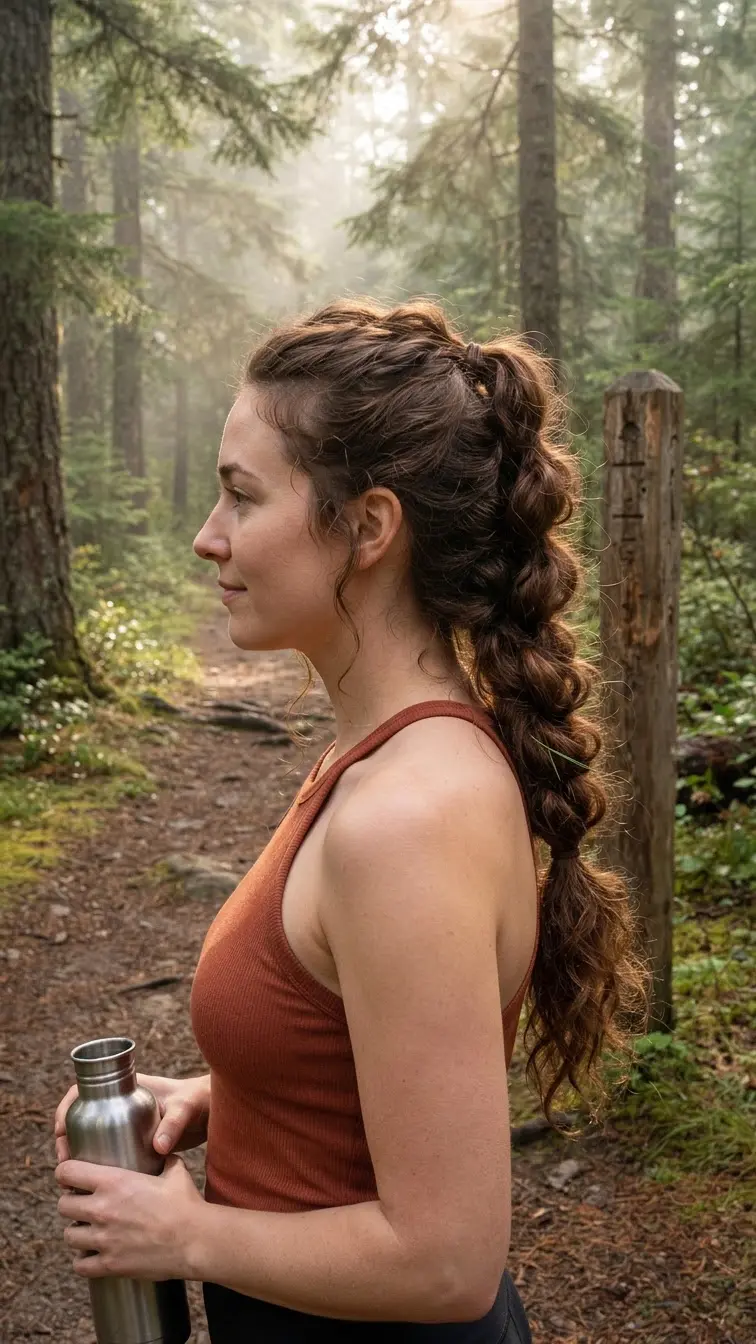
No braiding skills? No problem. This one is just ponytails.
- Make a small ponytail at the crown.
- Make a second one right under it.
- Split the top ponytail in two and bring the second one up through the middle.
- Tie the top ponytail below. Repeat down the head.
- Gently pull each loop wider.
The result looks like a fat, puffy braid. On curly hair the loops stay round and textured instead of sliding flat.
A solid pick for hikes, since it keeps long curls out of backpack straps.
21. Slicked Front Sections With a Curly Half Ponytail
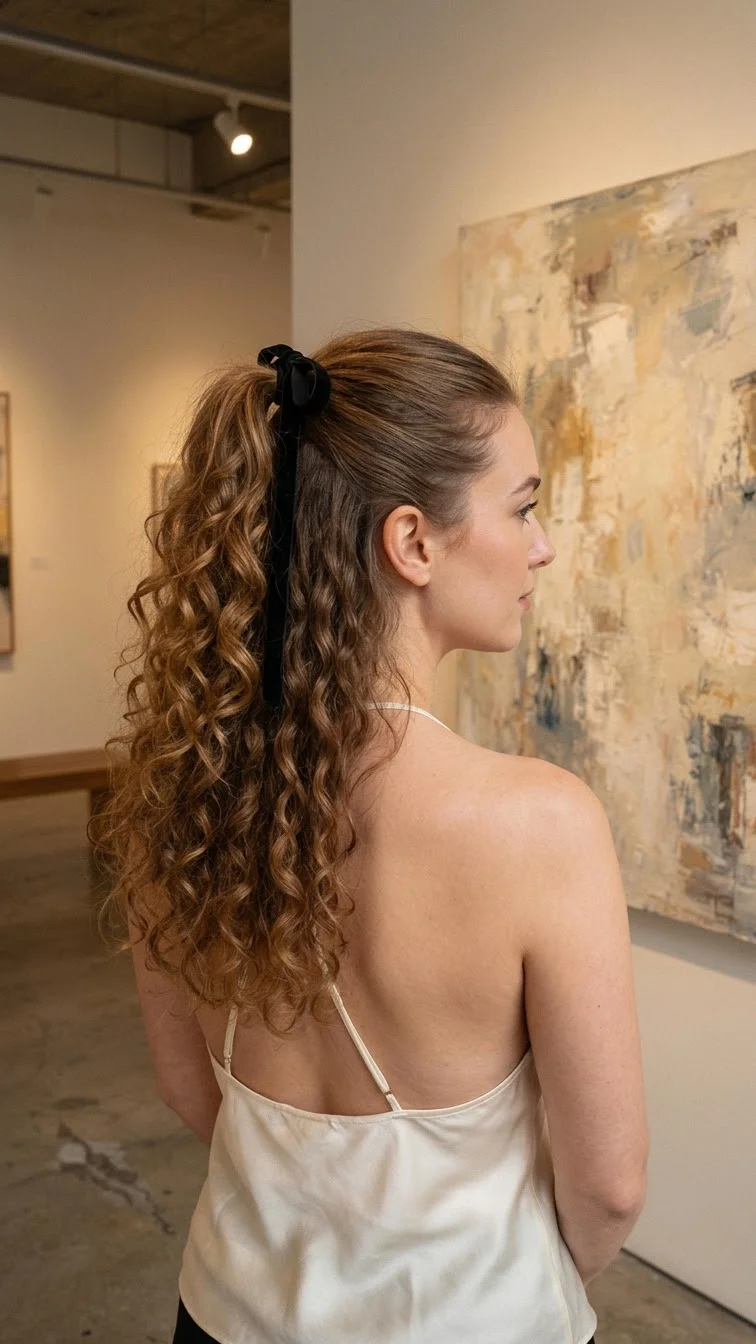
This look plays smooth against curly, and the contrast is what makes it.
Using a soft boar bristle brush and a little gel, brush only the top and front sections up into a half ponytail. Tie it high. Leave everything below loose and untouched.
A few notes:
- Brush with gel while hair is damp, so the curls under the sleek part do not puff
- Tie a black velvet ribbon over the elastic
- Scrunch the loose curls after, to bring back any you brushed by accident
It pairs well with cleaner, minimal outfits, like a plain silk top or a black dress.
22. Silk Scarf Woven Through a Curly Braid

The scarf is doing two jobs here.
It adds color without any pins or clips, and it acts as a smooth strand inside the braid, so the curls rub against silk instead of each other. Less friction means less frizz by evening.
Tie the scarf around the base of a low ponytail, then use one tail as one strand of a regular three strand braid. Knot it at the end with the elastic.
Thin scarves work best. A wide one makes the braid look bulky on one side.
23. Low Side Bun for Sweater Weather
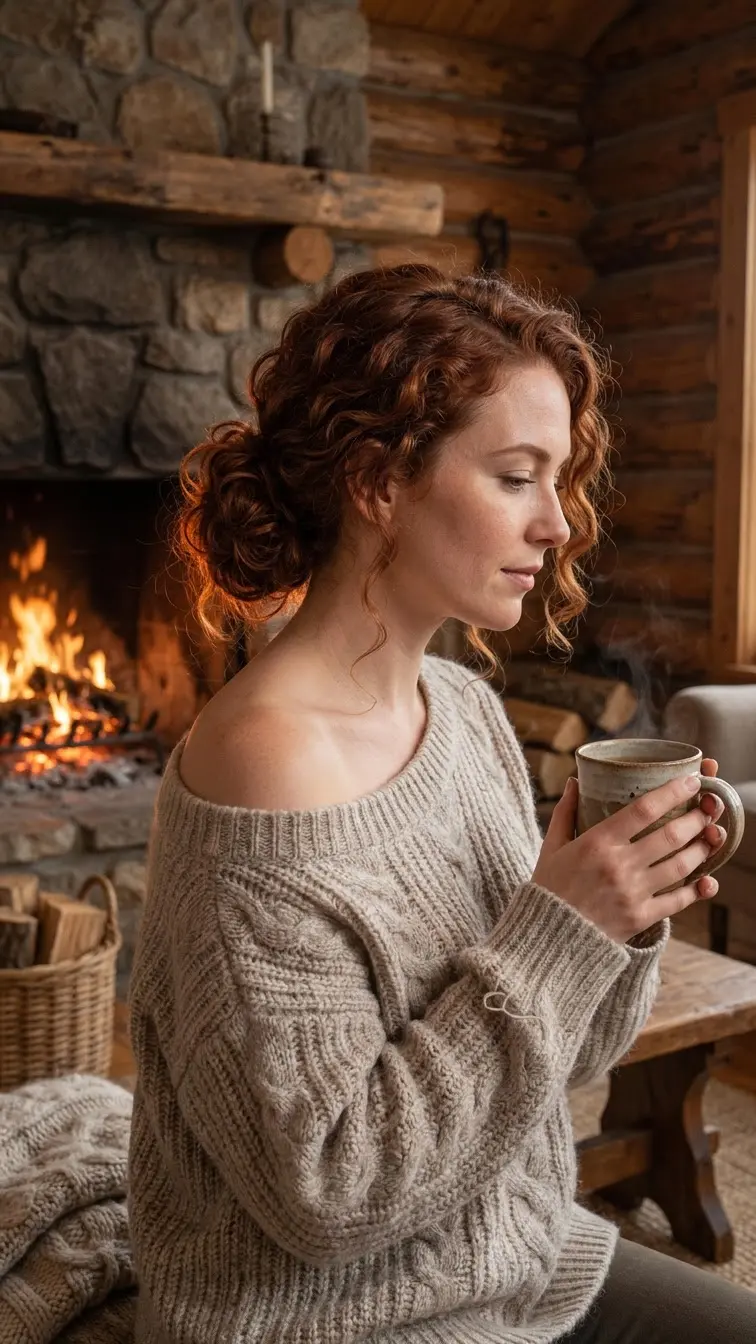
Chunky sweaters snag curls. A low bun in the center gets pushed up by a big collar. Moving it to the side solves both.
Sweep all your curls to one side, twist them loosely, and coil into a bun right behind the ear. Pin it with U pins pointing toward your face.
Leave the front swoop loose and let it fall over your temple. That swoop is the part people see when you sit across from them, so give it a quick scrunch with a drop of cream.
It pairs best with off the shoulder knits and wide boat necks, which leave the bun room to sit.
Loose curls rubbing against a chunky knit all day. By lunch the back is matted, the ends are fuzzy, and a few strands are caught in the yarn.
Curls tucked into a side bun behind one ear. The knit never touches them, the front swoop stays defined, and you can lean back on the couch without crushing anything.
24. Mini Braids Framing the Face With Loose Curls
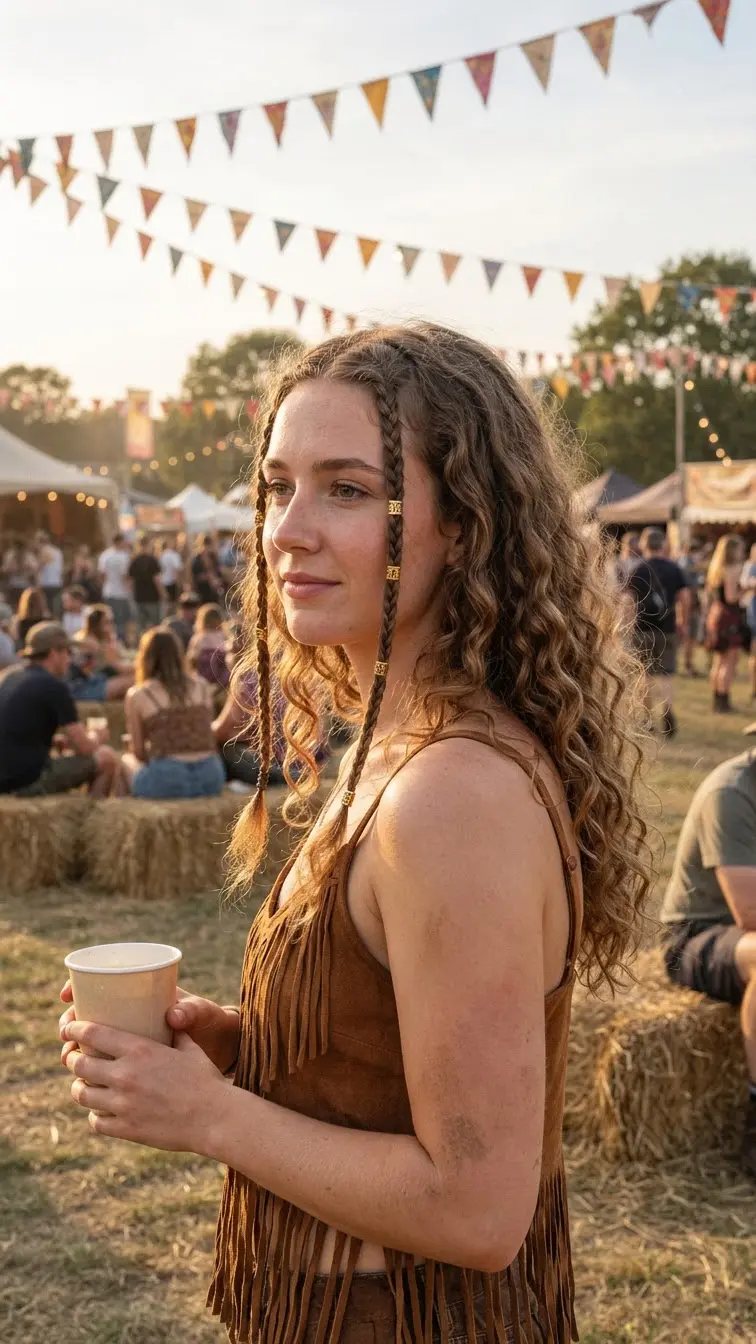
Two thin braids at the front, nothing else.
That is the whole style, and it fixes a very specific problem. On day three, curls right around the face are usually the frizziest because you touch them all day. Braiding just those pieces hides the worst of it and keeps them off your lip balm.
Each braid takes under a minute. Use a pencil width section from right at the hairline.
Gold cuffs are optional, but they catch the light nicely at an outdoor show.
25. Half Up Curls With a Burgundy Velvet Bow
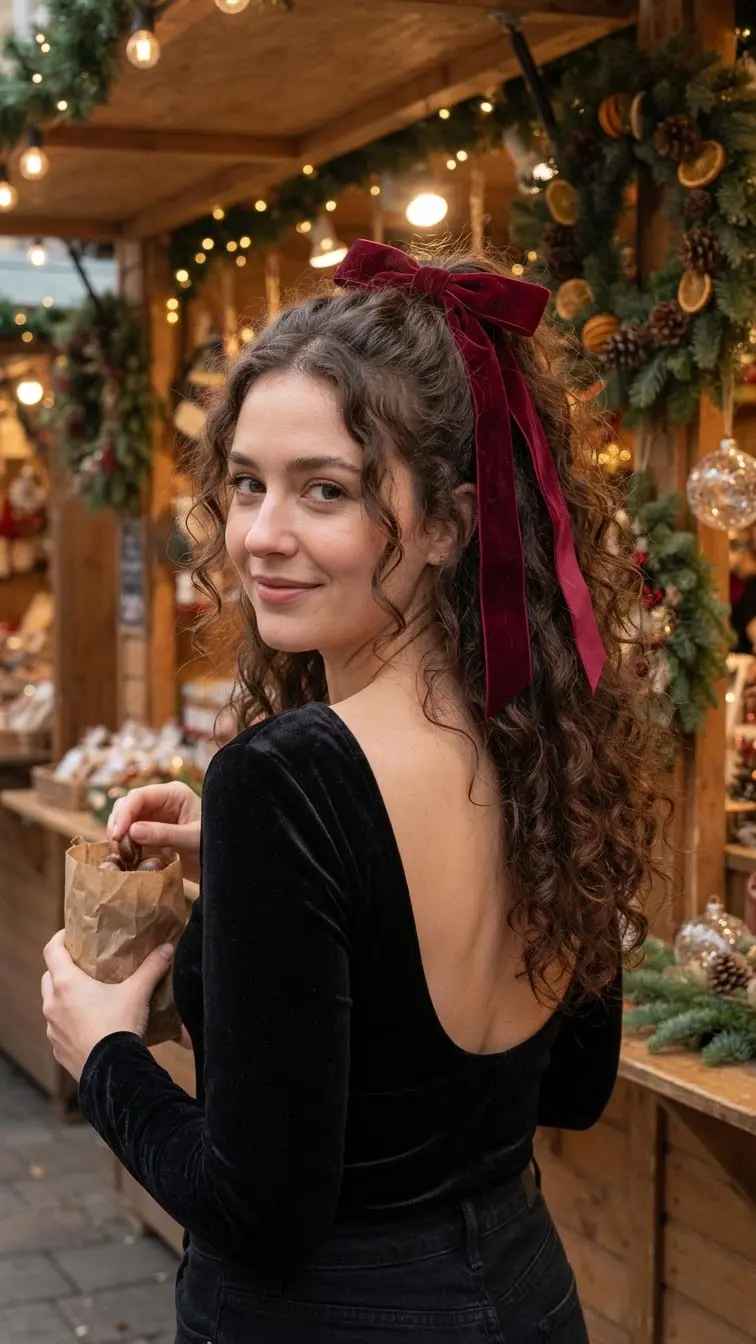
Bows on curly hair used to feel too sweet to me. Then I tried velvet in a deep wine shade, and it looked grown up right away.
Here is why it works. A big bow needs something solid behind it, and the volume of curly hair gives it that. On thin straight hair, the same bow can look like it is floating.
Tie the half up section with an elastic first. Then tie the ribbon over it, so the bow is decoration, not the thing holding your hair.
Late November through New Year is its best season.
26. Curly Updo With a Wooden Hair Stick
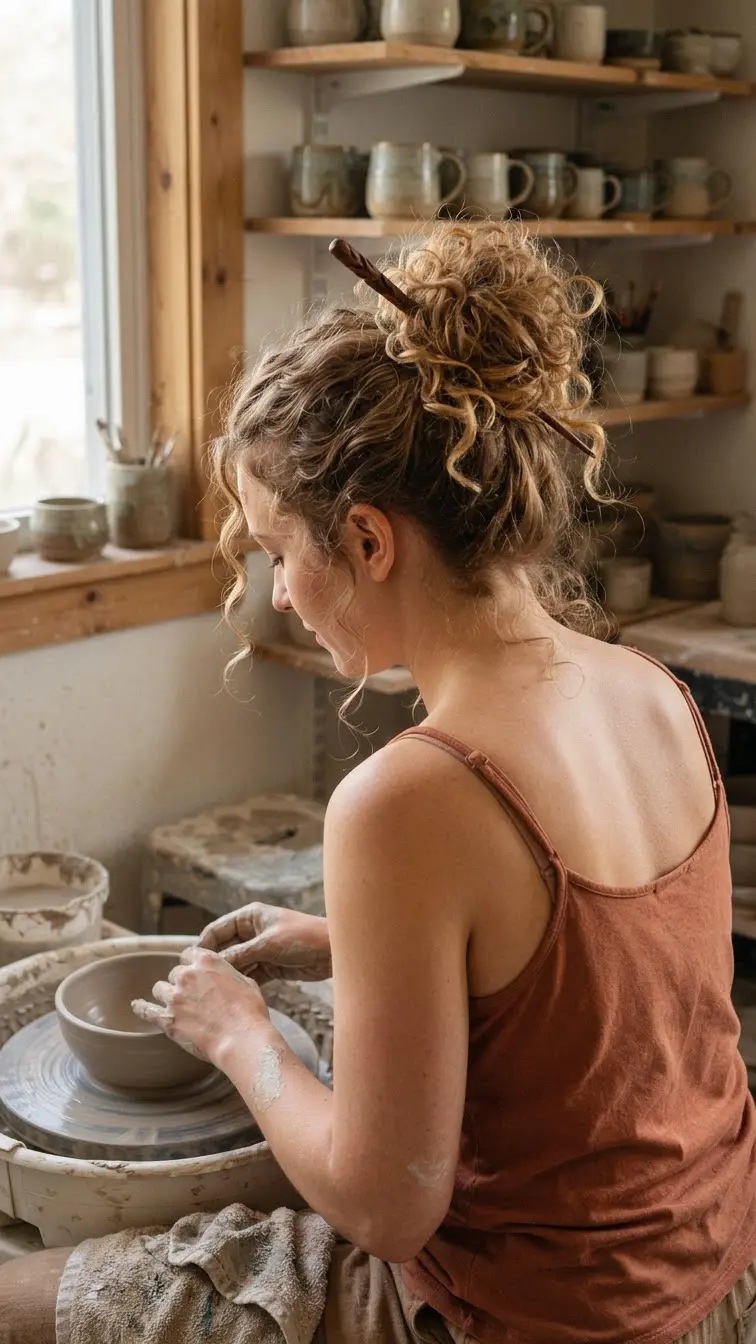
One stick, no pins, no elastic. It holds better on curls than on any other texture.
How to do it:
- Twist your curls into a rope and wrap it once around your fingers at the crown.
- Push the stick in through the side of the bun, catching a bit of scalp hair.
- Turn the stick upright and push it through to the other side.
The curl texture grips the stick and stops it sliding. Walnut and maple sticks feel warmer for fall than metal ones.
Your hands stay free and nothing digs into your head.
27. Crisscross Gold Pins on Pinned Back Sides
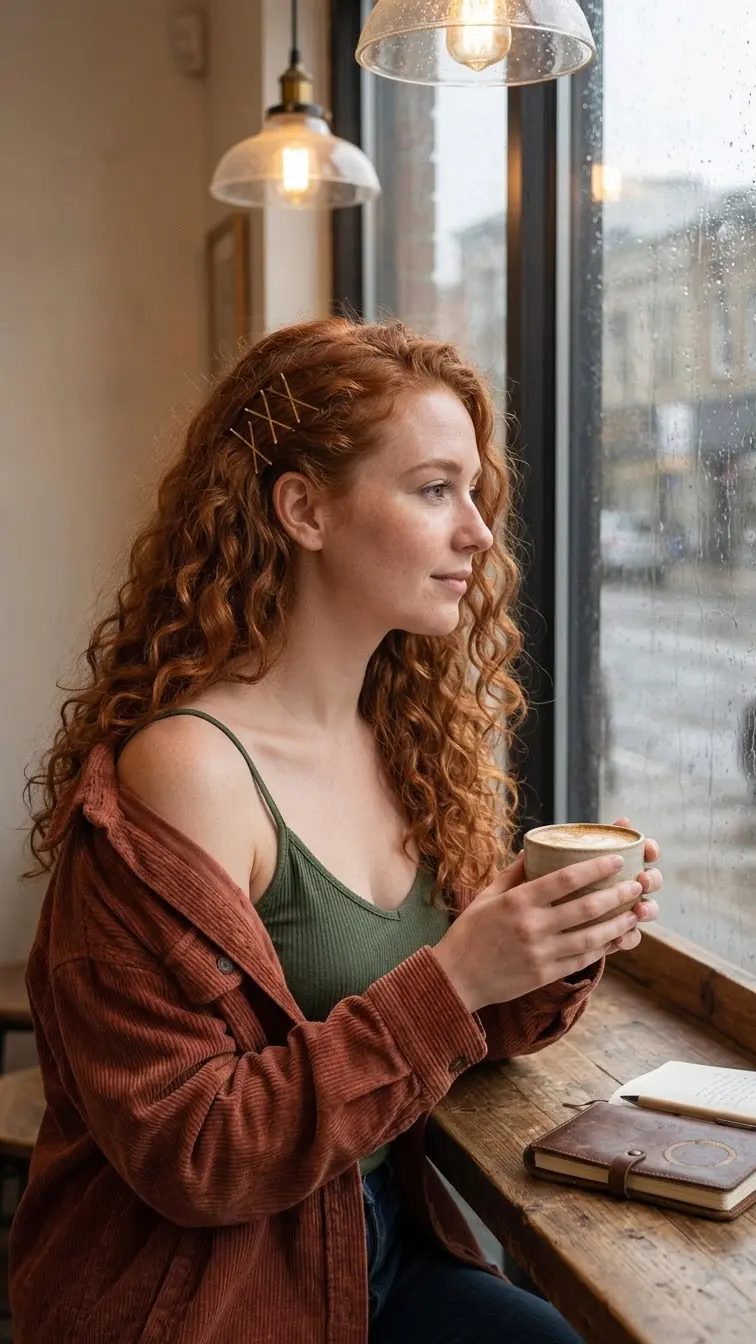
Rainy fall day. Curls are puffier than planned. You need them off your face fast.
Push each side back above the ear, then slide two gold bobby pins in to form an X. Stack two or three X shapes on each side. Done in a minute.
The pins become the accessory, so nobody notices the frizz. Matte gold pins grip better than shiny ones, which tend to slip out of dry curls.
Stick to the sides only. The top and back stay full so the shape does not go flat.
28. Loose Diffused Cinnamon Copper Curls
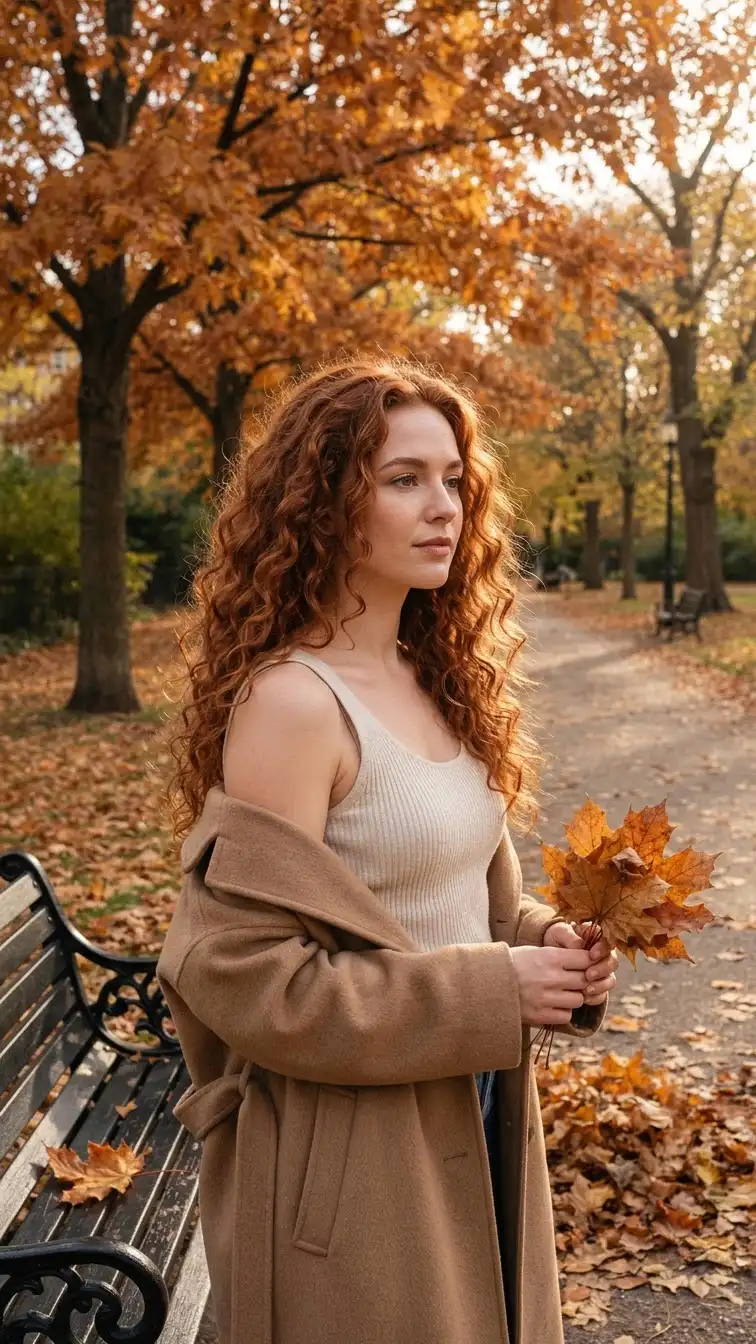
Sometimes the best fall style is no style at all. Just your curls, big and well defined, in a warmer shade.
Cinnamon copper is a soft red brown that sits between auburn and light copper. It flatters most fair skin tones and makes every ringlet look more defined, because the light catches the color shift on each curl.
For volume, diffuse upside down with a little mousse at the roots, then flip back and shake your head once.
Ask for a gloss instead of a full permanent color if you want to test it first. It fades gently in a few weeks.
Let Your Curls Have Their Fall Moment
Fall weather does not have to mean hiding your curls under a hat until March. Dry air, wind, and wool will always do something to curly hair. What changes is whether those curls are tucked safely into a braid, a scarf bun, or a pinned twist, or left loose to rub against a collar all day.
Start with the velvet pineapple and the claw clip twist for busy mornings. Keep the crown braid and the pearl half up for long dinners and trips.
With a few U pins, one silk scarf, and a velvet scrunchie in your bag, these fall hairstyles for curly hair are ready for every cold, windy, or rainy day ahead.
Save this list to your fall hair board so your next sweater weather morning already has a plan.