
By hour seven, the bun you twisted up at 5:30 a.m. has slipped to one side. A loose piece keeps brushing your mask, and both hands are busy with something you cannot put down. Nobody warns you that a shift tests your hair as much as your feet.
Most hair advice assumes you are sitting still. Nurses bend over beds, turn patients, lean into small spaces, and wash their hands a dozen times before lunch. Hair that swings or rests on the collar ends up in the way, and many workplaces ask for hair to stay off the collar and out of your face.
So these nurse hairstyles are chosen for how they hold, not just how they look. You will find options for short, long, curly, straight, braided, and natural hair. Each one comes with a clear way to make it last and a note on who it suits best. Keep a few pins and a strong elastic nearby, then pick the style that matches your next shift.
1. The Low Twisted Bun That Clears Your Collar

Start with the lowest point on your head, not the crown. A low bun sits under the collar line, so nothing rubs your neck or tips into your mask.
- Brush your hair into a low ponytail at the nape.
- Twist the ponytail into a rope, turning it in one direction only.
- Coil it flat against your head and pin it with two U-shaped pins, one on each side.
Tuck the ends under the coil so no tail pokes out the bottom.
Quick tip: Slide each pin in against the direction of the coil so it locks instead of loosening by noon.
2. Two Dutch Braids Pinned Into A Crossed Knot
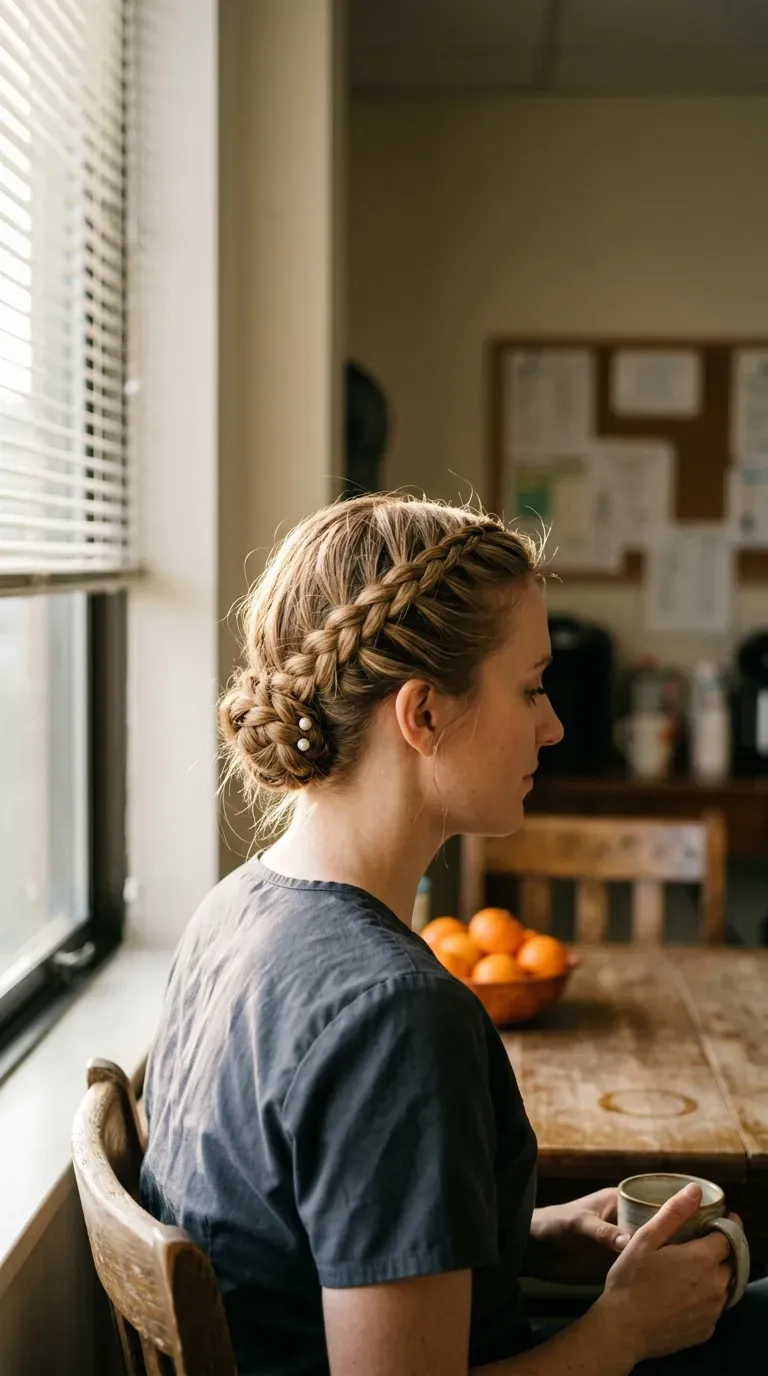
Two braids spread the weight, which means less pulling on one spot during a long day. That helps if your scalp gets sore by hour ten.
- Part your hair down the middle and Dutch braid each side toward the nape.
- Cross the braid tails behind your head and pin each end to the opposite side.
- Add a few extra pins where the braids meet.
Dutch braids sit on top of the hair, so they hold flatter and tighter than a regular braid. If one pin fails, the other side keeps the shape.
Works best on medium to long hair that is not freshly washed, because a little grip helps it stay.
3. Claw Clip Twist With A Hidden Elastic Backup

A claw clip alone is a gamble on a long shift. Add one small backup and it becomes reliable.
Gather your hair into a ponytail with a snug elastic first. Twist the tail up and under, then clamp the clip across the twist so its teeth catch both the twist and the roots.
The elastic is the secret. If the clip loosens when you lean over a bed, your hair stays gathered instead of dropping.
Pick a matte clip with strong teeth, the kind that does not slide on clean hair.
Watch out: Skip big, shiny clips that stick out the back. They bump into pillows and headrests.
4. The Flat High Bun That Fits Under A Surgical Cap
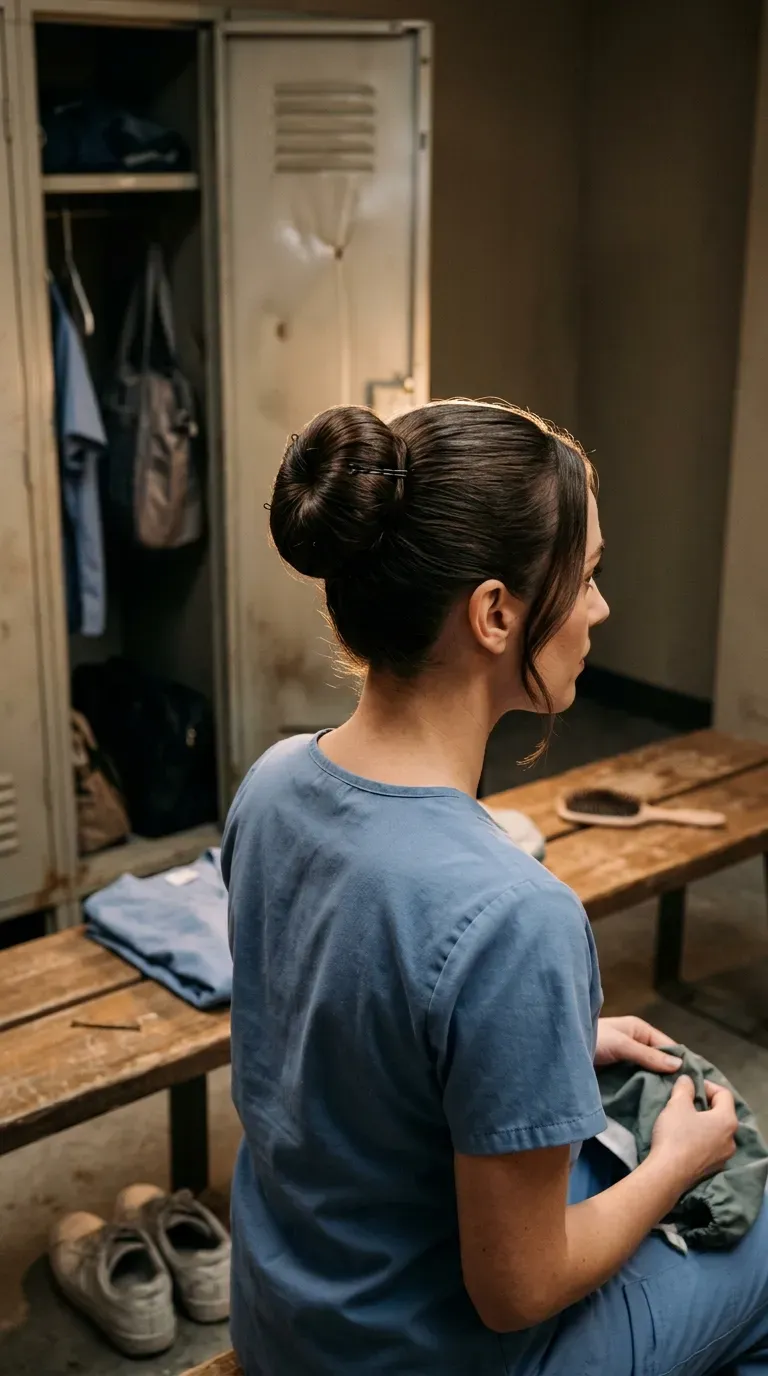
Most high buns turn into a lump the second a cap goes on. The fix is making the bun smaller and flatter, not looser.
Brush your hair into a high ponytail and smooth the roots with a little water. Wrap the tail around the base, flatten the wrap, and pin it down like a coin instead of building a tall knot.
- Use a snag free elastic, not one with a metal join.
- Pin the bun around its edge, about four pins.
- Put the cap on last and tuck it behind your ears.
Best for long, thick hair that would otherwise bulk up. If your scalp is sensitive, keep the ponytail a touch looser at the root.
5. Fishtail Braid Folded Into A Loop At The Nape

Fishtail braids look intricate, but the grip is what matters here. The small crisscrossed strands lock together better than a standard three strand braid.
Braid a fishtail down the back and tie it off. Fold it up on itself into a loop, pin it flat against the nape, and hide the tied end underneath.
Make it last: Spritz a little texture spray on dry hair before braiding. Slippery, freshly washed hair is what makes fishtails unravel by lunch.
For fine, straight hair that slides out of buns, this one stays put.
6. A High Curly Puff That Keeps Its Shape All Shift

Curly hair does not need to be slicked flat to behave. A high puff keeps your curls off your neck and lets them keep their shape.
- Gather the curls at the crown with your fingers, not a brush.
- Secure with a wide, soft scrunchie or a fabric covered elastic.
- Fluff the ends gently and pin any loose curls back with a bobby pin.
Skip skinny rubber bands. They crush curls and leave a dent by hour six.
Quick tip: Refresh with a little water on your hands, then re-smooth the sides.
Thin rubber band, tight pull at the root, curls flat and frizzy by midday.
Wide soft scrunchie, loose gather, curls lifted and still defined at clock out.
7. Half Up Top Knot For Hair That Stops At The Shoulder

Shoulder length hair lives in an awkward spot. It is too short for a real bun and too long to leave down. A half up top knot solves both.
Take the top section from ear to ear, twist it, and wrap it into a small knot at the crown. Pin the knot with two bobby pins crossed in an X.
- Hair down: tuck it behind your ears and pin once on each side.
- Hair fully up: gather the lower lengths into a mini ponytail under the knot.
Pick the fully up version on days with lots of bending, since loose lengths swing forward.
8. Low Ponytail Wrapped In A Strand To Hide The Elastic

The most common ponytail mistake is the elastic sliding down by lunch. Wrapping fixes that and looks neater too.
Make a low ponytail and tie it snugly. Take a thin section from underneath the tail, wrap it around the elastic three or four times, and pin the end inside the wrap with a bobby pin.
The wrapped hair adds friction, so the elastic stays where you put it.
If the tail brushes your collar, loop it under once and pin it into the wrap.
Suits straight and wavy hair best. Very thin hair may need a second pin.
9. Box Braids Gathered Into A Low Wrapped Bun

Box braids get heavy by hour nine, so where you place the weight matters. A low bun spreads it across the back of your head instead of pulling at the crown.
- Gather the braids into a low ponytail at the nape.
- Wrap one braid around the base and pin the end.
- Tuck the rest into a loose coil and pin around it.
Use a wide, soft hair tie that will not snap or dig into the braids.
Take the bun down gently at night and let your scalp rest. If a few braids feel tight at the hairline, mention it to your braider next time.
Coil the braids loosely around the base.
Use a wide fabric tie that has some stretch.
A tight high bun that pulls on the crown.
A thin elastic that cuts into the braids.
10. Bob Held Back With Two Flat Twists And Pins
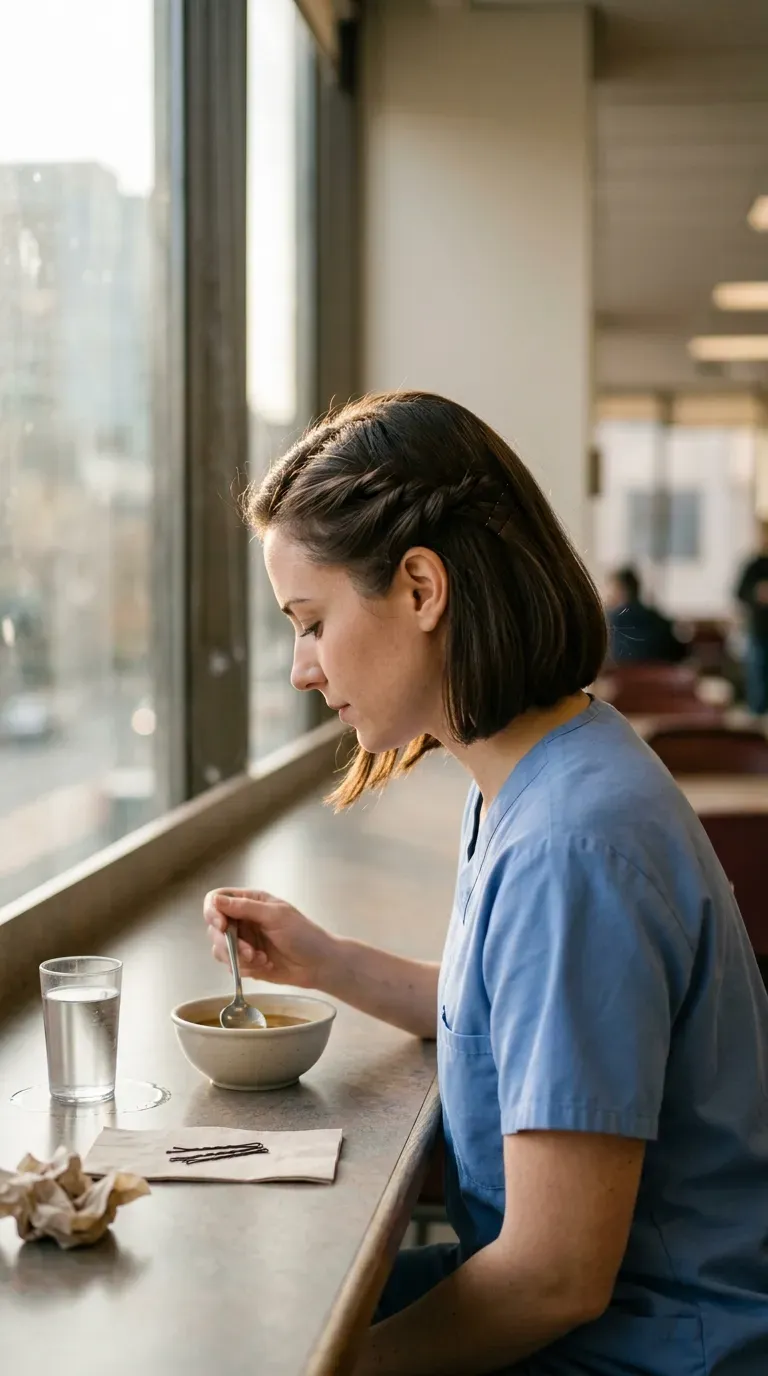
Short bobs usually mean hair falling forward the moment you lean over. Two flat twists fix that without needing a bun.
Take a section above each ear, twist it back along your head like a rope, and pin it just behind the ear. Pin the ends flat and cover the pins with the twist.
Short hair rule: Use bobby pins, not clips. Clips can pop open when you reach or bend.
If the back of your cut sits above the collar, you are done. If it touches the collar, pin the lower layer up too.
11. Two Low Buns When One Bun Gets Too Heavy
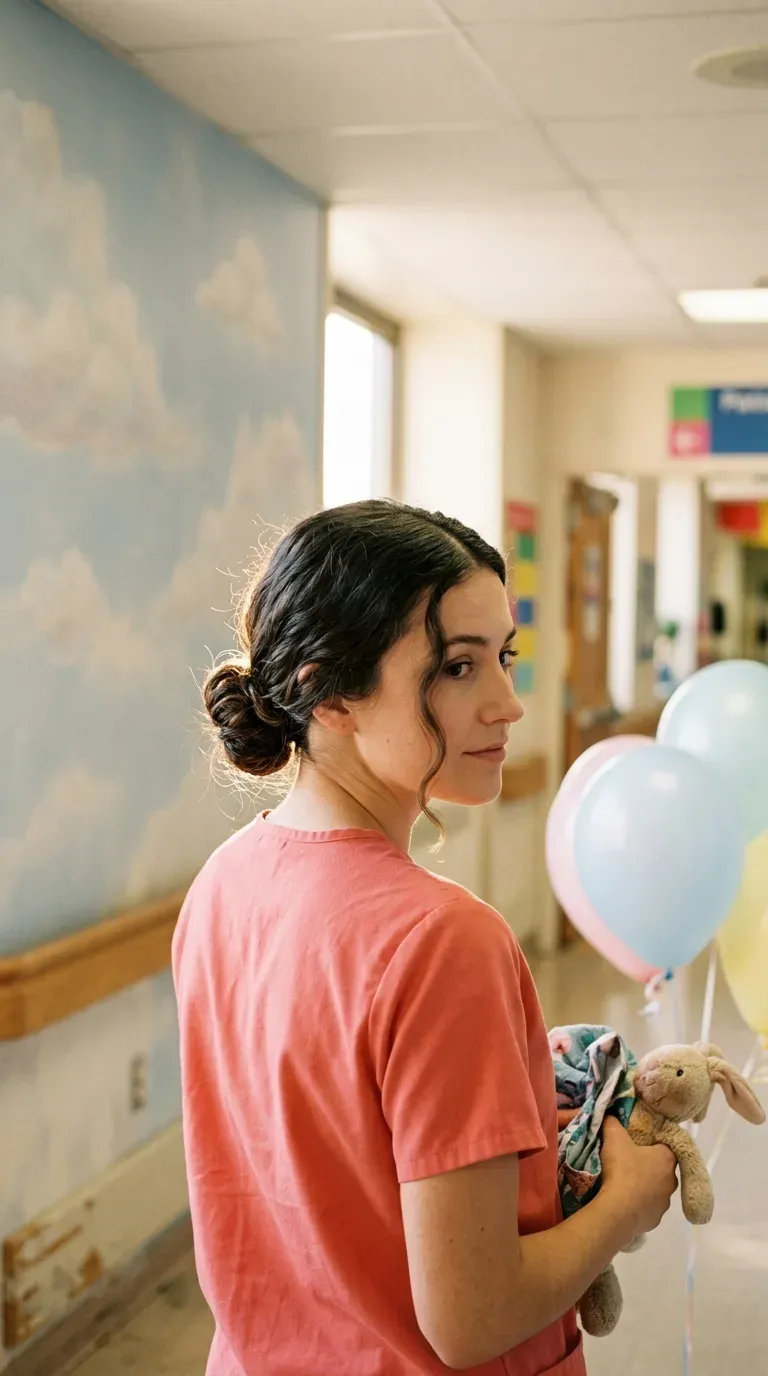
Thick hair makes one bun feel like a bowling ball on your head by the third hour. Splitting it in two cuts the weight and the bulk.
Part down the middle and make two low ponytails just behind each ear. Twist each one and coil it against your head, then pin it in place.
- Keep the buns at ear level, not higher, so they stay under any head covering.
- Match their size so the shape looks even.
The two buns also act as a backup. If one starts to slip, the other still holds, so you can fix it on a quick break.
12. Bubble Ponytail With Three Snag Free Elastics
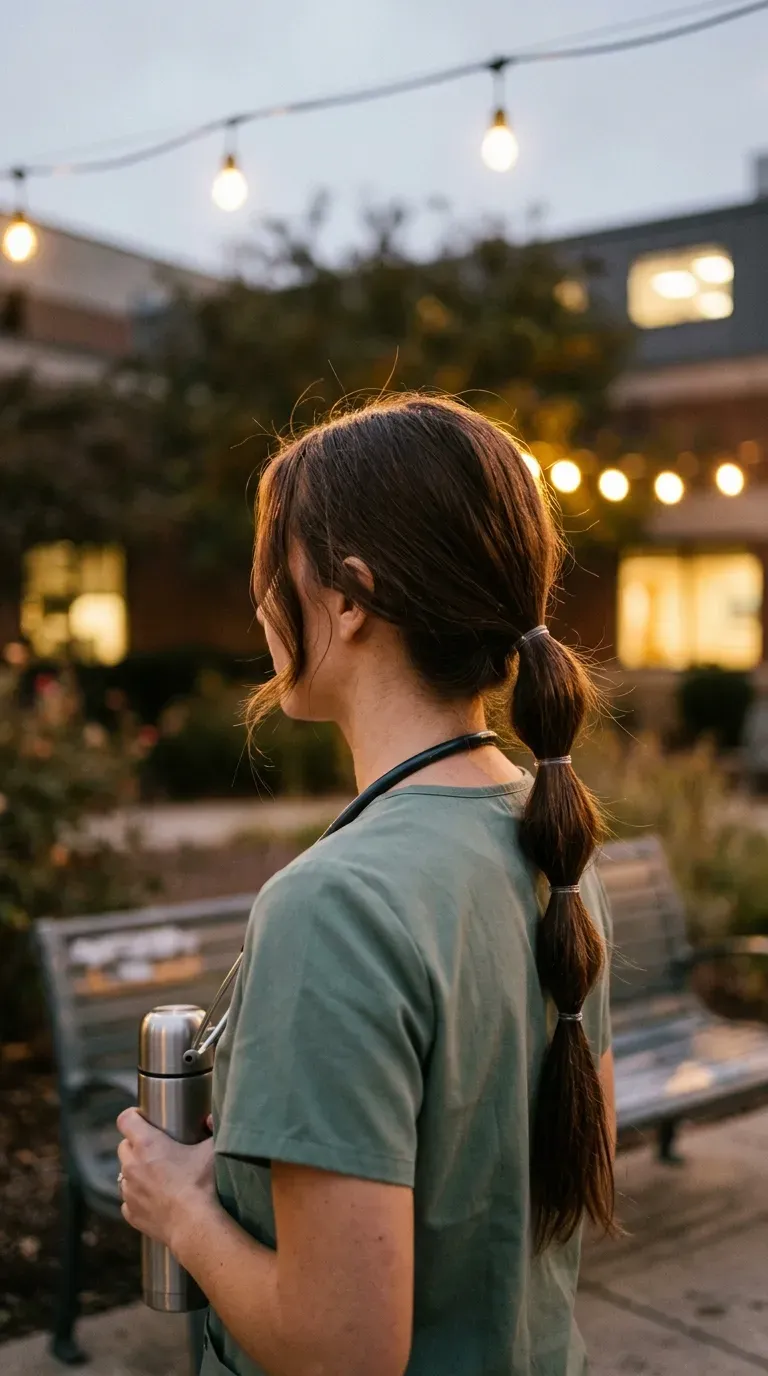
Dividing long hair into sections means no single part can flop forward. A bubble ponytail does exactly that.
- Make a low ponytail and secure it.
- Place a second elastic about three inches down and gently fluff the hair between.
- Repeat once more near the ends.
Pull the sections outward just a little to create the rounded shape.
Quick tip: Use clear or hair colored elastics so the style still looks tidy at clock out.
Works on long, straight hair that needs control but not a tight bun.
13. Flat Twists Into A Low Puff For Natural Hair

Natural hair does best with less pulling, and flat twists give you that. They keep the front neat while the back stays soft.
Start with damp, moisturized hair. Make four to six flat twists from the front hairline back toward the nape, then gather everything into a low puff and secure it with a fabric covered tie.
- Moisturize before twisting so the hair does not dry out under a cap.
- Keep the puff low, near the nape, so it clears your collar.
Skip: Edges pulled tight. If your hairline feels sore, loosen the twists.
14. Short Cut Held Back With A Stretchy Headband

Pixie and short cuts need less styling, but they still fall forward. A stretchy headband pushes everything back in seconds.
Choose a wide, soft band with some grip, like a ribbed fabric. Place it at the hairline and slide it back an inch so the front stays off your face.
- Soft band: gentle on the scalp and good for all day wear.
- Hard plastic band: slips more easily and presses behind the ears.
Add a bobby pin on each side for any short pieces near your ears. They stay put when you bend over.
15. Looped Ponytail For Hair That Resists Buns

Pull the tail only halfway through on the last wrap, and a plain ponytail becomes a loop. It sits tight and leaves no loose ends at the collar.
The loop works because the tail is folded into the elastic, not dangling. It is a good pick for hair that is too slippery for a bun or too short for one.
Keep the loop small, about the width of your palm, and smooth the front with a little water.
Watch out: A very long loop can still swing. Fold it twice if it passes your shoulder blades.
Tie a low ponytail with a snug elastic and smooth the front.
On the last wrap, pull the tail only halfway through to form the loop.
Fold the loop up against the base and pin it flat with one bobby pin.
16. French Braid Ending In A Low Bun

A French braid holds hardest along the hairline, which is where loose pieces usually escape. Ending it in a bun gets the rest of the length out of the way.
Start the braid at the crown and work down, adding hair on each side. Once you reach the nape, finish with a regular braid, coil it into a bun, and pin it.
- Dampen flyaways slightly before braiding.
- Pin the start of the braid so it does not slide back.
Best for medium to long hair, and anyone tired of fixing their front pieces every hour.
17. French Roll Held By Two Hair Sticks

Smooth, tucked, and surprisingly sturdy, a French roll relies on two sticks that cross for grip. It still looks neat after a double shift.
Gather your hair into a ponytail at the back, twist it up, and fold it inside along your head. Slide one hair stick through the roll from side to side, then cross a second stick through it in the opposite direction.
Quick tip: Pick sticks with a little texture. Slick ones slip out when you move quickly.
Check your unit’s rules on accessories near patients. A bobby pin version works the same way.
18. A Long Braid Folded Up Into A Pinned Bob
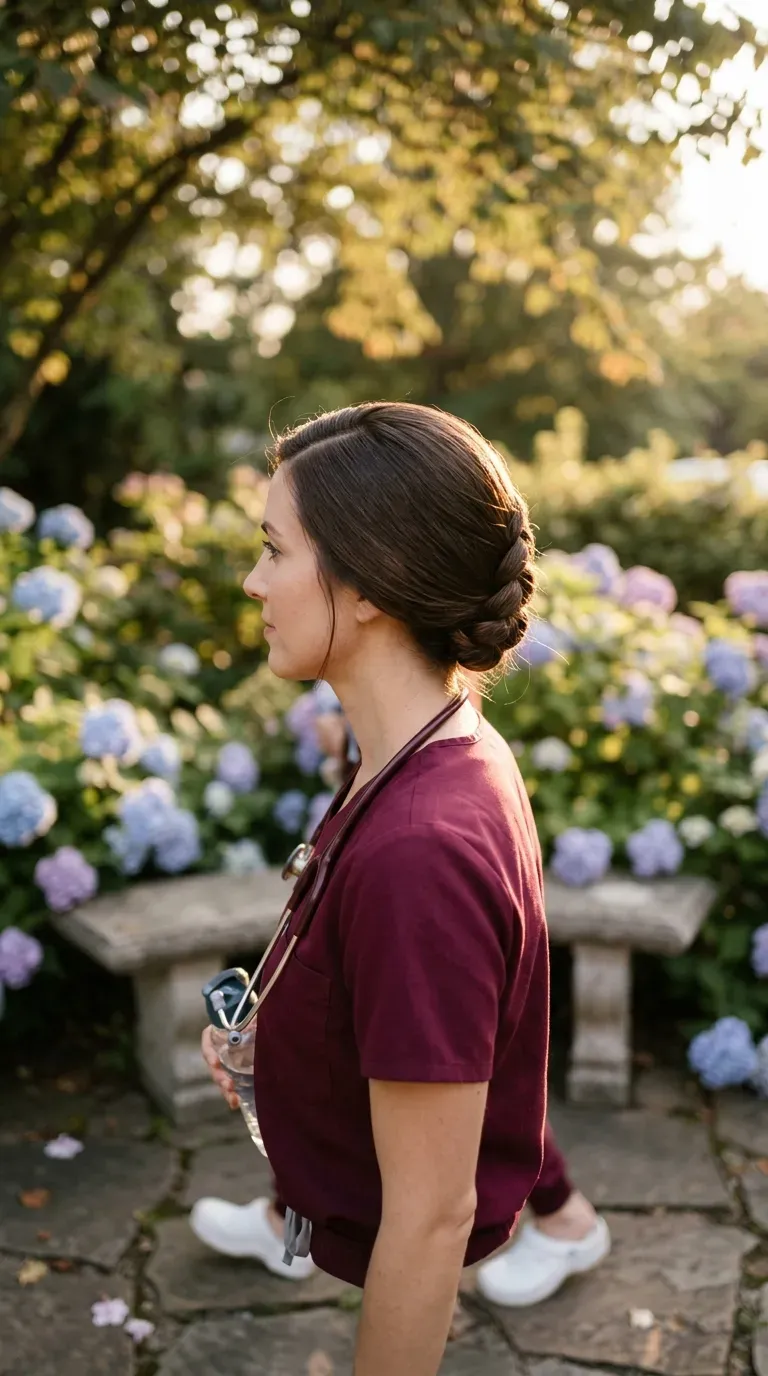
Long hair has a trick up its sleeve: it can pretend to be short. A folded braid does exactly that, and nothing hangs past your collar.
- Make a single low braid and tie it off.
- Fold the braid up under itself so the tied end sits at the nape.
- Pin through the fold in three spots.
The result looks like a neat bob from the front and stays tight from the side.
Quick tip: Add a tiny bit of hair balm to the ends so they do not poke out.
Twist or braid first, then pin. Hair that is shaped before it is pinned stays up far longer than hair that is only pulled tight.
19. Low Bun Made To Fit Under A Tie Back Scrub Cap
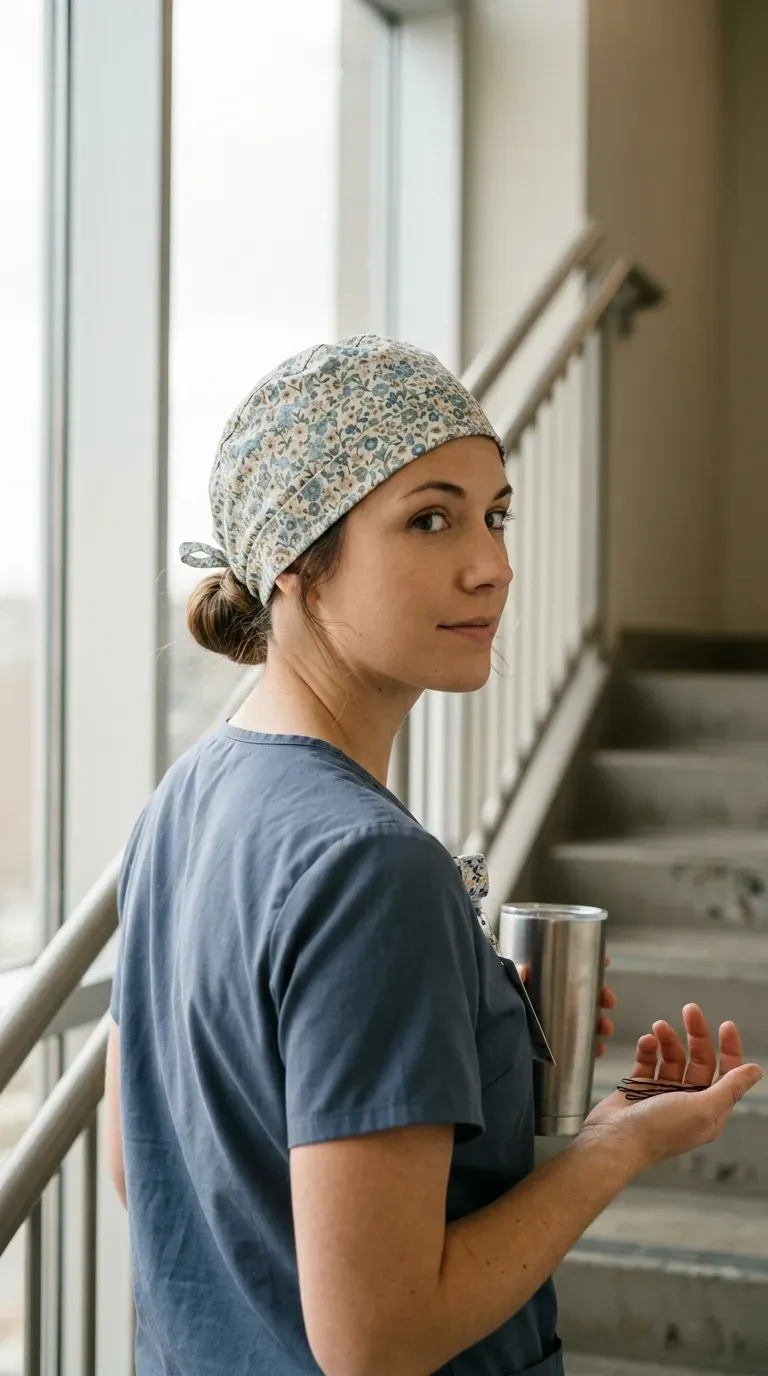
Scrub caps with ties sit lower on the head than most people expect. A bun in the wrong spot turns the cap into a bump.
Make a low bun about two finger widths above the nape. Slide the cap on from the front and tie the ties over the bun, tucking any loose ends under the fabric first.
- Smooth your hair back before the cap goes on.
- Keep pins flat, with the open ends facing in.
- Check the front hairline for stray bits.
Best for anyone who wears a cap every day and wants it to stay secure without a headache.
20. Sleek Low Ponytail For The Last Hours Of A Night Shift
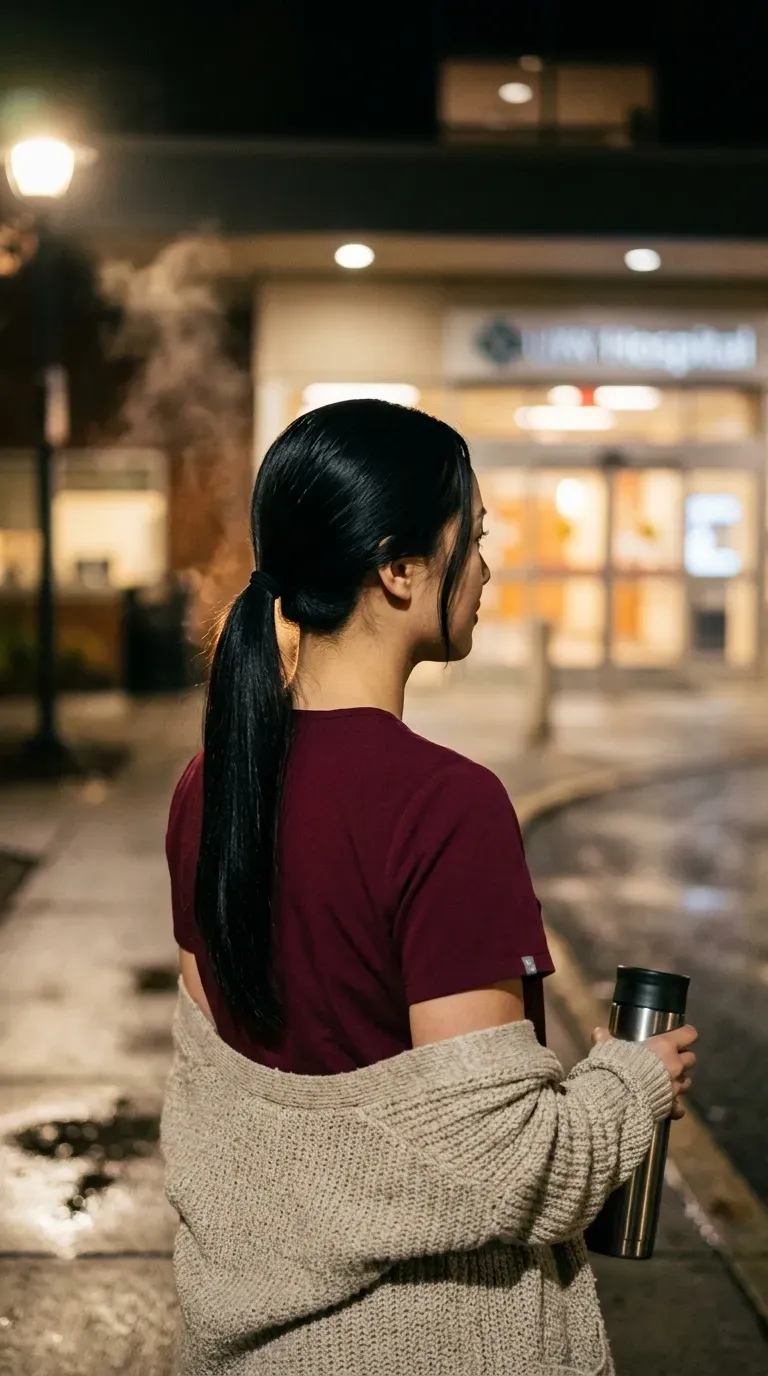
By 4 a.m., hair that has been pushed and re-pushed starts to look tired. A sleek low ponytail resists that because the surface stays smooth.
Brush a small amount of light hold gel or smoothing cream through your hair first, then gather it low at the nape. Secure it with a snug elastic and smooth the tail down.
- Use a soft bristle brush to flatten the crown.
- Keep a spare elastic in your pocket.
Quick fix at the break room mirror: wet your fingertips, smooth the sides, and you are done in a minute. Best for straight or sleek hair and nights when you have no time for repairs.
The best nurse hairstyles are the ones you stop thinking about by lunch. Pick the one that matches your hair length and texture, practice it once on a day off, and keep two bobby pins and a spare elastic in your pocket. That tiny kit fixes most mid shift slips before anyone notices. If your first try feels loose, twist a little more, pin a little flatter, and test it by bending over the way you would at a bedside. Your energy belongs with your patients and your feet, not with a bun that keeps drifting. A style that holds is one less thing to manage.
Save this list to your Pinterest board for the next time your alarm goes off before sunrise.